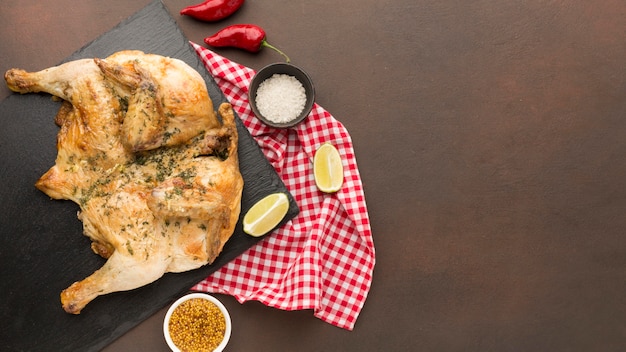
Ah, chicken breasts. They're a kitchen staple, aren't they? Easy, versatile, and always a crowd-pleaser. But let's face it, getting them perfectly cooked can be a real challenge. One minute they're dry and rubbery, the next they're still pink in the middle. Not exactly a culinary win, is it?
I've spent years in the kitchen, trying out countless chicken breast recipes, and let me tell you, I've learned a lot – sometimes the hard way! Nothing quite ruins a meal like biting into a tough, dry chicken breast. So, I’m here to share my hard-earned wisdom and hopefully save you from those culinary disasters. By the time you're done reading, you'll be a chicken breast cooking master.
Part 1: The Importance of Choosing the Right Chicken Breast

Just like you wouldn't build a house on a shaky foundation, cooking the perfect chicken breast starts with choosing the right ingredients. It's not just about grabbing any old chicken breast from the supermarket - there are some things to consider.
1.1. Fresh vs. Frozen: A Quick Comparison
This is a personal preference battle, really. Fresh chicken breasts are generally juicier, but they have a shorter shelf life. frozen chicken breasts, on the other hand, are more convenient as they can last longer in the freezer. Personally, I prefer fresh chicken, but both options work well. Just remember to thaw your frozen chicken breasts properly before cooking.
1.2. Size Matters: A Guide to Picking the Right Cut
Think about your recipe and what you're planning to make. If you're grilling or pan-frying, smaller, thinner chicken breasts will cook faster and more evenly. For a roast chicken or casseroles, larger breasts might be better. Just be careful they're not too big or they might take ages to cook through.
1.3. Boneless or Bone-In? The Great Debate
Ah, the age-old question. Boneless chicken breasts are generally easier to cook and slice, making them a great choice for quick weeknight meals. But let's be honest, bone-in chicken breasts often hold more flavour. It's a trade-off! For a fast and easy meal, boneless is the way to go. If you're looking for a bit more flavour and a slightly more involved cooking process, then bone-in is worth trying.
Part 2: Prepping Your Chicken Breast for Cooking Perfection

So you've got your perfect chicken breast - now it's time to get it ready for the oven, pan, or grill. This might seem like a simple step, but it's crucial for achieving those juicy, delicious results.
2.1. Patting Dry: The Secret to crispy skin
Before you even think about seasoning, grab a paper towel and pat your chicken breast dry. It might seem like an obvious step, but it's vital for achieving that beautiful, crispy skin. Moisture creates steam, which makes the skin soggy and less appealing.
2.2. Seasoning Secrets: Flavour without Overdoing It
Salt and pepper are always a classic starting point. But don't be afraid to get creative! Herbs like rosemary, thyme, or oregano add depth of flavour. Spices like paprika, cumin, or garlic powder can add a kick. But remember, you want to enhance the flavour, not drown it.
2.3. Marination Magic: Tender and Juicy Results
Want to take your chicken breast to the next level? Try marinating it! This is a game-changer when it comes to adding both flavour and tenderness. You can use a simple lemon-herb marinade, or something more exotic like a teriyaki or ginger-soy marinade. Just make sure you give it enough time to soak in those delicious flavours.
Part 3: chicken breast cooking methods: A Guide to the Classics

With your chicken breast prepped and ready, it's time to choose your cooking method. Each method has its own advantages and disadvantages. We'll explore the most popular options to help you find the perfect fit for your recipe.
3.1. The Oven: A Simple and Reliable Option
oven-baked chicken breasts are a reliable choice for a reason. They're super easy to make, and you can cook a large batch at once, making them perfect for feeding a crowd. Preheat your oven to 375°F (190°C) and place your chicken breasts on a baking sheet lined with parchment paper. Cook for 20-25 minutes, or until the internal temperature reaches 165°F (74°C). For extra moisture, try adding a few tablespoons of water to the baking sheet.
3.2. The Pan: For Crispy Skin and Quick Cooking
pan-fried chicken breasts are a fantastic choice for a quick and delicious meal. Heat a tablespoon of oil in a skillet over medium heat. Add your chicken breasts and cook for 5-7 minutes per side, or until golden brown and cooked through. For an extra flavour boost, try adding a knob of butter towards the end of cooking.
3.3. The Grill: For That Perfect Smokey Flavour
grilled chicken breasts are the perfect accompaniment to summer BBQs. Preheat your grill to medium heat. Season your chicken breasts with your favourite seasonings and grill for 5-7 minutes per side, or until cooked through. To get those iconic grill marks, rotate your chicken breasts 90 degrees halfway through cooking.
Part 4: Chicken Breast Cooking Time: A Detailed Breakdown
Now we're getting into the nitty-gritty! Cooking time is crucial for ensuring your chicken breasts are cooked through and perfectly juicy. Here's a breakdown based on cooking method and the thickness of your chicken breast.
4.1. oven cooking times:
| Thickness (cm) | Cooking Time (Minutes) |
|---|---|
| 1-1.5 | 20-25 |
| 1.5-2 | 25-30 |
| 2-2.5 | 30-35 |
Remember, these are just general guidelines. Always use a meat thermometer to check the internal temperature of your chicken breast. This is the only way to be sure it's cooked through.
4.2. Pan Cooking Times:
| Thickness (cm) | Cooking Time (Minutes) |
|---|---|
| 1-1.5 | 5-7 per side |
| 1.5-2 | 7-9 per side |
| 2-2.5 | 9-11 per side |
You'll want to cook your chicken breasts over medium heat. This allows them to brown nicely without burning.
4.3. Grill Cooking Times:
| Thickness (cm) | Cooking Time (Minutes) |
|---|---|
| 1-1.5 | 5-7 per side |
| 1.5-2 | 7-9 per side |
| 2-2.5 | 9-11 per side |
For the best results, preheat your grill to medium heat. This will ensure that your chicken breasts cook evenly and develop those beautiful grill marks.
Part 5: Avoiding the Dreaded Dry Chicken: Tips and Tricks
Let's be honest, dry chicken breasts are a culinary crime. But fear not, there are ways to avoid this disaster. Here are some tips to ensure your chicken breasts stay juicy and tender.
5.1. Don't Overcook It: The Importance of Internal Temperature
This is the golden rule of chicken breast cooking. overcooked chicken breasts are tough and dry, which is a real shame. Use a meat thermometer to check the internal temperature. Once the internal temperature reaches 165°F (74°C), your chicken breast is cooked through.
5.2. Resting is Key: Allowing the Juices to Redistribute
After cooking, let your chicken breast rest for 5-10 minutes before slicing or serving. This allows the juices to redistribute throughout the meat, resulting in a more tender and juicy chicken breast.
5.3. Brine It: Boosting Moisture for Extra Tenderness
Brining involves soaking your chicken breast in a salt solution. This helps to retain moisture, making your chicken breast more tender and juicy. To brine, simply combine salt and water in a bowl or container. Submerge your chicken breast and refrigerate for at least 30 minutes or up to 4 hours.
Part 6: chicken breast recipes: Inspiration for Your Next Meal
Now that you're armed with all the knowledge you need to cook chicken breasts perfectly, it's time to get creative! Here are a few recipe ideas to get you started.
6.1. Classic Lemon Herb Chicken: A Simple and Delicious Favourite
This recipe is a classic for a reason. It's quick, easy, and bursting with flavour. Combine lemon juice, olive oil, and fresh herbs like rosemary, thyme, and oregano. Marinate your chicken breasts for at least 30 minutes, then pan-fry or bake them until cooked through. Serve with roasted vegetables for a complete meal.
6.2. Honey Garlic Chicken: Sweet and Savoury Perfection
This recipe is a sweet and savoury delight that's sure to impress. Combine honey, soy sauce, garlic, and ginger. Marinate your chicken breasts for at least 30 minutes, then bake or grill them until cooked through. Serve with rice or noodles for a satisfying meal.
6.3. Chicken Parmesan: A Crowd-Pleasing Italian Classic
This recipe is a classic for a reason. Coat your chicken breasts with breadcrumbs and Parmesan cheese. Bake or pan-fry them until golden brown and cooked through. Top with marinara sauce and mozzarella cheese. Serve with spaghetti or your favourite pasta for a truly delicious meal.
Part 7: Chicken Breast Storage and Leftovers: Making the Most of Your Ingredients
So you've cooked up a batch of delicious chicken breasts, but what about the leftovers? Don't let them go to waste! Here are some tips for storing and using leftover chicken breasts.
7.1. Storage Tips: Keeping Your Chicken Safe
After cooking, allow your chicken breasts to cool completely before storing them in the refrigerator. Place them in an airtight container or wrap them tightly with plastic wrap. Store them for up to 3-4 days. You can also freeze your cooked chicken breasts for up to 3 months. Just make sure to wrap them well and label them with the date.
7.2. Leftover Inspiration: Turning Leftovers into Delicious Dishes
Leftover chicken breasts are a fantastic base for many delicious meals. You can add them to salads, soups, sandwiches, or casseroles. Or, you can simply reheat them and serve them with a side dish. Get creative and experiment with different flavours!
Part 8: FAQs: Your Chicken Breast Questions Answered
I get it, there are so many questions when it comes to cooking chicken breasts. Let's tackle some of the most common ones.
8.1. What's the Best Way to Tell if Chicken is Cooked Through?
The best way is to use a meat thermometer. Insert it into the thickest part of the chicken breast. If the internal temperature reaches 165°F (74°C), your chicken breast is cooked through. You can also check by cutting into the chicken breast and making sure the juices run clear.
8.2. How Can I Make Sure My Chicken Breast Doesn't Dry Out?
Avoid overcooking. Use a meat thermometer to check the internal temperature. Let your chicken breast rest for 5-10 minutes after cooking to allow the juices to redistribute. Try brining your chicken breast before cooking to boost moisture.
8.3. What's the Difference Between Chicken Breasts and chicken thighs?
Chicken breasts are leaner and have less fat than chicken thighs. This means they can be more prone to drying out. Chicken thighs are more flavorful and tend to stay more juicy, but they also have a higher fat content.
8.4. Can I Cook Chicken Breasts in the Microwave?
It's possible, but not ideal. microwave cooking can often lead to uneven cooking and dry chicken breasts. However, if you're in a pinch, you can microwave your chicken breast for a few minutes, but make sure to check the internal temperature to ensure it's cooked through.
8.5. How Long Can I Keep Cooked Chicken in the Fridge?
You can safely store cooked chicken in the refrigerator for 3-4 days. Make sure it's properly stored in an airtight container or wrapped tightly with plastic wrap. After 4 days, it's best to discard it.
There you have it! My ultimate guide to cooking chicken breasts. I hope these tips and tricks help you to conquer the kitchen and create delicious, juicy chicken breast meals. Remember, practice makes perfect, so don't be afraid to experiment and try new things. Happy cooking!
Everyone is watching

How to Cook Frozen Lobster Tails Perfectly: A Step-by-Step Guide
RecipesLobster. Just the word conjures up images of lavish meals, special occasions, and a taste of luxury. But let's...

Pigs in a Blanket Cooking Time: How Long to Bake for Perfect Results
RecipesAh, pigs in a blanket. Just the name conjures up images of those delightful little parcels of crispy pastry en...

Pork Fillet Cooking Time: How Long to Cook It Perfectly
RecipesPork fillet, or tenderloin as it's sometimes called, is a real favourite in our house. It's so versatile, and...

The Ultimate Guide to Tender, Juicy Pulled Pork
RecipesRight, let's talk pulled pork. It's one of those dishes that just screams "comfort food," doesn't it? I mean...

The Ultimate Guide to Cooking Delicious Frankfurters
RecipesLet's face it, we all love a good frankfurter. It's a classic, simple, and always satisfying. But let's be rea...
