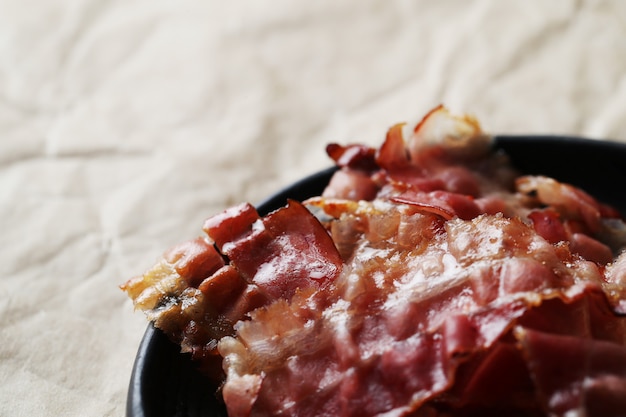
As a seasoned home cook, there are certain culinary battles I’ve fought and won. Mastering the art of perfectly crispy bacon is one of them. It wasn't always this way, though. There was a time when my bacon journey was a constant struggle against limp, undercooked strips, or worse, the dreaded burnt, rubbery mess. But I persevered, experimented, and eventually found the holy grail of bacon cooking: crispy, golden-brown, and oh-so-delicious.
Today, I’m going to share my secrets with you. You’ll learn the foolproof method I’ve developed over the years, and discover the nuances of cooking bacon on the stovetop to achieve that ultimate level of crispiness. We’ll delve into the crucial factors that affect the outcome, and explore different techniques to suit your preferences. So, grab your favourite pan, your best bacon, and let’s embark on this bacon-tastic adventure together.
(Part 1) The Importance of Choice

Before we even start cooking, it’s essential to understand that not all bacon is created equal. choosing the right bacon is the first step towards achieving that perfect crisp. Let’s be honest, we all have our personal preferences when it comes to bacon. Some folks prefer thick-cut, some go for the thinner variety, and others swear by a specific brand. The key is to find what suits your taste buds. And trust me, it makes a world of difference!
1.1. The Bacon Family Tree
Let’s talk bacon varieties:
- thick-cut bacon: This chunky fella offers a satisfying chew and tends to be less prone to overcooking. It’s excellent for those who enjoy a more substantial bite. Think of it as the steak of the bacon world - hearty and full of flavour.
- Thin-cut bacon: This nimble variety cooks up quickly, making it ideal for breakfast sandwiches or a quick snack. It’s perfect for those who prefer a more delicate texture. It's the "fast food" bacon, satisfying and convenient.
- smoked bacon: This classic boasts a rich smoky flavour and aroma that’s simply irresistible. You can find smoked bacon in various thicknesses, catering to different preferences. Think of it as the "classic" bacon, a timeless favourite.
- Uncured bacon: This option is often made with celery juice or other natural ingredients for curing, resulting in a less salty and more naturally flavourful bacon. It's a healthier choice for those looking for a more natural taste.
- Maple bacon: Sweet and savoury, this bacon is coated with a maple syrup glaze, adding a touch of sweetness to the classic flavour. It’s perfect for those who love a bit of sweetness in their bacon. Think of this one as the "dessert" bacon, a delightful twist on the original.
1.2. Quality Matters
Once you’ve chosen your bacon style, remember that quality matters. It’s worth investing in a high-quality bacon, as it’s less likely to shrink excessively during cooking and will deliver a more robust flavour. If you’re feeling adventurous, try a butcher’s bacon for an authentic taste and texture. But let’s be honest, the supermarket variety can be just as delicious, as long as you pick a reputable brand. I always aim for a good balance of fat and lean, as this helps ensure a nice, even crisp.
(Part 2) The Tools of the Trade

Armed with your chosen bacon, it’s time to gather your trusty kitchen warriors. The right tools make a significant difference in your bacon journey. While you can certainly get away with just a frying pan, a few extra gadgets can elevate your bacon experience.
2.1. The Pan
A good quality, heavy-bottomed pan is crucial for even heat distribution, preventing hot spots that can lead to uneven cooking. cast iron pans are a classic choice, known for their exceptional heat retention and ability to create a beautiful crispy crust. However, any non-stick pan will do the trick. Just make sure it’s large enough to hold your bacon without overcrowding. A crowded pan will steam the bacon instead of crisping it.
2.2. The bacon press
Now, this is where things get exciting. A bacon press is a game-changer, especially for those who crave that ultimate crisp. It’s essentially a weighted device that helps to flatten the bacon and render out excess fat, creating a perfectly crisp result. You can use anything from a heavy cast iron pan to a simple brick wrapped in foil. Just make sure it’s clean and won’t scratch your pan. I prefer using a dedicated bacon press, as it provides even pressure and doesn't risk contaminating your food.
2.3. The Tongs
A good pair of tongs is essential for flipping and transferring the bacon without tearing it. Choose tongs with a sturdy grip and that are long enough to reach comfortably into your pan. They’ll be your trusty companions throughout the cooking process. And don’t forget a spatula for scooping up those glorious crispy bacon bits! I always keep a separate set of tongs just for bacon, as it helps prevent cross-contamination with other foods.
(Part 3) Prepping for Success
Now that we’ve gathered our essentials, it’s time to prep our bacon for a dazzling transformation. Remember, a little prep goes a long way.
3.1. The Drying Ritual
Before we even think about putting the bacon in the pan, we need to ensure it’s nice and dry. Bacon is already salty, and any excess moisture will just steam the bacon instead of crisping it up. So, pat it dry with paper towels to eliminate any lingering droplets. This simple step makes a huge difference. I find that using two paper towels, one for patting and one for blotting, helps ensure the bacon is thoroughly dry.
3.2. The Room Temperature Rule
Here’s a little insider secret: letting your bacon come to room temperature before cooking helps it cook more evenly and prevents it from curling up too much. This is particularly important for thick-cut bacon, as it gives the thicker pieces a chance to warm up and render their fat more efficiently. Just leave it out on the counter for about 15 minutes before cooking. This allows the bacon to cook more evenly and prevents it from shrinking too much.
(Part 4) The Cooking Commandments
Now we’re at the heart of the matter. This is where we bring our knowledge of bacon and our carefully chosen tools together to create a masterpiece of crispiness.
4.1. The Heat is On
The heat is a crucial factor in achieving that perfectly crispy bacon. For optimal results, start with a medium-high heat. This allows the fat to render quickly and helps to create that beautiful golden-brown colour. If you prefer a less crispy bacon, you can reduce the heat to medium, but be prepared for a longer cooking time. Remember, the key is to find the right balance between heat and time for your desired level of crispiness.
4.2. The Bacon Placement
Lay your bacon in the hot pan, leaving a little space between each strip to allow for even cooking and prevent overcrowding. You want the bacon to have room to breath and render its fat efficiently. The ideal arrangement is to have the strips side-by-side, but not touching, allowing for even heat distribution and airflow.
4.3. The First Flip
Let the bacon cook undisturbed for about 3-4 minutes, or until the underside develops a beautiful golden-brown colour. Then, using your trusty tongs, carefully flip each strip to cook the other side. The time it takes to achieve this desired colour will vary depending on the thickness and quality of your bacon, so keep a watchful eye. Be careful not to overcook the first side, as it can lead to a burnt or tough texture.
4.4. The Crispness Quest
Now, here comes the fun part! As the bacon continues to cook, you’ll notice the fat starting to render. The more fat that renders, the crispier the bacon becomes. You can tilt the pan slightly to help the fat flow away from the bacon, speeding up the rendering process. If you’re using a bacon press, this is the time to add it. Apply gentle pressure to help flatten the bacon and create even crisping. This step is crucial for achieving that perfect balance of crispness and tenderness.
4.5. The Turning Point
Keep flipping the bacon every few minutes, making sure it cooks evenly on all sides. You’ll know it’s getting close to perfect when the edges start to curl and the bacon becomes noticeably stiff. Use your tongs to lift a strip and check for that telltale crisp. If it’s still a little soft, give it a few more minutes. If you’re using a bacon press, you can adjust the pressure depending on your desired level of crispiness. This is where your experience and intuition come into play. Keep checking and adjusting until you achieve your ideal level of crispness.
(Part 5) Beyond the Basics
Now that we’ve covered the fundamentals of stovetop bacon cooking, let’s explore some variations and tips to spice things up and cater to different preferences. Remember, every bacon lover has their own unique approach, so experiment and discover what works best for you. There's no one-size-fits-all approach to bacon cooking, so feel free to customize your technique.
5.1. The Water Trick
For those who prefer a less greasy bacon, there’s a clever trick you can try. Once your bacon is halfway cooked, add a splash of water to the pan. The steam created will help render the fat faster and create a crispier result. Be careful, as the water will splatter, so use a splash guard or keep a safe distance. Just remember to pour the water into the side of the pan, not directly onto the hot bacon. This can lead to uneven cooking and a less appealing result. This technique is especially effective for thicker bacon, as it helps to evenly cook the entire strip.
5.2. The oven method
For a hands-off approach, you can always finish your bacon in the oven. After cooking the bacon in the pan for a few minutes, transfer it to a baking sheet lined with parchment paper. Bake in a preheated oven at 375°F (190°C) for about 5-10 minutes, or until it reaches your desired level of crispiness. This method is excellent for cooking large batches of bacon without the constant flipping. Just remember to keep a close eye on the bacon to avoid overcooking. This method is great for parties or when you need to cook a lot of bacon at once.
5.3. The Crumbly Delight
If you’re craving that extra crispy, crumbly bacon, try a slightly different approach. Instead of flipping the bacon every few minutes, let it cook undisturbed for a longer period on each side. This will allow the fat to render more thoroughly and create a crispy, almost brittle texture. Just be careful not to burn the bacon. Keep an eye on it and adjust the cooking time accordingly. This technique is perfect for topping salads, soups, or adding a crunchy texture to your favourite dishes.
(Part 6) The Aftermath
Congratulations! You’ve successfully conquered the stovetop bacon challenge. Now, it’s time to enjoy the fruits of your labour. But before you dive in, there are a few important steps to consider.
6.1. The Fat Removal
After cooking, remove the bacon from the pan and place it on a plate lined with paper towels. The paper towels will absorb any excess fat and help the bacon cool quickly. You can also use a slotted spoon to transfer the bacon to a wire rack, allowing for even drainage and preventing any soggy patches. This step helps prevent the bacon from becoming greasy and soggy, ensuring it stays crisp and delicious.
6.2. The bacon grease Treasure
Don’t throw away that golden bacon grease! It’s a culinary treasure trove, packed with flavour and perfect for adding a rich taste to countless dishes. Let it cool and solidify in the pan, then strain it through a fine-mesh sieve to remove any solid bits. Store it in an airtight container in the refrigerator for up to a week. It’s amazing for frying eggs, sauteing vegetables, and adding a touch of magic to your next batch of roasted potatoes. Remember, bacon grease is a versatile ingredient that can be used in many ways, so don't waste it!
(Part 7) bacon variations
The world of bacon is vast and full of possibilities. Why settle for plain, ordinary bacon when you can explore the endless world of flavoured bacons? Let’s dive into some exciting variations that can spice up your bacon game.
7.1. The Sweet and Savoury Dance
If you’re looking for a more adventurous flavour profile, try maple bacon. The sweetness of the maple syrup complements the salty, smoky flavour of the bacon perfectly. You can even add a touch of chilli flakes for a sweet and spicy kick. This is a great option for those who love a bit of sweetness and spice in their food.
7.2. The Spicy Kick
For a fiery flavour, experiment with spicy bacon. This bacon is infused with chilli peppers, adding a delightful heat to the classic flavour. It’s perfect for those who love a bit of spice in their food. This is a great option for those who enjoy a little heat in their meals.
7.3. The Herb Garden Delight
If you prefer a more delicate and aromatic bacon, try herb-infused bacon. This bacon is flavoured with fresh or dried herbs like rosemary, thyme, or garlic. It’s a perfect accompaniment to salads, sandwiches, or simply enjoyed on its own. This is a more sophisticated option for those who prefer subtle, aromatic flavours.
(Part 8) Bacon Beyond Breakfast
While bacon is a breakfast staple, its culinary appeal extends far beyond the morning meal. Let your creativity run wild and incorporate this delicious treat into your lunches, dinners, and even snacks.
8.1. The Lunchtime Hero
Add a touch of smoky, salty goodness to your sandwiches. A few slices of crispy bacon elevate a simple BLT to new heights. You can also crumble it into salads for a textural and flavourful addition. And don’t forget about the classic bacon cheeseburger, a lunchtime masterpiece. Bacon adds a wonderful dimension of flavour and texture to your lunch, making it more satisfying and enjoyable.
8.2. The Dinner Delight
Bacon isn’t just for breakfast. It pairs beautifully with countless dinner dishes. Wrap it around chicken breasts for a juicy and flavorful main course. Add it to pasta dishes for a smoky, salty kick. And don’t forget about the classic bacon-wrapped dates, a delicious and elegant appetizer. Bacon can be used to create flavourful and sophisticated dishes for dinner parties and everyday meals.
8.3. The Snack Time Star
Why wait for a special occasion to enjoy bacon? It’s a perfect snack anytime, anywhere. Just a few crispy strips can satisfy your cravings for something salty and satisfying. You can even crumble it into popcorn for a unique and delicious snack. Bacon is a great choice for a quick and easy snack when you need a satisfying and tasty treat.
FAQs
1. Can I cook bacon in a cast iron skillet?
Absolutely! cast iron skillets are a classic choice for cooking bacon. Their excellent heat retention and ability to create a beautiful crispy crust make them ideal for achieving that perfectly crispy bacon. Just make sure to preheat the skillet properly and use a little oil if necessary. Cast iron skillets are known for their even heating and ability to create a delicious sear on the bacon, resulting in a crispy exterior and a juicy interior.
2. What happens if I overcook bacon?
Overcooked bacon will be tough and rubbery, losing its juicy tenderness. It can also develop a burnt flavour. Keep a close eye on your bacon and remove it from the pan as soon as it reaches your desired level of crispiness. Overcooked bacon is a culinary tragedy, so pay close attention to the cooking time and don't let it burn!
3. How long should I cook bacon on the stovetop?
The cooking time for bacon depends on the thickness and quality of the bacon. Thin-cut bacon typically cooks faster than thick-cut. A good rule of thumb is to cook it for about 3-5 minutes per side, flipping it every few minutes. Always check for doneness by lifting a strip and checking for a crisp texture. Experience is the best teacher when it comes to judging bacon doneness. Don't be afraid to experiment and find what works best for you.
4. Can I cook bacon in the microwave?
While it’s possible to cook bacon in the microwave, it won’t achieve the same level of crispiness as stovetop cooking. Microwaved bacon tends to be softer and less flavorful. It’s also more prone to uneven cooking and splattering. For the best results, stick to the stovetop or oven methods. Microwaving bacon is a last resort for those short on time, but for the best taste and texture, stick to traditional methods.
5. How do I store leftover bacon?
Store leftover bacon in an airtight container in the refrigerator for up to a week. You can also freeze it for up to 2 months. To reheat, simply bake it in the oven at 350°F (175°C) for 5-10 minutes, or until it’s heated through. Proper storage helps preserve the freshness and flavour of your bacon, allowing you to enjoy it for longer.
Everyone is watching

How to Cook Frozen Lobster Tails Perfectly: A Step-by-Step Guide
RecipesLobster. Just the word conjures up images of lavish meals, special occasions, and a taste of luxury. But let's...

Pigs in a Blanket Cooking Time: How Long to Bake for Perfect Results
RecipesAh, pigs in a blanket. Just the name conjures up images of those delightful little parcels of crispy pastry en...

Pork Fillet Cooking Time: How Long to Cook It Perfectly
RecipesPork fillet, or tenderloin as it's sometimes called, is a real favourite in our house. It's so versatile, and...

The Ultimate Guide to Cooking Delicious Frankfurters
RecipesLet's face it, we all love a good frankfurter. It's a classic, simple, and always satisfying. But let's be rea...

The Ultimate Guide to Tender, Juicy Pulled Pork
RecipesRight, let's talk pulled pork. It's one of those dishes that just screams "comfort food," doesn't it? I mean...