Ham! It's a quintessential festive food, a comforting classic, and a real crowd-pleaser. But let's face it, getting it absolutely perfect can feel like a bit of a culinary gamble. Overcook it, and you'll end up with a dry, rubbery nightmare. Get it just right, and you'll have a succulent, melt-in-your-mouth masterpiece that everyone will be raving about.
Now, I've been cooking ham for years. I've learned a thing or two, believe me. I've had my fair share of dry ham disasters, but I've also perfected the art of creating the most gloriously moist, tender ham every single time. And I'm here to share all my secrets with you.
So, grab a cuppa, get comfy, and let's dive into this ultimate guide to ham cooking time per pound. We'll cover everything from understanding the different types of ham to mastering the art of carving and even share some mouthwatering leftover ideas.
(Part 1) Understanding Ham
Before we get into the nitty-gritty of cooking times, we need to understand what we're dealing with. Ham isn't just ham, you know. It comes in different forms, each with its own unique characteristics and cooking requirements.
Types of Ham
There are two main categories of ham:
- cured ham: This is the most common type you'll find in the supermarket. It's been cured with salt, sugar, and other seasonings, giving it a distinctive salty and sweet flavour. Many cured hams are also smoked, which adds a beautiful smoky depth. Cured ham is usually already cooked and ready to eat, but you can cook it further to reheat and enhance the flavour.
- fresh ham: This is raw, un-cured, and unsmoked ham. It needs to be cooked thoroughly before it's safe to eat. While fresh ham offers a clean, unadulterated flavour, it's less common and requires a bit more preparation. We'll focus on cured ham for this guide, as it's the one most home cooks are familiar with.
The Importance of Ham Quality
The quality of the ham you choose plays a huge role in the final result. A good quality ham will have a good marbling of fat, which keeps it moist and flavourful during cooking. Look for hams with a good colour, a pleasant aroma, and a firm texture. Avoid any hams that have a strange odour or a slimy surface. This is a good rule of thumb for any meat, really.
Ham Sizes and Shapes
Cured ham comes in all shapes and sizes, from small, spiral-sliced hams perfect for a family dinner to large bone-in hams perfect for a holiday feast.
Here's a quick breakdown of the most common types:
- Bone-in Ham: This type of ham has the bone still attached, which helps to keep it moist during cooking. It often comes in a whole ham form or as a half ham. The bone adds a wonderful flavour and gives the ham a classic, traditional look.
- boneless ham: This type of ham has had the bone removed, making it easier to slice and serve. It's often pre-sliced and sold in a spiral shape. Boneless ham tends to cook a little faster than bone-in ham.
- Spiral-sliced Ham: This ham is already pre-sliced in a spiral shape, which makes it super convenient for serving. It's often pre-glazed, adding an extra layer of flavour and a gorgeous golden-brown colour.
Glazing - The Final Touch
Now, let's talk about the pièce de résistance – the glaze. Everyone loves a good ham glaze. It adds that extra layer of flavour and gives the ham an irresistible, glossy finish. There are tons of options out there, from store-bought to homemade. I personally love a simple honey and mustard glaze, but the possibilities are endless!
You can even get creative and experiment with different flavours. A brown sugar and maple syrup glaze adds a rich, caramel sweetness. For something tangy, try a Dijon mustard and orange zest glaze. Or, if you're feeling adventurous, try a pineapple and ginger glaze for a tropical twist.
(Part 2) Calculating Cooking Time
Alright, let's get down to the nitty-gritty: calculating cooking time. This is where you need to pay close attention, my friends. Get this wrong, and your ham could end up dry and disappointing.
Cooking Time Per Pound
Here's the general rule of thumb for cooking time:
For a bone-in ham, aim for 15-20 minutes per pound at 325°F (160°C).
For a boneless ham, you'll need a slightly shorter cooking time of 10-15 minutes per pound at the same temperature.
Remember, these are just general guidelines. You may need to adjust the cooking time based on the size and shape of your ham, the type of ham (cured or fresh), and your personal preference.
How to Calculate Total Cooking Time
Let's say you have a 10-pound bone-in ham. Here's how you'd calculate the cooking time:
- Multiply the ham's weight by the cooking time per pound: 10 pounds x 15 minutes/pound = 150 minutes
- Adjust for the ham's shape: Since it's a bone-in ham, we'll add an extra 30 minutes to the total cooking time to ensure it cooks evenly.
- Total cooking time: 150 minutes + 30 minutes = 180 minutes, or 3 hours.
Tips for Accurate Cooking Time
Here are a few extra tips to ensure your ham is cooked to perfection:
- Use a meat thermometer: This is the most reliable way to ensure your ham is cooked through. Insert the thermometer into the thickest part of the ham, making sure not to touch the bone. The internal temperature should reach 140°F (60°C) for a fully cooked ham.
- Consider pre-cooked hams: Many cured hams are already pre-cooked, which means you only need to reheat them. Check the packaging for instructions, but a general rule of thumb is to reheat them in the oven at 325°F (160°C) for 10-15 minutes per pound.
- Avoid overcooking: Overcooking can lead to a dry, tough ham. Keep a close eye on the cooking time and use a meat thermometer to make sure it's cooked to the right temperature. If you're worried about overcooking, you can always lower the oven temperature slightly.
(Part 3) ham cooking methods

Now that we've got the basics of cooking time down, let's talk about the different methods for cooking ham. Each method has its own advantages and disadvantages, so choose the one that best suits your needs and preferences.
Oven-Baking
Oven-baking is the classic method for cooking ham. It's simple, reliable, and perfect for large hams.
Here's how to do it:
- Preheat your oven to 325°F (160°C).
- Place the ham in a roasting pan. You can add a little water to the bottom of the pan to help keep the ham moist.
- Bake according to the calculated cooking time. During the last 30 minutes of cooking, baste the ham with your glaze. This will create a beautiful, caramelized crust and enhance the flavour.
- Let the ham rest for 15 minutes before slicing. This allows the juices to redistribute, resulting in a more succulent and flavorful ham.
Slow-Cooking
If you're looking for a more hands-off method, slow-cooking is the way to go. It's perfect for achieving a beautifully tender ham, packed with flavour. Simply let the slow cooker do its magic for hours, and you'll be rewarded with a delicious, melt-in-your-mouth ham.
Here's how to slow-cook ham:
- Place the ham in the slow cooker.
- Add a little liquid, such as broth, apple cider, or even pineapple juice. This helps keep the ham moist and adds flavour.
- Cook on low for 6-8 hours, or on high for 3-4 hours.
- During the last hour of cooking, baste the ham with glaze for that extra layer of flavour and gorgeous finish.
- Let the ham rest for 15 minutes before slicing.
Grilling
For a smoky, char-grilled flavour, grilling is a fantastic option. It's perfect for a smaller ham and adds a touch of outdoor cooking magic.
Here's how to grill ham:
- Preheat your grill to medium heat.
- Place the ham on the grill and cook for about 20-25 minutes per pound. You'll want to flip the ham halfway through cooking to ensure it cooks evenly.
- Keep an eye on the grill to prevent any flare-ups.
- During the last 15 minutes of cooking, baste the ham with glaze for a delicious, caramelized finish.
- Let the ham rest for 15 minutes before slicing.
Boiling
While boiling is the least common method, it's a good option for smaller hams. It produces a moist, tender ham, but it won't give you that crispy, caramelized crust.
Here's how to boil ham:
- Place the ham in a large pot and cover with water.
- Bring the water to a boil, then reduce the heat and simmer for 15-20 minutes per pound.
- Once the ham is cooked, remove it from the pot and let it cool slightly before slicing.
(Part 4) Knowing When Your Ham is Cooked
You've got your ham in the oven (or slow cooker, or on the grill) and that delicious aroma is filling your kitchen. But how do you know when it's actually done?
Using a Meat Thermometer
The most reliable way to ensure your ham is cooked through is with a meat thermometer. It's a simple but essential tool for any home cook.
Here's how to use it:
- Insert the thermometer into the thickest part of the ham. Make sure not to touch the bone, as this can give you a false reading.
- The internal temperature should reach 140°F (60°C) for a fully cooked ham. If it's not quite there yet, keep cooking until it reaches that temperature.
Don't have a meat thermometer? Don't fret. There are a few other ways to check if your ham is cooked.
The "Pull-Back" Method
This method is a bit less precise than a meat thermometer, but it can still be useful. Just gently pull back on a piece of ham.
If the ham gives way easily and the juices run clear, it's done. If it's still firm and the juices are pink, it needs more cooking time.
The "Fork Test" Method
Insert a fork into the thickest part of the ham. If the fork slides in easily and the ham feels tender, it's likely cooked through. If the fork encounters resistance, it may need more cooking time.
Don't Overcook!
Remember, ham can dry out if you overcook it. So, once it reaches the desired internal temperature, it's best to take it out of the oven and let it rest for about 15 minutes before slicing. This allows the juices to redistribute and prevents the ham from becoming dry.
(Part 5) ham leftovers - Don't Waste Them!
You've cooked a magnificent ham, everyone's devoured it, and now you're left with some delicious leftovers. Don't let them go to waste! There are so many creative and delicious ways to use those leftover ham scraps.
Ham and bean soup
This classic and comforting soup is a great way to use up leftover ham. Simply chop up the ham and add it to a pot of soup with beans, vegetables, and broth. You can add other ingredients like potatoes, carrots, and celery to make it extra hearty.
Ham Salad
This is a fantastic option for sandwiches, wraps, or salads. Just chop up the ham and mix it with mayonnaise, mustard, onion, celery, and other seasonings. You can also add chopped pecans, cranberries, or grapes for extra flavour and texture.
ham and cheese quiche
This is a delicious and satisfying way to use up leftover ham. Add the ham to your favourite quiche recipe along with cheese, eggs, and milk. You can add other vegetables like spinach, mushrooms, or peppers to make it even more interesting.
Ham fried rice
This is a quick and easy way to use up leftover ham. Just chop up the ham and add it to your favourite fried rice recipe along with other vegetables and rice. You can also add an egg or two to make it even more filling.
Ham and Broccoli Pasta
This is a simple and delicious way to use up leftover ham. Cook pasta according to package directions, then toss it with ham, broccoli florets, and a simple garlic-lemon sauce. You can also add other ingredients like sun-dried tomatoes, olives, or red pepper flakes for extra flavour and texture.
Ham and Pineapple Pizza
A sweet and savory twist on the classic pizza, ham and pineapple is a delicious combination. Use your leftover ham and top your pizza with pineapple chunks, mozzarella cheese, and your favorite pizza sauce.
Ham Biscuits
For a Southern-inspired treat, try ham biscuits. Use your leftover ham to create a flavorful filling for flaky biscuits. You can also add cheese, onion, and other ingredients to make it even more delicious.
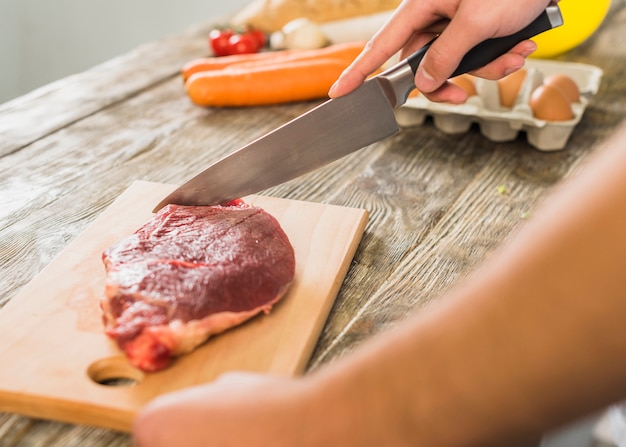
(Part 6) The Art of Carving a Ham
You've cooked your ham to perfection, and now it's time to carve it. It's not as daunting as it looks! With a little practice, you'll be carving like a pro in no time.
Tools of the Trade
You'll need a sharp carving knife and a carving fork. If you're carving a bone-in ham, you'll also need a meat cleaver to separate the bone from the meat.
Step-by-Step Guide
Here's a step-by-step guide to carving a bone-in ham:
- Remove the ham from the roasting pan and place it on a cutting board.
- Use the meat cleaver to separate the ham from the bone. This might take a few tries, so be patient.
- Hold the ham firmly with the carving fork, and use the carving knife to slice the ham into thin, even slices. Slice against the grain to make the ham more tender.
- Once you've sliced the ham from the bone, you can slice it across the grain to create smaller, bite-sized pieces.
- Serve the ham on a platter, garnished with fresh herbs or fruit if desired.
For boneless hams, you can skip the step of separating the meat from the bone. Simply slice the ham into thin, even slices, and serve.
Tips for Carving Like a Pro
Here are a few tips to make carving your ham a breeze:
- Use a sharp knife: A sharp knife will make slicing through the ham much easier and will produce clean, even slices.
- Don't be afraid to ask for help: If you're not comfortable carving a ham, don't hesitate to ask a butcher or someone with experience to help you.
- Practice makes perfect: The more you carve ham, the better you'll get at it.
(Part 7) ham storage - Keeping it Fresh
You've cooked your ham to perfection, carved it beautifully, and enjoyed a delicious meal. But now you've got some leftovers. How long can you keep them? And how do you store them properly?
Refrigerating Leftover Ham
Leftover ham can be stored in the refrigerator for 3-4 days. Wrap it tightly in plastic wrap or aluminum foil, or place it in an airtight container.
Freezing Leftover Ham
You can also freeze leftover ham for up to 2 months. To freeze it, wrap it tightly in plastic wrap and then aluminum foil. Make sure to label the package with the date.
Thawing Frozen Ham
To thaw frozen ham, transfer it to the refrigerator and allow it to thaw overnight. You can also thaw it in a cold water bath, but make sure to change the water every 30 minutes to ensure it stays cold. Never thaw ham at room temperature.
Freezing Ham Before Cooking
You can also freeze a whole ham before cooking it. Just wrap it tightly in plastic wrap and then aluminum foil, and place it in the freezer for up to 2 months. To cook a frozen ham, you'll need to thaw it in the refrigerator overnight before cooking.
(Part 8) FAQs
You've made it this far, so you're probably a ham-cooking pro by now! But just in case you've got a few lingering questions, let's tackle them.
1. Can I cook a ham from frozen?
Technically, you can, but it's not recommended. Frozen ham will take longer to cook, and it might not turn out as evenly cooked as a thawed ham. It's best to thaw the ham completely in the refrigerator before cooking it.
2. How do I know if my ham is bad?
If your ham has a sour or off smell, or if it's slimy to the touch, it's probably gone bad. It's best to err on the side of caution and throw it away.
3. Can I eat ham cold?
Absolutely! Cured ham is often eaten cold, and it can be a great addition to sandwiches, salads, or charcuterie boards.
4. What are some good side dishes for ham?
There are so many delicious side dishes that go well with ham. Some popular options include:
- Roasted vegetables, such as asparagus, Brussels sprouts, or carrots.
- mashed potatoes
- green bean casserole
- sweet potato casserole
- Macaroni and cheese
- fruit salad
- Cornbread
5. Can I use a crock pot for ham?
Yes, you can definitely use a crock pot to cook ham. Just place the ham in the crock pot, add a little liquid (like broth or apple cider), and cook on low for 6-8 hours, or on high for 3-4 hours.
I hope this guide has been helpful in your quest for the perfect ham. Remember, practice makes perfect, so don't be afraid to experiment and find what works best for you. Happy cooking, and bon appétit!
Everyone is watching

How to Cook Frozen Lobster Tails Perfectly: A Step-by-Step Guide
RecipesLobster. Just the word conjures up images of lavish meals, special occasions, and a taste of luxury. But let's...

Pigs in a Blanket Cooking Time: How Long to Bake for Perfect Results
RecipesAh, pigs in a blanket. Just the name conjures up images of those delightful little parcels of crispy pastry en...

Pork Fillet Cooking Time: How Long to Cook It Perfectly
RecipesPork fillet, or tenderloin as it's sometimes called, is a real favourite in our house. It's so versatile, and...

The Ultimate Guide to Cooking Delicious Frankfurters
RecipesLet's face it, we all love a good frankfurter. It's a classic, simple, and always satisfying. But let's be rea...

The Ultimate Guide to Tender, Juicy Pulled Pork
RecipesRight, let's talk pulled pork. It's one of those dishes that just screams "comfort food," doesn't it? I mean...