Let me tell you, there's nothing quite like the smell of smoky, tender ribs wafting through the air on a sunny afternoon. It’s the epitome of a perfect summer cookout, and I’ve spent countless hours perfecting my rib-cooking skills to achieve that ideal. However, let's be real, cooking ribs isn't a simple affair. It takes time, patience, and a bit of know-how. So, grab a cold drink, settle in, and let’s delve into the world of rib cookery together, covering everything from picking the right cut to that final, glorious bite.
(Part 1) Choosing the Right Ribs: The Foundation of Flavor

Before we even get to the grilling part, the first step is selecting the right cut. There are two main contenders: baby back ribs and spare ribs, each offering a distinct flavor profile and cooking experience.
baby back ribs: A Delicate Delight
I'm a big fan of baby back ribs for their smaller size and more delicate bone structure, making them ideal for a quicker cook time and a more refined flavor. These ribs typically have a sweeter taste with more tender meat. When picking out baby back ribs, look for a good amount of marbling – the beautiful white fat that adds moisture and flavor. It’s a good sign that the ribs will be juicy and flavorful. Avoid ribs that look dry, cracked, or have many crevices; you want a nice, even texture.
Spare Ribs: A Hearty and Robust Option
Spare ribs, on the other hand, are larger and meatier, boasting a bolder, robust flavor. They're the perfect choice when feeding a crowd or wanting a more substantial meal. They tend to be more robust and require a bit more time on the grill to achieve that melt-in-your-mouth tenderness. The bone structure is more pronounced, adding to the meaty experience. Spare ribs also have a thicker layer of fat, contributing to a delicious, crispy bark when cooked correctly. So, if you crave a rib experience with a powerful punch, spare ribs are your best bet.
(Part 2) The Magic of Brine: Unveiling Tenderness and Depth of Flavor

Now, with your chosen ribs ready to go, let's get them ready for grilling. This is where brining comes in. It's a process of soaking the ribs in a salt-based solution that works wonders for the meat. Brining not only tenderizes the ribs, making them unbelievably juicy, but also adds a depth of flavor that's simply irresistible. It's like giving your ribs a secret flavor boost, unlocking their full potential.
You'll find plenty of elaborate brine recipes online, but the basic principle is simple: salt, sugar, and water. Some people prefer adding spices like black pepper, garlic powder, or a splash of apple cider vinegar for extra complexity. I've found that a simple salt and sugar brine works perfectly, allowing the natural flavor of the ribs to shine through.
Brining Time: Finding the Right Balance
The length of time you spend brining depends on the size and cut of the ribs. For baby back ribs, I recommend a minimum of 4 hours. Spare ribs, with their larger size, benefit from a 6-8 hour brine. Personally, I often brine overnight for an extra burst of flavor and tenderness. Remember, you're not trying to soak your ribs until they turn into mush; you want them to absorb enough moisture to become incredibly juicy and tender, but still maintain their structure.
(Part 3) Rub It In: The Power of a Good Seasoning Rub

Alright, your ribs have had their brine bath, and now it’s time to give them some TLC. We’re talking about a good old-fashioned seasoning rub, the key to unlocking a truly delicious rib experience. This is your chance to get creative and personalize your ribs, finding the flavour profile that tantalizes your taste buds.
The beauty of a rub is that it adds layers of flavor and creates a crispy, delicious bark on the ribs as they cook. There are endless rub combinations, but here are some classics that always deliver:
- The Classic BBQ Rub: A simple mix of salt, pepper, paprika, garlic powder, onion powder, and a little bit of brown sugar. It's a tried-and-true recipe that delivers a smoky, sweet flavour, perfect for those who like a traditional taste.
- Spicy Heat: For those who enjoy a bit of kick, add some cayenne pepper, chili powder, or chipotle powder to your rub. This will give your ribs a fiery punch, but remember to start with a small amount of spice and add more to taste. No one wants to end up with a mouth full of fire!
- Sweet and Savoury: For a sweeter flavour profile, try adding some brown sugar, molasses, or honey to your rub. This will create a rich and caramelized bark that's simply irresistible, adding a delightful balance of sweetness and savoriness.
The Art of Rubbing: A Gentle Touch
Remember, the key is to rub the seasoning into the meat gently and evenly, ensuring you get it into all the nooks and crannies. Don't be afraid to use your hands. It’s the best way to ensure the rub adheres to the ribs and gets nice and crusty during cooking. You can even add a little bit of olive oil to the rub to help it stick to the ribs and achieve an even coating.
(Part 4) The Great Smoker Debate: To Smoke or Not to Smoke?
Now we come to a crucial decision: do you smoke your ribs or grill them? It's a long-standing debate among barbecue enthusiasts. And, frankly, there’s no right or wrong answer. It comes down to personal preference and the tools you have at your disposal.
The Smoke Show: A Journey of Patience and Flavor
smoking ribs is a slow and low process that infuses the meat with incredible smoky flavor. It's a labor of love, requiring patience and attention to detail, but the results are truly rewarding. You’ll need a good smoker, whether it's a charcoal smoker or an electric smoker. The key is maintaining a low and slow temperature, around 225-250 degrees Fahrenheit (107-121 degrees Celsius). Choosing the right smoking wood is also crucial. Woods like hickory, mesquite, or pecan will give your ribs a classic smoky flavor.
Personally, I'm a bit of a traditionalist when it comes to smoking ribs. I love the entire process – the aroma of smoke filling the air, the anticipation building as those ribs slowly cook to perfection. It's an experience that's hard to beat, and the unique flavor imparted by the smoke is unparalleled.
Grilling for Speed and Convenience
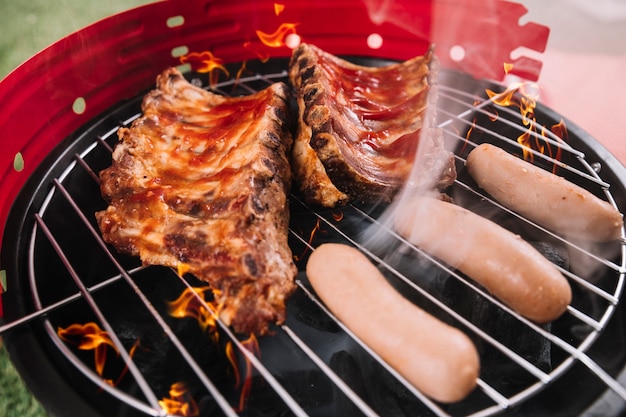
On the other hand, grilling ribs over high heat offers a faster alternative, achieving a delicious, crispy bark in a shorter time. You can achieve great results with a gas grill or a charcoal grill. The key is to cook them over medium-high heat, around 350-400 degrees Fahrenheit (177-204 degrees Celsius). This method creates a crispy, caramelized bark on the outside while keeping the ribs juicy and tender on the inside. And, of course, the convenience of grilling is undeniable.
Now, I won't lie, I've been known to use my grill for ribs when I'm feeling lazy or pressed for time. And let me tell you, they're still incredibly delicious!
(Part 5) Mastering the Art of Ribs: Time and Temperature
Let’s talk about the meat of the matter, literally! The time it takes to cook ribs depends on a few key factors, including the size of the ribs, the temperature of your grill or smoker, and the method you choose. But, generally speaking, you're looking at a cook time of around 3-4 hours for baby back ribs and 4-6 hours for spare ribs.
The Tell-Tale Signs of Doneness: A Culinary Dance of Tenderness
So how do you know when your ribs are cooked to perfection? There are a few telltale signs to look for. First, the meat should be incredibly tender and pull away easily from the bone. Second, the ribs should have a beautiful, crispy bark on the outside. And finally, the internal temperature should reach 190-203 degrees Fahrenheit (88-95 degrees Celsius).
There's a little trick I've learned over the years: if you can easily pull the bone out with a fork without resistance, your ribs are done. It's a surefire way to know you've reached that perfect level of tenderness, where the meat falls off the bone with a gentle tug.
(Part 6) The Sauce Game: Adding a Flavor Symphony
Your ribs are cooked to perfection, and now it's time to take things to the next level – sauce time! You might be thinking, “Sauce? Why would I need sauce if the ribs are already so delicious?" And you're right, the ribs are fantastic on their own. But, a good sauce can elevate the flavor profile to new heights, adding a beautiful symphony of flavor to your ribs.
The Sauce Spectrum: From Sweet to Spicy
The world of barbecue sauce is vast and diverse, offering a wide range of flavor profiles to suit every palate. You've got your sweet sauces, your spicy sauces, your smoky sauces, and everything in between. Personally, I like a balance of sweet and smoky, with a hint of tanginess. I've tried countless sauces over the years, and I've found that a good homemade sauce is hard to beat. It gives you complete control over the ingredients and allows you to experiment with different flavours, creating a sauce that’s uniquely yours.
The Art of Saucing: A Final Touch of Magic
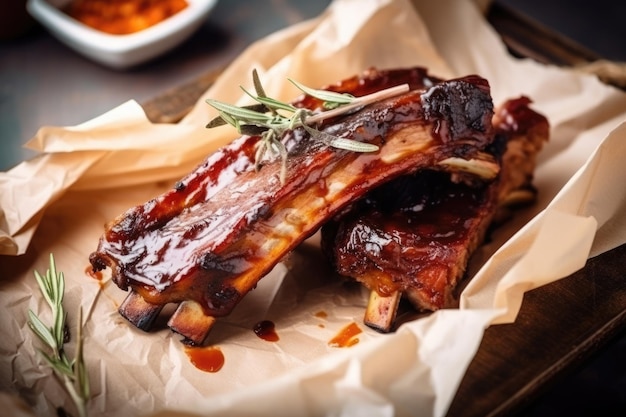
There are two schools of thought when it comes to applying sauce: you can apply it early in the cooking process, or you can save it for the very end. I'm a firm believer in the latter. Adding sauce too early can lead to a burned, sticky mess. Instead, I like to apply a thin layer of sauce during the last 30 minutes of cooking, giving it just enough time to caramelize and create a beautiful glaze. Remember, you don't want to drown your ribs in sauce. Just a gentle coating is all you need. And if you want to get fancy, you can brush the ribs with a little bit of melted butter before applying the sauce. This will help the sauce adhere to the ribs and create a richer, more flavorful glaze.
(Part 7) Resting Up: Letting the Ribs Relieve Stress
Your ribs are done, you've applied the sauce, and now you're ready to dig in, right? Not so fast! Before you start chowing down, give your ribs a good 15-20 minutes to rest. This might seem like an unnecessary step, but it's actually crucial. Allowing the ribs to rest allows the juices to redistribute throughout the meat, making them incredibly tender and juicy. It also gives the bark a chance to set and prevents it from becoming soggy when you slice into the ribs.
The Art of Patience: A Culinary Reward
I know it's hard to wait, especially when the aroma of delicious ribs is filling the air. But, trust me, the extra few minutes of waiting are well worth it. You'll be rewarded with ribs that are so tender, they'll practically melt in your mouth. And that, my friends, is the ultimate goal of rib cookery.
(Part 8) Slicing and Serving: A Culinary Triumph
Alright, your ribs have had their rest, and now it's time to slice and serve. Now, I know some people like to go for the traditional “bone-in” approach, but I prefer to slice my ribs into individual portions. It makes them easier to handle and eat, especially if you're serving a large group. And it allows you to show off your amazing cooking skills.
A Feast for the Senses: Ribs that Wow
Use a sharp knife to slice the ribs between the bones, ensuring clean, even cuts. Don't be afraid to give those ribs a good pull to ensure they're nice and tender. Now, it's time to assemble your rib platter. You can add a side of coleslaw, baked beans, or mac and cheese. And don't forget the napkins! Ribs can be a bit messy, but that's all part of the fun. Serve those ribs hot and enjoy! You've worked hard to create this culinary masterpiece, so take pride in your creation.
FAQs
1. What is the best way to tell if ribs are done?
The best way to tell if your ribs are done is to check the tenderness of the meat and the internal temperature. The meat should be incredibly tender and pull away easily from the bone. The internal temperature should reach 190-203 degrees Fahrenheit (88-95 degrees Celsius). If you can easily pull the bone out with a fork without resistance, your ribs are done, and you've achieved the perfect tenderness.
2. What is the best type of wood for smoking ribs?
Woods like hickory, mesquite, or pecan will give your ribs a classic smoky flavour. You can also experiment with other woods like cherry, apple, or maple for a different flavour profile, adding subtle notes of sweetness or fruitiness.
3. How do I prevent ribs from drying out?
To prevent ribs from drying out, cook them over low and slow heat. Use a smoker or a grill with a lid to maintain a consistent temperature, preventing hot spots that can lead to uneven cooking. Also, make sure to use a good quality cut of ribs with a decent amount of marbling, which will help retain moisture during cooking.
4. How long should ribs rest before serving?
Allow your ribs to rest for 15-20 minutes before serving. This will allow the juices to redistribute throughout the meat, making them incredibly tender and juicy. It also gives the bark time to set and prevents it from becoming soggy when you slice into the ribs.
5. What are some good side dishes for ribs?
Some classic side dishes for ribs include coleslaw, baked beans, mac and cheese, potato salad, and corn on the cob. You can also get creative and try different side dishes depending on your preference. Consider pairing the richness of the ribs with lighter, tangy sides like a vinegar-based coleslaw or a refreshing cucumber salad.
So there you have it, folks. The secrets to grilling ribs to perfection. Remember, it's all about patience, attention to detail, and a little bit of love. Now go out there and grill up some amazing ribs that will leave your guests begging for more!
Everyone is watching

How to Cook Frozen Lobster Tails Perfectly: A Step-by-Step Guide
RecipesLobster. Just the word conjures up images of lavish meals, special occasions, and a taste of luxury. But let's...

Pigs in a Blanket Cooking Time: How Long to Bake for Perfect Results
RecipesAh, pigs in a blanket. Just the name conjures up images of those delightful little parcels of crispy pastry en...

Pork Fillet Cooking Time: How Long to Cook It Perfectly
RecipesPork fillet, or tenderloin as it's sometimes called, is a real favourite in our house. It's so versatile, and...

The Ultimate Guide to Cooking Delicious Frankfurters
RecipesLet's face it, we all love a good frankfurter. It's a classic, simple, and always satisfying. But let's be rea...

Wolf Meat Recipes: A Guide to Cooking Wild Game
RecipesLet's be honest, you don't see wolf meat at your local butcher shop every day. It's a bit of a wild card, but ...
