(Part 1) The Wings Themselves: Choosing the Right Ones

First things first, you've got to start with the right wings. Now, I'm no Michelin-star chef, but I've been cooking wings for years, and let me tell you, it makes a difference. You've got your drumettes, your flats, and your whole wings. Drumettes are the smaller, thicker parts, and flats are the larger, flatter parts. Whole wings are, well, the whole shebang, and they're great for parties. Personally, I'm a fan of flats – they cook a little quicker and have more surface area for that crispy skin. But it all comes down to what you fancy, really.
Finding the Best Wings
Now, when you're at the butcher's or supermarket, take a good look at those wings. You want them to be fresh, with a nice, even color. Avoid any that look dry or have a funny smell. I always give them a quick sniff – trust your nose, it'll tell you if something's amiss. Also, check for any bruising or cuts, as these can make the wings cook unevenly.
Weight Matters
Another thing to consider is the weight of the wings. You're looking for wings that are roughly the same size, especially if you're cooking a big batch. Why? Because they'll cook at roughly the same rate. If you've got a mix of small and large wings, the smaller ones might overcook before the larger ones are done. It's a bit like trying to cook a whole chicken and a drumstick at the same time – you need to be careful!
(Part 2) Getting Ready: Prepping the Wings

Alright, you've got your wings, now it's time to get them ready for cooking. This is where things get a bit more exciting, because this is where you can really make them your own. I've got my tried and tested methods, but feel free to experiment and find what you like best. It's all about personal preference, you know?
Washing and Patting Dry
First things first, give the wings a good wash under cold running water. This'll get rid of any dirt or debris. Then, pat them dry with some kitchen paper. You don't want any excess water hanging around, as it'll stop the skin from getting crispy. So, make sure you pat them dry, really dry. You'll be surprised how much water can cling to those wings!
Seasoning Time!
Now comes the fun part, seasoning the wings! This is where you can really let your creativity run wild. There are so many different options, and it's all about finding what you love.
I tend to go for a classic salt and pepper mix, maybe some paprika for a bit of colour, and sometimes even a sprinkle of cayenne pepper for a bit of heat. But hey, you could use garlic powder, onion powder, smoked paprika, Cajun seasoning, or even a blend of herbs. You can even make your own dry rub, using whatever spices you fancy. It's all about experimenting and finding what works for you. Remember, there's no right or wrong here!
(Part 3) The Big Cook: Oven, Grill, or Fryer?

Alright, you've got your seasoned wings, now it's time to cook 'em. But first, you need to decide which method you're gonna use. You've got the oven, the grill, and the deep fryer. Each one has its own advantages and disadvantages, so let's break it down.
Oven Cooking: A Classic Choice
Oven cooking is a great option for a large batch of wings. It's super easy, and you don't need to stand over the stove watching them cook. Plus, it gives you a nice, even cook. Here's how you do it:
- Preheat your oven to 190°C (375°F). Make sure it's nice and hot before you put those wings in.
- Spread the wings out on a baking sheet lined with parchment paper. This prevents them from sticking and makes for easier cleanup.
- Bake for 40-45 minutes, flipping the wings halfway through. This ensures that they cook evenly on both sides.
- Once they're cooked, you can either serve them immediately or broil them for a few minutes to get that crispy skin. Just watch them carefully, as they can burn quickly.
Grilling: For That Smoky Flavor
Grilling is a great option if you want that smoky, charred flavour. Just remember to keep an eye on them, as they can burn easily. Here's how you grill those beauties:
- Preheat your grill to medium heat. You want the grill to be hot enough to sear the wings but not so hot that they burn.
- Place the wings on the grill, leaving a bit of space between each one. This allows the heat to circulate and helps them cook evenly.
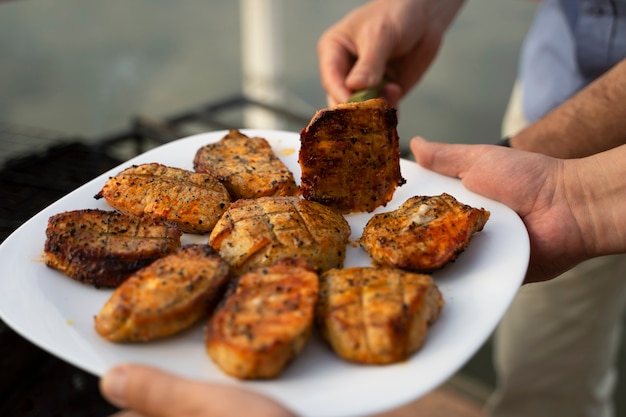
- Cook for 15-20 minutes, turning them every 5-10 minutes. This ensures they cook evenly and get that beautiful grill mark.
- Once they're cooked, you can serve them immediately or brush them with some barbecue sauce for extra flavour.
Deep Frying: For the Ultimate Crunch
Now, if you're looking for that ultimate crispy skin, then deep frying is the way to go. It's a bit more hands-on than oven or grilling, but trust me, it's worth it. You'll get wings that are crispy on the outside and juicy on the inside. Here's the lowdown:
- Fill a large saucepan or deep fryer with enough vegetable oil to submerge the wings. Heat the oil to 175°C (350°F). You can use a thermometer to check the temperature. Make sure the oil is hot enough to cook the wings quickly and evenly.
- Carefully drop the wings into the hot oil, making sure not to overcrowd the pan. Work in batches if necessary. You don't want to lower the temperature of the oil too much.
- Fry the wings for about 8-10 minutes, or until they're golden brown and cooked through. This is where you'll need to keep an eye on them, as cooking times can vary depending on the size of the wings and the oil temperature.
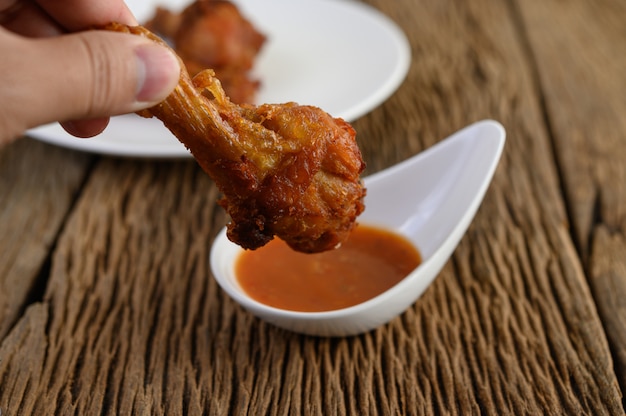
- Remove the wings from the oil and place them on a wire rack to drain. You can then toss them in your favourite sauce or serve them plain.
(Part 4) Checking for Doneness: The Ultimate Test
Right, so you've cooked your wings, but how do you know if they're actually cooked through? It's important to make sure the meat is cooked all the way through to avoid any nasty surprises. Here are a few tips to check for doneness:
The meat thermometer: The Gold Standard
The best way to check for doneness is with a meat thermometer. Insert it into the thickest part of the wing, making sure it doesn't touch any bone. The internal temperature should reach 74°C (165°F) for safe consumption. This is the most accurate way to ensure the wings are cooked through.
The Touch Test: A Quick Check
If you don't have a meat thermometer, you can use the touch test. Gently press the meat with your fingers. If it feels firm and springs back, it's cooked through. If it feels soft or squishy, it needs to be cooked a bit longer. This method is less precise than using a thermometer, but it can be helpful in a pinch.
Visual Clues: A Visual Indicator
You can also look for visual clues. The wings should be golden brown and have a crispy skin. The meat should be white throughout, with no trace of pink. If you see any pink, it means they need to be cooked a bit longer. However, this method should always be used in conjunction with other tests, as colour can be deceiving.
(Part 5) Resting: Letting the Wings Settle In
Okay, so your wings are cooked, but don't just rush to dive in. Give them a few minutes to rest. This allows the juices to redistribute, resulting in more succulent and flavourful wings. It's a bit like giving them a chance to catch their breath after all that cooking!
Simply transfer the wings to a wire rack or a platter lined with paper towels. This lets any excess grease drain away, leaving you with those crispy wings you've been dreaming of. Let them rest for at least 5-10 minutes before serving.
(Part 6) The Saucing Game: Taking Things to the Next Level
Right, your wings are cooked, rested, and ready to be devoured. But why stop there? It's time to take things to the next level with some delicious sauces! This is where you can truly customize your wings and create something truly special.
Classic BBQ: A Timeless Favorite
Let's start with the classic – barbecue sauce. It's a crowd-pleaser and for good reason. It's sweet, smoky, and tangy, and it goes perfectly with chicken wings. There are so many different varieties available, so you can find one that suits your taste buds.
buffalo wing sauce: A Spicy Delight
Then there's the legendary Buffalo wing sauce. It's a spicy, tangy masterpiece that'll get your taste buds tingling. It's made with hot sauce, butter, and vinegar, and it's usually served with celery sticks and blue cheese dressing. The combination of heat and tang is truly addictive.
Sweet Chili: A Sweet and Spicy Kiss
If you're looking for something a bit sweeter, try a sweet chili sauce. It's got a nice balance of sweet and spicy, with a hint of garlic and ginger. It's a great alternative to traditional barbecue sauce, offering a more nuanced flavor profile.
Teriyaki: A Touch of Japan
For a more exotic flavour, try a teriyaki sauce. It's a Japanese sauce that's made with soy sauce, sugar, and sake. It's sweet, savoury, and a bit salty, and it gives your wings a nice glaze. Teriyaki is a great choice if you're looking for something with a more savory and slightly sweet flavor.
Get Creative!
Don't be afraid to get creative with your sauces! You can mix and match different flavours, or even make your own sauce from scratch. The possibilities are endless, so experiment and see what you come up with! There are also tons of amazing homemade sauce recipes online, so don't be afraid to explore!
(Part 7) The Serving Game: It's All About Presentation
Okay, so you've got your perfectly cooked and sauced wings. Now it's time to serve them up in style. Presentation is everything, right? You want to make your wings look as good as they taste.
The Platter: Setting the Scene
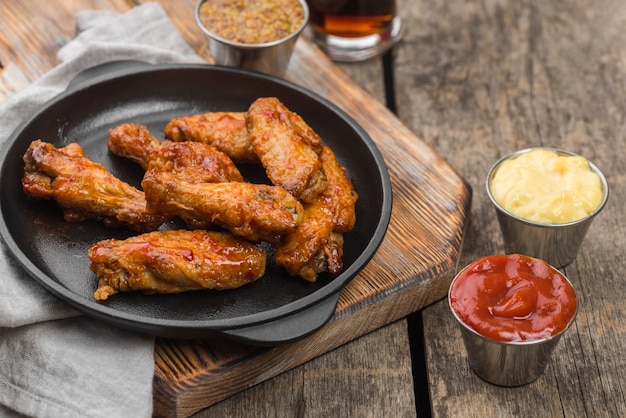
Start with a nice platter or serving bowl. A wooden platter gives it a rustic feel, while a white ceramic bowl adds a touch of elegance. You can even use a basket for a more casual look. The choice of platter can really set the tone for your wing feast!
Sides: The Perfect Accompaniments
Don't forget the sides. You can't have chicken wings without some classic sides, like celery sticks, carrot sticks, and blue cheese dressing. You can also add some potato wedges, onion rings, or coleslaw for a more complete meal. Sides not only complement the wings but also offer a refreshing contrast in flavor and texture.
The Finishing Touches: Adding Flair
To add some extra flair, you can sprinkle some fresh herbs, like parsley or chives, on top of the wings. You can also garnish with some lemon wedges or lime wedges. These finishing touches elevate the presentation and add a burst of fresh flavor.
(Part 8) The Leftovers: Don't Throw Them Away!
Let's be honest, you're probably gonna have some leftover wings. Don't throw them away! There are so many delicious ways to use them up. Here are a few ideas:
Chicken Wing Salad: A Refreshing Twist
Toss the leftover wings with some chopped veggies, lettuce, and your favourite dressing. You can even add some crumbled cheese for extra flavour. It's a quick and easy way to use up leftover wings and make a satisfying salad.
Chicken Wing Pizza: A Flavorful Fusion
Crumble the leftover wings and use them as a topping for your pizza. It's a great way to add some extra protein and flavour to your pizza. Just make sure you use a good quality pizza dough and sauce.
Chicken Wing Soup: A Warm and Comforting Dish
You can even make a delicious chicken wing soup with your leftovers. Just simmer the wings with some vegetables, broth, and your favourite spices. It's a warm and comforting dish that's perfect for a cold day.
(Part 9) FAQs: Your Chicken Wing Questions Answered
How long should I cook chicken wings?
The cooking time for chicken wings will depend on the cooking method you choose, the size of the wings, and the temperature of your oven, grill, or fryer. As a general guide, you can expect to cook wings for around 40-45 minutes in the oven, 15-20 minutes on the grill, and 8-10 minutes in a deep fryer. However, it's always best to use a meat thermometer to ensure the wings are cooked through.
What temperature should I cook chicken wings at?
Again, the temperature will vary depending on the method you choose. For oven cooking, preheat your oven to 190°C (375°F). For grilling, preheat your grill to medium heat. And for deep frying, heat your oil to 175°C (350°F).
What are the best sauces for chicken wings?
The best sauce for chicken wings is a matter of personal preference. There are so many delicious sauces to choose from, including barbecue sauce, Buffalo wing sauce, sweet chili sauce, teriyaki sauce, and more. Experiment and find what you love!
How do I get crispy chicken wings?
Deep frying is the best way to get crispy chicken wings. However, you can also achieve crispy skin in the oven or on the grill by making sure the wings are dry and cooked at a high enough temperature.
How do I store leftover chicken wings?
Store leftover chicken wings in an airtight container in the refrigerator for up to 3-4 days. You can also freeze leftover wings for up to 3 months. To reheat, simply place the wings in a preheated oven at 180°C (350°F) for about 10-15 minutes, or until they're heated through.
(Part 10) Conclusion: Chicken Wing Mastery
So there you have it, the ultimate guide to chicken wing cooking times. It's all about finding what works best for you. Don't be afraid to experiment with different cooking methods, sauces, and sides. And remember, the most important thing is to enjoy yourself.
Happy cooking!
Everyone is watching

How to Cook Frozen Lobster Tails Perfectly: A Step-by-Step Guide
RecipesLobster. Just the word conjures up images of lavish meals, special occasions, and a taste of luxury. But let's...

Pigs in a Blanket Cooking Time: How Long to Bake for Perfect Results
RecipesAh, pigs in a blanket. Just the name conjures up images of those delightful little parcels of crispy pastry en...

Pork Fillet Cooking Time: How Long to Cook It Perfectly
RecipesPork fillet, or tenderloin as it's sometimes called, is a real favourite in our house. It's so versatile, and...

The Ultimate Guide to Cooking Delicious Frankfurters
RecipesLet's face it, we all love a good frankfurter. It's a classic, simple, and always satisfying. But let's be rea...

Wolf Meat Recipes: A Guide to Cooking Wild Game
RecipesLet's be honest, you don't see wolf meat at your local butcher shop every day. It's a bit of a wild card, but ...
