(Part 1) The Chicken: Choosing the Right Ingredients
First things first, you need the right ingredients for a successful grilling session. It's like building a house – a good foundation is crucial. We're talking about the chicken itself, and trust me, there are some important factors to consider.
1. Bone-In or Boneless? The Great Debate
This is a classic dilemma, and there's no right or wrong answer – it's purely a matter of personal preference. bone-in chicken thighs tend to be juicier because the bone helps retain heat. Plus, they just have that extra layer of flavour that boneless thighs sometimes lack.
On the other hand, boneless, skin-on thighs are a bit quicker and easier to work with. They're ideal for a midweek meal when you're short on time.
Personally, I'm a bone-in kind of guy. I love the extra flavour and the fact that they cook a bit more evenly. But I totally understand why people prefer boneless – it's all about finding what works best for you.
2. Fresh vs Frozen: A Matter of Convenience
Fresh chicken is always the gold standard, but we all know those moments when we're scrambling to get dinner on the table and frozen thighs are our only option. If you're using frozen thighs, just make sure to thaw them completely in the fridge before grilling.
Never, ever thaw chicken at room temperature – that's a recipe for disaster!
3. Size Matters: Aim for Even Cooking
Okay, this isn't about your ego, folks. When it comes to chicken thighs, size does matter. Aim for thighs that are roughly the same size – this ensures they cook evenly. You don't want some thighs overcooked and dry while others are still raw. It's all about finding that perfect balance.
(Part 2) Prepping for the Grill: Getting Ready for Glory
Now that you've chosen your chicken, it's time to get those hands dirty and prep for the grilling.
1. The Pat-Down: A Crucial First Step
First things first, give your chicken thighs a good pat dry with some kitchen paper. We want to eliminate excess moisture, which can lead to steam and prevent that beautiful, crispy skin.
2. The Salt Bath: Enhancing Flavor and Creating a Crisp
This is where things get exciting – salt is your secret weapon. It not only enhances the flavour of the chicken but also helps to draw out moisture, which results in a crispier skin. I like to give my thighs a good sprinkle of salt and let them sit for at least 30 minutes, but an hour is even better. This allows the salt to work its magic.
3. Marinade Mayhem: The Optional Flavor Boost
A marinade is not strictly necessary, but it can take your chicken to a whole new level of flavour. You can go classic with a lemon and herb marinade, or get adventurous with something spicy or sweet.
The key is to let the marinade penetrate the chicken well, so aim for at least a couple of hours, or even overnight. You'll be rewarded with a burst of flavour that will make your taste buds sing.
4. The Skin Factor: Scoring for a Crispier Finish
If you're using skin-on chicken, consider scoring the skin in a criss-cross pattern. This allows for better fat rendering, resulting in a crispier, more flavourful skin. I'm telling you, it's a game-changer.
(Part 3) Grilling: The Art of the Heat
Now we're getting to the heart of the matter – the actual grilling process. But before you fire up the grill, let's talk about heat control.
1. Charcoal vs Gas: A Matter of Preference
This is a bit of a debate, and honestly, it's all down to personal preference. Charcoal offers a more smoky flavour, but it requires a bit more expertise in controlling the heat. Gas is easier to manage, but it might lack that smoky depth.
I'm a charcoal purist, but I respect those who prefer the gas route. It's all about finding what works best for you.
2. The Hot and the Cold: Two Zones for Perfection
This is where things get interesting – the two-zone technique. By creating two heat zones on your grill, you can achieve grilling perfection. The hot zone is for searing, and the cold zone is for cooking through. You'll want to sear the chicken over the hot zone to get that beautiful crust, then move it to the cooler zone to finish cooking.
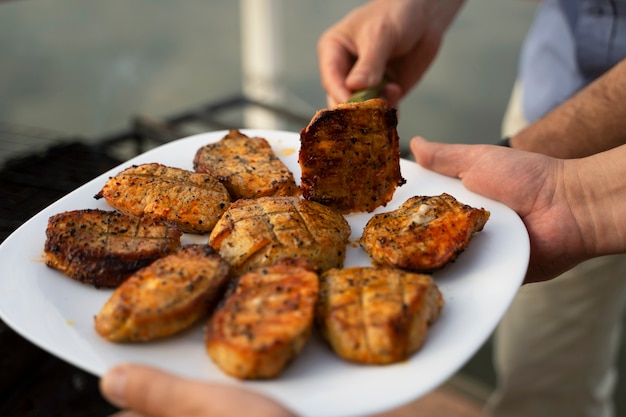
3. The Grilling Process: Step-by-Step Guide
Here's a step-by-step guide to grilling chicken thighs to perfection using the two-zone technique:
- Preheat your grill to medium-high heat (around 400°F/200°C). You want those grates scorching hot for a good sear.
- Place your chicken thighs on the grill over the hot zone, making sure they don't touch each other. Give them some space to breathe!
- Cook for about 4-5 minutes per side, or until they develop a nice sear. You'll know it's ready when you see those beautiful grill marks.
- Move the thighs to the cooler zone of the grill. You're not done yet, just letting them cook through gently.
- Continue cooking for another 10-15 minutes, or until the internal temperature reaches 165°F (74°C). You can use a meat thermometer to check.
4. The doneness test: No Guesswork Allowed
Don't rely solely on timing, especially if you're using thick thighs. Always use a meat thermometer to check for doneness. Insert the thermometer into the thickest part of the thigh, making sure it doesn't touch bone.
If the internal temperature reaches 165°F (74°C), your chicken is perfectly cooked and safe to eat. Don't overcook it – you want it juicy and tender, not dry and tough.
(Part 4) Beyond the Basics: Taking Your Chicken Game to the Next Level
So you've mastered the fundamentals – you can now grill a decent chicken thigh. But what about taking your chicken game to the next level? Let's explore some techniques and ingredients that will make your chicken sing.
1. The Flip-Flop Method: A Trick for Perfect Grill Marks
This is a little trick I learned from a seasoned grill master. After searing the thighs on both sides, rotate them 90 degrees before finishing them in the cooler zone. This creates those beautiful, even grill marks and ensures that the chicken cooks evenly. It's a simple trick, but it makes a big difference.
2. The Glaze Game: Adding a Touch of Sweetness and Shine
A glaze adds that final touch of flavour and brilliance to your grilled chicken. You can create your own or find a store-bought option that suits your taste. I'm partial to a honey-soy glaze, but the possibilities are endless.
Apply the glaze in the last 5 minutes of cooking to let it caramelize. It's that last-minute touch of sweetness that takes your chicken to the next level.
3. Smoking It Up: Adding a Smoky Depth
If you're using a charcoal grill, adding a few wood chips to the coals creates a delightful smoky flavour. Soak the chips in water for about 30 minutes, then add them to the hot coals. I prefer hickory or pecan chips, but there's a world of flavours to explore.
4. The Herb Effect: Fresh Herbs for a Burst of Flavor
Don't underestimate the power of herbs. Fresh herbs, like rosemary, thyme, oregano, or parsley, add a burst of flavour and aroma. Simply sprinkle them over the chicken during grilling or incorporate them into your marinade.
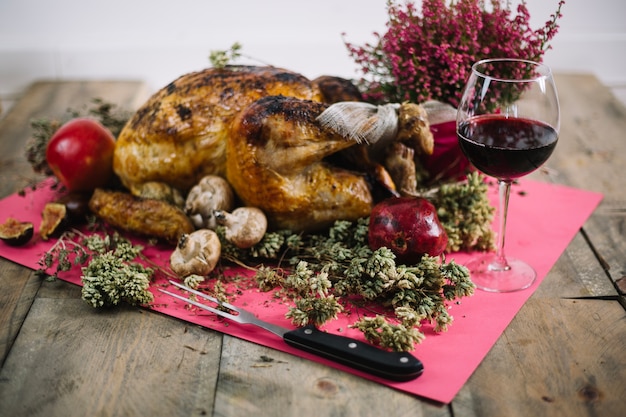
5. The Sidekick Factor: Perfect side dishes for a Complete Meal
Let's not forget about the companions! grilled chicken thighs go beautifully with a variety of side dishes. corn on the cob, grilled vegetables, potato salad, or a fresh salad are all excellent choices.
Get creative and experiment – there are endless possibilities for side dishes that will complement your grilled chicken perfectly.
(Part 5) Mastering the Rest: Ensuring Juicy, tender chicken
Okay, you've grilled your chicken to perfection. But the story doesn't end there. We need to ensure it's cooked right, rested properly, and enjoyed to the fullest.
1. Resting Up: Redistributing Juices for Maximum Tenderness
Once the chicken is cooked, don't jump right into slicing it. Let it rest for about 5-10 minutes. This allows the juices to redistribute, ensuring a juicy, tender bite. It's a simple step, but it makes a big difference in the overall texture and flavour.
2. Slicing It Right: Cutting Against the Grain for Tenderness
When slicing the chicken, cut against the grain. This makes the meat more tender and easier to chew. It's a small detail, but it makes a big difference in the overall eating experience.
3. The Leftover Dilemma: Repurposing for Delicious Meals
If you've got leftovers, don't despair! Grilled chicken thighs are great for salads, sandwiches, or even a hearty soup. It's a great way to make the most of your hard work.
(Part 6) The Ultimate Grilled Chicken Thigh Recipe
Now, for the pièce de résistance, here's a tried-and-true recipe for the most heavenly grilled chicken thighs.
Ingredients:
- 4 boneless, skin-on chicken thighs
- 1 tablespoon olive oil
- 1 teaspoon salt
- 1/2 teaspoon black pepper
- 1/2 teaspoon garlic powder
- 1/2 teaspoon paprika
- 1 tablespoon lemon juice
- 1 tablespoon fresh parsley, chopped
- Optional: 1 tablespoon honey for a sweet glaze
Instructions:
- Pat the chicken thighs dry with kitchen paper. You want to remove any excess moisture.
- In a bowl, combine the olive oil, salt, pepper, garlic powder, paprika, lemon juice, and parsley. This is your simple, flavorful marinade.
- Add the chicken thighs to the marinade and toss to coat evenly. Let the flavours infuse.
- Cover and refrigerate for at least 30 minutes, or up to 2 hours. The longer you marinate, the more intense the flavours will be.
- Preheat your grill to medium-high heat (around 400°F/200°C). Get those grates hot and ready for searing.
- Remove the chicken from the marinade and discard the marinade. You don't want to burn the marinade on the grill.
- Place the chicken thighs on the grill, making sure they don't touch each other. Give them space to cook evenly.
- Cook for about 4-5 minutes per side, or until they develop a nice sear. You'll see those beautiful grill marks appearing.
- Move the thighs to the cooler zone of the grill. Time to let them cook through gently.
- Continue cooking for another 10-15 minutes, or until the internal temperature reaches 165°F (74°C). Use a meat thermometer to check for doneness.
- If desired, brush the chicken thighs with the honey glaze in the last 5 minutes of cooking. It'll caramelize beautifully and add a touch of sweetness.
- Remove the chicken from the grill and let it rest for 5-10 minutes before slicing. This will allow the juices to redistribute.
- Serve with your favourite side dishes and enjoy!
(Part 7) A Table of Grilling Temperatures
This table shows some of the most popular grilling temperatures and their respective cooking times for chicken thighs. It can help you adjust your grilling time based on the temperature you choose:
| Temperature (°F) | Temperature (°C) | Cooking Time (minutes) |
|---|---|---|
| 350 | 175 | 20-25 |
| 400 | 200 | 15-20 |
| 450 | 230 | 10-15 |
(Part 8) FAQs
Let's address some common questions you might have about grilling chicken thighs.
1. What if my chicken thighs are too thick?
If your thighs are really thick, you might need to adjust the cooking time. Consider lowering the heat to medium and extending the cooking time by a few minutes. You want to make sure the chicken cooks through evenly.
2. Can I grill chicken thighs with the skin on?
Absolutely! Grilling with the skin on results in a crispy, delicious skin. However, if you prefer, you can remove the skin before grilling. It's entirely up to you.
3. How do I know when the chicken is cooked?
The best way to check for doneness is with a meat thermometer. The internal temperature should reach 165°F (74°C) for safe consumption. Don't guess, use a thermometer for peace of mind!
4. Can I use a marinade for boneless, skinless chicken thighs?
Yes! Marinating boneless, skinless chicken thighs is a great way to add flavour and moisture. It's especially helpful for boneless thighs, which can sometimes be a bit dry.
5. How do I prevent the chicken from sticking to the grill?
You can prevent sticking by oiling the grill grates before grilling. You can also use a grill mat to help prevent sticking. These little tips can make a big difference in preventing your chicken from sticking and making it easier to grill.
(Part 9) Conclusion
There you have it, folks! Your comprehensive guide to grilling chicken thighs to perfection. Remember, the key is to choose the right chicken, prep it properly, master the heat, and be patient. With a little practice and this guide, you'll be a grilling champion in no time. So, fire up the grill, grab your chicken, and let the good times roll!
Everyone is watching

How to Cook Frozen Lobster Tails Perfectly: A Step-by-Step Guide
RecipesLobster. Just the word conjures up images of lavish meals, special occasions, and a taste of luxury. But let's...

Pigs in a Blanket Cooking Time: How Long to Bake for Perfect Results
RecipesAh, pigs in a blanket. Just the name conjures up images of those delightful little parcels of crispy pastry en...

Pork Fillet Cooking Time: How Long to Cook It Perfectly
RecipesPork fillet, or tenderloin as it's sometimes called, is a real favourite in our house. It's so versatile, and...

The Ultimate Guide to Tender, Juicy Pulled Pork
RecipesRight, let's talk pulled pork. It's one of those dishes that just screams "comfort food," doesn't it? I mean...

The Ultimate Guide to Cooking Sweet Potatoes: From Roasting to Mashing
RecipesSweet potatoes. Just the name conjures up images of warm, comforting dishes, bursts of vibrant color, and a to...