Let's face it, folks. Brisket is a bit of a culinary enigma. It's one of those cuts of meat that can either be a triumph or a total flop. But when it's done right, it's an absolute revelation, a symphony of smoky flavours and melt-in-your-mouth tenderness. You'll be wondering why you ever settled for anything less.
Now, I've been on this brisket journey for years, experimenting, learning, and perfecting my technique. It's been a process of trial and error, seeking advice from seasoned pitmasters, and just plain old good ol' fashioned barbecue passion. But I'm here to tell you, it's been worth every minute.
So, gather 'round, my fellow barbecue enthusiasts, as we delve into the world of brisket together. We'll cover everything from choosing the right cut to mastering the smoking techniques, and even tackle those pesky questions you might have about the "stall." By the end of this, you'll be armed with the knowledge and confidence to conquer any brisket challenge that comes your way. Let's get started!
(Part 1) The Brisket Breakdown: Choosing Your Cut

The first step, and arguably the most important, is picking your brisket. Now, you've got two main players in this game: the point and the flat.
The point, the fattier end, is known for its juicy, marbled flavour. Imagine a symphony of rich, savory notes dancing on your taste buds. It's a true meat lover's dream. On the other hand, the flat, the leaner end, offers a more uniform texture, a clean, straightforward flavour profile. It's like a well-crafted solo, smooth and satisfying.
You can cook them separately, creating two distinct dishes, or you can go for the ultimate brisket experience and cook them together – the "packer brisket." This is where the magic truly happens. The fat from the point renders down, basting the flat and creating a perfectly balanced brisket that's both tender and flavorful.
Choosing the best brisket
So, how do you choose the perfect brisket? Look for these key features:
- The Fat Cap: A good fat cap is your friend. It's the key to a juicy, succulent brisket. Aim for a layer at least half an inch thick. It'll render down during the cooking process, adding flavour and moisture. Think of it as the secret sauce that makes your brisket irresistible.
- Marbling: This refers to the streaks of fat running throughout the meat. The more marbling, the more flavour. You want a good amount of marbling, ensuring that every bite is a burst of deliciousness.
- Colour: A deep, rich red colour is what you're after. Avoid any discolouration, dryness, or signs of spoilage. Your brisket should look fresh and inviting, ready to embark on its culinary journey.
- Texture: The brisket should feel firm and springy to the touch. Avoid any cuts that feel soft or mushy. It's a sign of a brisket that hasn't been handled properly.
Still feeling a bit unsure? Don't be afraid to ask your butcher for help. They're the experts! They can guide you through the process and even trim the brisket for you, leaving you ready to start your brisket adventure with confidence.
(Part 2) Getting Ready: Trimming and Seasoning

Now, it's time to get our hands dirty! We're going to trim the fat and apply a delicious rub that'll give our brisket that irresistible smoky flavour. This is where the magic really starts to happen.
Trimming the Fat
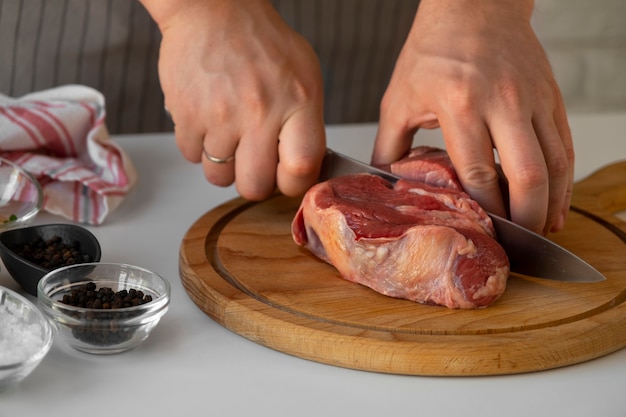
Trimming the fat is a crucial step. It prevents the fat from burning during cooking, ensuring an even cook. But don't go overboard! We need some of that fat for moisture and flavour.
Here's how to trim the fat like a pro:
- Remove Excess Fat: Trim the fat from the edges and any large chunks that might burn. Think of it as sculpting your brisket, removing any unnecessary bits to create a beautiful, even surface. But leave a layer of fat about 1/4 to 1/2 inch thick covering the brisket.
- Create a Flat Surface: Trim any uneven areas of fat to create a smooth surface for the rub to adhere to. You want that rub to coat the brisket evenly, ensuring every inch of the meat gets its share of flavour.
- Don't Trim Too Much: Remember, fat is your friend. It adds moisture and flavour. Leave enough fat to keep your brisket tender and juicy.
Applying the brisket rub
Now, the fun part! Time to get that rub on. You can go with a store-bought rub or whip up your own – the world is your oyster. But here's a basic rub that I've found works like a charm, providing a delicious blend of smoky, salty, and sweet flavours:
Basic Brisket Rub
| Ingredient | Quantity |
|---|---|
| Kosher salt | 2 tablespoons |
| Black pepper | 1 tablespoon |
| Garlic powder | 1 tablespoon |
| Onion powder | 1 tablespoon |
| Paprika | 1 tablespoon |
| Chili powder | 1 tablespoon |
| Brown sugar | 1 tablespoon |
Generously rub that rub all over the brisket, making sure to coat both sides. Don't be shy! You want that rub to penetrate the meat and impart its flavour, creating a beautiful crust that'll have you drooling.
Once you've rubbed your brisket with love, let it sit uncovered in the fridge for at least 2 hours, preferably overnight. This gives the rub time to do its magic, infusing the meat with flavour and creating a delicious, smoky aroma that'll fill your kitchen.
(Part 3) The Smoking Ritual: Getting the Fire Going

Alright, folks, this is where the real fun begins. We're about to fire up the smoker, unleash those smoky flavours, and embark on a journey of culinary patience and pure, unadulterated barbecue bliss.
I've experimented with different methods over the years – charcoal smokers, electric smokers, you name it. Each has its own unique charm. But for that classic smoky flavour, I always go back to my trusty charcoal smoker. It's just something about the combination of wood and charcoal that creates that truly irresistible, authentic barbecue taste.
Getting the Smoker Ready
The first step is to preheat your smoker to the right temperature – typically between 225 and 250 degrees Fahrenheit. This ensures a slow, even cook, allowing the smoke to permeate the meat and the fat to render down. It's a crucial step in achieving that perfectly tender, juicy brisket.
Choosing the Wood
Now, the type of wood you use can make a world of difference in the flavour of your brisket. I'm a big fan of hickory for its strong, smoky flavour. It's like adding a dash of bold, smoky spice to your brisket symphony. But other great options are available, like pecan, oak, and mesquite. Feel free to experiment and find the flavours that tickle your fancy.
Setting Up the Smoke
Soak your wood chunks in water for at least 30 minutes. This helps them to smolder longer, producing a nice, steady smoke that infuses your brisket with flavour. Once they're soaked, place a few chunks directly on the charcoal. This will give your smoker that authentic smoky flavour, the cornerstone of every good barbecue.
With your smoker preheated and the wood ready, you're ready to place your brisket on the grill. Make sure there is a good amount of space between the brisket and the heat source. You want to allow for even cooking, ensuring that your brisket cooks evenly and perfectly.
(Part 4) The Long and Slow Journey: Mastering the Smoke
This is where patience comes into play. Brisket takes time, folks. Like, a lot of time. But I promise you, it's worth the wait. You'll be rewarded with a brisket that's tender, juicy, and packed with flavour, a culinary masterpiece you'll be proud to share.
The key is to cook it low and slow. Remember that 225-250 degree Fahrenheit range? That's your target temperature. We want that brisket to cook slowly and evenly, allowing the smoke to penetrate and the fat to render down. Think of it as a slow dance, where the smoke and heat intertwine with the meat, creating a harmonious flavour profile that's irresistible.
Monitoring the Temperature
During the smoking process, it's important to monitor the temperature of your smoker. Use a meat thermometer to check the internal temperature of the brisket. You'll want to make sure the temperature stays within that 225-250 degree range. Adjust the vents on your smoker as needed to maintain a consistent temperature.
The Importance of Patience
Now, this is where you need to be a little patient. I know it's hard to resist opening the smoker and peeking at the brisket every few minutes, but resist the temptation! Opening the smoker frequently can cause the temperature to fluctuate and slow down the cooking process.
Think of it as a marathon, not a sprint. Let the brisket cook undisturbed, allowing the smoke and heat to work their magic. Trust me, you'll be glad you did.
The "Stall" and How to Handle It
You might notice something called the "stall" happening. This is where the internal temperature of the brisket plateaus for a while. Don't panic! It's perfectly normal and happens because the meat is releasing moisture.
To overcome the stall, you can wrap the brisket in butcher paper or aluminum foil. This helps to trap the steam and keep the brisket moist. It's like giving your brisket a warm, comforting hug, allowing the meat to stay tender and juicy.
(Part 5) The smoke ring: A Sign of a Well-Cooked Brisket
Now, you might hear whispers of a "smoke ring" among seasoned barbecue enthusiasts. It's that pinkish-red ring that forms beneath the surface of the brisket, a beautiful sign of proper smoking. It's a testament to your patience and culinary prowess, a visible marker of a brisket that's been treated with care and respect.
The smoke ring is created when the smoke from the smoker penetrates the meat and reacts with the myoglobin in the muscle fibers. It's a chemical reaction that gives the brisket that distinctive colour, adding a visual appeal to the already delicious flavours. The thicker the smoke ring, the better, a clear sign that you've got a truly exceptional brisket on your hands.
Creating the Perfect Smoke Ring
To get that perfect smoke ring, you need to pay close attention to the smoking temperature and the type of wood you use. Higher temperatures can make the smoke ring thin or even absent. So, stick to those lower temperatures for the best results.
And remember, a good quality wood like hickory or pecan can create a deeper, more pronounced smoke ring. It's all about those little details that make the difference between a good brisket and an extraordinary one.
(Part 6) The "texas crutch": A Technique for Moistness
Remember that "stall" we talked about earlier? Some folks like to use a technique called the "Texas crutch" to speed things up a bit. It involves wrapping the brisket in butcher paper or aluminum foil to trap steam and help it cook faster.
But, let me tell you, this can be a bit controversial. Some purists swear by not wrapping the brisket, believing it compromises the bark and flavour. Others find it a useful tool for achieving tenderness and moisture.
The Pros and Cons of the "Texas Crutch"
Here's a breakdown of the pros and cons of this technique:
Pros:
- Faster cooking time: Wrapping the brisket helps to speed up the cooking process by trapping the moisture and heat.
- Increased Tenderness: The steam created by wrapping helps to break down the tough connective tissues, resulting in a more tender brisket.
- Reduced "Stall": The wrapping can help to reduce the duration of the stall by keeping the meat moist.
Cons:
- Reduced Bark Development: Wrapping can prevent a crispy bark from forming on the brisket, as the steam creates a moist environment.
- Less Smoke Penetration: The wrapping can limit the amount of smoke that penetrates the brisket, which might affect the flavour.
Ultimately, the decision to wrap or not is up to you. If you're looking for the quickest and most tender brisket, then the Texas crutch might be a good option. But, if you're after that crispy bark and bold smoky flavour, then sticking to unwrapped cooking might be the way to go.
(Part 7) The Rest and the Reveal: Let the brisket rest
Alright, folks, we're nearing the end of our brisket journey! The anticipation is building, and the aroma of smoky goodness is filling the air. But before you dive in, there's one more crucial step: resting the brisket.
Think of it as giving the brisket a little time to relax and settle. It allows the juices to redistribute throughout the meat, resulting in an even more tender and flavorful brisket. It's like allowing the flavours to meld and harmonize, creating a symphony of taste that'll leave you wanting more.
The resting time is essential. You want to wrap the brisket tightly in foil and let it rest for at least 2 hours. This allows the juices to redistribute, making for an exceptionally tender and juicy brisket.
While you're waiting, you can start preparing your sides and get the table set. You'll be ready for a barbecue feast that'll have your guests raving for days.
(Part 8) The Moment of Truth: Slicing and Serving
Okay, folks, it's finally time to reveal the masterpiece you've been working on. Unwrap that brisket and get ready for a culinary revelation. The aroma alone will be enough to make your mouth water.
Slicing Technique for Perfect Brisket
When slicing, you want to make thin slices against the grain. This helps to break down the muscle fibers and ensures a tender, melt-in-your-mouth experience.
You can use a sharp knife or a carving fork to slice the brisket. Don't be afraid to use a bit of force, as the brisket should slice through easily now that it's been rested.
Serving Your brisket masterpiece
Now, the grand finale! Serve your brisket hot and fresh, with your favourite bbq sauce on the side. You can also add a few sides like coleslaw, potato salad, or baked beans to complete the barbecue feast.
FAQs: Your Brisket Questions Answered
I know you might still have some lingering questions, so here are some frequently asked questions and answers:
1. What if My Brisket Isn't Tender Enough?
If your brisket is a bit tough, don't despair! It's probably just undercooked. You can always put it back in the smoker or oven until it reaches the desired tenderness. Just keep an eye on the temperature and make sure it doesn't dry out.
2. How Do I Tell if My Brisket is Done?
You can use a meat thermometer to check the internal temperature of your brisket. It's done when it reaches an internal temperature of at least 203 degrees Fahrenheit for the flat and 195 degrees for the point.
3. How Long Should I Cook a Brisket?
The cooking time for a brisket can vary depending on the size of the brisket, your smoker temperature, and other factors. But it typically takes 10 to 16 hours. Remember, it's a slow and steady process!
4. Can I Freeze Brisket?
Yes, you can freeze brisket. It's best to freeze it before cooking, as it can be tough to thaw it after cooking without affecting the texture. To freeze, wrap the brisket tightly in plastic wrap and then aluminum foil.
5. What if I Don't Have a Smoker?
Don't worry! You can still cook a delicious brisket without a smoker. You can use a slow cooker or a dutch oven. Just make sure to keep the temperature low and slow, and use a combination of liquid and moisture to keep the brisket tender and juicy.
Alright, folks, that's it! I hope you enjoyed this ultimate guide to cooking a tender, juicy, and flavourful brisket. Remember, it's a journey of patience and culinary delight, but the reward is well worth the effort. So, get out there and create your own brisket masterpiece. Happy grilling!
Everyone is watching

How to Cook Frozen Lobster Tails Perfectly: A Step-by-Step Guide
RecipesLobster. Just the word conjures up images of lavish meals, special occasions, and a taste of luxury. But let's...

Pigs in a Blanket Cooking Time: How Long to Bake for Perfect Results
RecipesAh, pigs in a blanket. Just the name conjures up images of those delightful little parcels of crispy pastry en...

Pork Fillet Cooking Time: How Long to Cook It Perfectly
RecipesPork fillet, or tenderloin as it's sometimes called, is a real favourite in our house. It's so versatile, and...

The Ultimate Guide to Cooking Delicious Frankfurters
RecipesLet's face it, we all love a good frankfurter. It's a classic, simple, and always satisfying. But let's be rea...

Wolf Meat Recipes: A Guide to Cooking Wild Game
RecipesLet's be honest, you don't see wolf meat at your local butcher shop every day. It's a bit of a wild card, but ...
