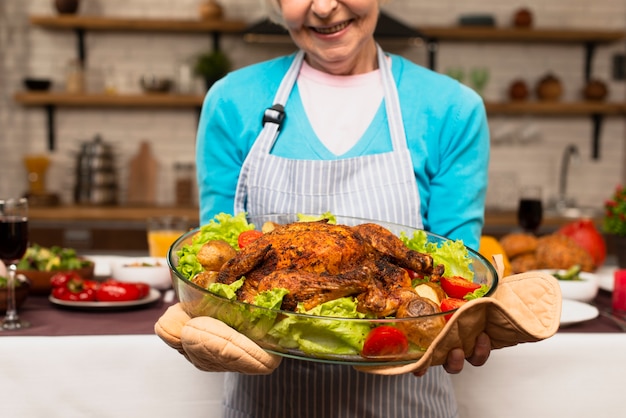
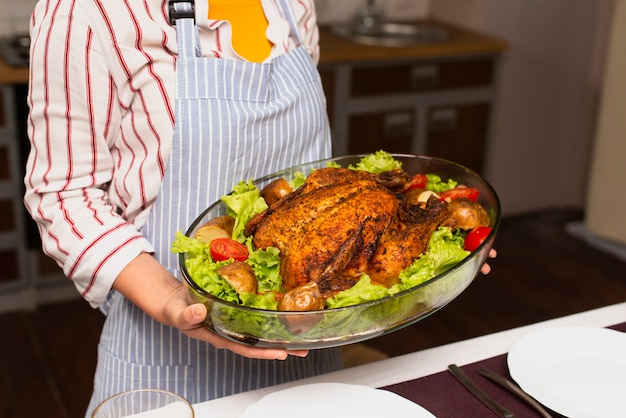
There's a certain kind of magic in the air when a perfectly roasted turkey graces the table. The golden-brown skin, the aroma that fills the house, the joyous chatter of loved ones gathered around - it's the epitome of a celebratory meal. But let's be honest, the prospect of roasting a turkey can be daunting, especially if you're a novice cook. There's the worry of dry meat, the uncertainty of cooking times, and the pressure to deliver a show-stopping dish. But fear not, my culinary companions! After years of trial and error, I've cracked the code for a succulent, juicy turkey, cooked to perfection at 350 degrees fahrenheit. And I'm here to share my secrets, so you can confidently embark on your own turkey-roasting journey.
(Part 1) The Pre-Game: Preparation is Key
As a seasoned cook, I've learned that the key to any successful dish lies in thorough preparation. A well-prepared turkey is the foundation for a delicious meal, so let's get our hands dirty!
1. Choosing the Right Turkey

First, we need to choose the right turkey for our needs. There's no point in attempting to roast a giant bird for just two people, and equally, a tiny turkey won't be enough to feed a large family. A good rule of thumb is to aim for about 1 pound of turkey per person. If you're hosting a smaller gathering, a smaller turkey will suffice, and for larger families, a bigger bird is the way to go.
When it comes to the type of turkey, I always go for a fresh turkey, preferably free-range, for the best flavour and quality. They're often a bit more expensive, but I find the taste is worth it. If you're short on time or can't find a fresh turkey, a frozen turkey will do just fine, just remember to defrost it properly beforehand. Allow 24 hours for every 5 pounds of frozen turkey to defrost in the refrigerator, and never thaw at room temperature as this can encourage bacterial growth.
2. Spatchcocking: The Game Changer

Now, here's where things get interesting. While traditional roasting is fine, spatchcocking a turkey is a game changer. It's a method where you remove the backbone and flatten the turkey, allowing for faster, more even cooking and juicier results. This simple technique is the single best thing you can do for your turkey, and it's not as intimidating as it sounds. All you need is a sharp pair of kitchen shears!
To spatchcock your turkey, start by turning it breast-side down on a cutting board. Locate the backbone along the center of the bird. Using your kitchen shears, cut along both sides of the backbone, removing it completely. Next, flip the turkey over to breast-side up and flatten it by pressing down on the breastbone until it lies flat. This ensures that the breast and legs cook evenly, reducing the risk of dry meat.
3. Brining: The Secret to Juicy Turkey

Let's face it, no one wants a dry, tough turkey. Brining is the hero of the story, infusing the turkey with moisture and flavour, and ensuring a juicy, tender result. You can use a simple brine solution of salt, sugar, and water, or get fancy with herbs and spices.
I prefer a dry brine, which involves rubbing the turkey with a salt and spice mixture and leaving it in the fridge overnight. This method is less messy and allows the flavours to penetrate deeper into the meat. To create a dry brine, mix together salt, sugar, herbs, and spices to your taste. Rub the mixture all over the turkey, making sure to get under the skin. Place the brined turkey in a large roasting pan, uncovered, and refrigerate for 12-24 hours. The longer the turkey is brined, the more flavourful and juicy it will be.
4. Seasoning and Stuffing: It's All About Flavour
Now that the turkey is prepped and ready to go, let's talk flavour! A good rub with herbs and spices is essential for a delicious turkey. I use a blend of rosemary, thyme, garlic powder, and black pepper, but feel free to experiment with your favourite combinations.
If you're stuffing the turkey, make sure you're using a recipe specifically designed for cooking inside the bird. Overstuffing can lead to uneven cooking and potential food safety hazards.
If you're not stuffing the turkey, you can also add flavor by placing aromatics, like herbs, onions, and citrus fruits, inside the cavity. This will infuse the turkey with a delicious aroma as it cooks.
(Part 2) Game Day: Roasting the Turkey
We've laid the groundwork, now it's time to shine! Let's get that turkey in the oven and make it happen.
5. Setting the Stage: Oven and Temperature
Preheat your oven to 350 degrees Fahrenheit (175 degrees Celsius). This temperature ensures a nice, even cooking process, preventing the skin from burning while the meat cooks thoroughly.
If you're using a roasting rack, place it in a large roasting pan to catch any drippings. This will prevent the turkey from sitting in its own juices, resulting in soggy skin.
6. The Turkey Goes In: Time to Roast
Now comes the exciting part! Place the seasoned turkey in the preheated oven, ensuring it's sitting comfortably on the rack. The cooking time will vary depending on the size of the turkey.
A good rule of thumb is to calculate 15 minutes per pound for an unstuffed turkey and 20 minutes per pound for a stuffed one. For example, a 12-pound unstuffed turkey would need to cook for about 3 hours. However, it's always best to use a meat thermometer to ensure the turkey is cooked through.
7. Monitoring the Progress: Checking for Doneness
The suspense is building! While the turkey is in the oven, don't forget to keep a close eye on it. About halfway through the cooking time, you'll want to baste it with pan drippings for extra moisture and flavour. This involves spooning the melted fat and juices from the bottom of the roasting pan over the turkey.
Once the estimated cooking time is up, use a meat thermometer to check for doneness. The internal temperature should reach 165 degrees Fahrenheit (74 degrees Celsius) in the thickest part of the thigh.
(Part 3) The Aftermath: Rest and Carving
It's done! The turkey is cooked, and the aroma fills the kitchen. But before we dig in, we need to give it a little TLC.
8. Resting is Key: Let it Settle
After removing the turkey from the oven, let it rest for at least 15-20 minutes before carving. This allows the juices to redistribute throughout the meat, resulting in a more tender and succulent turkey.
Cover the turkey loosely with aluminium foil to keep it warm and prevent drying.
9. Carving the Turkey: The Final Act
Now for the grand finale! With a sharp carving knife, we'll slice and dice our masterpiece. Start by separating the legs and thighs from the breast. Then, slice the breast into thin, even pieces.
Remember, carve against the grain for the most tender results. And don't forget to save the pan drippings for a delicious gravy!
(Part 4) side dishes: Completing the Feast
No turkey feast is complete without a selection of delicious side dishes. These complement the main attraction, adding variety and flavour to the table.
10. Classic Sides: potato gratin, Stuffing, and Cranberry Sauce
A classic potato gratin, creamy and comforting, is a must-have. It's a perfect foil to the rich turkey. A homemade stuffing, bursting with herbs and flavour, adds a comforting element to the meal. And of course, a dollop of cranberry sauce, tangy and sweet, is essential for balancing the flavours.
If you're feeling adventurous, you can also try a Brussels sprout gratin or a butternut squash stuffing for a twist on the classics.
11. Veggie Options: Roasted Vegetables and Green Salad
For those seeking lighter options, roasted vegetables like Brussels sprouts, carrots, and parsnips are a delicious and healthy choice. A fresh green salad with a vinaigrette dressing adds a touch of lightness and freshness to the table.
Try roasting the vegetables alongside the turkey in the same oven for added flavour and convenience.
(Part 5) turkey leftovers: Turning Scraps into Delights
The feast is over, but the culinary adventure isn't. Leftover turkey is a treasure trove of delicious possibilities.
12. turkey sandwiches: A Classic Choice
Let's be honest, who doesn't love a juicy turkey sandwich? Thin slices of roasted turkey, piled high with stuffing, cranberry sauce, and a dollop of mayonnaise, make for a perfect post-feast treat.
You can also try adding other ingredients like sliced avocado, crisp lettuce, or a tomato for an extra flavor boost.
13. turkey soup: A Hearty and Warm Option
Turkey soup is a comforting and warming dish that's perfect for a chilly evening. Simply simmer leftover turkey with vegetables, broth, and herbs for a hearty and flavourful meal.
You can use any vegetables you have on hand, like carrots, celery, onions, or potatoes. A sprinkle of fresh parsley adds a burst of freshness to the soup.
14. turkey pot pie: A Savoury and Filling Delight
For a more substantial leftover meal, try a turkey pot pie. Fill a pie crust with leftover turkey, vegetables, and gravy for a delicious and satisfying dish.
You can use a store-bought pie crust or make your own from scratch. For an extra touch of richness, add a dollop of sour cream or cream cheese to the filling.
(Part 6) FAQs: Answering Your Questions
Let's address some common queries regarding turkey roasting.
1. How Long Does it Take to Roast a Turkey at 350 Degrees?
The roasting time for a turkey at 350 degrees Fahrenheit varies depending on its weight. A good rule of thumb is to allow 15 minutes per pound for an unstuffed turkey and 20 minutes per pound for a stuffed one. For example, a 12-pound unstuffed turkey would need to roast for about 3 hours. It's important to check the internal temperature with a meat thermometer to ensure it reaches 165 degrees Fahrenheit in the thickest part of the thigh.
Remember, the cooking time is just an estimate. You should always use a meat thermometer to check for doneness.
2. What Happens if I Overcook the Turkey?
Overcooking a turkey can lead to dry and tough meat. To prevent this, it's crucial to use a meat thermometer and check for doneness at the right temperature. If you're unsure, it's better to slightly undercook a turkey than overcook it.
3. How Do I Know When My Turkey is Done?
The best way to determine if your turkey is done is to use a meat thermometer. The internal temperature should reach 165 degrees Fahrenheit in the thickest part of the thigh. You can also check the turkey for doneness by pressing on the breastbone – it should feel firm and not springy.
4. Can I Roast a Turkey at a Different Temperature?
While 350 degrees Fahrenheit is a standard roasting temperature, you can adjust it based on your preferences. A lower temperature, like 325 degrees Fahrenheit, will result in a more evenly cooked turkey but will take longer.
5. How Do I Store Leftover Turkey?
Leftover turkey should be stored in an airtight container in the refrigerator for up to 4 days. You can also freeze leftover turkey for up to 2 months. When freezing, wrap the turkey tightly in plastic wrap and aluminum foil to prevent freezer burn.
(Part 7) Beyond the Basics: Taking it to the Next Level
Now that you've mastered the fundamentals of roasting a turkey, let's explore some advanced techniques and flavour enhancements.
15. Brining Techniques: Expanding Your Flavour Palette
We've already touched upon the magic of brining, but there are various techniques to explore beyond the basic salt and sugar solution.
You can experiment with different brining liquids, like apple cider or buttermilk, for unique flavour profiles. Adding herbs, spices, or citrus peels to the brine infuses the turkey with a depth of aroma.
For a citrusy twist, try a brine with oranges, lemons, and rosemary. For a savory flavor, add garlic, thyme, and bay leaves to the brine.
16. Mastering the Roasting Rack: Elevated Cooking
A roasting rack is a valuable tool for achieving a crispy skin and evenly cooked turkey. The rack allows air to circulate around the turkey, preventing it from sitting in its own juices and resulting in a moister bird.
You can also elevate the roasting rack by placing it on a baking sheet filled with vegetables like carrots, onions, or celery. This not only creates a flavourful base but also allows the vegetables to absorb the delicious drippings.
17. Flavour Infusion: Injecting and Butterflying
For an extra burst of flavour, consider injecting the turkey with a marinade or butter-based mixture. This technique allows for deeper flavour penetration and a juicier result.
Alternatively, butterfly the turkey by splitting the breastbone and laying it flat. This allows for more even cooking and increased surface area for seasoning and basting.
18. The Gravy Game: Perfecting the Sauce
The pan drippings from your roasted turkey are the foundation for a delicious gravy. To create a silky smooth gravy, strain the drippings and skim off excess fat. Then, whisk in flour and broth to create a thick and flavourful sauce.
You can also enhance the gravy with herbs, spices, or even a splash of wine or sherry for a richer flavour.
(Part 8) The Journey Continues: Embracing the Culinary Adventure
Roasting a turkey is more than just cooking; it's an adventure. It's about embracing traditions, experimenting with flavours, and creating memories that will last a lifetime.
As you navigate this culinary journey, remember to embrace the process. Don't be afraid to make mistakes and learn from them. Every roast is a learning experience, and with each attempt, you'll refine your technique and find your perfect turkey roast.
So, gather your family and friends, put on your apron, and let's embark on this delicious adventure together. With a little patience, practice, and a dash of creativity, you'll be creating a turkey roast that will impress even the most discerning palates. Happy cooking!
Everyone is watching

Corn on the Cob: The Ultimate Guide to Perfectly Cooked Ears
Healthy MealsAh, corn on the cob. Just the name evokes images of sunny days, barbecues, and that sweet, juicy flavour that ...

Perfect Pork Roast Oven Cooking Time: A Guide to Delicious Results
Healthy MealsThere's something truly satisfying about a perfectly roasted pork. The aroma alone is enough to make your mout...

Ham Cooking Time: How Long to Bake, Smoke, or Boil a Delicious Ham
Healthy MealsAh, ham. It's a classic, isn't it? A real crowd-pleaser, especially around holidays. And when done right, it'...

Scallops: The Ultimate Guide to Perfect Cooking
Healthy MealsAh, scallops. Those delicate, sweet, and utterly delicious morsels of the sea. They hold a special place in my...

Spaghetti Squash: The Ultimate Guide to Cooking and Serving
Healthy MealsRemember that time you saw spaghetti squash at the supermarket, looking all bumpy and strange, and thought, "W...
