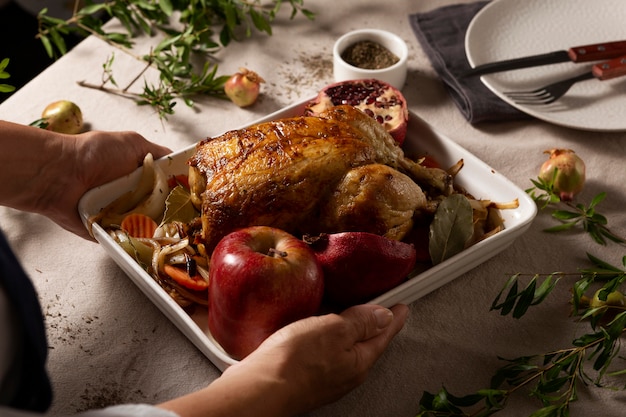
Alright, you've got a 14-pound turkey, a whole crew coming over for Christmas dinner, and you're determined to make it a feast to remember. But let's face it, that big bird can be a bit daunting. You want to avoid a dry, overcooked turkey or, worse, one that's undercooked. I've been there, trust me! I've had my fair share of turkey triumphs and disasters. But I've learned a thing or two along the way, and I'm here to guide you through the process, step by step. We'll break down everything from selecting the perfect turkey to roasting it to perfection, tackling common myths, and even exploring delicious ways to use up those scrumptious leftovers. So grab your apron, gather your ingredients, and let's get cookin'!
Part 1: Picking the Right Bird
The first step to a fantastic turkey dinner is selecting the right bird. You want a turkey that's plump, juicy, and ready to deliver a delicious Thanksgiving or Christmas meal. Here's what to look for:
choosing a turkey You Can Trust
- Color Check: The skin should have a nice, healthy yellow or cream color. Avoid any turkeys that look greyish or bluish – that's a sign that they haven't been stored properly.
- Feel the Firmness: Give the turkey a gentle squeeze. The breast should feel firm, and the legs should have a bit of spring to them. You don't want a bird that feels limp or soft. It should feel like a good, solid turkey.
- Smell for Freshness: Always give the turkey a sniff. It should smell fresh and clean, not funky or sour. You're looking for that classic turkey aroma, not something that would make you wrinkle your nose.
Once you've found your perfect turkey, make sure to keep it refrigerated until you're ready to start cooking.
Thawing Time: The Right Way to Do It
If you're working with a frozen turkey, you'll need to thaw it before roasting. The safest and most reliable method is to thaw it in the refrigerator. It takes a couple of days, but it's worth it for peace of mind. Just place the turkey on a tray to catch any drips and make sure it's completely thawed before you start cooking.
You can also thaw a turkey in cold water, but it's not as safe. If you go this route, make sure to change the water every 30 minutes to keep it cold. Never, ever thaw a turkey at room temperature. That's a recipe for disaster and potential foodborne illness.
Part 2: Getting Your Turkey Ready for the Oven
Now that your turkey is thawed and ready to go, it's time to give it a little TLC before it hits the oven.
Giblets and Stuffing: The Basics
First, remove any giblets from the turkey's cavity. These are the turkey's heart, liver, and gizzards, and they're often packed in a separate bag inside the cavity. You can use them to make a delicious gravy or stock, or simply discard them.
If you're feeling adventurous, you can stuff the turkey with a delicious bread stuffing. Just make sure to cook the stuffing separately in a baking dish to ensure it's cooked thoroughly. I find that separate stuffing is the way to go. It cooks evenly and prevents the turkey from taking longer to roast.
Brining: To Brine or Not to Brine, That is the Question
Some people swear by brining their turkey, which involves soaking it in a saltwater solution to keep it juicy. While brining can help with moisture, I find it's not essential if you cook the turkey properly.
However, if you do decide to brine your turkey, make sure to do it for at least 24 hours. Just keep in mind that brining can add a fair bit of time to the preparation process.
Spice It Up: Seasoning Your Turkey for Flavor
Before you pop your turkey into the oven, you need to give it some flavor. You can use a simple mix of salt and pepper, or get creative with a blend of herbs and spices. I personally like to rub my turkey with a mixture of olive oil, garlic powder, onion powder, paprika, and thyme. It gives it a beautiful color and a delicious savory flavor.
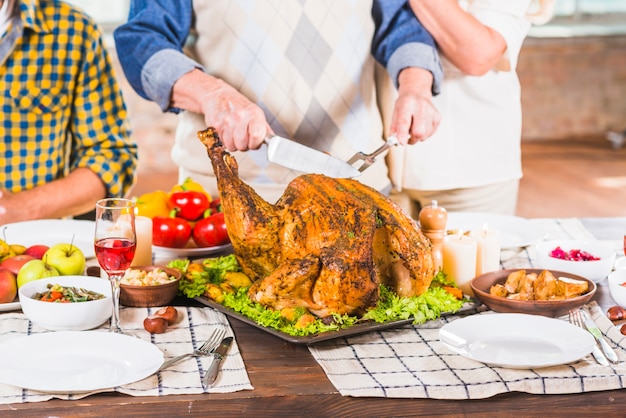
Part 3: Roasting Your Turkey to Perfection

You've prepped your turkey, it's seasoned to perfection, and now it's time for the main event: roasting! Here's how to ensure a juicy, flavorful, and beautifully golden-brown turkey.
Setting the Stage for Roasting
You'll need a large roasting pan for this, big enough to accommodate your 14-pound turkey. Using a roasting rack is essential. It helps to elevate the turkey, allowing heat to circulate evenly around it and ensuring even cooking.
Oven Temperature: The Key to juicy turkey
Preheat your oven to 325°F (160°C). You want the oven to be hot enough to cook the turkey evenly without drying it out. You'll often hear people say 350°F is the way to go, but I've found that 325°F is the magic number for a juicy turkey. Trust me on this one!
Turkey Cooking Time: How Long Is Too Long?
Now comes the part that often throws people for a loop: knowing how long to roast your turkey. No worries, I've got a handy chart to help you nail it.
Turkey Cooking Time Chart: Your Guide to a Perfectly Roasted Turkey
| turkey weight (lbs) | roasting time (hours) |
|---|---|
| 12-14 | 3-3.5 |
Keep in mind that these are just guidelines. The actual cooking time will depend on the size and shape of your turkey. So always check the temperature to make sure it's cooked through.
Checking for Doneness: Making Sure It's Cooked Through
The key to a perfectly cooked turkey is to roast it until it reaches an internal temperature of 165°F (74°C) in the thickest part of the thigh. That's where the magic happens.
You can use a meat thermometer to check the temperature. Just insert it into the thickest part of the thigh, making sure to avoid touching any bones. If you don't have a thermometer, you can use the "pop-up" method. Simply insert a pop-up thermometer into the thickest part of the thigh. When the thermometer pops up, it means the turkey is cooked through.
Resting the Turkey: A Key Step for Juiciness
Once your turkey is cooked, it's essential to let it rest for at least 30 minutes before carving. This allows the juices to redistribute throughout the meat, ensuring a juicy and flavorful turkey. It's a crucial step, so don't skip it!
Part 4: Debunking turkey cooking myths
You've probably heard all sorts of tips and tricks about turkey cooking. But sometimes, the best advice is the simplest, and a lot of those "must-do" tips are actually myths. Let's set the record straight.
Myth 1: Stuffing Inside the Turkey? Think Again!
Stuffing your turkey is completely optional, and I'd argue that it's best to cook it separately. While stuffing can add a lot of flavor, cooking it inside the turkey can make it difficult to cook evenly. Plus, it can increase the risk of foodborne illness.
I highly recommend cooking your stuffing separately in a baking dish. This ensures it's cooked through to a safe temperature and keeps the turkey from taking longer to roast.
Myth 2: Basting: A Unnecessary Step
Basting your turkey is often touted as the key to a juicy bird, but it's not actually necessary. The idea behind basting is to add moisture to the turkey, but in reality, it can actually dry it out. The heat from the oven evaporates the moisture in the basting liquids, leaving the turkey drier.
My advice: Skip the basting and focus on cooking the turkey at a low temperature for a longer time. That's the secret to a juicy and flavorful bird.
Myth 3: Foil: When to Use It and When to Ditch It
Covering your turkey with foil can help to prevent it from drying out, especially during the early stages of roasting. But, covering it for the entire cooking time can trap moisture, making the skin soggy.
I suggest covering your turkey with foil for the first half of the cooking time, then removing it to allow the skin to crisp up. This gives you the best of both worlds – a juicy turkey and a crispy skin.
Part 5: turkey leftovers: Turning Them into Delicious Meals
You've enjoyed your turkey feast, and now you're left with a mountain of delicious leftovers. But don't let them go to waste! Here are some delicious ways to transform those leftovers into scrumptious meals.
The Classic: The Turkey Sandwich
Let's be honest, the turkey sandwich is a leftover staple for a reason. It's simple, satisfying, and perfect for a quick lunch or a light dinner. Just grab your favorite bread, pile on the turkey, add some cranberry sauce or gravy for a touch of sweetness, and you're good to go.
Soup's On! Warming Up with turkey soup
For a comforting and flavorful meal, try making a hearty turkey soup. You can add all sorts of vegetables, such as carrots, celery, onions, and potatoes. Add some noodles or rice for extra texture and a complete meal.
Spice Things Up with Turkey Chili
If you're in the mood for something spicy and satisfying, turkey chili is a fantastic option. You can add beans, corn, peppers, and other chili-friendly ingredients for a hearty and flavorful meal.
Light and Delicious: turkey salad
For a lighter and fresher meal, try making turkey salad. Combine leftover turkey with mayonnaise, celery, onion, and cranberries for a flavorful and satisfying salad. Serve it on bread, crackers, or lettuce for a quick and easy lunch or dinner.
A Gourmet Option: turkey pot pie
If you're feeling ambitious, try your hand at making a turkey pot pie. It's a delicious and comforting meal that's perfect for using up leftover turkey and vegetables. You can make a classic pot pie with a flaky crust, or try a modern twist with a puff pastry crust.
Part 6: Tips for a Turkey That Will Impress
Here are a few more tips to help you achieve a juicy, flavorful, and beautifully golden-brown turkey:
- Don't Overdo It: It's important to not overcook the turkey, as this can dry it out. Use a meat thermometer to ensure the turkey reaches an internal temperature of 165°F (74°C) in the thickest part of the thigh, but don't cook it a minute longer.
- Let It Rest: Always let the turkey rest for 30 minutes before carving. This allows the juices to redistribute throughout the meat, making it even more tender and flavorful.
- Basting Brush: If you do decide to baste your turkey, use a basting brush to distribute the juices evenly over the turkey. It helps to ensure a more evenly cooked and flavorful bird.
- Keep an Eye on the Skin: Watch out for the skin, making sure it doesn't burn. If it starts to brown too quickly, you can cover the turkey loosely with foil.
Part 7: Troubleshooting Common Turkey Problems
Even the most seasoned cooks can encounter a few bumps in the road when roasting a turkey. Here's a guide to help you troubleshoot common turkey problems:
Dry Turkey: Saving the Day
If your turkey is too dry, it's likely because you overcooked it. While you can't undo overcooking, you can try to add some moisture by basting it with juices or gravy. But, the best way to prevent dry turkey is to cook it at a low temperature for a longer time.
Undercooked Turkey: Not a Time for Guessing
If your turkey is undercooked, you'll need to cook it for longer. Use a meat thermometer to check the temperature of the turkey and make sure it reaches an internal temperature of 165°F (74°C) in the thickest part of the thigh.
Lackluster Skin: Getting that Crispy Finish
If your turkey skin isn't crispy, it's likely because you didn't cook it long enough at a high enough temperature. You can try to crisp up the skin by broiling it for a few minutes at the end of the cooking time. Just make sure to watch it closely to avoid burning.
Part 8: FAQs: Your Turkey Questions Answered
I Don't Have a Meat Thermometer, What Do I Do?
You can use the "pop-up" method to check the doneness of your turkey. Simply insert a pop-up thermometer into the thickest part of the thigh. When the thermometer pops up, it means the turkey is cooked through. But, a meat thermometer is the most accurate way to ensure your turkey is cooked to the right temperature.
How Long Can I Keep Leftover Turkey in the Fridge?
Leftover turkey can be stored in the fridge for 3-4 days. Make sure you store it in an airtight container to prevent it from drying out.
Can I Freeze Leftover Turkey?
You can freeze leftover turkey for up to 2 months. Wrap it tightly in freezer paper or plastic wrap. To reheat frozen turkey, thaw it in the refrigerator overnight and then reheat it in the oven or microwave.
What's the Best Way to Carve a Turkey?
The best way to carve a turkey is to start by removing the legs. Then, remove the wings. Finally, slice the breast meat into thin slices. It's a bit of a dance, but with practice, you'll become a turkey-carving pro.
What's the Best Way to Serve Turkey?
Turkey is delicious served with a variety of side dishes. Some popular options include mashed potatoes, stuffing, gravy, cranberry sauce, and green bean casserole. You can also serve turkey with roasted vegetables or a salad.
So there you have it, my friend. A complete guide to roasting a 14-pound turkey, from choosing the perfect bird to creating delicious leftovers. Remember, practice makes perfect, and with a little patience and confidence, you'll be a turkey roasting pro in no time. Happy cooking!
Everyone is watching

Corn on the Cob: The Ultimate Guide to Perfectly Cooked Ears
Healthy MealsAh, corn on the cob. Just the name evokes images of sunny days, barbecues, and that sweet, juicy flavour that ...

Perfect Pork Roast Oven Cooking Time: A Guide to Delicious Results
Healthy MealsThere's something truly satisfying about a perfectly roasted pork. The aroma alone is enough to make your mout...

Ham Cooking Time: How Long to Bake, Smoke, or Boil a Delicious Ham
Healthy MealsAh, ham. It's a classic, isn't it? A real crowd-pleaser, especially around holidays. And when done right, it'...

Scallops: The Ultimate Guide to Perfect Cooking
Healthy MealsAh, scallops. Those delicate, sweet, and utterly delicious morsels of the sea. They hold a special place in my...

Spaghetti Squash: The Ultimate Guide to Cooking and Serving
Healthy MealsRemember that time you saw spaghetti squash at the supermarket, looking all bumpy and strange, and thought, "W...