Ah, corn on the cob. The quintessential summer treat, bursting with sweetness and juicy kernels. The smell of it grilling fills the air with summery joy, and the sight of it piled high on a plate is enough to make anyone’s mouth water. But getting that perfect bite of corn on the cob, tender and sweet, with just the right amount of char on the outside, requires a bit more than just tossing it on the grill.
Over the years, I’ve experimented with countless cooking methods and timings, learning the subtle nuances that make all the difference. I’ve discovered that the secret to perfect corn on the cob isn’t just about the cooking time, but also about the freshness of the corn, the method you use, and even the type of corn you choose. So, get ready to dive into my guide, packed with tips and tricks, to help you master the art of cooking corn on the cob to absolute perfection.
Part 1: Choosing the Right Corn
Let’s face it, the quality of your corn is the foundation of a delicious dish. Just like a good foundation in a house, it sets the stage for everything else. It's the starting point for achieving those sweet, juicy kernels that make corn on the cob so irresistible.
1. Fresh is Best
There’s no substitute for fresh corn. Fresh corn, picked at its peak, is bursting with sweetness and flavour. It’s a world away from the bland and watery corn you might find in the supermarket off-season.
If you can, head to a local farmers market or pick your own corn. You’ll be rewarded with a corn that’s bursting with flavour. When choosing corn, look for ears with tightly packed kernels and a vibrant green husk. Give them a gentle squeeze – they should feel firm, not mushy. If the husks are dry and brown, it’s a sign that the corn has been sitting around for a while and might be less flavorful.
2. Know Your corn varieties
Not all corn is created equal. Different varieties have unique flavour profiles and textures. Some are sweet, some are starchy, and some have a subtle sweetness with a satisfyingly chewy texture.
For those who crave sugary sweetness, sweet corn varieties like ‘Golden Bantam’ or ‘Silver Queen’ are excellent choices. They tend to have a shorter cooking time than starchy varieties. If you prefer a more starchy corn with a bolder flavour, try a flint corn variety like ‘Indian Corn’. They have a unique, almost nutty flavour and a slightly firmer texture.
Part 2: Preparing the Corn

Once you've found your perfect corn, it’s time to get ready for cooking. This is where things can get a little messy, but trust me, it’s worth it!
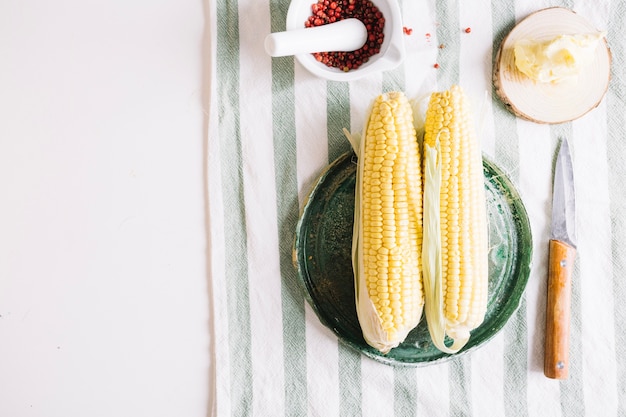
1. Husking the Corn
The husks are like a natural little wrapper for the corn, protecting it during cooking. If you're grilling the corn, you can keep the husks on for that smoky flavour. But for boiling, steaming, or roasting, I prefer to remove the husks for a more even cooking process.
Use a sharp knife to peel back the husks and remove the silk. You can do it with your hands, but the knife makes the process quicker and more efficient. If you’re feeling fancy, you can soak the corn in cold water for 15 minutes before husking. The silks will float to the top, making them easier to remove.
2. Cleaning the Corn
Once the husks are off, give the corn a good wash under cold running water to remove any dirt or debris that might be clinging to the kernels. Then, dry the corn thoroughly before you start cooking. You don’t want your perfectly chosen corn to be watered down by excess moisture!
Part 3: Cooking Methods
Now, the fun part – cooking! Each method brings its own unique flavour and texture to the table.
1. Grilling
Grilling is my personal favourite method for cooking corn on the cob. It gives the corn a beautiful char and an irresistible smoky flavour. For grilling, I leave the husks on and soak them in cold water for 30 minutes. This helps to steam the corn and keep it moist during the grilling process.
Then, I grill the corn over medium heat for about 15 minutes, turning it every few minutes. You know it's done when the husks are slightly charred and the kernels are plump. Be sure to use a grill brush to clean the grates before you grill, to prevent sticking.
2. Boiling
Boiling is the simplest and most classic way to cook corn on the cob. It’s a great method for preserving the natural sweetness of the corn. Fill a large pot with water and bring it to a rolling boil. Add the corn to the boiling water and cook for about 5-7 minutes, or until the kernels are tender. Add a pinch of salt to the water for extra flavour.
3. Steaming
Steaming is another excellent method for preserving the corn’s colour and flavour. The steam gently cooks the kernels, ensuring they stay tender and bright. Place the corn in a steamer basket over a pot of boiling water, cover the pot, and steam for about 5-7 minutes, or until the kernels are tender. If you don’t have a steamer, you can microwave the corn on a plate for about 5 minutes, covered.
4. Roasting
For a more intense flavour and a slightly crispy texture, try roasting corn on the cob. Preheat your oven to 200°C (400°F) and place the corn on a baking sheet. Drizzle with olive oil and season with salt and pepper. Roast for about 20-25 minutes, turning it halfway through, until the kernels are tender and slightly charred. Wrapping the corn in foil before roasting creates a steamy effect, resulting in a more tender and succulent corn.
Part 4: Cooking Time
The cooking time for corn on the cob depends on the size of the ears and the cooking method you choose. As a rule of thumb, corn is cooked through when the kernels are tender and slightly plump.
1. Boiling Time
For boiling, aim for a cooking time of 5-7 minutes. Fresh corn might need just 3-5 minutes, while frozen corn may require a few extra minutes. To test for doneness, pierce a kernel with a fork. If it comes off easily, it’s ready to eat.
2. Grilling Time
grilling corn with the husks on takes about 15 minutes. If you choose to grill without husks, you might only need 10 minutes. Use the fingernail test for doneness – if a kernel gives way easily, it’s ready to eat.
3. Steaming Time
Steaming takes about 5-7 minutes for both steamer basket and microwave methods. Use the fingernail test to check for doneness.
4. roasting time
Roasting time is approximately 20-25 minutes. The fingernail test is a reliable way to determine if the corn is done.
Part 5: Serving the Corn
Corn on the cob is a versatile treat – it’s delicious served hot or cold. For a warm meal, I love to slather it with butter and sprinkle with salt and pepper. For a refreshing summer side dish, simply refrigerate the cooked corn after cooling. It’s also wonderful sliced off the cob and added to salads, salsas, or soups.
1. Butter and Seasonings
A classic combination is simply butter and salt and pepper. To elevate the flavour, try adding a bit of garlic powder, paprika, or chili powder. Herbs like parsley, chives, or cilantro add a delightful fresh touch.
2. Toppings and Sauces
The possibilities for toppings are endless, and it’s all about personal preference! Here are some of my favourites:
- Sour cream or crème fra??che
- Cotija cheese or queso fresco
- Fresh salsa or pico de gallo
- Grilled lime wedges
- Spicy mayo or sriracha
Part 6: Storage
Cooked corn on the cob can be stored in the refrigerator for up to 3 days. To keep it fresh, wrap it in plastic wrap or aluminium foil and place it in a sealed container. If you want to freeze the corn, you can leave it on the cob or remove the kernels. For frozen corn on the cob, wrap it in plastic wrap and then in aluminium foil. For frozen kernels, blanch them in boiling water for about 3 minutes, drain, cool completely, and then place them in a freezer-safe bag. Frozen corn on the cob or kernels can be stored for up to 6 months.
Part 7: Tips for Perfect Results
Here are a few additional tips to ensure your corn on the cob turns out perfectly every time:
- Don't overcook the corn. Overcooked corn will be mushy and lose its sweetness. Taste the corn to check for doneness – if the kernels are too soft, you’ve overcooked it.
- Use a sharp knife to husk the corn. This will help to avoid tearing the husks and spilling the kernels. Take your time and be careful when cutting.
- Add a pinch of salt to the boiling water. Salt enhances the flavour and prevents the corn from sticking to the pot.
- Use a grill brush to clean the grill grates. This will prevent the corn from sticking to the grill. Even if you’re grilling with husks on, cleaning the grates will ensure a smooth grilling experience.
Part 8: FAQs
1. Why is my corn on the cob not sweet?
If your corn on the cob isn’t sweet enough, it’s likely due to one of these factors:
- The corn isn’t fresh. Fresh corn is bursting with sweetness, so if it’s been sitting around for a while, it will have lost some of its flavour.
- The corn is overcooked. Overcooked corn loses its sweetness and becomes mushy. Check for doneness with the fingernail test.
2. How do I know when corn on the cob is done?
You can tell if corn on the cob is done by checking for tenderness and a slight plumpness in the kernels. The fingernail test is a reliable indicator – if a kernel gives way easily, it’s ready to eat. If you’re grilling with husks on, slightly charred husks indicate the corn is cooked through. If the kernels are still hard, the corn needs to cook longer.
3. Can I cook corn on the cob in the oven?
Yes, you can! Preheat your oven to 200°C (400°F) and place the corn on a baking sheet. Drizzle with olive oil and season with salt and pepper. Roast for about 20-25 minutes, turning it halfway through, until the kernels are tender and slightly charred. For a more steamy effect, wrap the corn in foil before roasting.
4. What is the best way to store corn on the cob?
For the refrigerator, wrap the cooked corn in plastic wrap or aluminium foil and store it in a sealed container for up to 3 days. To freeze corn on the cob, wrap it in plastic wrap, then aluminium foil. For frozen corn kernels, blanch them in boiling water for 3 minutes, drain, cool completely, and store in a freezer-safe bag. Frozen corn can be stored for up to 6 months.
5. How can I make my corn on the cob more flavourful?
Here are some tips to boost the flavour of your corn on the cob:
- Use fresh corn. Freshness is key for maximum sweetness.
- Add a pinch of salt to the boiling water. Salt enhances the flavour and prevents sticking.
- Use a grill brush to clean the grill grates. Clean grates ensure a smooth grilling experience.
- Get creative with toppings. Experiment with butter, herbs, spices, cheese, sauces, or even a squeeze of lime juice.
Part 9: A delicious corn on the Cob Recipe
Here’s a simple recipe for delicious corn on the cob that you can easily make at home:
Ingredients:
- 4 ears of fresh corn
- 2 tablespoons of butter
- 1 teaspoon of salt
- 1/2 teaspoon of black pepper
- 1/4 cup of chopped fresh cilantro
- 1 lime, cut into wedges
Instructions:
- Remove the husks and silks from the corn.
- Wash the corn and dry it thoroughly.
- Heat a grill pan over medium heat.
- Place the corn on the grill pan and cook for about 15 minutes, turning it every few minutes.
- Remove the corn from the grill pan and brush it with butter.
- Sprinkle with salt, pepper, and cilantro.
- Serve with lime wedges.
Enjoy!
Part 10: Final Thoughts
Cooking corn on the cob to perfection is within everyone’s reach. With the right ingredients, techniques, and a touch of experimentation, you can create a delicious and satisfying summer treat. Remember, fresh corn is the key, and each cooking method brings its unique charm. Don’t be afraid to experiment with toppings and flavour combinations to discover your perfect corn on the cob experience.
Everyone is watching

Corn on the Cob: The Ultimate Guide to Perfectly Cooked Ears
Healthy MealsAh, corn on the cob. Just the name evokes images of sunny days, barbecues, and that sweet, juicy flavour that ...

Perfect Pork Roast Oven Cooking Time: A Guide to Delicious Results
Healthy MealsThere's something truly satisfying about a perfectly roasted pork. The aroma alone is enough to make your mout...

Ham Cooking Time: How Long to Bake, Smoke, or Boil a Delicious Ham
Healthy MealsAh, ham. It's a classic, isn't it? A real crowd-pleaser, especially around holidays. And when done right, it'...

Scallops: The Ultimate Guide to Perfect Cooking
Healthy MealsAh, scallops. Those delicate, sweet, and utterly delicious morsels of the sea. They hold a special place in my...

Spaghetti Squash: The Ultimate Guide to Cooking and Serving
Healthy MealsRemember that time you saw spaghetti squash at the supermarket, looking all bumpy and strange, and thought, "W...