Right, let's talk tri-tip. This cut of beef, often overlooked in the supermarket, is a real gem, and I’m telling you, it’s one of those things that just makes a meal special. It’s got a nice, rich flavour, and if you cook it right, it melts in your mouth. But honestly, I’ve had my fair share of dry, tough tri-tip in the past, which was a real bummer. So, I decided to put in the legwork (and maybe a bit of elbow grease) and figure out the best way to cook this beauty in the oven. And let me tell you, I’ve got a system that gets those tender, juicy results every single time.
This article is your one-stop shop for all things tri-tip in the oven. We’ll be covering everything from picking the right cut to seasoning, cooking methods, and even some handy tips for serving. So, grab a cuppa, get comfy, and let’s get cooking!
(Part 1) Choosing Your Tri-Tip
The Meat of the Matter
First things first, you need to pick the right tri-tip. You’ll find it in the butcher’s section of your supermarket, usually labelled as a “tri-tip roast”. Now, don’t be put off by the word “roast”. It doesn’t have to be a big, fancy occasion. This cut is perfect for weeknight dinners, family gatherings, or even just a solo feast.
The Look and Feel
When you're at the counter, give the tri-tip a good look. You want a cut that’s got a nice, even marbling. This means it’s got a good balance of fat and lean meat, which is key to getting a juicy and flavourful result. You’ll also want to make sure it’s a good colour, a nice deep red without any discoloration. The fat should be a creamy white, not yellow, which indicates it's been sitting around for too long.
Now, if you’re really feeling adventurous, ask the butcher about the grain of the meat. Tri-tip has a distinct grain, similar to a steak, and cutting across the grain will make it more tender. Imagine the muscle fibres as tiny little ropes, and you want to cut them perpendicularly to make the meat easier to chew. But honestly, I usually just go with what looks good and hope for the best!
Size Matters
Size is important too. For a small family or a couple, a 1-1.5lb tri-tip is perfect. If you’re feeding a crowd, you’ll want to go for something bigger, 2-3 lbs. Don’t be afraid to ask the butcher for help. They’ll know exactly what you need.
(Part 2) Seasoning Your Tri-Tip

Spice It Up
Now, onto the fun part: seasoning. This is where you can really get creative. I’ve tried a bunch of different seasonings, and I’m always experimenting with new flavour combos. But here are a few of my favourites:
- Simple and Classic: Salt, pepper, and garlic powder. It’s hard to go wrong with this classic combination. It lets the natural flavour of the beef shine through. And trust me, sometimes simple is best. Make sure you're using freshly ground pepper for the best flavor.
- Mediterranean Twist: Olive oil, dried oregano, rosemary, and a pinch of red pepper flakes. This is a lovely mix that brings a touch of the Mediterranean to your dinner table. For a more intense flavor, use fresh rosemary and oregano if you have them on hand.
- Southwest Fiesta: Chili powder, cumin, paprika, and smoked paprika. This adds a bit of heat and smoky depth, perfect for a bolder flavour profile. If you like it spicy, add a dash of cayenne pepper to the mix.
- Herb-Infused: Combine dried thyme, sage, rosemary, and a touch of Dijon mustard for a fragrant and robust seasoning. The Dijon mustard adds a subtle tanginess that complements the herbs perfectly.
- Steakhouse Style: This one is a real crowd-pleaser. Use a pre-made steak seasoning blend or mix your own with coarse salt, black pepper, garlic powder, onion powder, and a sprinkle of dried herbs like thyme or rosemary.
The Rubdown
Once you’ve chosen your seasoning blend, it’s time for a good rubdown. I like to pat the tri-tip dry with paper towels first. This helps the seasoning stick better. Then, I rub the seasoning all over the tri-tip, making sure to get every corner. Don’t forget to season the fat cap! It'll render down and add flavour to the meat.
Now, you can season it just before cooking, or you can give it a little head start. I’ve found that seasoning it a few hours ahead of time lets the flavour really sink in. Just make sure it’s covered in the fridge until you’re ready to cook.
(Part 3) Cooking Your Tri-Tip
Oven-Ready
Preheat your oven to 375°F (190°C). While the oven is warming up, you want to prep your tri-tip. It’s always a good idea to sear the tri-tip before putting it in the oven. This helps to seal in the juices and gives it a delicious crust. It also adds a fantastic flavor to the final product.
Searing the Tri-Tip
Now, for searing, you can use a cast-iron skillet, a grill pan, or even a griddle pan. Just make sure it’s nice and hot before you add the tri-tip. The pan should be smoking hot, almost too hot for your hand to touch for a few seconds. This ensures a nice browning and searing effect. Sear for about 2-3 minutes per side, until it’s nicely browned. Don’t worry if the inside isn’t completely cooked, you’ll be finishing it in the oven.
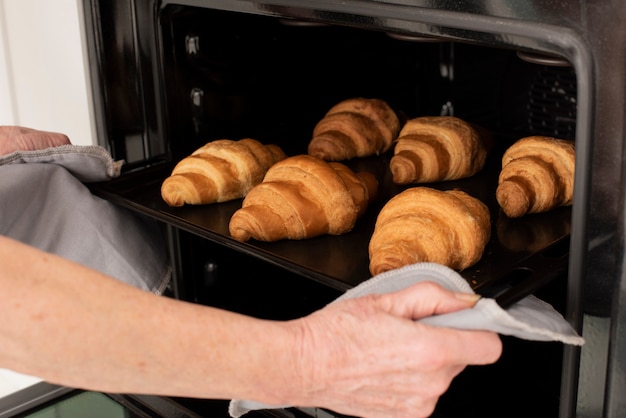
Into the Oven
Now, you can move the tri-tip from the pan to a roasting pan or baking sheet. I like to use a baking sheet because it’s easier to clean up afterwards. Remember, you want to cook your tri-tip to your desired level of doneness, so keep an eye on it. Here’s a quick guide:
| Doneness | internal temperature (°F) | Description |
|---|---|---|
| Rare | 125-130 | Red center with a thin layer of brown around the edges |
| Medium-Rare | 130-135 | Slightly pink center with a thicker layer of brown |
| Medium | 140-145 | Mostly brown center with a small amount of pink |
| Medium-Well | 150-155 | Very little pink center, mostly brown |
| Well-Done | 160 | Completely brown center, no pink |
To get the temperature just right, you’ll want to use a meat thermometer. You can find these at most grocery stores and they’re a lifesaver. I’ve learned the hard way that you can’t always rely on just looking at the meat. Stick the thermometer into the thickest part of the tri-tip. It should be inserted deep enough to avoid hitting bone.
Rest and Slice
Once your tri-tip is cooked to your liking, take it out of the oven and let it rest for 10-15 minutes before slicing. This is a crucial step that allows the juices to redistribute throughout the meat. Trust me, this makes a huge difference in the tenderness and juiciness. Cover the tri-tip loosely with foil to keep it warm while it rests. After it’s rested, slice the tri-tip against the grain. This will make it easier to chew and more tender.
(Part 4) Tri-Tip Serving Ideas
Let's Get This Party Started
Now, you’ve got a beautiful, juicy, perfectly cooked tri-tip. Time to get creative with serving! This is a versatile cut that works well with a range of sides.
Classic Comfort
For a classic pairing, try mashed potatoes, gravy, and roasted vegetables. It’s simple, comforting, and always a crowd-pleaser. For an extra touch of elegance, use roasted garlic in your mashed potatoes and serve a rich red wine sauce alongside the tri-tip.
Mediterranean Flair
Embrace the Mediterranean vibe with couscous, roasted peppers, and a lemon-herb sauce. This adds a touch of lightness and freshness. Serve a refreshing Greek salad with crumbled feta cheese and olives alongside for a complete meal.
Summertime BBQ
For a summer BBQ, try serving the tri-tip with grilled corn on the cob, a simple salad, and a creamy coleslaw. This is a delicious way to enjoy the flavours of summer. Add a tangy bbq sauce on the side for dipping.
Wrap It Up
Tri-tip is also great for sandwiches or wraps. Thinly sliced tri-tip with your favourite toppings makes for a delicious lunch or dinner. Try adding a dollop of horseradish cream or a spicy chimichurri sauce for a flavorful twist.
(Part 5) FAQs
What’s the difference between a tri-tip and a sirloin?
Tri-tip and sirloin are both cuts of beef, but they come from different parts of the cow. Tri-tip is found in the bottom sirloin, while sirloin comes from the upper part. Tri-tip is known for its intense flavour and tenderness when cooked properly, while sirloin is generally leaner and less flavorful. Tri-tip is also a more triangular shape, while sirloin is typically a rectangular cut.
Can I cook tri-tip in the slow cooker?
Absolutely! slow cooking is a fantastic way to get incredibly tender and flavourful tri-tip. It’s a perfect set-and-forget method. Just make sure to season it generously and cook it on low for 6-8 hours. Add a cup of beef broth or red wine to the slow cooker for extra moisture and flavour.
How do I make tri-tip even more tender?
There are a few ways to boost the tenderness of your tri-tip. You can try marinating it for a few hours before cooking. Marinades help to break down the tough muscle fibers, making the meat more tender. A simple marinade of olive oil, lemon juice, garlic, and herbs can work wonders. Another option is to use a meat tenderizer. These come in a variety of forms, from hammers to needles, and they work by physically breaking down the muscle fibers. Just remember to use the tenderizer before seasoning.
What are some good substitutes for tri-tip?
If you can’t find tri-tip, you can try other cuts of beef that are similar in flavour and texture. Top sirloin, bottom round roast, and even flank steak are all good options. Just make sure to adjust your cooking time and temperature based on the specific cut you’re using. Check out your butcher for recommendations based on your preference and what's available.
What should I do with leftover tri-tip?
Leftover tri-tip is a gift. You can slice it thin and enjoy it in sandwiches, salads, or tacos. Or, you can dice it up and add it to soups, stews, or pasta dishes. It's also great for making a hearty tri-tip hash with potatoes and onions.
(Part 6) Tri-Tip Variations
Beyond the Basics
While the basic tri-tip recipe is a classic, there are plenty of ways to get creative with this versatile cut. Here are a few ideas to get your culinary juices flowing:
Smoked Tri-Tip
For a truly impressive dish, try smoking your tri-tip. It adds a unique, smoky depth of flavour that is irresistible. You can use a smoker, a grill with a smoker box, or even a smoker oven. Just make sure to use a good wood for smoking, such as hickory, mesquite, or apple wood. For a milder smoke flavour, use cherry or pecan wood. Start by smoking the tri-tip at a low temperature (225°F) for a few hours, then raise the temperature to 325°F for the final hour to ensure the inside is cooked through.
Garlic Herb Tri-Tip
This is a simple yet flavourful variation. Make a garlic herb butter by combining softened butter with minced garlic, fresh herbs like rosemary and thyme, and a pinch of salt and pepper. Spread the butter over the tri-tip before cooking. It will melt and infuse the meat with a rich, aromatic flavour. You can also add a bit of lemon zest to the butter for a citrusy twist.
Honey Garlic Tri-Tip
For a sweet and savory combo, try a honey garlic glaze. Combine honey, soy sauce, garlic, and ginger in a saucepan and simmer until thickened. Brush the glaze over the tri-tip during the last 30 minutes of cooking. It will caramelize and create a delicious, sticky glaze. You can also add a touch of red pepper flakes to the glaze for a bit of heat.
(Part 7) Tri-Tip Tips and Tricks
From the Kitchen to the Table
Here are a few tips and tricks I’ve picked up along the way to make your tri-tip experience even better:
Don’t Overcook It
One of the biggest mistakes people make is overcooking tri-tip. It can go from tender and juicy to dry and tough in a flash. Use a meat thermometer to ensure it’s cooked to your desired level of doneness and take it out of the oven as soon as it reaches the right temperature. For a more forgiving cooking experience, aim for a slightly lower internal temperature than your target, as the meat will continue to cook a bit while it rests.
Keep It Moist
To prevent the tri-tip from drying out, you can add some liquid to the roasting pan. I like to add a cup of beef broth or red wine. It creates steam and helps to keep the meat moist. Don’t worry, you can use the pan juices to make a delicious gravy later. You can also add some aromatics like onion, garlic, or herbs to the pan juices for extra flavor.
Let It Rest
I’ve already mentioned this, but it’s worth repeating: always let the tri-tip rest before slicing. It gives the juices time to redistribute and prevents the meat from becoming dry and tough. Cover the tri-tip loosely with foil to keep it warm and let it rest for at least 10-15 minutes, or even 20 minutes for a larger roast.
Embrace the Fat Cap
Tri-tip has a distinct fat cap that can be a little intimidating, but it's actually a good thing! The fat adds flavor and keeps the meat moist. Don't trim it off completely. You can score it with a knife to allow some of the fat to render out during cooking, adding flavor and preventing the fat from becoming too chewy.
(Part 8) The Bottom Line: It's Tri-Tip Time!
So there you have it, a complete guide to cooking tri-tip in the oven. Remember, the key to a tender, juicy tri-tip is choosing the right cut, seasoning it generously, cooking it to the right temperature, and letting it rest. And don’t be afraid to experiment! Try different seasoning blends, marinades, and glazes. Who knows, you might just discover your new favourite way to cook this delicious cut of beef.
Happy cooking! And if you’ve got any questions, feel free to leave a comment below. I’m always here to help.
Everyone is watching

Corn on the Cob: The Ultimate Guide to Perfectly Cooked Ears
Healthy MealsAh, corn on the cob. Just the name evokes images of sunny days, barbecues, and that sweet, juicy flavour that ...

Perfect Pork Roast Oven Cooking Time: A Guide to Delicious Results
Healthy MealsThere's something truly satisfying about a perfectly roasted pork. The aroma alone is enough to make your mout...

Scallops: The Ultimate Guide to Perfect Cooking
Healthy MealsAh, scallops. Those delicate, sweet, and utterly delicious morsels of the sea. They hold a special place in my...

Ham Cooking Time: How Long to Bake, Smoke, or Boil a Delicious Ham
Healthy MealsAh, ham. It's a classic, isn't it? A real crowd-pleaser, especially around holidays. And when done right, it'...

Spaghetti Squash: The Ultimate Guide to Cooking and Serving
Healthy MealsRemember that time you saw spaghetti squash at the supermarket, looking all bumpy and strange, and thought, "W...