Let's be honest, folks. We all love a good chicken breast, especially when it's oven-baked to juicy perfection. It's a true culinary chameleon, transforming into a delicious centerpiece for countless meals. But as any seasoned cook knows, mastering the art of oven-baked chicken breast is a journey. From choosing the right chicken to achieving that perfect golden brown crust, it's a process that involves a mix of skill, knowledge, and a sprinkle of intuition. So, buckle up, because we're about to embark on a comprehensive journey to unlock the secrets of oven-baked chicken breast, turning you into a true chicken-baking maestro.
Part 1: Choosing the Right Chicken: The Foundation of Flavor
The journey begins with the heart of the dish – the chicken itself. Remember, not all chicken breasts are created equal. Choosing the right one is like laying the foundation for a magnificent culinary structure.
1.1. Fresh vs. Frozen: A Matter of Convenience and Flavor
This is a perennial debate in the culinary world, and I'm here to tell you, there's no right or wrong answer. As someone who believes in the magic of fresh ingredients, I often gravitate towards fresh chicken. It tends to have a more delicate flavor and a delightful tenderness. However, life gets busy, and frozen chicken is a true lifesaver. Don't judge it too harshly. The key is to pick a high-quality brand with minimal additives. When it comes to frozen chicken, defrost it properly in the fridge overnight. Remember, room temperature defrosting is a recipe for disaster. Trust me on this one.
1.2. Size Matters: Finding the Goldilocks of Chicken Breasts
When choosing chicken breasts, it's all about finding the right size. Too big, and you risk dry, unevenly cooked chicken. Too small, and you might end up with a measly portion. My recommendation? Aim for medium-sized breasts. They offer the perfect balance of size and tenderness, ensuring a juicy, flavorful result.
1.3. Don't Be Afraid of Fat: The Secret to juicy chicken
Now, here's a little secret I've learned over the years – a bit of fat goes a long way in the world of chicken. Look for chicken breasts with some marbling, those lovely streaks of fat running through the meat. They're a natural source of moisture and flavor, adding a richness that will elevate your chicken to new heights.
Part 2: The Pre-Bake Preparation: Setting the Stage for Flavor
Before you pop that chicken breast into the oven, it's crucial to lay the groundwork for flavor. This pre-bake preparation is like getting your kitchen stage ready for a delicious performance.
2.1. Pat It Dry: Moisture is the Enemy of a Crisp Skin
The first rule of chicken pre-baking is simple: pat it dry. Excess moisture can lead to steam, preventing your chicken from browning beautifully and achieving that coveted crispy skin. So, grab a few paper towels and pat your chicken breast dry, giving it a thorough but gentle treatment.
2.2. Seasoning is Key: Unleashing the Flavors
This is your chance to unleash your culinary creativity. There's an endless world of seasoning possibilities out there, and I encourage you to experiment. Personally, I love a simple combination of salt, pepper, garlic powder, and paprika. But don't be afraid to venture beyond the basics. Herbs like thyme, rosemary, and oregano can add a touch of herbal magic. If you're feeling bold, a pinch of cayenne pepper will provide a delightful kick. Remember, season generously, as the flavors will intensify during the baking process.
2.3. Brining: A Secret Weapon for Tender, Juicy Chicken
Here's a little insider tip – brining your chicken breast before baking can work wonders. It involves soaking the chicken in a saltwater solution for a few hours, allowing it to absorb moisture and become incredibly tender. You can even add aromatics like herbs, lemon, or garlic to the brine for an extra layer of flavor. Brining is especially beneficial for larger chicken breasts, ensuring they cook evenly and retain their moisture.
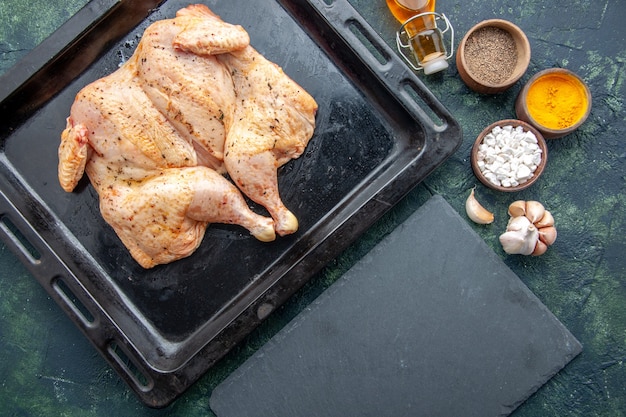
Part 3: Baking the Chicken Breast: The Grand Finale
Now, it's time for the grand finale, the moment we've all been waiting for – baking the chicken breast. Remember, every oven is unique, so you might need to adjust the cooking time and temperature slightly. Don't fret; I'll guide you through it.
3.1. Oven Temperature: Finding the Sweet Spot
For optimal results, I recommend baking chicken breasts at 375°F (190°C). This temperature provides the perfect balance of heat for quick, even cooking, while also allowing the skin to crisp up beautifully. However, if you're working with smaller chicken breasts, consider reducing the temperature to 350°F (175°C) to prevent overcooking.
3.2. Cooking Time: A Matter of Size and Intuition
The cooking time for chicken breasts depends on their size. As a general rule, a small chicken breast will take about 15-20 minutes, while a larger one might require 20-25 minutes. But don't rely solely on the timer. Your senses are your best tools in the kitchen.
3.3. The internal temperature Test: A Culinary Must-Have
This is the ultimate test for ensuring your chicken is cooked to perfection. Insert a meat thermometer into the thickest part of the chicken breast. It should register an internal temperature of 165°F (74°C). If you don't have a thermometer, you can test for doneness by cutting into the chicken. The juices should run clear, not pink.
Part 4: Baking Techniques: Elevating Your Chicken Game
Now that we've covered the basics, let's explore some advanced baking techniques that will take your chicken breast to the next level.
4.1. Roasting with Vegetables: A One-Pan Culinary Symphony
This technique is a true kitchen hero. It's all about creating a symphony of flavors by combining your chicken breast with your favorite vegetables, such as broccoli, carrots, or potatoes. Toss them all together on a single baking sheet and roast until perfection. Not only is it convenient, but it also allows the chicken and vegetables to exchange flavors, creating a truly delicious and satisfying meal.
4.2. Wrapping in Foil: The Secret to Extra-Juicy Chicken
If you're concerned about your chicken drying out, wrapping it in foil can be a lifesaver. Simply wrap the seasoned chicken breast in foil and bake as usual. The foil creates a steamy environment, helping to retain moisture and ensure a tender, juicy result. Just remember to remove the foil for the last few minutes of cooking to allow the skin to crisp up.
4.3. Baking with a Glaze: Adding a Touch of Sweet or Savory Magic
Glazing your chicken breast is a fantastic way to add a burst of flavor and a beautiful sheen. You can use a simple honey-soy glaze, a tangy lemon-herb glaze, or even a sweet and spicy chili glaze. Apply the glaze during the last 10-15 minutes of baking to allow it to caramelize and stick to the chicken, creating a gorgeous finish.
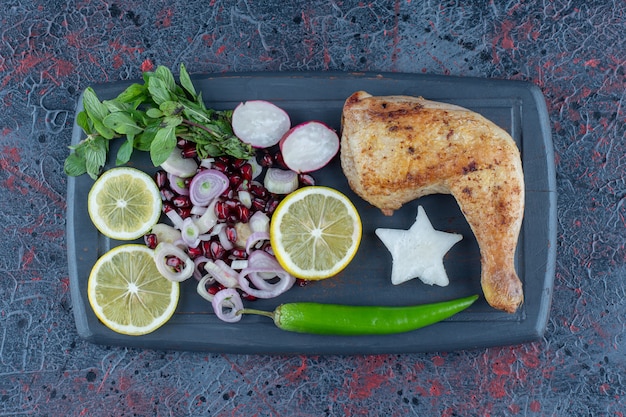
Part 5: Serving Suggestions: From Simple to Sophisticated
Your chicken breast is cooked to perfection. Now, it's time to showcase its deliciousness! I've got a variety of serving suggestions, ranging from simple and quick to more elaborate and impressive.
5.1. The Classic: With Roasted Vegetables and Rice
This is a timeless combination that never fails to please. Pair your chicken breast with your favorite roasted vegetables, such as asparagus, bell peppers, or zucchini. Serve it all with a side of fluffy white rice, and you've got a balanced and satisfying meal.
5.2. The Mediterranean Delight: With grilled vegetables and Feta
For a lighter and more flavorful option, try serving your chicken breast with grilled vegetables like eggplant, zucchini, and bell peppers. Top it off with crumbled feta cheese and a drizzle of olive oil for a taste of the Mediterranean.
5.3. The Asian Fusion: With Stir-Fried Noodles and a Spicy Sauce
Craving something bolder? Try serving your chicken breast with a bed of stir-fried noodles and a spicy sauce. I've experimented with various sauces – from peanut-based to chili-based – and they all complement the chicken beautifully.
Part 6: Leftovers: Transforming Leftover Chicken into Culinary Gold
Let's be real; sometimes we end up with leftovers. But don't despair! There are countless delicious ways to repurpose your leftover chicken breast, turning it into culinary gold.
6.1. The chicken salad: A Classic comfort food
This is a timeless classic that's perfect for lunch or a light dinner. Simply chop your leftover chicken breast and combine it with mayonnaise, celery, onion, and your favorite herbs. Serve it on bread, crackers, or lettuce leaves for a satisfying and flavorful meal.
6.2. The Chicken Quesadillas: A quick and easy meal
Looking for a quick and easy meal? Slice up your leftover chicken breast and add it to a quesadilla with cheese, your favorite toppings, and a dollop of sour cream. It's a delicious and satisfying way to use up leftovers.
6.3. The Chicken Soup: A Comforting Remedy
When you're feeling under the weather, nothing beats a bowl of chicken soup. Shred your leftover chicken breast and add it to a pot of your favorite soup recipe. It's a comforting and nutritious way to use up leftover chicken.
Part 7: Mistakes to Avoid: Lessons Learned the Hard Way
We've covered the basics, the techniques, and the serving suggestions. Now, it's time to address the mistakes to avoid. We all make them, and I'm here to share some lessons learned the hard way.
7.1. Overcrowding the Pan: A Recipe for Uneven Cooking
One of the most common mistakes is overcrowding the baking sheet. When your chicken breasts are crammed together, they won't cook evenly, resulting in dry, rubbery chicken. Always leave some space between the chicken breasts, allowing them to cook properly and develop a crispy skin.
7.2. Neglecting the Temperature: Don't Be Afraid to Check
Don't rely solely on the timer. Always check the internal temperature of your chicken breast to ensure it's cooked through and safe to eat. I've learned this lesson the hard way, and I highly recommend using a meat thermometer to avoid any culinary mishaps.
7.3. Underestimating the Power of Rest: Patience is a Virtue
Don't underestimate the importance of resting your chicken breast after baking. It might seem like a small detail, but it's crucial for allowing the juices to redistribute, resulting in a more tender and flavorful breast. I usually let my chicken rest for about 5-10 minutes before slicing it.
Part 8: FAQs: Your Chicken Breast Questions Answered
Now, let's address some common questions about oven-baked chicken breast. You're probably wondering about certain things, and I'm here to provide the answers.
8.1. Can I Marinate Chicken Breast Before Baking?
Absolutely! Marinating chicken breasts before baking is a fantastic way to infuse them with flavor. I often use a simple marinade of olive oil, lemon juice, garlic, and herbs. Just make sure to marinate the chicken for at least 30 minutes, or even overnight for maximum flavor.
8.2. How Do I Keep Chicken Breast Moist When Baking?
There are a few tricks to keep your chicken breast moist. First, make sure to pat it dry before baking. Second, consider brining or wrapping the chicken in foil. Third, don't overcook the chicken. And lastly, let the chicken rest for a few minutes after baking.
8.3. Can I Use Different Cuts of Chicken?
While boneless, skinless chicken breasts are the most common choice for baking, you can certainly use other cuts. chicken thighs, for example, are more flavorful and tend to stay moister during baking. Just be sure to adjust the cooking time accordingly.
8.4. What Happens If I Overcook chicken breast?
overcooked chicken breast will be dry, tough, and rubbery. It's important to cook chicken breasts to an internal temperature of 165°F (74°C) but no more. If you overcook the chicken, there's not much you can do to salvage it. But don't worry, it happens to the best of us!
8.5. What Kind of Oven Should I Use?
You can use a regular oven or a convection oven to bake chicken breasts. Convection ovens use a fan to circulate hot air, which helps to cook food more evenly and quickly. If you're using a convection oven, you may need to adjust the cooking time and temperature slightly.
Part 9: Final Thoughts: A culinary journey Continues
And there you have it! My ultimate guide to oven-baked boneless chicken breast. I hope this journey through the world of chicken baking has been enlightening and inspiring. Remember, the key is to experiment and find what works best for you. Don't be afraid to try new techniques, flavor combinations, and serving ideas. And most importantly, enjoy the process! As for me, my culinary journey continues. I'm always eager to learn and discover new ways to transform this versatile ingredient. So stay tuned for more adventures in the kitchen!
Everyone is watching

Corn on the Cob: The Ultimate Guide to Perfectly Cooked Ears
Healthy MealsAh, corn on the cob. Just the name evokes images of sunny days, barbecues, and that sweet, juicy flavour that ...
Perfect Pork Roast Oven Cooking Time: A Guide to Delicious Results
Healthy MealsThere's something truly satisfying about a perfectly roasted pork. The aroma alone is enough to make your mout...
Scallops: The Ultimate Guide to Perfect Cooking
Healthy MealsAh, scallops. Those delicate, sweet, and utterly delicious morsels of the sea. They hold a special place in my...
Ham Cooking Time: How Long to Bake, Smoke, or Boil a Delicious Ham
Healthy MealsAh, ham. It's a classic, isn't it? A real crowd-pleaser, especially around holidays. And when done right, it'...
Spaghetti Squash: The Ultimate Guide to Cooking and Serving
Healthy MealsRemember that time you saw spaghetti squash at the supermarket, looking all bumpy and strange, and thought, "W...