Ever dreamt of biting into a perfectly golden-brown, crispy shrimp, the crunchy coating giving way to a juicy, succulent interior? It's a culinary experience that's hard to beat, and today, I'm going to share my secrets for achieving this seafood nirvana.
Now, I've been there, done that - the soggy breading, the rubbery shrimp, the whole kitchen disaster. But trust me, with a little bit of knowledge and a dash of confidence, anyone can whip up a batch of irresistible crispy breaded shrimp.
So, put on your apron, gather your ingredients, and let's dive into the world of crispy breaded shrimp!
(Part 1) Choosing the perfect shrimp: The Foundation of Flavor
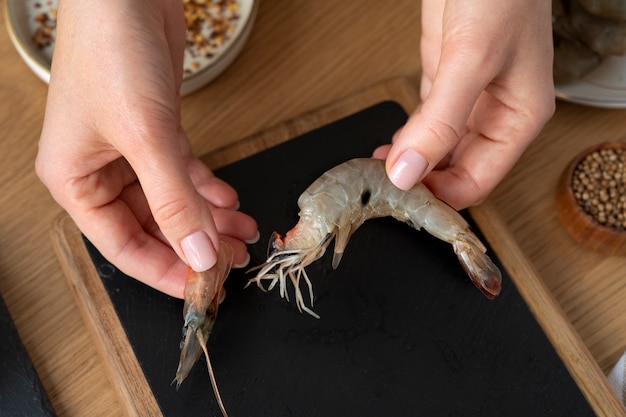
We can't build a masterpiece without the right foundation, and the same goes for crispy breaded shrimp. Selecting the right shrimp is crucial. Think of it like choosing the perfect canvas for your culinary creation.
Size Matters: Navigating the Count System
shrimp sizes are determined by how many shrimp it takes to make a pound. A 16/20 count means there are 16 to 20 shrimp per pound. Smaller shrimp, like 16/20, are easier to work with and cook faster. They're also generally more affordable. For a more luxurious experience, consider 8/12 count shrimp – they'll have a more substantial bite.
Variety is the Spice of Life: Exploring Different Shrimp Types
The world of shrimp is a vast one, offering a range of flavors and textures. Whiteleg shrimp, also known as Pacific white shrimp, are a popular choice for their mild flavour and affordability. For a more robust taste, try wild-caught shrimp, although they tend to be pricier.
Personally, I've discovered that the type of shrimp doesn't dramatically impact the final result. As long as they're fresh and cooked properly, they'll be delicious!
Freezing and Thawing: The Art of Defrosting
Let's be honest, fresh shrimp isn't always available. If you're working with frozen shrimp, proper thawing is essential. Never, ever, toss a frozen block of shrimp into a hot pan! It'll lead to uneven cooking and soggy breading, a culinary crime we want to avoid.
The best approach is to gently defrost shrimp in the refrigerator overnight. Alternatively, you can defrost them quickly in a bowl of cold water, but remember to change the water every 30 minutes to keep it cold.
(Part 2) The Art of the Batter: Creating a Crispy Crust
Now we get to the fun part – the batter! This is where you can unleash your creativity and experiment with different flavours. But before we get carried away, let's talk about the essential elements for a truly outstanding batter.
The Essential Ingredients: A Culinary Symphony
Think of a perfect batter as a symphony of ingredients, each playing a vital role. Flour provides the structure, cornstarch adds that coveted lightness and crispiness, baking powder helps the batter rise, and salt and pepper provide the essential seasoning.
Now, I personally love adding a touch of cayenne pepper for a hint of heat, but feel free to experiment with other spices, like paprika, garlic powder, or onion powder, to create your own signature flavour.
Creating the Perfect Consistency: A Balancing Act
Achieving the right consistency is paramount. You want a batter that coats the shrimp beautifully but isn't so thick that it falls off easily. Imagine a pancake batter, but a little thicker.
The trick is to add the liquid gradually, starting with a small amount of cold water or milk. Whisk it into the dry ingredients until you have a smooth paste, then slowly add more liquid, whisking constantly, until you achieve that perfect, workable consistency.
The Importance of Temperature: Cold Batter, Crispy Crust
Here's a secret: cold batter creates a crispier crust. Why? Because the cold temperature helps the breading solidify, resulting in that satisfying crunch. If you're not using your batter immediately, pop it into the refrigerator for at least 30 minutes before breading.
Sometimes, I forget to chill the batter (it happens to the best of us!), but fear not! Just add a couple of ice cubes to the batter before breading the shrimp. This will help keep the batter cold, ensuring a delightful, crispy crust.
(Part 3) The Breading Process: Creating a Golden Armor
Alright, batter is ready, and our shrimp are eagerly awaiting their transformation. Let's get those hands dirty and bread those shrimp! It's a simple process, but a few key points will help you achieve impeccable results.
Preparation: Setting the Stage
Before you start breading, make sure your shrimp are thoroughly dry. Pat them dry with paper towels or let them air dry for a few minutes. This step ensures the batter adheres properly and prevents soggy breading.
If you're using a seasoned batter, skip this step. The batter will already be infused with flavour. However, for plain batter, I recommend seasoning the shrimp with salt, pepper, and any additional spices you desire.
The Breading Steps: A Gentle Dance
Now, it's time for the breading magic. Your hands are your best tools here, but clean hands, of course!
- Dip each shrimp into the batter, making sure it's fully coated.
- Gently shake off any excess batter.
- Carefully place the shrimp on a wire rack.
- Repeat until all the shrimp are breaded.
If you find it helpful, use a fork to aid in dipping the shrimp, but I find my fingers to be the most intuitive tools for this task.
Resting Time: Letting the Batter Set
Once you've breaded all your shrimp, let them rest on the wire rack for at least 15 minutes. This allows the batter to set, preventing it from falling off during frying.
You can also refrigerate the breaded shrimp for up to 30 minutes before cooking, which will result in even crispier breading. Just remember to bring them back to room temperature before frying.
(Part 4) Frying for Crispy Perfection: A Culinary Symphony of Heat
The breading is done, the batter is chilled, and the anticipation is building. It's time for the grand finale – frying those shrimp to golden perfection.
Choosing the Right Oil: The Foundation of Flavor
First, we need to choose our oil. I prefer vegetable oil for its high smoke point and neutral flavor. Peanut oil or canola oil are also excellent choices. Avoid olive oil, as its low smoke point can lead to burning.
Heating the Oil: The Right Temperature for Success
Ensure your oil is heated to the perfect temperature before adding the shrimp. The oil should be hot enough to cook the shrimp quickly and evenly without burning the breading.
The best way to test the temperature is to drop a small piece of breading into the oil. If it sizzles and browns quickly, the oil is ready. I highly recommend investing in a kitchen thermometer for precise temperature control.
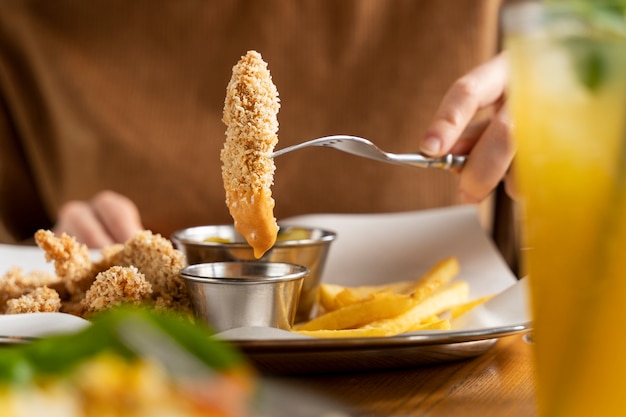
Frying the Shrimp: A Culinary Dance
Now, it's time to get those shrimp sizzling in the hot oil! Don't overcrowd the pan; it will lower the oil's temperature and result in soggy shrimp. Fry the shrimp in batches for about 2-3 minutes per side, or until they're golden brown and cooked through.
The shrimp are done when they turn opaque, and the flesh is firm to the touch. To confirm doneness, cut into a shrimp to ensure it's not pink in the centre.
Draining the Shrimp: Removing Excess Oil
Once your shrimp are perfectly cooked, remove them from the oil and drain them on paper towels to absorb any excess oil.
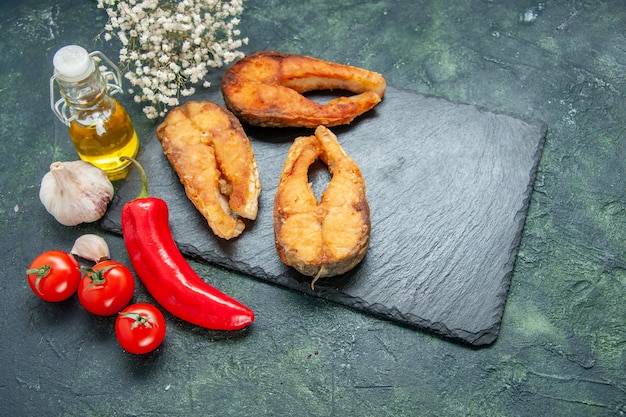
(Part 5) Serving Up Your Crispy Shrimp: A Culinary Celebration
The moment you've been waiting for has arrived – your crispy breaded shrimp are ready to be enjoyed! But before you dive in, let's talk about how to best showcase these culinary masterpieces.
Sauces and Dips: The Perfect Accompaniments
Crispy breaded shrimp are incredibly versatile and can be paired with a variety of sauces and dips. Here are some of my favourites:
- Classic Cocktail Sauce: A tangy, vibrant blend of ketchup, horseradish, and lemon juice.
- Honey Mustard Sauce: A sweet and tangy combination that brings a delightful balance of flavors.
- Lemon Aioli: Creamy garlic aioli infused with the bright zest of lemon.
- Spicy Mayo: Mayonnaise with a kick, featuring sriracha or other chili sauce.
- Sriracha Mayo: A personal favorite, with the heat of sriracha tempered by the creaminess of mayo.
A squeeze of fresh lemon juice or a sprinkle of chopped parsley adds a touch of freshness and elegance.
side dishes: Completing the Culinary Ensemble
Complete your meal with a selection of delicious side dishes that complement the crispy shrimp. Here are a few ideas:
- french fries: A classic pairing for a satisfyingly crunchy and salty counterpoint.
- Coleslaw: A refreshing and tangy side that provides a delightful contrast to the richness of the shrimp.
- Rice: A versatile option that can be spiced up with herbs, vegetables, or a flavorful sauce.
- Salad: A lighter option, incorporating fresh greens, vegetables, and a flavorful vinaigrette.
- Mac and Cheese: A decadent and comforting option for a truly satisfying meal.
Presentation: A Culinary Art Form
Presentation is key! Keep it simple with a platter adorned with your crispy shrimp, a side of sauce, and lemon wedges for squeezing. If you're feeling fancy, use individual plates and garnish with fresh parsley, cilantro, or even a sprig of rosemary.
(Part 6) Storage and Reheating: Preserving Crispy Perfection
You've savored every delicious bite of your crispy breaded shrimp, but what about those tempting leftovers? Don't worry, they can still be enjoyed!
Storing Your Shrimp: Keeping the Crunch
Let the shrimp cool completely and then transfer them to an airtight container in the refrigerator. They'll stay fresh for up to 3 days.
Store the sauce separately to prevent the breading from becoming soggy. Reheat the sauce separately when you're ready to enjoy your shrimp.
Reheating Your Shrimp: Restoring Crispy Glory
There are a few methods for reheating your shrimp. My favorite is to bake them in the oven at 350°F (175°C) for about 10 minutes. This crisps up the breading without drying out the shrimp.
You can also reheat them in a skillet over low heat, but be careful not to overcook them.
(Part 7) Variations and Experimentation: Unleashing Your Culinary Creativity
We've covered the basics, but now it's time to get creative! This is where you can truly unleash your inner chef and experiment with different flavours and techniques.
Flavour Variations: A World of Flavors
Add different spices and herbs to your batter for unique flavour profiles. Here are some ideas:
- Garlic powder and onion powder: For a savoury, umami-rich flavour.
- Smoked paprika: For a smoky, rustic flavour.
- Cayenne pepper or chili powder: For a hint of heat.
- Fresh herbs: Like parsley, cilantro, or thyme, for an herbaceous and aromatic touch.
Cooking Variations: Exploring New Horizons
Don't feel limited to frying. You can also bake your shrimp in the oven or grill them on the barbecue. For a healthier option, try air-frying your shrimp.
Other Seafood Options: Expanding Your Culinary Repertoire
The crispy breading technique isn't just for shrimp. Use other types of seafood, like fish or calamari, for delicious and satisfyingly crunchy dishes.
(Part 8) Troubleshooting: Tackling Culinary Challenges
No matter how seasoned a chef you become, there will always be times when things don't go exactly as planned. But don't worry, I'm here to help you troubleshoot any issues you might encounter.
Soggy Breading: Restoring the Crunch
If your breading is soggy, it's likely due to shrimp that weren't dried properly or the oil not being hot enough.
Overcooked Shrimp: Avoiding Rubberiness
Overcooked shrimp will be tough and rubbery. Fry them for the correct amount of time and check for doneness using a thermometer to avoid this.
Unevenly Cooked Shrimp: Ensuring Consistent Cooking
Unevenly cooked shrimp are a result of overcrowding the pan. Fry them in batches to ensure consistent cooking.
Burnt Breading: Maintaining Crispy Perfection
Burnt breading is a sign that the oil was too hot. Check the oil temperature before adding the shrimp.
FAQs: Your Burning Questions Answered
I'm sure you have a few questions buzzing around, so let's address them head-on.
1. Can I use breadcrumbs instead of batter?
Absolutely! Breadcrumbs will create a crispier, less airy breading. Coat the shrimp thoroughly and let them rest for at least 30 minutes before frying.
2. How do I know if the shrimp are cooked through?
Cut into a shrimp to ensure it's not pink in the centre. The flesh should also be firm to the touch.
3. What if I don’t have a deep fryer?
No worries! A large skillet or dutch oven will do the trick. Just make sure the oil is deep enough to cover the shrimp.
4. Can I freeze the cooked shrimp?
Yes! Let them cool completely, transfer them to an airtight container or freezer bag, and freeze for up to 3 months.
5. How do I reheat frozen shrimp?
Reheat frozen shrimp in the oven, skillet, or air fryer. Heat them thoroughly before serving.
And there you have it! My ultimate guide to crispy breaded shrimp. I hope you've enjoyed this culinary adventure and are now ready to create your own masterpiece. Remember, practice makes perfect, so don't be afraid to experiment and refine your techniques. Happy cooking!
Everyone is watching

Corn on the Cob: The Ultimate Guide to Perfectly Cooked Ears
Healthy MealsAh, corn on the cob. Just the name evokes images of sunny days, barbecues, and that sweet, juicy flavour that ...

Perfect Pork Roast Oven Cooking Time: A Guide to Delicious Results
Healthy MealsThere's something truly satisfying about a perfectly roasted pork. The aroma alone is enough to make your mout...

Scallops: The Ultimate Guide to Perfect Cooking
Healthy MealsAh, scallops. Those delicate, sweet, and utterly delicious morsels of the sea. They hold a special place in my...

Ham Cooking Time: How Long to Bake, Smoke, or Boil a Delicious Ham
Healthy MealsAh, ham. It's a classic, isn't it? A real crowd-pleaser, especially around holidays. And when done right, it'...

Spaghetti Squash: The Ultimate Guide to Cooking and Serving
Healthy MealsRemember that time you saw spaghetti squash at the supermarket, looking all bumpy and strange, and thought, "W...