Let's talk pickled onions, but not the limp, pale, supermarket-bought kind. I'm talking about the real deal, the kind that make your taste buds sing and leave you wanting more. You know, those with that perfect balance of sweet and sour, a satisfying crunch, and a vibrant, jewel-toned hue that adds a splash of colour to any plate.
I've been making pickled onions for years now, experimenting with different techniques and ingredients to find the ideal combination. It's a journey worth taking, and the satisfaction of creating something so delicious and versatile from humble onions is truly rewarding.
So, grab a jar, put on your apron, and get ready to embark on a flavourful adventure. This guide will take you step-by-step, from choosing the perfect onions to mastering the art of the perfect brine. We'll even tackle some of the common pitfalls and answer those burning questions you might have.
(Part 1) Onion Selection: The Foundation of Flavor

Choosing the Right Onions: A Matter of Taste
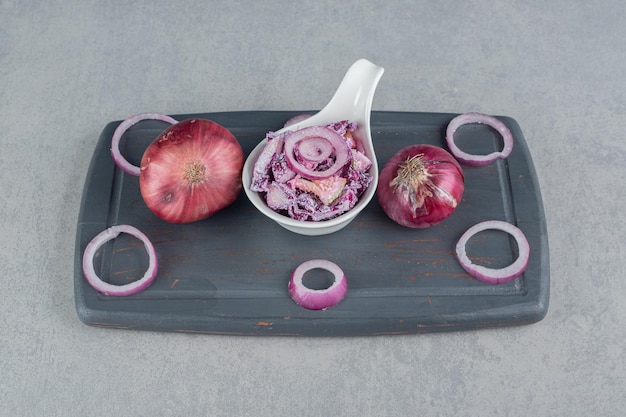
First things first, let's talk about onions. Not all onions are created equal when it comes to pickling. You want an onion that’s firm, crisp, and has a good balance of sweetness and bite. My personal favourite for pickling is the red onion. They’ve got that beautiful purple hue that adds a touch of elegance, and they hold up beautifully in the brine. Plus, they have a slightly sweeter flavour than white onions, which I find a perfect complement to the vinegar.
But don't limit yourself to red onions! You can experiment with other varieties, like yellow onions for a slightly milder flavour, or even shallots for a more delicate and aromatic experience. The key is to find an onion that suits your taste.
Prepping Your Onions: A Crucial Step
Once you’ve chosen your onions, it’s time to prep them. This part is crucial, because it will affect the final texture and flavour of your pickled onions.
- Thinly Sliced: For a classic pickled onion, I always go for thin slices. They pickle faster, absorb the brine beautifully, and have that satisfying crunch when you bite into them. You can use a mandoline if you want perfectly even slices, or a sharp knife will do the job just fine. Just be sure to keep your fingers away from the blade!
- Rings or Quarters: If you prefer a more substantial bite, you can slice the onions into rings or quarters. These options will take a bit longer to pickle, but they still hold their shape nicely and have a wonderful texture.
No matter how you choose to slice them, always give your onions a good rinse under cold water to remove any loose layers or dirt.
(Part 2) The Art of the Brine: A Balancing Act of Flavor

The Essential Ingredients: The Foundation of Your Brine
The heart of any pickled onion is the brine. It's the magic elixir that transforms simple onions into a flavourful delicacy. And here's the secret: it's all about achieving the perfect balance of sweet, sour, and salty.
Here’s a basic brine recipe that I’ve perfected over the years:
| Ingredient | Amount | Notes |
|---|---|---|
| White vinegar | 1 cup | Use high-quality vinegar for the best flavour. |
| Water | 1 cup | This helps to dilute the vinegar, making it less acidic. |
| Sugar | 1/2 cup | Adjust this to your taste preference for sweetness. |
| Salt | 1 tablespoon | Less is more when it comes to salt, so don't oversalt! |
| Black peppercorns | 1 teaspoon | Adds a lovely warmth and spice to the brine. |
| Bay leaves | 2 | Aromatic and slightly bitter, bay leaves add a unique flavour. |
| Whole cloves | 3-4 | Clove adds a warm, slightly spicy flavour. |
This recipe creates a delightful balance of sweet and sour. Adjust the amount of sugar based on your preference for sweetness. And remember, less is more when it comes to salt. Too much salt can overpower the other flavours.
Spice It Up: Experimenting with Flavours
Now, for the fun part – experimenting with different flavours! There’s no right or wrong when it comes to adding a personal touch to your brine.
Here are a few of my favourite additions:
- Mustard Seed: A dash of mustard seed adds a wonderful bite and complexity to the flavour. You can use yellow mustard seeds or brown mustard seeds, depending on the intensity of flavour you desire.
- Garlic: A few cloves of garlic add a hint of warmth and depth to the brine. I usually crush the garlic cloves slightly before adding them to the brine, releasing their flavour more effectively.
- Ginger: A touch of grated ginger gives a subtle zing and a unique aroma. Use fresh ginger for the best flavour, and grate it finely for a more subtle flavour.
- Fresh Herbs: A sprig of thyme, rosemary, or dill adds a beautiful fragrance and flavour. Fresh herbs are best, but dried herbs can be used in a pinch.
- Chilli Flakes: For a fiery kick, add a pinch of chilli flakes to the brine. Use red pepper flakes for a mild heat, or try a pinch of cayenne pepper for a bolder kick.
Don't be afraid to experiment with different combinations until you find the perfect flavour profile for you. The possibilities are endless!
(Part 3) The Pickle Process: Bringing Your Onions to Life

Preparing the Jars: Ensuring a Safe and Clean Environment
Before you start pickling, it’s important to sterilise your jars. This helps prevent bacteria from growing in the brine and ensures your onions stay fresh and crisp for longer.
Here's how I do it:
- Washing: Wash your jars thoroughly with hot soapy water. Make sure to reach every corner of the jar, including the lid.
- Boiling: Place the clean jars in a large pot filled with boiling water. Allow them to boil for 10 minutes to sterilize them completely. Ensure the jars are completely submerged in the boiling water.
- Drying: Remove the jars from the boiling water and let them air dry completely on a clean tea towel.
While the jars are drying, you can prepare your onions and brine.
Packing the Jars: Creating a Beautiful and Flavourful Arrangement
Once the jars are sterilised and dry, you can pack them with your prepared onions.
- Layering: I like to layer the onions in the jars, alternating them with the spices and herbs. This creates a beautiful visual effect and ensures that each onion is well-coated in the brine.
- Leaving Space: Leave about an inch of space at the top of the jar to allow for expansion during the pickling process. This will prevent the jars from exploding!
The Brine Pour: Bringing It All Together
With the jars packed, it’s time to pour in the brine.
- Boiling the Brine: Bring your brine to a boil in a saucepan, making sure all the sugar is dissolved. Let it simmer for a few minutes to allow the flavours to meld.
- Pouring: Carefully pour the hot brine over the onions in the jars, making sure they’re completely submerged. The brine should cover the onions completely, leaving no air pockets.
- Removing Air Bubbles: Use a spoon to remove any air bubbles that might be trapped around the onions. This ensures that the brine can fully penetrate the onions during the pickling process.
(Part 4) The Waiting Game: Patience is Key
Now comes the most challenging part – waiting! You’ve created your beautiful pickled onions, and now you need to give them time to transform.
The Pickling Process: A Transformation
As the onions sit in the brine, a magical transformation takes place. The vinegar, sugar, and salt penetrate the onion cells, changing their texture and flavour. The onions become tender and crisp, and the brine imparts a delicious sweet and sour flavour.
Time is of the Essence: Finding the Right Balance
The pickling time depends on the thickness of your onion slices and your personal preference. Thin slices can pickle in as little as 24 hours, while thicker slices might require up to 3 days.
I usually let my onions pickle for at least 2 days. This gives them enough time to absorb the brine and develop that perfect balance of sweet and sour. But if you prefer a more intense flavour, you can leave them in the brine for longer.
(Part 5) The Big Reveal: Tasting Your Culinary Creation
After waiting patiently, the moment of truth arrives! It’s time to open those jars and taste your culinary creation.
Testing for Perfection: Finding the Right Crunch
The first bite is always the best. You'll be greeted by a burst of flavour – a delicious combination of sweet, sour, and salty. You’ll also notice that the onions have become tender and crisp. If you’re happy with the crunch, you’re good to go!
If you find the onions are still a bit firm, you can leave them in the brine for another day or two. And if they’re too soft, you might need to adjust your pickling time in the future.
The Storage Factor: Keeping Your Onions Fresh
Once your pickled onions are ready, store them in the refrigerator. This will help them stay fresh and crisp for several weeks.
Make sure the jars are tightly sealed to prevent the brine from evaporating. And remember, once you open a jar, you'll want to finish it within a few weeks.
(Part 6) The Culinary Canvas: Adding Flavor to Your Dishes
Pickled onions are a versatile ingredient that can elevate a wide range of dishes.
A Touch of Brilliance: Adding Depth to Salads
I love adding a few slices of pickled onions to salads for a burst of flavour and a touch of acidity. They add a lovely crunch and brighten up the other ingredients.
Think about a classic green salad with a vinaigrette, or a hearty autumn salad with roasted vegetables and goat cheese. Pickled onions can be a game-changer!
Burgers and Sandwiches: A Flavorful Twist
Pickled onions are a staple for burgers and sandwiches. They cut through the richness of the meat and add a delightful zing to each bite.
Try topping your next burger with a few slices of pickled onions for a truly satisfying experience. And don’t forget about sandwiches! They’re equally delicious with a few pickled onion slices.
Beyond the Main Dish: Exploring Creative Combinations
The culinary possibilities with pickled onions are endless.
- Tacos and Quesadillas: Add a tangy twist to your next taco or quesadilla with a few pickled onion slices. The acidity of the pickled onions complements the Mexican flavours beautifully.
- Pizza: Top your pizza with a handful of pickled onion slices for a unique and delicious flavour combination. Pickled onions add a burst of flavour and a welcome contrast to the richness of the cheese and toppings.
- Charcuterie Boards: Pickled onions are a delightful addition to any charcuterie board. They add a vibrant burst of flavour and a beautiful visual element. Their acidity balances the richness of the cured meats and cheeses.
- Soups and Stews: Add a few slices of pickled onions to your next soup or stew for a hint of acidity and a touch of sweetness. Pickled onions add a complexity of flavour to hearty soups and stews.
(Part 7) Pickling Pitfalls: Avoiding Common Mistakes
While pickling onions is a relatively simple process, there are a few common pitfalls to avoid.
The Over-Salting Syndrome: Finding the Right Balance
Remember, less is more when it comes to salt. Too much salt can overpower the other flavours and make your onions taste bland. I’ve definitely been there - it’s easy to get carried away! Stick to the recommended amount, and you’ll be rewarded with a delicious and perfectly balanced pickle.
The Over-Cooked Pickle: Avoiding Texture Troubles
If you overcook the brine, your onions can become too soft and lose their lovely crunch. The key is to bring the brine to a boil, then reduce the heat and let it simmer gently. You don't want to boil the onions for too long, as this can make them mushy.
The Cloudy Brine: Maintaining Clarity
If your brine becomes cloudy, it usually means that the onions weren't properly washed or that you didn't sterilise the jars adequately. This can happen, but don’t worry – it doesn’t affect the taste. Just make sure you sterilise your jars thoroughly next time!
(Part 8) FAQs: Addressing Your Burning Questions
1. Can I Use Apple Cider Vinegar?
Absolutely! Apple cider vinegar adds a beautiful sweetness and a touch of apple flavour to the brine. It’s a wonderful alternative to white vinegar, especially if you prefer a milder flavour.
2. Can I Make Pickled Onions Without Sugar?
You can, but I wouldn’t recommend it. The sugar is essential for balancing the acidity of the vinegar and creating that delicious sweet and sour flavour. It also helps to create a more vibrant colour in the onions.
3. How Long Can I Keep Pickled Onions in the Fridge?
Pickled onions can last for several weeks in the refrigerator. Just make sure the jars are tightly sealed to prevent the brine from evaporating.
4. Can I Freeze Pickled Onions?
Freezing pickled onions isn’t recommended. Freezing can change the texture of the onions and make them mushy.
5. What’s the Best Way to Use Pickled Onions?
The best way to use pickled onions is to let your taste buds be your guide! They’re incredibly versatile and can add a touch of flavour and acidity to a wide range of dishes.
So, there you have it, my ultimate guide to making perfect pickled onions. It’s a journey that’s full of flavour, experimentation, and culinary satisfaction. So, grab a jar, put on your apron, and get ready to create your own batch of briny bliss!
Everyone is watching

Corn on the Cob: The Ultimate Guide to Perfectly Cooked Ears
Healthy MealsAh, corn on the cob. Just the name evokes images of sunny days, barbecues, and that sweet, juicy flavour that ...

Perfect Pork Roast Oven Cooking Time: A Guide to Delicious Results
Healthy MealsThere's something truly satisfying about a perfectly roasted pork. The aroma alone is enough to make your mout...

Ham Cooking Time: How Long to Bake, Smoke, or Boil a Delicious Ham
Healthy MealsAh, ham. It's a classic, isn't it? A real crowd-pleaser, especially around holidays. And when done right, it'...

Scallops: The Ultimate Guide to Perfect Cooking
Healthy MealsAh, scallops. Those delicate, sweet, and utterly delicious morsels of the sea. They hold a special place in my...

Spaghetti Squash: The Ultimate Guide to Cooking and Serving
Healthy MealsRemember that time you saw spaghetti squash at the supermarket, looking all bumpy and strange, and thought, "W...
