Let’s be honest, folks. Pastrami. It’s a culinary masterpiece, isn’t it? That salty, smoky, juicy goodness just hits the spot every time. I’ll never forget my first taste. I was a young lad, down in London visiting my auntie. She took me to a little deli in Soho, and I swear, that first bite was like an explosion of flavour. I was hooked, and I've been trying to recreate that magic ever since. And let me tell you, it’s possible! It takes a bit of time and effort, but trust me, the results are worth it. You'll have your own little piece of deli heaven in your kitchen, and you'll be the envy of all your friends.
This guide is your roadmap to making the perfect pastrami. We’ll cover everything, from selecting the perfect cut to mastering the art of smoking and curing. I'll be sharing all my tips and tricks, the ones I’ve learned over years of countless attempts and a few (okay, maybe a lot of) mistakes. It's like a friendly chat over a steaming cup of tea, just me, you, and the pursuit of deliciousness. Ready? Let’s get started.
(Part 1) choosing the right cut: The Foundation of a Good Pastrami
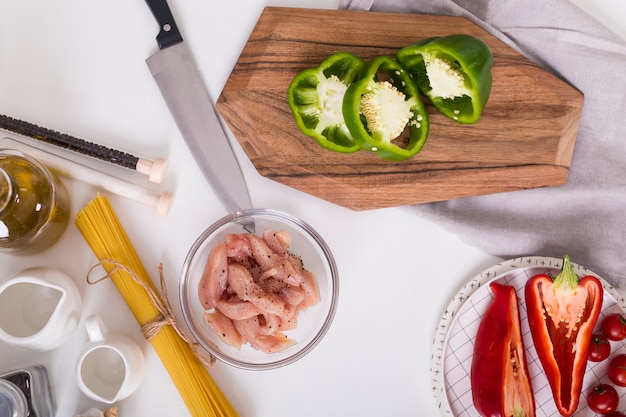
The first step to making a truly fantastic pastrami is picking the right cut of meat. Think of it like choosing the right canvas for a masterpiece. The cut you select will be the foundation of your deliciousness, so it's crucial. You'll want a cut that's got enough fat to render down and keep the pastrami moist and flavorful. You also want a cut that has a nice, even grain for even cooking.
Brisket: The King of Pastrami
For me, the best cut for pastrami is undeniably brisket. A full packer brisket, that is, the whole thing, not separated into the point and flat. It gives you the most flavour and richness. I always say, a brisket is like a well-seasoned old friend - it's got character, depth, and it's been around the block a few times. It's just the right kind of meat for pastrami.
Other Options
Now, if you can’t get your hands on a brisket, you can also use a thick-cut chuck roast. It won't be as fatty as brisket, but it's still a good option. You can even use a shoulder roast or a top round. Just make sure to choose a cut that's at least 1 inch thick.
Now, a word on choosing your meat. Go for a cut that’s got some marbling, but avoid anything that’s got too much fat. You want the fat to render down, not become a soggy mess. And make sure you choose a cut that’s been properly butchered. The meat should be neatly trimmed, free from bones and gristle. Don't be afraid to ask the butcher for their advice. They’re the experts, and they’re always happy to help.
(Part 2) The Cure: Bringing Out the Flavour
Right, now we’re getting into the heart of the matter - the cure. It's what makes pastrami, pastrami. It's the magic that transforms ordinary meat into something truly spectacular. It's a magical process that infuses the meat with flavour and helps it retain its moisture during the cooking process. It's like a secret handshake between the meat and the spices, and it's what unlocks the delicious potential of your pastrami. You’ll need to create a dry cure, which is a simple mix of spices and salt that you’ll rub all over your meat.
The Cure Recipe: A Symphony of Spices
There’s no need to go overboard with the spices. Just a few key players that will add layers of flavour. You want to find that delicate balance between sweetness, spice, and saltiness. Here’s my go-to cure recipe. This is what I've been using for years. It's simple, but it’s a proven winner. This recipe is good enough for a 5-7 pound brisket. You can adjust the amount of each ingredient depending on the size of your meat, but stick to these proportions.
- 1/2 cup kosher salt
- 1/4 cup brown sugar
- 2 tablespoons black peppercorns
- 1 tablespoon coriander seeds
- 1 tablespoon paprika
- 1 teaspoon garlic powder
- 1 teaspoon onion powder
- 1 teaspoon ground ginger
- 1 teaspoon mustard seeds
Give the spices a good grind in a mortar and pestle or a spice grinder. It will release the aromas and make sure they're distributed evenly. It's all about creating a beautiful, fragrant dust. This will be the magic that will transform your meat into something spectacular.
Curing the Meat: A Week of Transformation
Now, we’re ready to cure the meat. The first step is to trim the brisket. Trim away any excess fat, but don’t go crazy. You want to leave a good layer of fat on the meat. Then, sprinkle the cure evenly over the meat, rubbing it in well. Make sure to get all the nooks and crannies. Don't be shy. The more cure, the more flavour.
Now, find a container that’s big enough to hold your brisket. A large plastic storage container is perfect. You’re going to want to place the meat in the container, fat side up. You want to make sure the meat is completely covered by the cure. This is a really important step. If the meat isn't fully covered, it can dry out. Cover the container tightly and store it in the fridge for 7-10 days. Flip the brisket over every couple of days to make sure it’s evenly cured. This is where patience comes in. I know, you’re excited to get to the grilling stage, but this is a slow process. The key to making a great pastrami is letting the curing process do its magic. The wait will be worth it, I promise.
(Part 3) Washing and Brining: Preparing for the Smoke
After a week or so, it’s time to take your brisket out of the fridge. It should have a nice, firm texture and a beautiful, deep red colour. It's like looking at a piece of art - you can already feel the deliciousness radiating from it. Now, it’s time to wash the cure off. It’s like giving your meat a spa treatment.
Washing the Cure: A Gentle Rinse
Get a large bowl and fill it with cold water. Gently wash the meat, removing any excess cure. Don't be too rough with it. Remember, it’s been through a lot, so be gentle, like you’re treating a precious baby. You want to remove the excess cure without removing too much of the flavour. Then, pat the meat dry with paper towels. You're ready for the next step!
The Brine: Adding Moisture and Flavour
Next, you’re going to brine the meat. This will add moisture and even more flavour. Brining is like giving your pastrami a refreshing drink. It's like a little oasis for your meat in the desert of the curing process.
Brine Recipe: A Refreshing Soak
This is a basic brine recipe. You can adjust the amount of ingredients depending on the size of your brisket. This recipe is enough for a 5-7 pound brisket.
- 1 gallon cold water
- 1/2 cup kosher salt
- 1/4 cup brown sugar
- 2 tablespoons black peppercorns
- 1 tablespoon coriander seeds
- 1 tablespoon paprika
- 1 teaspoon garlic powder
- 1 teaspoon onion powder
- 1 teaspoon ground ginger
- 1 teaspoon mustard seeds
Combine all the ingredients in a large stock pot. You can add a few bay leaves for an extra layer of flavour. Stir until the salt and sugar are dissolved. Let it cool completely. Then, add the brisket to the brine, making sure it's fully submerged. Cover the pot and store it in the fridge for 24-48 hours. I've found that 36 hours works best for me. You want to give the brine time to soak into the meat. The brine helps to create a tender, succulent pastrami that will melt in your mouth.
(Part 4) Smoking the Pastrami: Adding that Smoky Goodness
Now, it's time to smoke your pastrami. This is the moment where you can finally start to smell the magic happening. You’re going to want to smoke your pastrami at a low temperature over hickory wood for a long time. It’s a bit like a long, slow dance between the heat and the meat, and it will result in a tender, smoky pastrami that you won't be able to resist. It’s the key to unlocking that irresistible smoky flavour.
Setting Up the Smoker: A Stage for Smoke
Set up your smoker according to the manufacturer's instructions. Make sure you have enough hickory wood chips to smoke your pastrami for the entire cooking time. This will impart a rich, smoky flavour that will make your pastrami sing. You're going to want to make sure your smoker is preheated to 225 degrees Fahrenheit (107 degrees Celsius). Once it’s heated up, place the brisket on the smoker, fat side up.
The Smoking Process: A Slow, Smoky Transformation
The smoking process can take anywhere from 8 to 12 hours, depending on the size of the brisket. You’ll need to keep an eye on the smoker and make sure the temperature stays steady. If the temperature fluctuates too much, it can affect the cooking process and make your pastrami unevenly cooked. I like to use a digital meat thermometer to keep track of the internal temperature of the brisket.
During the smoking process, you can use a spritzer bottle to mist the brisket with a mixture of apple cider vinegar and water. This helps to keep the meat moist and prevent it from drying out. You’ll also want to keep an eye on the smoker to make sure the meat isn’t burning. If the meat starts to get too dark, you can wrap it in aluminum foil. This will help to slow down the cooking process and prevent the meat from burning. It's like giving your pastrami a cozy blanket to keep it warm and safe.
Checking for Doneness: The Moment of Truth
You’re going to want to check for doneness using a meat thermometer. When the internal temperature of the brisket reaches 190 degrees Fahrenheit (88 degrees Celsius), it’s ready to be taken off the smoker. It's like your pastrami is letting you know it's ready for its close-up.
(Part 5) The Rest: Letting the Pastrami Rest
Once your pastrami is cooked, take it off the smoker and let it rest for at least an hour. This allows the meat to relax and reabsorb its juices. It's like giving your pastrami a chance to catch its breath after a long day of smoking. It’s the final step in creating a tender, juicy, and flavorful pastrami that you’ll be proud to serve.
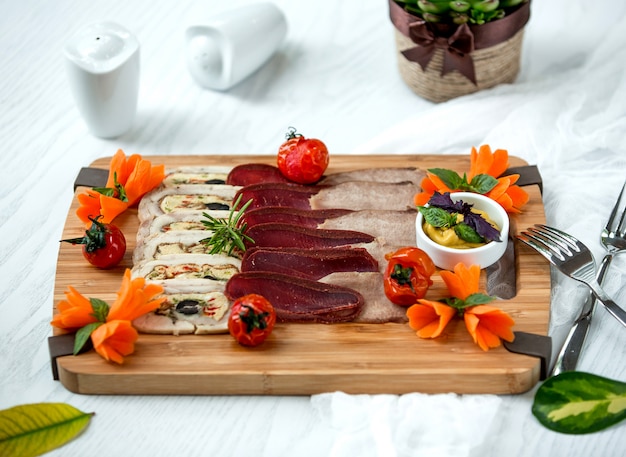
(Part 6) Carving and Serving: The Grand Finale
Now, it’s time for the grand finale - carving and serving your pastrami. Get your carving knife ready and a cutting board.
Carving: A Slice of Art
You're going to want to slice the pastrami thinly, against the grain. This makes for a tender, easy-to-chew pastrami. Think of it as a graceful ballet of your carving knife. If you slice it with the grain, you’re going to end up with tough, chewy pastrami. No one wants that. It’s a little bit of an art, but with practice, you’ll get it down.
Serving: A Feast for the Senses
Serve your pastrami on a toasted rye bread with a good amount of mustard. If you want to get fancy, you can add some sauerkraut, swiss cheese, and a pickle. It's the perfect way to enjoy a delicious, home-cooked meal.
Don’t be afraid to experiment with different serving styles. You can try it on a bagel, a croissant, or even in a sandwich. You can also try it with different sauces and toppings, like horseradish or chili sauce. The possibilities are endless.
(Part 7) Storage and Leftovers: Making the Most of Your Pastrami
Your pastrami will keep for up to a week in the fridge. It's like having a little piece of heaven in your refrigerator. Just wrap it tightly in plastic wrap and then aluminum foil. It's like giving your pastrami a cozy little home to rest in. You can also freeze it for up to three months. Just make sure to wrap it tightly in plastic wrap and then aluminum foil, then place it in a freezer-safe bag. It’s a great way to have some delicious pastrami on hand for a quick meal.
If you have leftovers, you can use them in all sorts of dishes. Try adding them to a salad, soup, or casserole. You can also use them to make a delicious pastrami hash. Don’t let any of that deliciousness go to waste.
(Part 8) Tips and Tricks: Mastering the Art of Pastrami
Here are a few tips and tricks I've learned over the years that have helped me make delicious pastrami.
- Use a meat thermometer. It’s essential for checking the internal temperature of the meat. It’s your best friend for ensuring a perfect cook.
- Don't overcook the pastrami. Overcooked pastrami can be dry and tough. You want to make sure your pastrami is juicy and tender.
- Let the pastrami rest for at least an hour before carving. This will help it to reabsorb its juices. It’s the key to creating a moist and flavorful pastrami.
- Slice the pastrami thinly, against the grain. This makes for a tender, easy-to-chew pastrami. It's the difference between a satisfying bite and a tough chew.
- Experiment with different serving styles and toppings. The possibilities are endless. Don’t be afraid to get creative.
- If you're new to smoking, start with a small brisket. It's easier to manage and will give you a chance to get the hang of the process. It’s all about building confidence and having fun.
- Be patient. Making pastrami takes time and effort, but it's worth it. Enjoy the process.
(Part 9) FAQs: Your Pastrami Questions Answered
1. What is the difference between pastrami and corned beef?
Pastrami and corned beef are both cured meats, but they have different flavour profiles. Corned beef is typically cured with salt and spices, while pastrami is cured with a mixture of salt, sugar, and spices. Pastrami is also smoked, which gives it a distinct smoky flavour. The curing process for pastrami usually lasts longer than for corned beef. In short, pastrami is the sophisticated cousin of corned beef.
2. Can I use a different type of wood for smoking pastrami?
You can, but hickory wood is the traditional choice for smoking pastrami. It gives the meat a rich, smoky flavour. You could also use mesquite wood for a more intense smoky flavour, or applewood for a sweeter flavour. But if you’re looking for that classic pastrami flavour, stick with hickory.
3. How do I know if my pastrami is done?
The best way to tell if your pastrami is done is to use a meat thermometer. The internal temperature should reach 190 degrees Fahrenheit (88 degrees Celsius). You can also check for doneness by looking at the colour of the meat. It should be a deep brown colour. And if you poke the pastrami with a fork, it should feel firm. It's like a little test to make sure it's ready for the spotlight.
4. Can I make pastrami in an oven instead of a smoker?
You can, but it won’t have the same smoky flavour. You can try to create a smoky flavour by adding a few wood chips to the oven. Just place the wood chips in a small foil pan filled with water and place them on the bottom rack of the oven. However, it’s best to use a smoker if you want to get that authentic pastrami flavour. It’s the real deal.
5. Can I use a different type of salt in the cure?
Yes, you can use table salt instead of kosher salt. But, kosher salt is the preferred choice because it’s less salty and has larger grains, which makes it easier to rub onto the meat. It’s like the salt has a special touch for curing your pastrami.
There you have it. Your ultimate guide to making delicious homemade pastrami. Remember, it’s a labour of love. Enjoy the process, and don’t be afraid to experiment. Get those hands dirty, and let the deliciousness unfold.
Everyone is watching

Corn on the Cob: The Ultimate Guide to Perfectly Cooked Ears
Healthy MealsAh, corn on the cob. Just the name evokes images of sunny days, barbecues, and that sweet, juicy flavour that ...

Perfect Pork Roast Oven Cooking Time: A Guide to Delicious Results
Healthy MealsThere's something truly satisfying about a perfectly roasted pork. The aroma alone is enough to make your mout...

Ham Cooking Time: How Long to Bake, Smoke, or Boil a Delicious Ham
Healthy MealsAh, ham. It's a classic, isn't it? A real crowd-pleaser, especially around holidays. And when done right, it'...

Scallops: The Ultimate Guide to Perfect Cooking
Healthy MealsAh, scallops. Those delicate, sweet, and utterly delicious morsels of the sea. They hold a special place in my...

Spaghetti Squash: The Ultimate Guide to Cooking and Serving
Healthy MealsRemember that time you saw spaghetti squash at the supermarket, looking all bumpy and strange, and thought, "W...