Part 1: The Spatchcock Chronicles
Honestly, I used to be terrified of cooking a turkey. The whole process seemed so daunting, what with the basting and the timing and the constant fear of it being undercooked. But then I discovered the wonders of spatchcocking, and it changed my life. It's truly a game-changer.
Why Spatchcock?
Think of it this way. You're dealing with a large bird, and heat needs to penetrate that thick breast meat. When you leave the backbone in, it essentially creates a barrier, slowing down the cooking process. That's where spatchcocking comes in. By removing the backbone, you're essentially flattening the bird, allowing the heat to reach every nook and cranny more effectively. It's a simple trick, but it makes a world of difference.
The Benefits of Spatchcocking:
- Even Cooking: As I mentioned, the heat penetrates the bird more evenly, ensuring a perfectly cooked turkey, with no dry breast meat. This means your entire turkey will be tender and juicy, from the breast to the thighs.
- Faster Cooking Time: Spatchcocking significantly reduces the cooking time, which is a huge bonus if you're short on time or need to feed a large crowd. Imagine, instead of hours in the oven, you can have a delicious turkey ready in less than half the time!
- More Flavor: The skin crisps up beautifully, giving you a delicious, golden-brown exterior that's bursting with flavour. That crispy skin is simply irresistible, and it adds a wonderful layer of texture and taste to the whole experience.
- Easy to Carve: Once the turkey is cooked, it's a breeze to carve, as you don't have to deal with a bulky, awkward bird. This makes the carving process a lot less stressful, and it allows you to easily serve up beautiful, even slices of turkey.
Getting Started: Tools of the Trade
Before you start spatchcocking, gather your tools. You'll need:
- A Sharp Chef's Knife: This is essential for removing the backbone and making precise cuts. It's worth investing in a good quality knife that will hold its edge and make the job easier.
- A Cutting Board: Large enough to accommodate your turkey. You can use a butcher block or a sturdy plastic board. Make sure it's big enough to comfortably hold the turkey without it spilling over the edges.
- Kitchen Scissors or Poultry Shears: These are helpful for cutting through the backbone, especially if it's tough or thick. They can make the job quicker and easier.
- A roasting pan: Large enough to hold your turkey and any juices that might drip out during cooking. You'll want a pan that's deep enough to catch the drippings, as you can use them to make gravy later on.
- meat thermometer: This is crucial for ensuring your turkey is cooked to the proper internal temperature. A meat thermometer is essential for safety, as it helps to ensure that the turkey is cooked through and safe to eat.
Part 2: Spatchcocking Your Turkey
Step 1: Preparing Your Turkey
The first step is to get your turkey ready. Pat it dry with paper towels and remove any giblets or neck from the cavity. This is your chance to give it a good visual inspection, looking for any signs of bruising or damage. If you find any, be sure to trim them away.
Step 2: Removing the Backbone
Here's where things get interesting. Place the turkey breast-side down on your cutting board. Using your chef's knife, cut along the backbone on both sides of the turkey. You want to go all the way through, separating the backbone from the rest of the bird. You can use your kitchen scissors or poultry shears to cut through the backbone if it's tricky.
A helpful tip: Use your fingers to feel for the backbone, and then follow its contour with your knife. This will help you make a clean, precise cut. Don't worry if it's not perfectly straight, as long as you've removed the entire backbone.
Step 3: Flatten the Bird
Now, flip the turkey breast-side up. Press down firmly on the breastbone, flattening the bird as much as possible. You'll feel the bones give way, and the turkey will become a much flatter, more manageable shape.
You can use your hands or a heavy skillet to help flatten the turkey. Just be careful not to break the bones, as this can make it difficult to cook evenly.
Step 4: Seasoning and Marinating
This is where you can get creative. I love to rub my turkey with a mixture of herbs and spices. My go-to recipe is a blend of rosemary, thyme, sage, garlic powder, and a good pinch of salt and pepper. You can also use a pre-made dry rub, or even marinade the turkey overnight in a brine. This will make the meat incredibly juicy and flavorful.
Here are some other seasoning ideas:
- Citrus and Herb: Combine lemon zest, orange zest, thyme, rosemary, and a touch of garlic powder.
- Spicy: Add chili powder, paprika, cumin, and cayenne pepper for a kick.
- Garlic and Herb: Mix garlic powder, onion powder, parsley, oregano, and a hint of thyme.
When marinating, make sure to choose a marinade that will penetrate the turkey well and create a flavorful layer. You can also try using a dry brine, which involves rubbing salt and spices onto the turkey and letting it sit in the refrigerator for a few hours. This helps to keep the meat moist and tender during cooking.
Part 3: Cooking Your Spatchcock Turkey
Step 1: Preheating the Oven
Preheat your oven to 375°F (190°C). This is the optimal temperature for roasting a spatchcocked turkey. If you're cooking it on a gas grill, make sure to use medium heat.
Step 2: roasting time
Now, here's the tricky part – figuring out the roasting time. Since you're dealing with a 20lb turkey, it's going to take a bit longer than a smaller bird. As a rule of thumb, I'd say about 2 hours and 15 minutes. But it's always best to check the internal temperature with a meat thermometer to ensure it's cooked through.
Here's a more detailed breakdown of cooking times for different weights:
| Weight (lbs) | Cooking Time (hours) |
|---|---|
| 10-12 | 1.5-2 |
| 12-14 | 2-2.5 |
| 14-16 | 2.5-3 |
| 16-18 | 3-3.5 |
| 18-20 | 3.5-4 |
Remember, these are just estimates. Always use a meat thermometer to check the internal temperature of the turkey, as cooking times can vary depending on the size and shape of the bird, as well as the oven's temperature.
Step 3: Checking the Internal Temperature
The safe internal temperature for a turkey is 165°F (74°C). I recommend checking the temperature in the thickest part of the thigh. If it's not quite there yet, continue roasting for another 15-20 minutes, checking the temperature again until it reaches the desired level.
Make sure to insert the thermometer into the thickest part of the thigh, avoiding the bone. The turkey is done when the temperature reaches 165°F (74°C) in the thickest part of the thigh. You can also check the breast meat, which should reach 165°F (74°C) as well.
Step 4: Resting Time
Once the turkey is cooked, it's crucial to let it rest for at least 15-20 minutes before carving. This allows the juices to redistribute, ensuring the meat stays juicy and tender. Cover it with foil while it rests, keeping it warm.
Resting is essential for a moist and flavorful turkey. While it's tempting to carve it immediately, give it some time to rest and let the juices redistribute throughout the meat. This will make a huge difference in the final result.
Part 4: cooking tips
Here are a few extra tips that will help you achieve a perfect spatchcock turkey:
- Basting: During the last 30 minutes of cooking, baste the turkey with pan juices or melted butter. This will help the skin crisp up and add extra flavor. You can use a spoon or a basting brush to evenly coat the turkey with the juices.
- Adding Vegetables: I love to roast vegetables alongside the turkey, such as potatoes, carrots, onions, and garlic. Not only does it add flavor to the bird, but it also creates a delicious side dish. You can place the vegetables around the turkey in the roasting pan or on a separate baking sheet.
- Using a Roasting Rack: A roasting rack will elevate the turkey, ensuring even cooking and allowing air to circulate. It also prevents the turkey from sitting in its own juices, which can make the skin soggy. You can use a standard roasting rack or a wire rack that fits inside your roasting pan.
Part 5: FAQs
Q1: What if my turkey is not 20lbs?
Don't worry, this guide is just a starting point. For a smaller turkey, you'll need to adjust the cooking time accordingly. A good rule of thumb is to cook for 15-20 minutes per pound. For example, a 12lb turkey would cook for about 3 hours. Always check the internal temperature to ensure it's cooked through.
Q2: Can I spatchcock a frozen turkey?
It's best to spatchcock a thawed turkey. Frozen turkey is very hard to work with, and you run the risk of damaging the meat. Allow ample time for the turkey to thaw completely before spatchcocking it.
Thawing a turkey in the refrigerator is the safest and most recommended method. Allow 24 hours for every 5 pounds of turkey to thaw completely. You can also thaw a turkey in cold water, but make sure to change the water every 30 minutes.
Q3: What if the breast meat is dry?
If the breast meat is dry, it's usually a sign that the turkey was overcooked. You can try to remedy this by adding some pan juices or broth to the turkey during the resting time. This will help to rehydrate the meat. In the future, try to reduce the cooking temperature and monitor the internal temperature closely.
Q4: How do I store leftover turkey?
Leftover turkey should be stored in an airtight container in the refrigerator for up to 3-4 days. You can also freeze leftover turkey for up to 3 months. Be sure to defrost it completely in the refrigerator before reheating it.
You can use leftover turkey in a variety of dishes, such as sandwiches, salads, soups, or casseroles. It's also delicious cold, served with a little bit of gravy or cranberry sauce.
Q5: What are some other ways to cook a spatchcocked turkey?
You can cook a spatchcocked turkey on a gas or charcoal grill, or even in a smoker. The possibilities are endless! Just be sure to adjust the cooking time and temperature based on your chosen method.
Grilling a spatchcocked turkey gives it a beautiful char and smoky flavor. If you're using a smoker, you can experiment with different wood chips to add unique flavor profiles. Just make sure to monitor the temperature closely, as cooking times can vary depending on the type of grill or smoker you're using.
Part 6: The Great Spatchcock Experiment
Okay, let's get real. I've been talking a lot about spatchcocking, but how about a real-world example? Last year, I decided to test my spatchcocking skills on a massive 20lb turkey for our Christmas dinner. I followed my usual method, seasoning it with a blend of herbs and spices, and then roasted it in the oven for about 2 hours and 15 minutes.
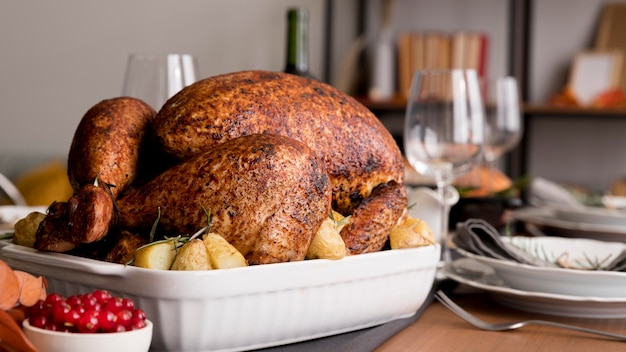
The results were amazing! The turkey was perfectly cooked, with crispy skin and juicy, tender meat. It was the best turkey I had ever cooked. My guests were blown away. One even said it was "the most delicious turkey they had ever tasted" (and they've had their fair share of turkey dinners, believe me).
The whole experience solidified my love for spatchcocking. It's a simple technique that truly makes a difference. It takes the stress out of cooking a large turkey and ensures a delicious, impressive centerpiece for any occasion.
Part 7: Troubleshooting
Okay, I know that cooking a turkey can be a little nerve-wracking, especially if you're new to it. So, let's talk about some potential issues you might encounter and how to solve them.
Problem 1: Overcooked Breast Meat
This is a common problem with large turkeys. The breast meat tends to cook faster than the thighs, so it's easy to overcook. Here are a few tips to avoid this:
- Reduce the Oven Temperature: Lower the oven temperature to 325°F (160°C) and roast for a longer time. This will help to ensure the breast meat doesn't dry out. You might need to increase the cooking time by 15-20 minutes.
- Tent the Breast Meat: Towards the end of cooking, cover the breast meat with foil to prevent it from getting too dry. This allows the thighs to finish cooking while the breast meat rests.
- Check the Temperature: Use a meat thermometer to ensure the turkey is cooked through, but not overcooked. The internal temperature of the breast should be 165°F (74°C). You can also check the temperature in the thickest part of the thigh, as it takes a bit longer to cook.
Problem 2: Undercooked Turkey
You don't want to risk undercooked turkey, so it's essential to check the internal temperature. If the turkey is undercooked, simply continue roasting it until it reaches the desired temperature.
It's better to err on the side of caution and cook the turkey for a few extra minutes than to risk undercooking. Make sure to check the temperature in the thickest part of the thigh, as it will take the longest to cook.
Problem 3: Soggy Skin
Soggy skin is a common problem when roasting a turkey. To avoid this, be sure to pat the turkey dry with paper towels before roasting. You can also use a roasting rack to elevate the turkey, allowing air to circulate.
Elevate the turkey on a roasting rack, so that it doesn't sit in its own juices. This will help to create crispy skin. You can also try flipping the turkey halfway through the cooking process, to ensure that both sides are evenly browned.
Part 8: The Verdict
There you have it. My spatchcocking guide for a 20lb turkey. I've tried to cover everything you need to know, from prep to cooking time to troubleshooting any potential issues. Remember, the key to a delicious turkey is to plan ahead, follow the instructions carefully, and don't be afraid to experiment with different seasonings and marinades. You'll be surprised at how easy it is to create a truly impressive centerpiece for your next feast.
So, go forth and spatchcock! You'll be glad you did. Just make sure you have enough gravy for everyone. Trust me, you'll need it. Happy cooking!
Everyone is watching

Corn on the Cob: The Ultimate Guide to Perfectly Cooked Ears
Healthy MealsAh, corn on the cob. Just the name evokes images of sunny days, barbecues, and that sweet, juicy flavour that ...

Perfect Pork Roast Oven Cooking Time: A Guide to Delicious Results
Healthy MealsThere's something truly satisfying about a perfectly roasted pork. The aroma alone is enough to make your mout...

Ham Cooking Time: How Long to Bake, Smoke, or Boil a Delicious Ham
Healthy MealsAh, ham. It's a classic, isn't it? A real crowd-pleaser, especially around holidays. And when done right, it'...

Scallops: The Ultimate Guide to Perfect Cooking
Healthy MealsAh, scallops. Those delicate, sweet, and utterly delicious morsels of the sea. They hold a special place in my...

Spaghetti Squash: The Ultimate Guide to Cooking and Serving
Healthy MealsRemember that time you saw spaghetti squash at the supermarket, looking all bumpy and strange, and thought, "W...