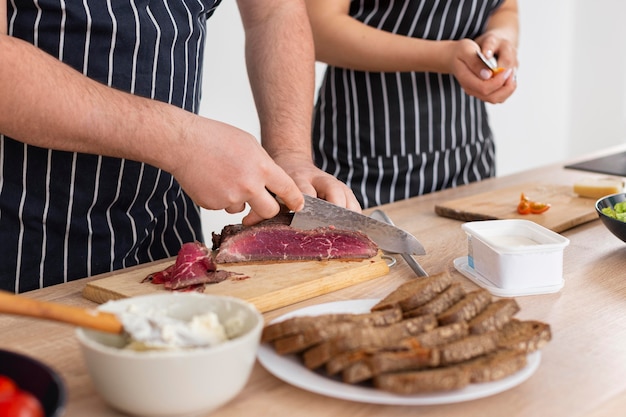
Ah, the pork tenderloin. It’s a culinary gem, a cut of meat that’s both elegant and easy to cook. When prepared correctly, it’s a symphony of flavours: tender, juicy, and bursting with flavour. But there’s a bit of a mystery surrounding it, a question that always seems to pop up: how long do you cook it for?
I’ve been a home cook for years, and I’ve spent my fair share of time wrestling with the oven timer. I’ve had my share of triumphs, but also those moments of utter frustration where a beautifully browned tenderloin was anything but tender inside. It’s a learning curve, but I’m here to tell you, it’s a curve you can master!
This guide is more than just a recipe; it’s a journey into the world of pork tenderloin roasting. We’ll delve into choosing the right cut, understanding the magic of cooking time and temperature, and even unlock some flavour-enhancing secrets. So, grab your apron, gather your ingredients, and get ready to embark on a culinary adventure.
Part 1: The perfect pork tenderloin
Let’s begin at the beginning, with the star of the show: the pork tenderloin. This cut, often called the “eye of the loin,” is a real charmer. It’s lean, cooks quickly, and is incredibly versatile. You can dress it up for a fancy dinner or keep it simple for a weeknight meal.
However, finding the right tenderloin is crucial. It’s not just about size; it’s about quality. You want a cut that’s both visually appealing and promises a juicy, tender outcome.
Choosing the Right Cut: A Visual Guide
Think of your pork tenderloin as a culinary canvas. Here’s what to look for:
- Evenly Shaped and Marbled: A good tenderloin should be evenly shaped with a good amount of marbling throughout. This marbling is the key to juicy meat, because it's fat that renders during cooking, adding flavour and moisture.
- 1-2 Inches Thick: Aim for a tenderloin that's about 1 to 2 inches thick. This thickness allows for even cooking and prevents it from drying out.
- Light Pink Colour: The colour should be a light pink, indicating freshness. Any discolouration is a red flag.
Don’t be afraid to ask your butcher for help! They can guide you towards the perfect tenderloin for your needs. And if you do come across a cut with excess fat or connective tissue, don’t fret! Simply trim them off. Save those trimmings for rendering them down into delicious pork crackling later!
Preparing for Cooking: The Foundation of Flavour
Now that you’ve found your perfect tenderloin, it's time to prepare it for its starring role. This is where the fun begins, where you get to infuse your personal touch and create a masterpiece of flavour.
- Pat Dry: Pat the tenderloin dry with paper towels. This will help the skin to crisp up beautifully.
- Salt and Pepper: Always season generously with salt and pepper. This step is the foundation of flavour, and it’s a step you should never skip!
- Spice It Up: Want to take your tenderloin to the next level? Experiment with other seasonings like garlic powder, onion powder, paprika, or a touch of cayenne pepper if you prefer a spicy kick.
- Marinate for Extra Depth: A marinade is a fantastic way to enhance the flavour and tenderize the meat. You can go with a simple citrus blend of olive oil, lemon juice, and herbs or delve into something more complex like a soy sauce, honey, and ginger marinade. The possibilities are endless! Remember to marinate for at least 30 minutes, or even better, overnight for maximum flavour absorption.
Now, you’ve got a beautiful, seasoned tenderloin ready to go. The next step? Understanding the art of cooking time and temperature.
Part 2: Oven Cooking Time: Mastering the Timing
Cooking time is where many cooks get a bit anxious. You don’t want to overcook it and end up with a dry, tough piece of meat. But don’t worry, it’s not as complicated as it seems! It’s all about understanding the relationship between size, thickness, and the oven’s heat.
Here's the general rule of thumb: a 1-pound tenderloin takes about 20-25 minutes at 350°F (175°C). For a 2-pound tenderloin, you'll need to increase the cooking time to about 30-35 minutes. However, remember these are just guidelines. You need to ensure that your pork tenderloin is cooked to perfection – and for that, we turn to our trusty ally, the meat thermometer.
The Meat Thermometer: Your Culinary Compass
The meat thermometer is a hero in disguise, a simple yet indispensable tool. It takes the guesswork out of cooking, providing a precise reading to ensure your tenderloin is cooked to juicy perfection.
Aim for an internal temperature of 145°F (63°C). This temperature ensures the meat is cooked through while still maintaining its juicy texture. You're not aiming for well-done, remember, you want that beautiful, tender texture!
Here’s how to use a meat thermometer like a pro:
- Thickest Part: Insert the thermometer into the thickest part of the tenderloin, making sure it doesn’t touch any bones.
- Hold It Steady: Leave the thermometer in place for a few seconds to get an accurate reading.
- Continue Cooking: If the internal temperature is below 145°F (63°C), continue cooking the tenderloin for a few more minutes.
- Rest Time: Once the internal temperature reaches 145°F (63°C), remove the tenderloin from the oven and let it rest for 10-15 minutes before carving. This resting period allows the juices to redistribute throughout the meat, resulting in a more tender and flavorful roast.
By using a meat thermometer, you eliminate the guesswork and ensure your pork tenderloin is cooked to the perfect level of doneness. Trust me, it’s a game-changer in the kitchen!
Part 3: Oven Cooking Temperature: The Art of Heat
Now that we’ve tackled cooking time, let's dive into the world of oven temperature. It's another crucial element that influences the outcome of your roast.
The standard oven temperature for pork tenderloin is 350°F (175°C). This temperature provides a balance – enough heat to create a crispy skin while allowing the interior to cook evenly. However, remember, you can always fine-tune the temperature depending on the thickness of your tenderloin and your personal preference.
For example, if you're working with a thicker tenderloin, you might want to cook it at a slightly lower temperature, around 325°F (160°C). This will ensure more even cooking and prevent drying out. However, keep in mind that lower temperatures will require longer cooking times.
Choosing the Right Temperature: A Guide to Personal Preference
The best way to find your perfect temperature is to experiment. Don’t be afraid to adjust the oven temperature and observe the results. Remember, it's about finding what works best for you and your tenderloin.
Here’s a cheat sheet for temperature preferences:
- Crispy Skin: For a crispy skin, crank up the heat to 375°F (190°C). Just be sure to keep a close eye on the tenderloin to avoid overcooking.
- Tender and Juicy Interior: For a tender and juicy interior, lower the temperature to 325°F (160°C). This allows the meat to cook more gently and prevents it from drying out.
- Preheating: Always preheat your oven to the desired temperature. This ensures consistent heat distribution and even cooking.
Remember, consistency in oven temperature is key. And, of course, your trusty meat thermometer will ensure your tenderloin is cooked to perfection, regardless of the temperature you choose.
Part 4: Enhancing the Flavour: A Symphony of Taste
Now that we’ve mastered the basics of time and temperature, let’s unleash our creativity and explore the world of flavour enhancement! There are countless ways to elevate your pork tenderloin from good to absolutely incredible.
Marinades: Infusing Flavour and Tenderness
Marinades are like a magical potion, transforming your tenderloin with a burst of flavour and tenderizing it to perfection. They work by breaking down the proteins in the meat, making it more tender and allowing the flavours to penetrate deeper.
Here are some marinade masterpieces to try:
- Citrus Burst: Combine olive oil, lemon juice, orange juice, garlic, and herbs like thyme and rosemary. It’s a bright and refreshing marinade that’s perfect for summer.
- Soy Ginger Savouriness: This marinade infuses a savory, umami flavour into your tenderloin. Combine soy sauce, ginger, garlic, honey, and a touch of sesame oil.
- Herbal Delight: This marinade is all about highlighting the natural flavour of the pork. Combine olive oil, garlic, and a medley of fresh herbs like thyme, rosemary, parsley, and oregano.
Remember, the key is to let your tenderloin marinate for at least 30 minutes, or better yet, overnight. This allows the flavours to really penetrate and create a truly delicious experience.
Seasonings: A Quick and Easy Way to Elevate Flavour
Even if you don’t have time for a full-blown marinade, you can still sprinkle some magic on your tenderloin with a simple seasoning blend.
Here’s a list of flavour-enhancing seasonings to explore:
- Classic Salt and Pepper: It’s a simple combination, but it’s a classic for a reason. Use freshly ground pepper for the best flavour.
- Garlic and Herb Blend: Combine dried garlic, dried oregano, dried thyme, and a touch of rosemary. It’s a simple yet aromatic blend.
- Spicy Rub: This blend packs a punch! Mix paprika, chili powder, cumin, garlic powder, onion powder, and a pinch of cayenne pepper. It’s perfect if you like a bit of heat.
Make sure to rub the seasonings into the tenderloin generously to ensure even flavour distribution.
Glazes: A Final Touch of Sweetness and Shine
For an extra burst of flavour and a gorgeous, caramelized finish, consider glazing your tenderloin during the last 15 minutes of cooking. Glazes add a touch of sweetness and create a glossy, irresistible appearance.
Here are some glaze ideas to try:
- Honey Mustard: Combine honey, Dijon mustard, and a touch of apple cider vinegar. It’s a tangy and sweet combination.
- Maple Syrup: Mix maple syrup, soy sauce, and a pinch of ginger. This glaze adds a delicious, earthy sweetness.
- Cranberry: Combine cranberry sauce, orange juice, and a little bit of brown sugar. This glaze is perfect for holiday meals.
Baste the tenderloin with the glaze every 5 minutes for the last 15 minutes of cooking, ensuring it’s evenly coated. This will create a beautiful, caramelized finish and make your tenderloin irresistible.
Part 5: cooking tips and Tricks: Mastering the Technique
Now that you’ve grasped the fundamentals of time, temperature, and flavour enhancement, let’s dive into some helpful tips and tricks to ensure your pork tenderloin roast is truly perfect.
Roasting Technique: A Step-by-Step Guide
When roasting your tenderloin, you want a roasting pan that’s large enough to accommodate the meat, allowing for proper heat circulation and even cooking.
Here’s how to roast your tenderloin like a pro:
- Use a Roasting Rack: Place the tenderloin on a roasting rack in the pan. This allows hot air to circulate around the meat, ensuring even cooking and preventing it from sticking to the pan. If you don’t have a rack, you can create a bed of chopped onions or carrots in the pan to elevate the tenderloin.
- Searing for Extra Crisp: For a truly crispy skin, you can sear the tenderloin in a hot pan before roasting it. This creates a beautiful crust on the outside. Just be sure not to overcook the meat in the pan. A few minutes per side should suffice.
Resting Time: The Secret to juicy tenderloin
I’ve mentioned this before, but it’s worth repeating: resting your tenderloin after cooking is crucial for a juicy, flavourful roast. As the meat rests, the juices redistribute throughout the tenderloin, resulting in a truly tender and delicious experience.
Once you remove the tenderloin from the oven, let it rest for 10-15 minutes before carving. You can loosely cover it with aluminium foil to keep it warm during this time.
Carving: A Skill That Makes a Difference
Now for the fun part – carving! When carving your tenderloin, slice thinly across the grain of the meat. This ensures each slice is tender and easy to eat. You can carve the tenderloin into individual medallions, or you can slice it into thinner strips for a more rustic look.
Part 6: Serving Suggestions: A Culinary Feast
The beauty of pork tenderloin is its versatility. It pairs beautifully with a wide variety of sides, making it perfect for any occasion.
Here are some ideas to inspire your culinary creativity:
- Classic roast vegetables: Roasted potatoes, carrots, and Brussels sprouts are a classic combination that complements the flavour of the tenderloin perfectly.
- Creamy Polenta: A rich and creamy polenta is a delicious and comforting side dish that adds another dimension of flavour.
- Fresh Salad: A light and refreshing salad is a wonderful way to balance out the richness of the tenderloin.
- fruit salad: A fruit salad adds a sweet and tangy contrast to the meal.
Don’t be afraid to experiment with different sides and find your own favourite combinations.
Part 7: Leftovers: A Culinary Treasure Trove
The best part of a meal? Often, it's the leftovers! Pork tenderloin is a champion of leftovers. It’s fantastic in sandwiches, salads, or even a hearty breakfast hash.
Here are some ideas to turn your leftover tenderloin into delicious creations:
- Pork Tenderloin Sandwiches: Slice the leftover tenderloin and pile it onto crusty bread with your favourite toppings.
- Pork Tenderloin Salad: Dice the leftover tenderloin and add it to a salad with your favourite vegetables and dressing.
- Pork Tenderloin Hash: Dice the leftover tenderloin and cook it with potatoes, onions, and peppers for a delicious and satisfying breakfast hash.
Just remember to store the leftover tenderloin in the refrigerator for up to 3-4 days.
Part 8: FAQs: Solving Your Cooking Quandaries
Q: How do I know if my pork tenderloin is cooked through?
Your trusty meat thermometer is your best friend for determining doneness. It should reach an internal temperature of 145°F (63°C). You can also check by pressing on the meat. If it’s firm to the touch, it’s cooked through.
Q: What happens if I overcook my pork tenderloin?
Overcooking results in dry, tough meat. If this happens, try to salvage it by shredding it and using it in a recipe like pulled pork sandwiches.
Q: Can I cook a pork tenderloin from frozen?
It’s not recommended to cook a pork tenderloin from frozen. It will take longer to cook and may not cook evenly. It’s best to thaw it in the refrigerator overnight before cooking.
Q: What’s the best way to store pork tenderloin?
Store uncooked pork tenderloin in the refrigerator for up to 3-4 days. Wrap it tightly in plastic wrap or aluminium foil to prevent it from drying out.
Q: Can I freeze pork tenderloin?
Yes, you can freeze pork tenderloin. Wrap it tightly in plastic wrap or aluminium foil, then place it in a freezer-safe bag. It can be frozen for up to 3-4 months.
Part 9: Conclusion: A culinary journey Completed
So there you have it – a comprehensive guide to cooking pork tenderloin in the oven. It’s a journey that starts with choosing the right cut and ends with a beautifully cooked, flavourful roast.
Remember, it’s all about understanding the key elements of time, temperature, and flavour enhancement. With a little practice and a dash of experimentation, you’ll be creating delicious pork tenderloin roasts every time.
Now, go forth and create! I’d love to hear about your culinary adventures and any tips you’ve discovered along the way. Happy cooking!
Everyone is watching

Corn on the Cob: The Ultimate Guide to Perfectly Cooked Ears
Healthy MealsAh, corn on the cob. Just the name evokes images of sunny days, barbecues, and that sweet, juicy flavour that ...

Perfect Pork Roast Oven Cooking Time: A Guide to Delicious Results
Healthy MealsThere's something truly satisfying about a perfectly roasted pork. The aroma alone is enough to make your mout...

Ham Cooking Time: How Long to Bake, Smoke, or Boil a Delicious Ham
Healthy MealsAh, ham. It's a classic, isn't it? A real crowd-pleaser, especially around holidays. And when done right, it'...

Scallops: The Ultimate Guide to Perfect Cooking
Healthy MealsAh, scallops. Those delicate, sweet, and utterly delicious morsels of the sea. They hold a special place in my...

Spaghetti Squash: The Ultimate Guide to Cooking and Serving
Healthy MealsRemember that time you saw spaghetti squash at the supermarket, looking all bumpy and strange, and thought, "W...