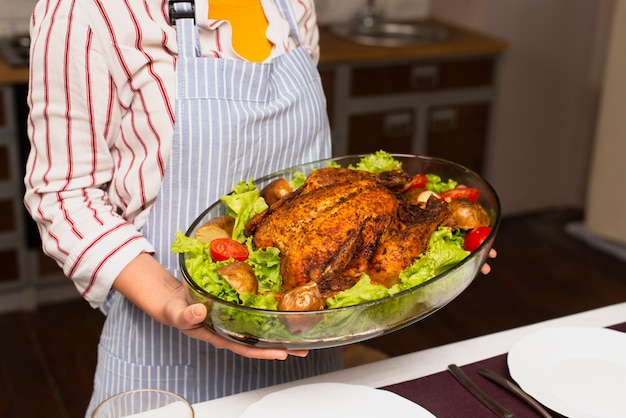
There’s nothing quite like the aroma of a perfectly roasted chicken, its skin crisp and golden, the meat succulent and juicy. But getting it right can be a bit of a culinary dance. You need to consider the size of the bird, the oven temperature, and the crucial factor – cooking time. That's where I come in, ready to guide you through the world of roast chicken cooking times and ensure a flawless roast every time.
I remember the first time I tried roasting a whole chicken. I was a young lad, armed with a recipe from my grandmother’s tattered cookbook. I followed the instructions meticulously, but the result was a dry, overcooked bird. Disheartened, I almost gave up on roasting chickens altogether. However, over the years, I’ve learned a thing or two, and I’m here to share my knowledge, so you don’t have to go through the same ordeal.
Part 1: Weighing In – The Key to Perfect Timing
The first step in mastering roast chicken is understanding that cooking time is directly linked to the weight of the bird. It’s not a one-size-fits-all scenario; a smaller chicken will cook much faster than a larger one. So, before you even think about preheating your oven, grab your trusty kitchen scale and weigh your bird. This is the foundation of your roast chicken success story.
1.1. Understanding the Chicken's Weight
A good rule of thumb is to calculate 20 minutes per 500g (1lb) of chicken. So, a 1.5kg (3.3lb) chicken would need roughly 60 minutes. However, this is just a starting point. You'll need to adjust your cooking time based on other factors, such as:
- Oven Temperature: A higher oven temperature will result in a shorter cooking time. Aim for 180°C (350°F) or 190°C (375°F) for a standard roast. A hotter oven creates a crispier skin, but be mindful of potential scorching.
- Stuffing: A stuffed chicken takes longer to cook through than an unstuffed one. Adding a stuffing, especially one with moist ingredients like bread or rice, will require an extra 15-20 minutes. The stuffing needs to reach a safe internal temperature of 74°C (165°F).
- Type of Chicken: A free-range chicken, with its thicker skin and more muscle, may take a bit longer to cook than a supermarket variety. These birds tend to have a richer flavour, but their denser structure might mean an extra 10-15 minutes of cooking time.
Part 2: Decoding Doneness – Knowing When It's Ready
Knowing when your chicken is perfectly cooked is a crucial part of the roasting process. You don’t want it dry and overcooked, and you certainly don’t want to risk undercooked meat. There are a few tried-and-true methods for assessing doneness, each offering a different approach to ensuring that your roast is ready for the table.
2.1. The Temperature Test - A Reliable Choice
The most reliable method for checking doneness is using a meat thermometer. This handy tool takes the guesswork out of the equation. Insert it into the thickest part of the thigh, making sure not to touch the bone. A temperature of 74°C (165°F) indicates that the chicken is cooked through and safe to eat.
2.2. The Jiggle Test – A Gentle Approach
The “jiggle test” is a classic method that involves gently moving the chicken’s thigh. If it feels firm and the juices run clear, it’s cooked. However, if the thigh feels loose and the juices are pink, it needs more cooking time. This method relies on feel, so it’s best to combine it with visual inspection.
2.3. The Leg Test – A Traditional Check
If you’re not using a thermometer, you can also check the leg joint. Gently twist the leg. If it moves freely and the leg feels loose, the chicken is likely cooked through. This method is more about assessing overall firmness, but it’s best to use it in conjunction with other tests.
Part 3: The Art of Resting – Letting the Juices Redistribute
Once your chicken is cooked to perfection, resist the urge to carve it immediately. It’s essential to let it rest before carving. This might seem like an unnecessary step, but it's crucial for creating a truly succulent and flavorful roast.
3.1. The Importance of Resting
While the chicken is roasting, the juices concentrate in the center of the meat. When you immediately carve the chicken, these juices will run out, leaving you with dry meat. Resting allows these juices to redistribute throughout the meat, resulting in a moister and tastier roast. Think of it as a culinary massage for your chicken, allowing the flavors to settle and deepen.
3.2. How Long to Rest Your Chicken
Aim for at least 10-15 minutes, depending on the size of the chicken. Cover the chicken loosely with foil to keep it warm and prevent it from drying out. While you wait, prepare your side dishes and enjoy the beautiful aroma that fills your kitchen. It’s a moment to appreciate the anticipation building towards your delicious meal.
Part 4: crispy skin Secrets – Achieving Golden Perfection
One of the most satisfying aspects of a roast chicken is the crispy, golden-brown skin. It adds a delightful crunch and a satisfying flavour. But achieving crispy skin requires a bit of effort and attention to detail. Here are my tips for creating that irresistible crust:
4.1. Start with Dry Skin – A Key to Crisping
Before you roast your chicken, pat the skin dry with paper towels. Moist skin will steam instead of crisping up. This is an essential step for creating the perfect crunch. Think of it as giving your chicken a dry-skin facial to prepare for its oven session.
4.2. Season Well – Enhancing Flavor and Texture
Don’t skimp on the seasoning. Salt and pepper are essential, but you can also add herbs, spices, or even a citrus rub to enhance the flavour. A well-seasoned skin not only adds flavour but also helps to create a more appealing golden brown colour.
4.3. High Heat and Space – Allowing for Circulation
Roast your chicken in a hot oven, preferably on a rack, allowing air to circulate around the bird. This helps the skin to crisp up beautifully. The rack elevates the chicken, ensuring even heat distribution and preventing the bottom from becoming soggy. It’s like giving your chicken a prime spot in the oven to bask in the heat.
4.4. Basting – Adding Moisture and Flavor
Basting is the key to achieving truly crispy skin. During the cooking process, pour the accumulated juices over the chicken, ensuring every part gets a good coating. This helps to keep the skin moist and prevent it from drying out, while also adding a layer of flavor. It's like a culinary spa treatment for your chicken, keeping it hydrated and glowing.
Part 5: Stuffing Your Chicken – A Flavorful Enhancement
Stuffing can add an extra dimension of flavour to your roast chicken, but it also adds a layer of complexity to the cooking process. If you’re planning to stuff your chicken, keep these points in mind to ensure a safe and flavorful experience.
5.1. Choose Your Stuffing Carefully – Ensuring Flavor and Compatibility
Use a stuffing recipe that is designed for poultry. Make sure it’s packed loosely to allow for proper cooking. Avoid stuffing that is overly dense or contains a lot of moisture, as this can prevent the stuffing from cooking thoroughly.
5.2. Stuffing Safety – Avoiding foodborne illness
Stuff the chicken just before roasting. Do not stuff it ahead of time, as this can create a breeding ground for bacteria. And remember, the stuffing must reach an internal temperature of 74°C (165°F) to be safe to eat.
5.3. Temperature and Timing – Accounting for the Added Layer
When stuffing a chicken, you need to allow additional time for the stuffing to cook. Add about 15-20 minutes to your regular cooking time. This extra time ensures that the stuffing cooks evenly and reaches a safe internal temperature.
Part 6: Adding Flavor with Aromatics – Enhancing with Natural Goodness
Aromatic vegetables and herbs can transform your roast chicken from ordinary to extraordinary. Try adding a few to the roasting pan to infuse the meat with delicious flavors. It’s like creating a symphony of flavors within your roast.
6.1. Versatile Vegetables – A Flavorful Foundation
Onions, garlic, carrots, and celery are classic choices for roasting with chicken. They release their sweetness and fragrance into the chicken juices, enhancing the flavor of the meat. The combination of these vegetables provides a balanced base that enhances the overall flavor profile.
6.2. Herbs and Spices – Adding a Touch of Fragrance
Rosemary, thyme, sage, and bay leaves are excellent choices for adding a fragrant touch to your roast. These herbs can be tied together with string and placed in the cavity of the chicken or added to the roasting pan. They release their aromas during cooking, infusing the chicken with their distinctive fragrance.
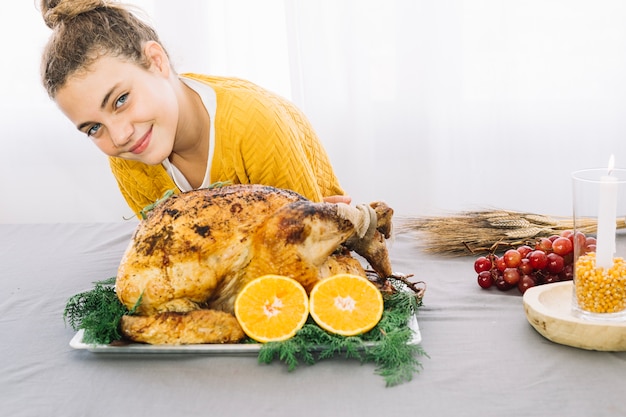
6.3. Citrus Burst – A Bright and Refreshing Element
A few slices of lemon or orange can add a bright and citrusy note to your roast. They also help to keep the meat moist and tender. The acidity of the citrus helps to break down the meat, making it more tender.
Part 7: Variations on the Roast – Experimenting with Flavor
Once you’ve mastered the basics of roasting chicken, you can start to experiment with variations. There are endless possibilities for adding your own personal touch and exploring new flavor combinations.
7.1. Spiced Roast – A Flavorful Kick
Give your roast chicken a kick with a blend of spices. Try a combination of paprika, cumin, chili powder, and garlic powder. This will add a smoky and savory flavour to your bird. The spices can be rubbed on the chicken before roasting or added to the roasting pan for a more subtle flavor.
7.2. Lemon and Herb Roast – A Classic Combination
A classic combination, lemon and herbs are a perfect complement to chicken. Stuff the cavity with lemon slices, fresh herbs, and a few cloves of garlic. The combination of citrus and herbs creates a refreshing and aromatic flavor profile.
7.3. Honey-Glazed Roast – Sweet and Savory Delight
For a sweet and savory glaze, brush your chicken with a mixture of honey, soy sauce, and a touch of ginger. This will create a sticky and caramelized crust. The glaze adds a layer of sweetness and a glossy sheen to the chicken.
Part 8: Leftovers and Recipes – Turning Leftovers into Culinary Treasures
The best part about roast chicken? The delicious leftovers! You can use the roasted chicken in a variety of ways, making it a versatile dish.
8.1. chicken salad – A Classic and Versatile Option
Shred the chicken and combine it with mayonnaise, celery, onion, and your favorite herbs for a classic chicken salad. Serve it on sandwiches, salads, or crackers. This is a simple and satisfying way to use leftover chicken.
8.2. Chicken Soup – A Comforting and Nourishing Meal
Use the roasted chicken bones to make a flavorful and nutritious chicken soup. Simmer the bones in water with vegetables and herbs for a rich and satisfying broth. The bones provide a rich source of collagen and flavor.
8.3. chicken tacos – A Flavorful and Fun Twist
Shred the chicken and use it to make tacos. Top with your favorite toppings, such as salsa, guacamole, and sour cream. This is a quick and easy way to use leftover chicken for a casual meal.
8.4. Chicken Pot Pie – A Comforting and Hearty Dish
Use the roasted chicken to make a comforting chicken pot pie. Combine the chicken with vegetables, gravy, and a flaky pastry crust. This is a hearty and satisfying dish that is perfect for a cold evening.
Part 9: Roast chicken faqs – Addressing Common Questions
Here are some of the frequently asked questions about roast chicken:
9.1. Can I Roast a frozen chicken?
It's not recommended. Frozen chicken needs to be thawed thoroughly before roasting. This ensures even cooking and prevents the chicken from being dry and tough. Thawing a frozen chicken in the refrigerator is the safest and most effective method.
9.2. What Happens If I Overcook My Chicken?
Overcooked chicken will be dry and tough. The meat will lose its moisture and become chewy. It's best to err on the side of undercooking rather than overcooking, as you can always cook it for a few more minutes if needed. Use a meat thermometer to ensure your chicken is cooked to perfection.
9.3. Can I Use a Roasting Bag?
Yes, roasting bags can be a great option for roasting chicken. They help to trap moisture and keep the chicken moist and tender. However, they don’t achieve the same crispy skin as roasting in a traditional oven. Roasting bags are a good option for a quick and easy roast, but if you're looking for crispy skin, a traditional oven is the way to go.
9.4. What Are the Best Side Dishes for Roast Chicken?
There are countless side dishes that pair well with roast chicken. Some classics include roasted vegetables, mashed potatoes, stuffing, green beans, and gravy. These dishes complement the chicken's flavor and create a well-balanced meal.
9.5. Can I Roast a Chicken in a slow cooker?
Yes, you can roast a chicken in a slow cooker. This is a good option for a hands-off approach. However, the chicken won't achieve the same crispy skin as roasting in a conventional oven. Slow cookers are great for creating tender, juicy chicken, but not for achieving that golden-brown crispy skin.
Part 10: Embrace the Roast Chicken Journey – A culinary adventure
Roasting a chicken is a culinary journey that requires patience and practice. It’s not just about following a recipe; it’s about understanding the nuances of cooking time, assessing doneness, and adding your own personal touches. With a little practice and these tips, you’ll be on your way to mastering the art of roast chicken and creating a delicious and satisfying meal for your family and friends.
So, grab your chicken, your trusty kitchen tools, and a dash of culinary adventure. Let’s embark on the journey of creating a perfect roast chicken that will leave everyone asking for seconds.
Everyone is watching

Corn on the Cob: The Ultimate Guide to Perfectly Cooked Ears
Healthy MealsAh, corn on the cob. Just the name evokes images of sunny days, barbecues, and that sweet, juicy flavour that ...

Perfect Pork Roast Oven Cooking Time: A Guide to Delicious Results
Healthy MealsThere's something truly satisfying about a perfectly roasted pork. The aroma alone is enough to make your mout...

Scallops: The Ultimate Guide to Perfect Cooking
Healthy MealsAh, scallops. Those delicate, sweet, and utterly delicious morsels of the sea. They hold a special place in my...

Ham Cooking Time: How Long to Bake, Smoke, or Boil a Delicious Ham
Healthy MealsAh, ham. It's a classic, isn't it? A real crowd-pleaser, especially around holidays. And when done right, it'...

Spaghetti Squash: The Ultimate Guide to Cooking and Serving
Healthy MealsRemember that time you saw spaghetti squash at the supermarket, looking all bumpy and strange, and thought, "W...