Ah, the humble turkey. A symbol of festive gatherings, family feasts, and, for some, a bit of culinary anxiety. But fear not, fellow cooks! As a seasoned home chef who's tackled more turkeys than I can count, I'm here to guide you through the process, sharing my tips and tricks to help you achieve a golden-brown, juicy, and succulent turkey that will have everyone singing your praises.
So, grab your apron, gather your ingredients, and let's embark on this culinary journey together. We'll dive into the secrets of roasting a stuffed turkey, exploring everything from choosing the right bird to nailing the perfect cooking time, and everything in between.
Part 1: Choosing the Right Turkey
Before you even think about turning on the oven, you need to select the perfect turkey, the foundation of your feast. Think of it like choosing the right canvas for a masterpiece.
1. Size Matters: A Bird for Your Crowd
First things first, consider the size of your turkey. A good rule of thumb is to allow about 1 pound of turkey per person. So, for a family of six, you'd probably want a turkey between 12 and 16 pounds. For a larger gathering, you'll need to scale up accordingly. If you're a bit uncertain, it's always better to err on the side of a slightly larger bird, especially if you enjoy having leftovers.
2. Fresh or Frozen: A Matter of Preference
Now, the big question: fresh or frozen? Personally, I prefer fresh turkeys. They tend to have a better flavour and texture, and they're generally easier to work with. Plus, let's face it, there's something satisfying about picking out a fresh bird from the butcher's counter. But if you're buying frozen, make sure you give it plenty of time to thaw in the fridge. A large turkey can take a few days to thaw completely, so plan ahead!
3. The Bird’s Appearance: A Visual Inspection
Once you've picked your turkey, give it a good look-over. You want a bird that looks plump and healthy, with smooth skin and no signs of bruising or discoloration. It should feel firm and have a pleasant aroma. If you see any signs of spoilage, don't hesitate to choose another one. A healthy turkey is essential for a delicious roast.
Part 2: Preparing the Turkey: A Symphony of Flavors
Now that you've got your perfect bird, it's time to prepare it for roasting. This step might seem simple, but it's essential for achieving a succulent and flavorful turkey.
1. Pat It Dry: A Crisp Skin Essential
First things first, pat the turkey dry with paper towels. This helps to ensure that the skin gets nice and crispy, creating that irresistible golden-brown crust. You can also use a hairdryer on a low setting to speed up the drying process. It may sound strange, but it really does work!
2. Brining: A Secret Weapon for Juiciness
Now, here's where things get interesting. You can either brine your turkey or not. Brining involves soaking the turkey in a salt solution for a few hours or overnight. This helps to season the meat, retain moisture, and create a juicier turkey. I highly recommend it, especially for larger turkeys. However, if you're short on time, you can skip this step. But, trust me, brining makes a noticeable difference.
Here's a simple brine recipe:
Ingredients:
- 1 gallon of cold water
- 1 cup of kosher salt
- 1/2 cup of brown sugar
- 1 tablespoon of black peppercorns
- 1 bay leaf
- 1/2 teaspoon of dried thyme
- 1/4 cup of fresh lemon juice
Instructions:
- Combine all ingredients in a large container and stir until the salt and sugar dissolve.
- Add the turkey to the brine, making sure it's completely submerged.
- Cover and refrigerate for 4-6 hours or overnight.
- Remove the turkey from the brine and pat dry before roasting.
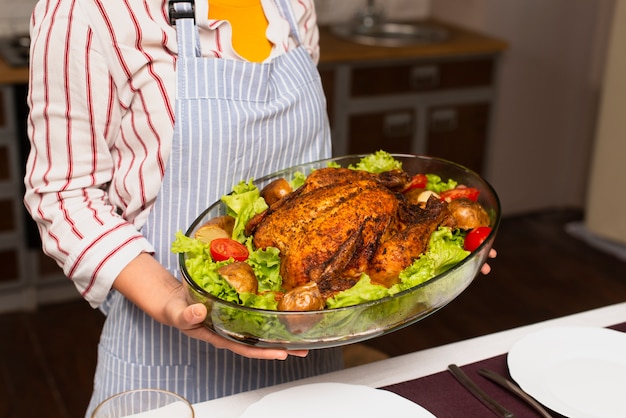
3. Stuffing: A Delicious Dilemma
This is where the real debate begins. Should you stuff your turkey? It's a matter of personal preference. I love the flavor and aroma of a stuffed turkey, but it's important to do it right. If you're going to stuff it, make sure you do it just before roasting and that the stuffing cooks properly. The stuffing should reach an internal temperature of 165°F (74°C) to ensure it's cooked through.
Alternatively, you can cook the stuffing separately in a casserole dish. This ensures the stuffing cooks evenly and eliminates the risk of undercooked stuffing.
4. The Art of Butter: A Touch of Richness
Now, for a little touch of magic, butter your turkey! Use softened butter and rub it all over the skin, especially under the wings and around the legs. This helps to create that beautiful golden-brown colour and adds a lovely richness to the flavour. Don't forget to season generously with salt and pepper.
Part 3: Roasting Your Turkey: A Symphony of Heat and Flavor
Finally, the moment you've been waiting for: roasting your turkey. This is where the magic really happens, transforming your humble bird into a masterpiece.
1. The Oven is Your Canvas: The Right Temperature
Preheat your oven to 325°F (165°C). I find that this temperature is perfect for achieving a golden-brown, evenly cooked turkey.
2. Choosing Your roasting pan: A Sturdy Support
You'll need a roasting pan big enough to hold your turkey comfortably. You can use a standard roasting pan or a more elaborate one with a rack. The rack helps to ensure that air circulates around the turkey, promoting even cooking.
3. The Positioning Game: Center Stage for Your Turkey
Place the turkey in the roasting pan, breast side up, making sure it's sitting in the center. If you're stuffing the turkey, make sure the stuffing is packed loosely and evenly distributed.
4. The Basting Ritual: Keeping Things Moist and Flavorful
As your turkey roasts, you'll want to baste it regularly. This helps to keep the skin moist and adds extra flavor. You can baste every 30 minutes or so, ensuring the turkey is evenly cooked. Use the turkey's juices or a mixture of butter and broth for basting.
5. Checking for Doneness: A Culinary Thermometer's Role
Now, here comes the crucial part: checking for doneness. The most reliable way to determine if your turkey is cooked through is to use a meat thermometer. Insert the thermometer into the thickest part of the thigh, making sure it doesn't touch any bone. The turkey is cooked when the internal temperature reaches 165°F (74°C).
6. Timing is Everything: A Guide to Roast Times
Here’s a general guideline for roasting times, keeping in mind that these are estimates and can vary slightly depending on your oven:
| turkey weight (lbs) | Roast Time (hrs) |
|---|---|
| 10-12 | 2.5-3.0 |
| 12-14 | 3.0-3.5 |
| 14-16 | 3.5-4.0 |
| 16-18 | 4.0-4.5 |
Remember, always check the internal temperature to ensure your turkey is cooked through.
Part 4: The Resting Process: Letting the Juices Redistribute
Once your turkey is cooked, it's important to let it rest before carving. Allow the turkey to rest for at least 15 minutes, covered with foil. This allows the juices to redistribute, resulting in a juicier, more flavorful turkey. Patience is key here!
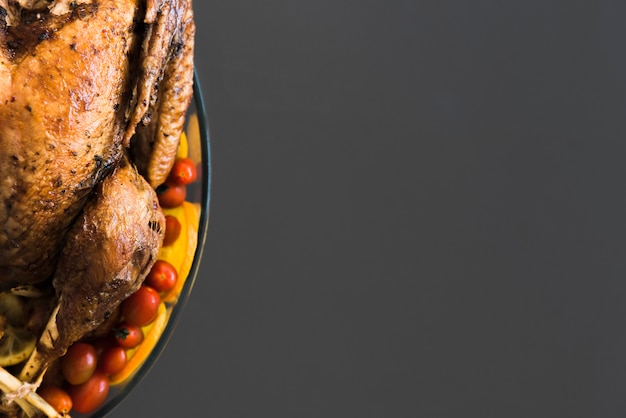
Part 5: Carving the Turkey: A Skillful Slice
After the resting period, it's time to carve the turkey. Use a sharp carving knife for this task.
1. The Breast: A Gentle Approach
Begin by carving the breast meat. Carefully slice the breast meat into thin slices, making sure to avoid cutting through the skin. The breast meat should be tender and juicy.
2. The Legs and Thighs: A Bit More Effort
Next, remove the legs and thighs from the turkey. Separate the legs and thighs from the bone, and then carve the meat into bite-sized pieces. The legs and thighs are often more flavorful than the breast meat.
3. The Wings: A Delectable Addition
Finally, remove the wings. You can carve the meat from the wings or simply serve them whole. The wings are great for snacking on or adding to a soup.
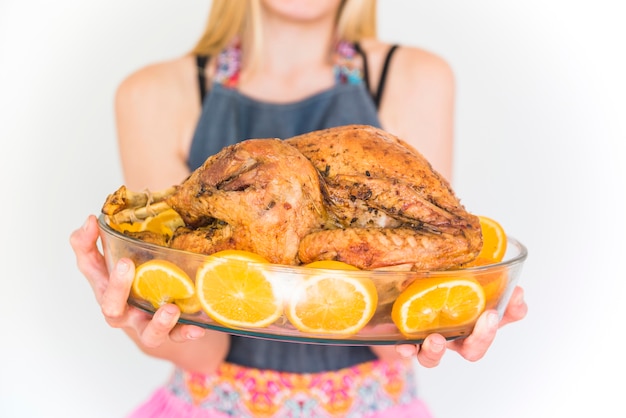
Part 6: Serving Your Turkey: A Feast for the Senses
Now, it’s time to serve your masterpiece! Arrange the carved turkey on a platter and serve with your favorite side dishes. I love a classic combination of mashed potatoes, gravy, stuffing, and cranberry sauce. But the possibilities are endless!
Part 7: Leftovers: A Feast Continues
Have a feast, enjoy the moment, and embrace the leftovers! You can use the leftover turkey to create a variety of dishes, like turkey sandwiches, turkey salad, or turkey soup. I find that the flavors of the turkey are even more intense the next day.
Part 8: Tips and Tricks: A culinary arsenal
Here are some additional tips and tricks for roasting a stuffed turkey:
1. Don’t Overcrowd the Oven: Space for Even Cooking
If you're roasting other dishes alongside your turkey, make sure you give it enough space in the oven. A crowded oven can hinder the airflow and cause the turkey to cook unevenly.
2. The Power of Moisture: Keeping Things Tender
To keep your turkey moist, you can use a roasting rack or place the turkey on a bed of vegetables like onions, carrots, and celery. These vegetables will release moisture as they cook, keeping the turkey moist.
3. Gravy: A Must-Have Companion
Gravy is essential for any turkey dinner. You can make gravy from the turkey drippings or use a homemade or store-bought gravy. Gravy adds richness and flavor to your meal.
Part 9: FAQs: Answers to Your Burning Questions
Here are some frequently asked questions about roasting a stuffed turkey:
1. How long do I roast a stuffed turkey?
The roasting time for a stuffed turkey depends on its size. A general rule of thumb is to allow 15 minutes per pound of turkey. For example, a 12-pound turkey would need to be roasted for about 3 hours. You can always check the internal temperature to be sure it's cooked through.
2. Can I stuff the turkey the night before?
While you can stuff the turkey the night before, it's not ideal. The stuffing may become dry and the turkey may not cook evenly. It’s best to stuff the turkey right before roasting.
3. How do I know if the turkey is cooked through?
The best way to determine if your turkey is cooked through is to use a meat thermometer. The internal temperature should reach 165°F (74°C). If you don’t have a thermometer, you can check the turkey’s juices. They should run clear, not pink.
4. What can I do if the skin is too pale?
If the skin is too pale, you can try browning it under the broiler for a few minutes. Just keep a close eye on it, as it can burn easily.
5. Can I freeze a roasted turkey?
Yes, you can freeze a roasted turkey for up to 2 months. Just make sure to wrap it tightly in plastic wrap and then foil. Thaw the turkey in the refrigerator for 2-3 days before reheating.
Part 10: A Culinary Triumph: Celebrate Your Success
So there you have it! Roasting a stuffed turkey is a culinary adventure that may seem daunting at first, but with the right approach, it can be an absolute triumph. Remember, it’s not about being perfect. It’s about creating a delicious meal that you and your loved ones can enjoy. And let’s be honest, even if it isn’t perfectly cooked, it’ll still taste amazing with a healthy dose of good company and festive cheer.
Now, go forth and conquer that turkey! Happy roasting!
Everyone is watching

Corn on the Cob: The Ultimate Guide to Perfectly Cooked Ears
Healthy MealsAh, corn on the cob. Just the name evokes images of sunny days, barbecues, and that sweet, juicy flavour that ...
Perfect Pork Roast Oven Cooking Time: A Guide to Delicious Results
Healthy MealsThere's something truly satisfying about a perfectly roasted pork. The aroma alone is enough to make your mout...
Scallops: The Ultimate Guide to Perfect Cooking
Healthy MealsAh, scallops. Those delicate, sweet, and utterly delicious morsels of the sea. They hold a special place in my...
Ham Cooking Time: How Long to Bake, Smoke, or Boil a Delicious Ham
Healthy MealsAh, ham. It's a classic, isn't it? A real crowd-pleaser, especially around holidays. And when done right, it'...
Spaghetti Squash: The Ultimate Guide to Cooking and Serving
Healthy MealsRemember that time you saw spaghetti squash at the supermarket, looking all bumpy and strange, and thought, "W...