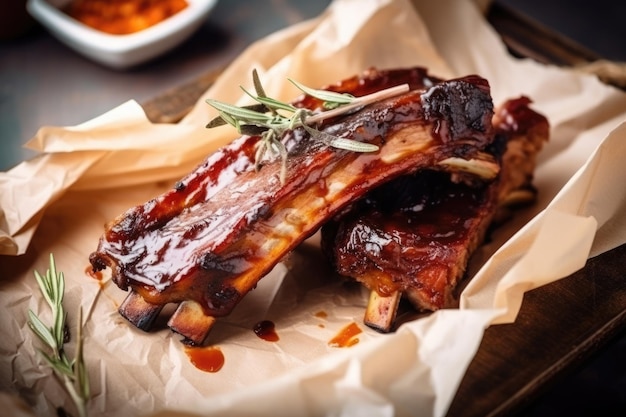
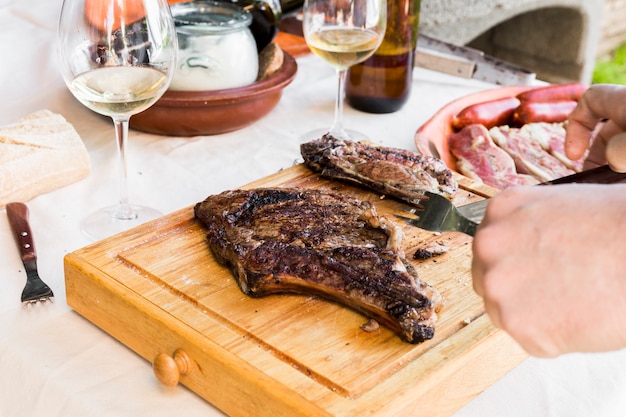
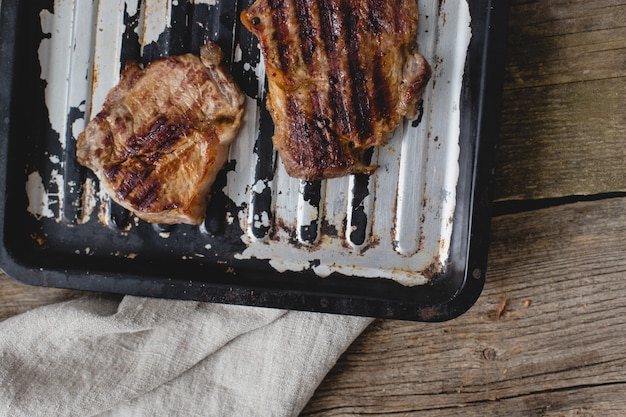
Ah, prime rib. Just the name conjures up images of a grand feast, a celebratory meal, a gathering of friends and family around a table laden with deliciousness. It's the kind of dish that makes you feel like a master chef, even if you're just winging it. And a 10lb prime rib? That's a serious statement piece, a testament to your culinary prowess and your commitment to making a truly memorable meal.
Now, I'm not going to lie, cooking a 10lb prime rib isn't exactly a walk in the park. It's a bit like handling a wild beast, a magnificent creature that needs to be tamed with patience and skill. But with the right guidance and a bit of confidence, you can achieve a level of deliciousness that will have your guests begging for seconds (and maybe even thirds!). So, let's dive in, shall we?
Part 1: Knowing Your Prime Rib

Before we even think about turning on the oven, let's get acquainted with our star ingredient. Understanding the basics of prime rib will give you the confidence to navigate the cooking process and ultimately create a masterpiece.
Prime Cuts: The Basics of a Prime rib roast
Prime rib, also known as standing rib roast, is a cut of beef taken from the rib section of the animal. It's a cut of meat that's inherently flavorful and tender, thanks to the marbling – those beautiful streaks of fat that run throughout the meat. This marbling is what gives prime rib its rich, juicy, and melt-in-your-mouth texture.
You'll often see prime rib roasts sold bone-in, which adds to the flavor and visual appeal. The bone acts as a conductor of heat, helping to cook the meat evenly. It also adds a delicious depth of flavor to the roast.
Decoding the Grades: Understanding Prime Rib Quality
Prime rib is graded by the USDA, which helps to ensure consistent quality. Here's a quick breakdown of the grades:
- Select: This is the most lean grade, but it may lack the rich flavor and tenderness of other grades.
- Choice: This is a popular choice, offering a good balance of leanness and marbling. It's a great option for a prime rib roast.
- Prime: This is the highest grade, with the most marbling and rich flavor. It's a splurge but worth it for a special occasion.
The Importance of Choosing a Good Butcher
Let's face it, finding the right butcher can be a game-changer. A good butcher will understand your needs and can guide you to the perfect cut of prime rib for your meal. They can even help you trim the roast, remove the silver skin, and tie it for even cooking. Don't be afraid to ask for their advice; they're the experts!
Part 2: The Pre-Roast Ritual

Right, now that we've chosen our prime rib, it's time to prepare it for its grand entrance into the oven. This stage is all about setting the stage for a truly amazing culinary experience.
Seasoning: The Simple Art of Enhancing Flavor
Prime rib is a star player, but even a star needs a little help from its supporting cast. Seasoning is key, and it doesn't have to be complicated. In fact, simplicity is often the key to success.
I'm a firm believer in the power of a simple salt and pepper rub. Use kosher salt for its larger crystals that cling to the meat better. And don't be afraid to go heavy-handed with the salt. It's a crucial element in bringing out the natural flavors of the meat.
For those who want a little more oomph, you can add other herbs and spices to your rub. Dried rosemary, thyme, garlic powder, or a touch of paprika can add another layer of flavor.
Resting: The Secret to Juicy Tenderness
After you've seasoned your prime rib, let it rest at room temperature for about 30 minutes before roasting. This allows the meat to come to room temperature, which helps it cook more evenly. Plus, it helps to ensure that the center of the roast doesn't get too cold when it goes into the oven.
Part 3: The Roasting Process

Now comes the moment of truth. It's time to get that prime rib into the oven and let the magic happen. This is where patience and a few key techniques come into play.
The Oven: A Culinary Stage for Prime Rib
We're going to be using a traditional oven to roast our prime rib. A 10lb prime rib is going to take a few hours to cook, so we need to create the perfect environment for it to reach its full potential.
The key is to start with a high temperature to create a beautiful crust on the outside. Then, we'll lower the temperature to ensure even cooking throughout.
Temperature: The Guiding Force
Now, I know temperatures can be a bit of a science, but trust me, it's not as complicated as it sounds. You'll need a meat thermometer – it's your trusted companion throughout this culinary journey.
For a 10lb prime rib, here's how to approach the roasting process:
1. Preheat the Oven: Set your oven to 450°F (232°C). Place the roast in a roasting pan, fat side up.
2. The Searing Stage: Roast for 15 minutes to create a beautiful, crispy crust on the outside. This step is crucial for both flavor and appearance.
3. Lowering the Heat: Reduce the oven temperature to 325°F (163°C). Continue roasting for about 2-2.5 hours, or until the internal temperature reaches your desired level of doneness.
4. Temperature Check: Use your meat thermometer to check the internal temperature every 30 minutes. Make sure to insert it into the thickest part of the roast, avoiding the bone.
Target Temperatures:
Here's a handy table to help you determine the internal temperature for your desired level of doneness:
| Level of Doneness | Internal Temperature (°F) | Internal Temperature (°C) |
|---|---|---|
| Rare | 125-130 | 52-54 |
| Medium-Rare | 135-140 | 57-60 |
| Medium | 145-150 | 63-66 |
| Medium-Well | 155-160 | 68-71 |
| Well-Done | 160+ | 71+ |
Basting: Adding Moisture and Flavor
Okay, now for a little secret that can really elevate your prime rib. Basting! It's a simple technique, but it makes a world of difference. Basting helps to keep the meat moist and adds a layer of flavor.
As the prime rib roasts, use a basting brush to periodically brush the meat with the pan drippings. You can also use a mixture of melted butter and herbs for added flavor.
Part 4: The Final Touches
We're almost there! The prime rib is nearing its culinary destiny. Just a few more steps, and we'll be ready to feast.
Resting: Letting the Juices Redistribute
Once the prime rib has reached your desired internal temperature, it's time for a crucial step: resting. This allows the juices to redistribute throughout the meat, ensuring a juicy and tender prime rib.
Remove the roast from the oven and let it rest on a cutting board, loosely covered with foil, for 15-20 minutes before carving.
Carving: The Art of Cutting a Prime Rib
Carving a prime rib is a satisfying experience. Here's a quick guide:
- Remove the Bone: If your roast is bone-in, use a carving knife to carefully remove the bone.
- Slice Against the Grain: Slice the roast against the grain, which means cutting across the muscle fibers. This will result in more tender slices.
- Arrange the Slices: Arrange the slices on a platter, and you're ready to serve!
Gravy: The perfect prime rib Companion
No prime rib feast is complete without a delicious gravy. It's a classic pairing that elevates the entire meal.
Here's a simple recipe for a prime rib gravy:
Simple Prime Rib Gravy
- After you remove the roast from the oven, pour off any excess fat from the roasting pan.
- Place the pan over medium heat and add a tablespoon of flour to the pan drippings. Cook the flour for a minute or two, stirring constantly.
- Gradually whisk in about 1 cup of beef stock or water.
- Bring the gravy to a boil, then reduce the heat and simmer for 5 minutes, stirring occasionally.
- Season the gravy with salt and pepper to taste.
Part 5: The Grand Feast
The moment has arrived! It's time to gather your loved ones around the table for a prime rib feast to remember.
side dishes: Complementary Flavors
Prime rib is a classic dish that pairs well with a variety of side dishes. Here are a few ideas to complete your menu:
- Roasted Potatoes: The classic pairing for prime rib.
- Creamed Spinach: A creamy and elegant side dish.
- Asparagus: A light and refreshing vegetable option.
- mashed potatoes: A comforting and creamy side.
- green bean casserole: A classic side dish that adds a touch of nostalgia.
- Garlic Bread: A simple and delicious way to soak up all the juices from the prime rib.
Serving with Style: Creating a Memorable Presentation
When presenting your prime rib, it's all about visual appeal. Carve the roast neatly and arrange the slices artfully on a platter. Add some sprigs of rosemary or thyme for a touch of elegance. Don't forget to serve the gravy in a gravy boat for easy pouring.
The Feast Begins: Enjoy the Fruits of Your Labor
And finally, the moment of truth. Dig in! Enjoy the fruits of your labor and bask in the compliments.
Part 6: FAQs
I know what you're thinking. You've got questions! Let's tackle some of the most common ones.
1. Can I Cook Prime Rib Ahead of Time?
You bet! cooking prime rib ahead of time is a great option for busy schedules. Just follow the same steps as above, but allow the roast to cool completely before storing it in the refrigerator for up to 3 days. When you're ready to serve, reheat the roast in a preheated oven at 325°F (163°C) for about 30-45 minutes. Let it rest for 15-20 minutes before carving.
2. What Temperature Should I Cook My Prime Rib?
The temperature you choose depends on your personal preference for doneness. Refer to the table in Part 3 to guide you on the recommended internal temperatures for different levels of doneness.
3. Can I Cook a Prime Rib in a slow cooker?
You can technically cook prime rib in a slow cooker, but it's not the ideal method. Slow cookers tend to break down the meat too much, resulting in a mushy texture. For a more tender and flavorful result, stick to the traditional oven method.
4. How Do I Make Prime Rib Gravy?
The simple gravy recipe in Part 4 is a great starting point. You can also experiment with different ingredients to add your own personal touch. For example, you can add a tablespoon of red wine to the pan drippings for a richer flavor.
5. Can I Freeze Prime Rib?
Yes, you can freeze prime rib for up to 3 months. Wrap it tightly in plastic wrap and then in aluminum foil. To thaw it, place it in the refrigerator for 2-3 days, or thaw it in a cold water bath, making sure to change the water every 30 minutes. Cook the thawed roast within 2-3 days.
Part 7: A Culinary Journey for the Ages
So there you have it, your guide to cooking a magnificent 10lb prime rib roast. Remember, the key is to have confidence, follow the steps, and enjoy the process. It's a culinary journey that will create memories to last a lifetime. Now, go forth and conquer. Your guests will thank you.
And if you're looking for a delicious way to use any leftovers, try making some prime rib sandwiches or a hearty prime rib soup.
Happy cooking, and happy feasting!
Everyone is watching

Corn on the Cob: The Ultimate Guide to Perfectly Cooked Ears
Healthy MealsAh, corn on the cob. Just the name evokes images of sunny days, barbecues, and that sweet, juicy flavour that ...

Perfect Pork Roast Oven Cooking Time: A Guide to Delicious Results
Healthy MealsThere's something truly satisfying about a perfectly roasted pork. The aroma alone is enough to make your mout...

Ham Cooking Time: How Long to Bake, Smoke, or Boil a Delicious Ham
Healthy MealsAh, ham. It's a classic, isn't it? A real crowd-pleaser, especially around holidays. And when done right, it'...

Scallops: The Ultimate Guide to Perfect Cooking
Healthy MealsAh, scallops. Those delicate, sweet, and utterly delicious morsels of the sea. They hold a special place in my...

Spaghetti Squash: The Ultimate Guide to Cooking and Serving
Healthy MealsRemember that time you saw spaghetti squash at the supermarket, looking all bumpy and strange, and thought, "W...
