prime rib. The mere mention of those words conjures up images of a succulent, beautifully-browned roast, radiating warmth and promise of a truly special meal. It's the king of roasts, the centerpiece of countless celebratory dinners, and frankly, the only way to properly celebrate a Sunday roast. But let's be real – cooking prime rib can feel a little intimidating. You've got this gorgeous cut of meat, those high expectations, and you want to nail it. Fear not, my friends! I've been on this prime rib journey for years, experimenting with different techniques, and I'm here to share my tried and tested tips to guarantee your next roast is a triumph. Ready to become a prime rib master? Let's dive in!
Part 1: choosing the right cut
The Prime Rib Cut: A Matter of Preference and Practicality
First things first, let's choose our weapon. When it comes to prime rib, you've got a few options, each with its own unique charm. The most common, and for good reason, is the standing rib roast. This is the showstopper, a whole rib roast typically boasting 3-7 bones, giving it a dramatic presence. You can also opt for bone-in rib roasts, which are essentially sections of the standing rib, usually featuring 2-3 bones. Then there's the boneless rib roast, a less dramatic but equally delicious choice.
Personally, I'm a sucker for the standing rib roast. It's got that wow factor, and those bones add an incredible depth of flavor and moisture to the meat. But, if you're cooking for a smaller group or prefer a less intimidating cut, a bone-in or boneless roast will do just fine. The decision comes down to your personal preference and the type of experience you're aiming for.
How Much Prime Rib Do I Need? A Guide to Feeding Your Crew
Now, let's talk numbers. How much prime rib do you need? That all depends on how many hungry mouths you need to feed! A good rule of thumb is to figure about 1 pound of prime rib per person if you're serving it as the main course. So, for a family of four, a 4-pound roast would be perfect. If you're hosting a larger gathering, adjust accordingly. And remember, a little extra prime rib is never a bad thing!
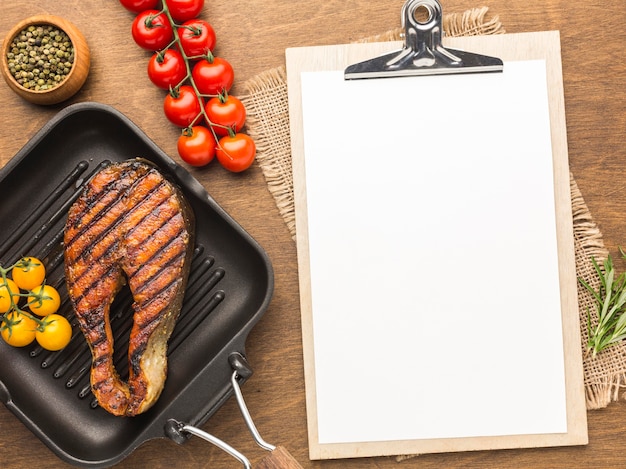
The Look and Feel of a Quality Cut: Picking the Right Roast
Once you've settled on your cut, it's time to choose the star of the show. Look for a roast with good marbling, meaning a pleasing balance of fat and lean meat. The fat will melt during cooking, keeping the meat juicy and incredibly flavorful. The color should be a rich, deep red, and the surface should feel firm and springy to the touch, indicating fresh and quality meat.
Part 2: Preparing the Prime Rib: Setting the Stage for Success
Seasoning Like a Pro: Keeping it Simple, Making it Delicious
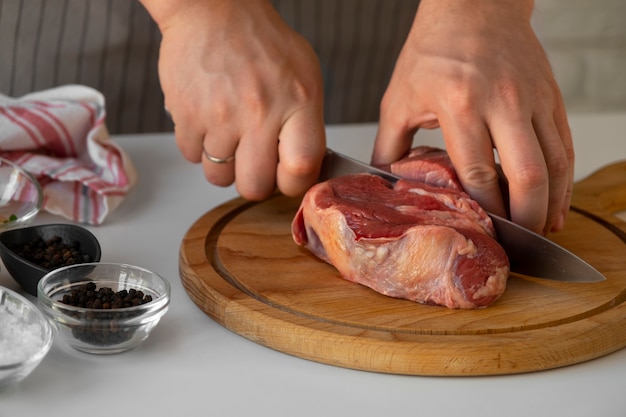
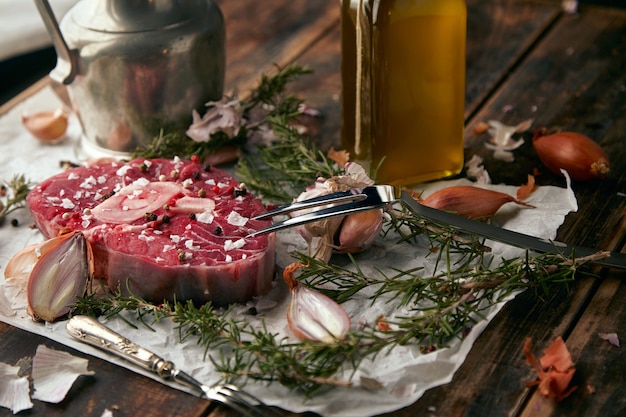
Alright, you've got your prime rib, it's time to get seasoning. Now, this is where I get a little bit picky. I like to keep it simple – salt and pepper. That's it. Generous amounts of both! And don't be shy with the pepper; I love a good, bold black pepper crust. However, if you're feeling adventurous, there's a whole world of herbs and spices you can explore to enhance the flavors of your prime rib.
I've dabbled in various rubs, and some of my favorites include rosemary and garlic, onion powder and paprika, and even a touch of mustard powder. But I always find myself coming back to good old salt and pepper. It's classic for a reason – it lets the beautiful flavor of the prime rib shine through.
Bringing the Roast to Room Temperature: A Crucial Step for Even Cooking
Before you even think about turning on the oven, let your prime rib sit out on the counter for at least 30 minutes, ideally an hour. This crucial step allows the roast to come up to room temperature, which is essential for even cooking. You don't want to throw a cold roast into a hot oven! It will lead to uneven cooking and a less-than-ideal result, leaving you with a dry and disappointing meal.
The Art of Roasting: Choosing Your Weapon
Now, we're getting into the fun part! There are two main methods for roasting prime rib: conventional roasting and reverse searing. Each method has its own advantages, so let's break them down.
Part 3: Roasting Prime Rib: Conventional vs. Reverse Sear
Conventional Roasting: A Classic Approach to Prime Rib
Conventional roasting is the classic, tried-and-true method. You simply place your prime rib in a preheated oven and cook it until it reaches your desired level of doneness. This method is relatively straightforward and works well for any prime rib cut. It's a great option if you're new to prime rib cooking or want a foolproof way to achieve a delicious result.
Reverse Sear: The Science of Perfection for the Ultimate Prime Rib
Now, the reverse sear method is a little more advanced, but it's well worth the extra effort for those who want to take their prime rib game to the next level. The magic of this method lies in a slow and low cook, followed by a high-heat sear. You cook the roast at a low temperature for a long time, allowing it to become incredibly tender, and then sear it at a high temperature to create a beautiful, crispy crust. This method is particularly great for large roasts, and it consistently produces incredibly tender, juicy, and flavorful meat.
Part 4: Conventional roasting guide
Setting the Stage for a Perfect Roast
First things first, preheat your oven to 450°F (230°C). This high initial heat is key to achieving that crispy, delicious crust. Place your prime rib on a roasting rack in a large roasting pan. This will allow the hot air to circulate around the roast, ensuring even cooking. Don't forget to insert your meat thermometer into the thickest part of the roast, making sure it doesn't touch bone. It's essential to keep an eye on the temperature to ensure you achieve your desired doneness.
Searing the Roast: The First Step to Flavor and Texture
We're going to start by searing the roast on all sides. This step is crucial for creating that beautiful, crispy crust and locking in the juices. Place the roast in the preheated oven and sear for 15 minutes. Then, lower the temperature to 325°F (160°C). This initial burst of heat will create a flavorful crust, while the lower temperature will allow the roast to cook evenly and reach the desired internal temperature.
Roasting to Perfection: Timing and Doneness Guide
Now, let's talk cooking times. Remember, these are just guidelines, as the size and thickness of your roast will impact the cooking time. For a 3-4 pound roast, expect about 1 hour and 15 minutes to 1 hour and 30 minutes for medium-rare. For larger roasts, you'll need to add additional time. It's best to use a meat thermometer to check the internal temperature of your roast, as this is the most reliable way to determine doneness.
Here's a handy guide to internal temperatures for prime rib:
| Doneness | Internal Temperature |
|---|---|
| Rare | 125°F (52°C) |
| Medium-rare | 130°F (54°C) |
| Medium | 140°F (60°C) |
| Medium-well | 150°F (66°C) |
| Well-done | 160°F (71°C) |
Once your prime rib has reached your desired internal temperature, remove it from the oven and let it rest for 15-20 minutes before carving. This resting time will allow the juices to redistribute, resulting in a much juicier and more flavorful roast.
Part 5: Reverse Sear Roasting Guide
Slow and Low for Ultimate Tenderness: The Art of the Reverse Sear
The reverse sear method starts with a slow and low cook, where the roast is gently brought to a temperature close to the desired final temperature, ensuring even cooking and incredible tenderness. Preheat your oven to 250°F (120°C) and place your prime rib on a roasting rack in a large roasting pan. You can add some aromatics to the pan, like onions, carrots, and garlic, if you like, to infuse the roast with a beautiful depth of flavor.
The goal is to cook the roast until it reaches a temperature about 15 degrees below your desired final temperature. For medium-rare, that would be 115°F (46°C). This typically takes about 2-3 hours for a 3-4 pound roast, and you'll need to add time for larger roasts. Patience is key here, as the slow cooking process will ensure the prime rib is incredibly tender and juicy.
Time for the Big Finish: The High-Heat Sear
Once the roast has reached its target temperature, remove it from the oven and let it rest for 30 minutes. During this time, preheat your oven to high heat, around 500°F (260°C). This is where the magic happens! While the oven is preheating, pat your roast dry with paper towels and generously salt and pepper it. Place the roast back in the oven and sear it for 10-15 minutes, until it's beautifully browned and crispy on all sides. You want that caramelized crust!
Remove the roast from the oven and let it rest again for 10-15 minutes before carving. This final resting period will allow the juices to redistribute throughout the roast, creating an incredibly flavorful and tender result.
Part 6: The Art of Resting and Carving
The Importance of Resting: A Crucial Step for Juiciness and Flavor
Resting is crucial, my friends. It allows the juices to redistribute throughout the roast, resulting in a much more tender and juicy cut of meat. I know, it's hard to wait! But trust me, it's worth it. That 15-20 minutes of patience will be rewarded with a roast that is bursting with flavor and melts in your mouth.
Carving with Confidence: The Final Act of a Prime Rib Master
After the roast has rested, it's time for the grand finale: carving. Use a sharp carving knife, cut against the grain, and slice the meat into even portions. It's always a good idea to practice carving a few times before the big event. And don't be afraid to ask for help if you need it.
Part 7: Serving and Enjoying Your Prime Rib Masterpiece
The Finishing Touches: Elevating Your Prime Rib Feast
Now that your prime rib is carved, it's time to serve it up. I love to serve it with a simple salad, roasted vegetables, and a good Yorkshire pudding. These classic sides complement the rich flavor of the prime rib beautifully. But feel free to get creative and pair it with whatever your heart desires. This is your moment to shine, to personalize your prime rib feast and create a memorable experience for your guests.
The Moment of Truth: Savoring Your Prime Rib Triumph
Finally, it's time to enjoy your masterpiece. Take a moment to admire the beautiful, rosy slices of prime rib, the perfectly crisp crust, and the aroma that fills your kitchen. This is what makes all the effort worth it – the satisfaction of creating a truly unforgettable feast.
So, there you have it. My guide to cooking the perfect prime rib. It's a bit of an adventure, but with a little practice and patience, you can become a prime rib master. Go on, unleash your inner chef and impress your loved ones with a truly unforgettable feast.
Part 8: prime rib faqs
Here are some of the most frequently asked questions about prime rib cooking, along with my expert advice:
1. What if my prime rib is too big for my oven?
Don't worry, this is a common problem! You can try to cook it in two stages. Roast the prime rib on a lower rack for a shorter amount of time, then move it to a higher rack for the final sear. You can also use a dutch oven or a roasting pan with a rack that fits inside your oven. Just make sure there's enough space for the hot air to circulate around the roast.
2. What if my prime rib is dry?
A dry prime rib is a culinary tragedy. If you find your prime rib is dry, try to avoid overcooking it. And remember, rest it properly to allow the juices to redistribute. You can also make a pan sauce with the drippings to add moisture and flavor.
3. Can I use a different type of meat for the reverse sear method?
Absolutely! The reverse sear method works beautifully with other cuts of meat, like steaks, pork chops, and even chicken. Just adjust the cooking time and temperature accordingly. This technique is all about gentle cooking followed by a high-heat sear to create a perfectly cooked and flavorful meal.
4. What if my roast isn't cooked evenly?
Uneven cooking is a common issue, especially with larger roasts. Use a meat thermometer to check the internal temperature in multiple places. If the temperature is uneven, you may need to cook the roast for a longer time. And make sure the roast is positioned in the oven in a way that allows for even heat distribution.
5. Can I freeze prime rib?
Yes, you can! Freeze prime rib for up to 3 months. To freeze, wrap the roast tightly in plastic wrap and then in aluminum foil. This will help prevent freezer burn and maintain the quality of the meat. Thaw the roast in the refrigerator for 2-3 days before cooking. Allow ample time for the roast to thaw completely before cooking to ensure even cooking and optimal results.
Everyone is watching

Corn on the Cob: The Ultimate Guide to Perfectly Cooked Ears
Healthy MealsAh, corn on the cob. Just the name evokes images of sunny days, barbecues, and that sweet, juicy flavour that ...

Perfect Pork Roast Oven Cooking Time: A Guide to Delicious Results
Healthy MealsThere's something truly satisfying about a perfectly roasted pork. The aroma alone is enough to make your mout...

Ham Cooking Time: How Long to Bake, Smoke, or Boil a Delicious Ham
Healthy MealsAh, ham. It's a classic, isn't it? A real crowd-pleaser, especially around holidays. And when done right, it'...

Scallops: The Ultimate Guide to Perfect Cooking
Healthy MealsAh, scallops. Those delicate, sweet, and utterly delicious morsels of the sea. They hold a special place in my...

Spaghetti Squash: The Ultimate Guide to Cooking and Serving
Healthy MealsRemember that time you saw spaghetti squash at the supermarket, looking all bumpy and strange, and thought, "W...