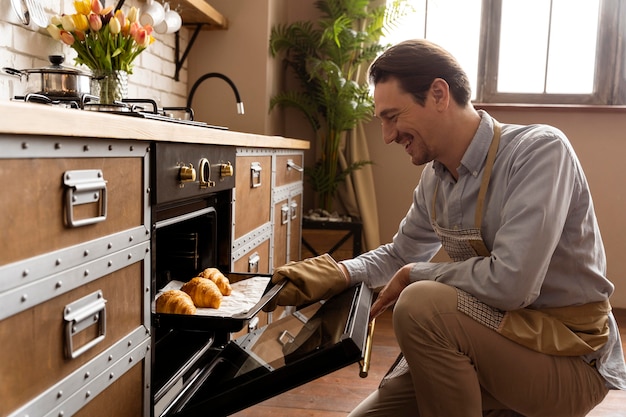
There's something incredibly satisfying about a perfectly roasted chicken. The crispy, golden-brown skin, the succulent, tender meat, and the irresistible aroma that fills your kitchen – it’s a true culinary triumph. But let’s be honest, mastering the art of roasting chicken can be a bit of a challenge. One wrong move and you could end up with a dry, overcooked bird. Fear not! I'm here to guide you through the process, sharing my tried-and-true tips for achieving juicy, delicious oven chicken every time.
I've spent years honing my chicken roasting skills, experimenting with different techniques and recipes. Whether you're a seasoned cook or just starting out, this guide will equip you with the knowledge and confidence to create mouthwatering oven chicken that will impress your family and friends.
Part 1: The Chicken Essentials

Before we dive into the actual cooking, let's talk about the foundation of our delicious roast: the chicken itself. It's all about choosing the right bird and prepping it correctly.
Choosing the Right Bird
First things first, selecting the perfect chicken is crucial. Now, I'm a huge fan of fresh, free-range birds, as they tend to be more flavorful and have a better texture. However, let's be realistic – they can be a bit pricey. Don't feel like you need to break the bank. frozen chicken can be just as delicious, and it's often a more economical choice.
I usually opt for a whole chicken that weighs around 1.5kg (3.3 lbs). This size provides enough meat for a satisfying meal without being overwhelming. If you're cooking for a larger group, you can always go for a bigger bird.
Prepping the Chicken
Once you have your chicken, it's time to give it a little TLC before it goes into the oven. Start by patting it dry with kitchen paper, making sure to remove any excess moisture. This step is essential for achieving that beautifully crispy skin.
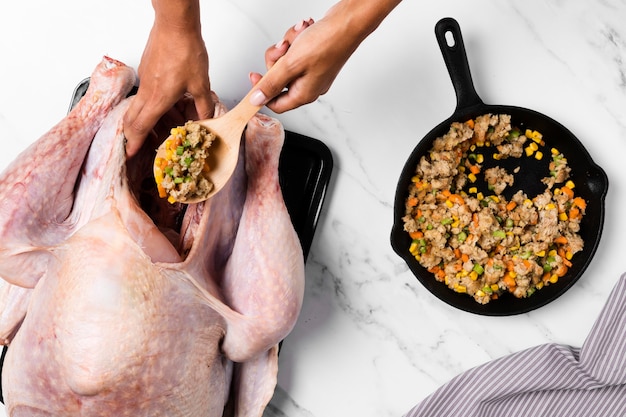
Now comes the fun part – flavoring the chicken! Stuffing the cavity with aromatics like herbs, garlic, or lemon wedges is a fantastic way to infuse the meat with deliciousness. Some of my favorites include fresh rosemary, thyme, and a couple of cloves of garlic. Don't be afraid to experiment with different combinations to find your signature blend.
Finally, season the chicken generously with salt and pepper. This may seem obvious, but it's crucial for bringing out the inherent flavor of the chicken. Don't be shy with the salt, especially if you're using a frozen chicken.
Part 2: cooking techniques

Now that our chicken is prepped and ready to go, let’s explore the various techniques you can use to achieve oven-roasted chicken perfection.
Roasting
The classic approach, roasting is all about slow, even cooking that results in juicy meat and crispy skin. This method is perfect for creating a traditional Sunday roast or a weeknight dinner that feels special.
For roasting, you'll need a roasting pan large enough to comfortably hold the chicken. Preheat your oven to 190°C (375°F) and place the chicken in the pan. Roast for about 1 hour and 15 minutes for a 1.5kg (3.3 lbs) chicken, or adjust the time based on the size of your bird.
While it's roasting, you can baste the chicken with its own juices or a flavorful marinade for extra moisture and flavor. To baste, simply use a spoon to ladle the juices from the bottom of the pan over the chicken every 15-20 minutes.
Spatchcocking
If you're looking for faster cooking times and a more evenly browned bird, spatchcocking is a game-changer. This technique involves flattening the chicken by removing the backbone, which allows the heat to penetrate the meat more quickly.
To spatchcock a chicken, use kitchen shears to cut along the backbone, removing it entirely. Flatten the chicken by pressing down on the breastbone, and season it generously.
Roast the spatchcocked chicken in a hot oven (220°C/425°F) for about 45 minutes, or until cooked through. The flat surface allows for even browning and makes it easier to carve.
reverse searing
For those who prioritize ultra-tender meat and crispy skin, reverse searing is the ultimate technique. It involves cooking the chicken at a low temperature for an extended period, followed by a high-heat sear.
Start by preheating your oven to 120°C (250°F). Place the chicken in a roasting pan and cook for about 1 hour and 30 minutes, or until the internal temperature reaches 74°C (165°F). This slow cooking process ensures the meat stays incredibly juicy and tender.
Once the chicken is cooked, increase the oven temperature to 220°C (425°F) and sear the chicken for about 15 minutes until the skin is golden brown and crispy. This final step adds a delicious crunch to the exterior.
Part 3: oven chicken cooking times

Now, let's get to the heart of this guide – the actual cooking times. Keep in mind that these are general guidelines. Always check the chicken's internal temperature with a meat thermometer to ensure it's cooked through. The chicken is considered safe to eat when the internal temperature reaches 74°C (165°F).
Here's a table outlining approximate roasting times for different sized chickens, based on the traditional roasting method.
| Chicken Weight | Roasting Time |
|---|---|
| 1-1.5 kg (2.2-3.3 lbs) | 1 hour 15 minutes - 1 hour 30 minutes |
| 1.5-2 kg (3.3-4.4 lbs) | 1 hour 30 minutes - 1 hour 45 minutes |
| 2-2.5 kg (4.4-5.5 lbs) | 1 hour 45 minutes - 2 hours |
For spatchcocked chickens, cooking times are significantly faster. Here's a rough guide:
- 1.5 kg (3.3 lbs) chicken: 45 minutes
- 2 kg (4.4 lbs) chicken: 50 minutes
- 2.5 kg (5.5 lbs) chicken: 55 minutes
Reverse searing takes a bit longer, but the results are worth the extra time. Here's a guideline for reverse seared chicken:
- 1.5 kg (3.3 lbs) chicken: 1 hour 30 minutes - 1 hour 45 minutes
- 2 kg (4.4 lbs) chicken: 1 hour 45 minutes - 2 hours
- 2.5 kg (5.5 lbs) chicken: 2 hours - 2 hours 15 minutes
Part 4: Checking for Doneness
You've roasted your chicken for the specified time, but how do you know if it's truly cooked through? Here are the most reliable methods for checking:
Using a Meat Thermometer
The most accurate way to determine if chicken is cooked through is by using a meat thermometer. Insert the thermometer into the thickest part of the thigh, making sure it doesn't touch the bone. The chicken is cooked when the internal temperature reaches 74°C (165°F).
The Leg Test
If you don't have a meat thermometer, you can use the leg test. Gently wiggle the chicken's leg. If it moves easily and feels loose, the chicken is likely cooked through.
Checking the Juices
Another way to check is by piercing the thickest part of the thigh with a skewer or knife. The juices should run clear, not pink. If the juices are still pink, the chicken needs more time in the oven.
Part 5: Resting the Chicken
Once your chicken is cooked, resist the urge to carve it immediately. It's crucial to let it rest for about 10-15 minutes before carving. This allows the juices to redistribute throughout the meat, resulting in a more tender and flavorful bird.
While the chicken is resting, you can make gravy by deglazing the roasting pan with some wine or stock. This will create a rich and flavorful gravy that perfectly complements the roasted chicken.
Part 6: Carving the Chicken
After the resting period, it's time to carve your beautifully roasted chicken. Use a sharp knife and carefully cut between the joints to separate the legs and thighs from the breast.
Remove the wishbone by gently pulling it upwards. Then, slice the breasts across the grain for a tender texture.
Serve the chicken with your favorite sides, like roasted vegetables, potatoes, or gravy.
Part 7: Oven chicken recipes
Ready to create a delicious oven chicken masterpiece? Here are a few of my favorite recipes to inspire you:
Roasted Lemon and Herb Chicken
This classic recipe is incredibly simple to make but bursting with flavor. Rub the chicken with a mixture of lemon zest, fresh herbs like thyme, rosemary, and parsley, and a drizzle of olive oil. Roast in a hot oven until golden brown and cooked through. Serve with roasted vegetables for a complete meal.
Honey Garlic Glazed Chicken
For a sweet and savory twist, try a honey garlic glaze. Combine honey, soy sauce, garlic, and ginger in a bowl. Brush the chicken generously with the glaze before roasting. The glaze will caramelize in the oven, creating a delicious and sticky coating.
Spatchcocked Chicken with Roasted Vegetables
Spatchcocking the chicken makes it cook faster and results in crispy skin. Combine the spatchcocked chicken with your favorite vegetables, such as potatoes, carrots, onions, or Brussels sprouts, for a complete and satisfying meal.
Part 8: Storage and Reheating
Leftover roasted chicken is a true treat. Here's how to store and reheat it properly so you can enjoy it for days to come:
Storage
Allow the chicken to cool completely before storing it in the refrigerator. Store it in an airtight container for up to 3-4 days.
Reheating
Reheat the chicken in a preheated oven at 180°C (350°F) for about 15-20 minutes, or until heated through. You can also reheat it in the microwave or on the stovetop.
Part 9: Tips for Success
Here are a few additional tips to help you achieve oven chicken success every time:
- Don't overcrowd the roasting pan. Give the chicken plenty of space to cook evenly. If you're roasting a large chicken or several pieces of chicken, consider using a larger pan or roasting them in batches.
- Basting the chicken with its own juices or a flavorful marinade during cooking helps keep it moist. You can baste the chicken every 15-20 minutes while it's roasting.
- Use a meat thermometer to check for doneness. It's the most accurate way to ensure the chicken is cooked through and safe to eat.
- Rest the chicken for 10-15 minutes before carving to allow the juices to redistribute. This step is essential for tender, juicy meat.
FAQs
Here are some frequently asked questions about oven chicken cooking times:
Q: How long should I roast a chicken for?
The roasting time depends on the size of the chicken. Refer to the table in Part 3 for approximate cooking times. Remember to always check the internal temperature with a meat thermometer to ensure it’s cooked through.
Q: Can I roast a frozen chicken?
It's possible to roast a frozen chicken, but it will take longer to cook. Defrost it completely in the refrigerator before roasting. Alternatively, you can roast it frozen, but it’s best to adjust the cooking time accordingly, adding about 50% to the total time.
Q: What temperature should I roast a chicken at?
Most ovens recommend a temperature of 190°C (375°F) for roasting chicken. However, some recipes call for higher or lower temperatures. Check the specific recipe you're using for recommended temperatures.
Q: What are some good sides to serve with roast chicken?
Roasted chicken pairs beautifully with a variety of sides. Classic options include roasted vegetables (potatoes, carrots, Brussels sprouts), mashed potatoes, gravy, and stuffing. You can also get creative with salads, rice dishes, or pasta.
Q: How do I know if chicken is cooked through?
The best way to check for doneness is with a meat thermometer. The internal temperature should reach 74°C (165°F). You can also use the leg test or check the juices. The leg should feel loose, and the juices should run clear, not pink.
Everyone is watching

Corn on the Cob: The Ultimate Guide to Perfectly Cooked Ears
Healthy MealsAh, corn on the cob. Just the name evokes images of sunny days, barbecues, and that sweet, juicy flavour that ...

Perfect Pork Roast Oven Cooking Time: A Guide to Delicious Results
Healthy MealsThere's something truly satisfying about a perfectly roasted pork. The aroma alone is enough to make your mout...

Scallops: The Ultimate Guide to Perfect Cooking
Healthy MealsAh, scallops. Those delicate, sweet, and utterly delicious morsels of the sea. They hold a special place in my...

Ham Cooking Time: How Long to Bake, Smoke, or Boil a Delicious Ham
Healthy MealsAh, ham. It's a classic, isn't it? A real crowd-pleaser, especially around holidays. And when done right, it'...

Spaghetti Squash: The Ultimate Guide to Cooking and Serving
Healthy MealsRemember that time you saw spaghetti squash at the supermarket, looking all bumpy and strange, and thought, "W...
