We've all been there. You're craving a juicy burger, but the only thing in your freezer is a pack of frozen patties. Don't despair! You don't need a fancy grill or hours of prep time to enjoy a delicious burger. With a few simple tricks and a hot pan, you can turn those frozen patties into a mouthwatering meal that will satisfy your cravings.
Over the years, I've cooked my fair share of frozen burgers, and I've learned a thing or two about achieving perfect results. From choosing the right pan to mastering the art of searing, I'm going to share all my secrets, so you can impress your friends and family with your burger-making skills.
Part 1: The Essential Equipment

Before we dive into the cooking process, let's gather our tools. This isn't a complicated culinary adventure; you can make a perfect burger with just a few simple items.
The Star of the Show: The Pan
The pan is the heart of your burger-cooking operation. My go-to choice is a trusty cast iron skillet. It's a kitchen workhorse that can handle high heat and delivers those beautiful sear marks that elevate any burger. The cast iron's ability to retain heat ensures even cooking, resulting in a burger that's cooked perfectly throughout.
But don't fret if you don't have a cast iron skillet. A heavy-bottomed stainless steel pan will work just as well. The key is to choose a pan that's large enough to comfortably accommodate your burgers. You don't want to overcrowd the pan, as this can lead to uneven cooking and soggy burgers.
Supporting Cast: Other Tools
Besides the pan, you'll need a few other essential tools:
- Spatula: A sturdy spatula is essential for flipping those burgers without breaking them apart. Choose one with a wide, thin blade that's flexible enough to slide under the burger without dragging it along the pan. This will help you maintain the burger's shape and prevent it from crumbling.
- Tongs: These come in handy for maneuvering the burgers around the pan, especially when you're flipping them. They provide a secure grip, reducing the risk of dropping your precious patties.
- meat thermometer: This isn't absolutely necessary, but I highly recommend it, especially if you're aiming for a specific level of doneness. It takes the guesswork out of cooking and ensures your burger is cooked to perfection, safe to eat, and juicy.
Part 2: Prepping for Success

Now that our equipment is ready, let's prep our ingredients. For this culinary adventure, you'll need a pack of frozen burger patties. I prefer slightly thicker patties, as they hold their shape better during cooking and tend to result in a juicier burger. Feel free to use any brand you like, but keep an eye out for patties that are free from added fillers or preservatives.
To Season or Not to Season?
Whether or not to season your patties before cooking is a matter of personal preference. I usually keep things simple with a sprinkle of salt and pepper. But if you're feeling adventurous, get creative with your seasonings! A touch of garlic powder, onion powder, or paprika can add depth and complexity to the flavor.
The Thawing Dilemma
One of the most common questions when cooking frozen burgers is whether to thaw them first. My advice? Don't bother! Thawing the patties can actually make them more prone to falling apart during cooking. I've found that cooking them straight from frozen results in a more even cook and prevents them from becoming dry or tough. The frozen patty will take a little longer to cook, but the extra time ensures a juicy, flavorful result.
Part 3: Heating Up the Pan

It's time to get that pan sizzling! I like to crank up the heat on my cast iron skillet to medium-high. You'll know it's ready when a few drops of water sizzle and evaporate immediately when you sprinkle them on the pan. This indicates that the pan is hot enough to create a beautiful sear on your burger. If you're using a stainless steel pan, medium heat should suffice.
Give the pan a few minutes to heat up thoroughly before adding the burgers. Don't rush the process. Patience is key! The hotter the pan, the crispier the crust, and the more flavorful your burger will be.
Part 4: The Art of Searing
Alright, the moment you've been waiting for! Once the pan is hot, carefully place your frozen burger patty into the pan. Make sure you give each patty some space to breathe. Don't overcrowd the pan. You want each burger to have its own space to cook evenly and develop those beautiful sear marks.
The Importance of Patience
Now, resist the temptation to peek or flip the burger too soon. Let it sit undisturbed for at least 3 minutes. This allows the bottom of the patty to develop a nice, golden crust. The longer you leave it, the crispier and more flavorful it will become.
Flipping for Perfection
After those crucial 3 minutes, gently flip the burger over. Use your spatula to carefully lift the burger and flip it without breaking it apart. The key here is to use a gentle touch. If the burger sticks to the pan, don't worry! We'll address that issue later.
Crosshatching for Signature Sear Marks
To achieve those stunning sear marks that make your burger look like a work of art, try the crosshatching technique. Simply use a knife or fork to make a few shallow crisscross lines on the top of the burger. Don't pierce all the way through. Just a few lines will do the trick. The more you crosshatch, the more pronounced the sear marks will be.
Pressing for a Juicier Burger
Here's a little secret that will help you achieve a thicker, juicier burger: apply gentle pressure to the patty with your spatula. Pressing down on the patty helps to force out some of the moisture and juices. This helps the patty cook more evenly and prevents it from becoming dry or tough. Just be careful not to press down too hard, as you don't want to squish the burger into a pancake!
Part 5: Flavoring Your Burger
While your burger is searing away, take advantage of the opportunity to enhance its flavor. I usually add a sprinkle of salt and pepper to both sides of the patty. But if you're feeling adventurous, go for it! A pinch of garlic powder, onion powder, or paprika can add a delightful touch of flavor.
Adding a Touch of Richness
For an extra burst of flavor and richness, consider adding a pat of butter to the pan. The butter will melt and infuse the burger with a delicious aroma and a beautiful golden brown color.
Cheese It Up!
If you're a cheese lover, add your favorite cheese towards the end of the cooking process. Wait until the burger is almost cooked through, and then carefully place a slice of cheese on top. The heat from the pan will melt the cheese beautifully, creating a gooey, cheesy topping.
A World of Flavor Options
Here are a few more flavor ideas to inspire you:
- Classic: Salt, pepper, and a sprinkle of paprika.
- Spicy: Cayenne pepper, chili powder, or a dash of hot sauce.
- Herby: Dried oregano, thyme, or rosemary.
- Savory: Garlic powder, onion powder, or a pinch of smoked paprika.
Part 6: Cooking to Perfection
After you've flipped the burger and added your seasonings, it's time to continue cooking. Keep the burger in the pan for another 3-5 minutes, depending on how thick your patty is and how well-done you like it.
Using a Meat Thermometer
For those who want to ensure their burgers are cooked to perfection, a meat thermometer is an invaluable tool. Insert the thermometer into the thickest part of the burger and make sure it reaches the desired temperature. Here's a quick guide to the most common burger doneness levels:
| Doneness Level | internal temperature |
|---|---|
| Rare | 125°F (52°C) |
| Medium-rare | 130°F (54°C) |
| Medium | 140°F (60°C) |
| Medium-well | 150°F (66°C) |
| Well-done | 160°F (71°C) |
Remember, it's important to cook your burgers to a safe internal temperature of at least 160°F (71°C) to eliminate any harmful bacteria.
Checking for Doneness Without a Thermometer
If you don't have a meat thermometer, you can still gauge the doneness of your burger by pressing on the center with your finger. If it's firm and springy, it's cooked through. If it's still soft, it needs a little more time in the pan.
Part 7: Rest and Serve
Once your burger is cooked to perfection, remove it from the pan and let it rest for a few minutes before serving. This allows the juices to redistribute throughout the patty, resulting in a more tender and flavorful burger. While the burger is resting, prepare your buns, toppings, and any side dishes.
Toasting the Buns
A good burger deserves a good bun! I like to lightly toast my buns in the pan for a few minutes to give them a bit of extra flavor and a crispy texture. Simply butter the buns and place them in the pan for a couple of minutes, flipping them halfway through. Keep an eye on them to prevent them from burning.
Building Your Burger Masterpiece
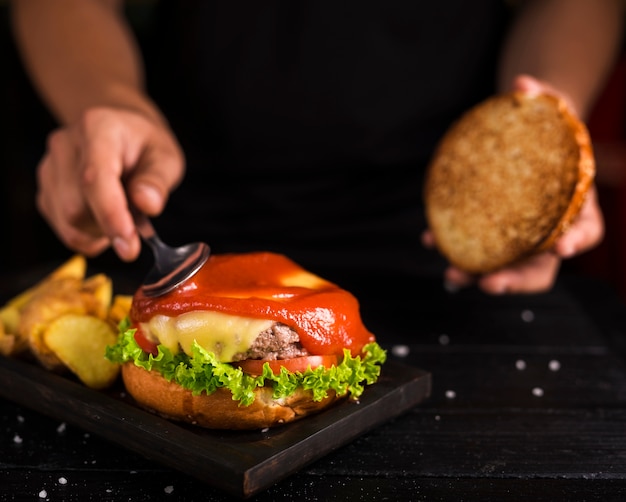
Now comes the fun part - assembling your burger! Start with your toasted bun and add your perfectly cooked and rested burger. Then, it's time to unleash your creativity with toppings!
Top It Off!
The world is your oyster when it comes to burger toppings! I'm a sucker for the classics, like lettuce, tomato, onion, and pickles. But feel free to experiment and add your favorite toppings. Try grilled pineapple, roasted peppers, or even a fried egg for a unique twist.
Completing Your Meal
Don't forget to pair your burger with some delicious side dishes! Some of my favorite burger accompaniments include crispy fries, creamy coleslaw, or a refreshing salad.
Part 8: Cleaning Up
After all the fun of cooking and enjoying a delicious burger, it's time to clean up. I usually start by wiping down the pan with a paper towel to remove any excess grease. Then, I wash it thoroughly with hot soapy water. If you're using a cast iron pan, remember to season it after cleaning to prevent rusting.
FAQs
1. Can I cook multiple burgers at the same time?
Absolutely! But make sure you don't overcrowd the pan. If you're using a smaller pan, it's best to cook the burgers in batches. This will ensure that each burger has enough space to cook evenly and develop that crispy crust.
2. What if my burger sticks to the pan?
If your burger sticks to the pan, don't panic! It's more common than you think. Use your spatula to gently pry it loose. If it's still stuck, try adding a little bit of oil or butter to the pan. And next time, make sure the pan is nice and hot before adding the burger.
3. How can I tell if my burger is cooked through?
The best way to tell if your burger is cooked through is to use a meat thermometer. Insert the thermometer into the thickest part of the burger and make sure it reaches the desired temperature. If you don't have a meat thermometer, you can check the burger for doneness by pressing on the center with your finger. If it's firm and springy, it's cooked through. If it's still soft, it needs to cook a little longer.
4. Can I add cheese to my burger while it's still frozen?
It's best to avoid adding cheese to the frozen burger while it's still frozen. The cheese might not melt properly and could stick to the patty. Instead, wait until the burger is almost cooked through and then add the cheese. The heat from the pan will melt it beautifully over the burger.
5. What if I don't have a cast iron skillet?
No worries! You can still cook a delicious frozen burger without a cast iron skillet. A heavy-bottomed stainless steel pan will do the trick just fine. Just make sure to preheat it properly and don't overcrowd the pan. And remember, you can still achieve that crispy crust by using a high heat setting.
With these tips and tricks, you'll be able to transform those frozen burger patties into a mouthwatering meal that will impress your taste buds and leave you craving for more.
Everyone is watching

Corn on the Cob: The Ultimate Guide to Perfectly Cooked Ears
Healthy MealsAh, corn on the cob. Just the name evokes images of sunny days, barbecues, and that sweet, juicy flavour that ...

Perfect Pork Roast Oven Cooking Time: A Guide to Delicious Results
Healthy MealsThere's something truly satisfying about a perfectly roasted pork. The aroma alone is enough to make your mout...

Ham Cooking Time: How Long to Bake, Smoke, or Boil a Delicious Ham
Healthy MealsAh, ham. It's a classic, isn't it? A real crowd-pleaser, especially around holidays. And when done right, it'...

Scallops: The Ultimate Guide to Perfect Cooking
Healthy MealsAh, scallops. Those delicate, sweet, and utterly delicious morsels of the sea. They hold a special place in my...

Spaghetti Squash: The Ultimate Guide to Cooking and Serving
Healthy MealsRemember that time you saw spaghetti squash at the supermarket, looking all bumpy and strange, and thought, "W...
