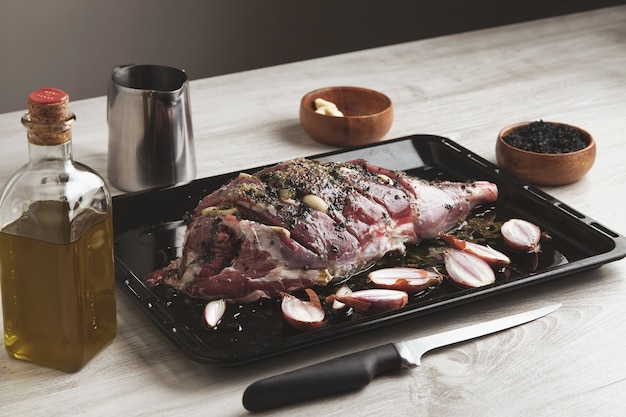
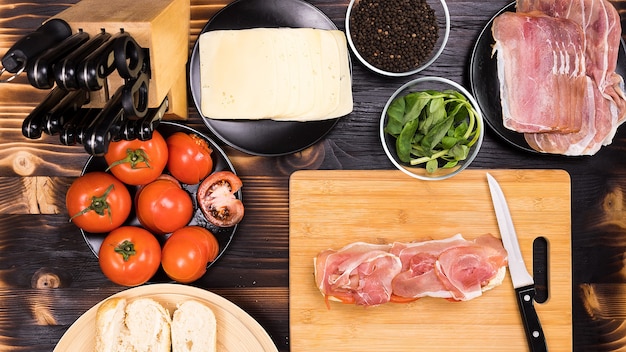
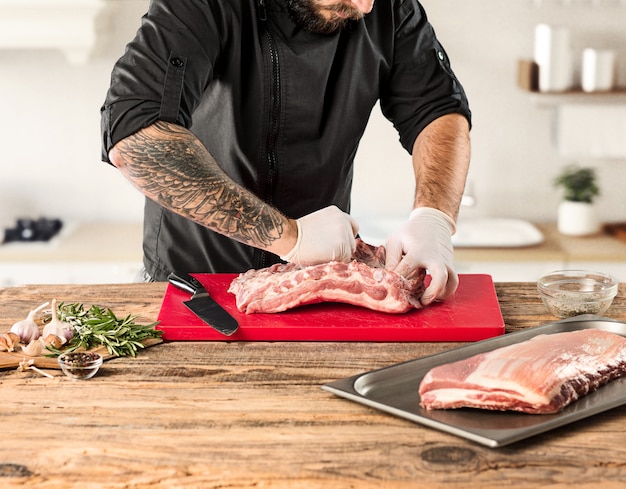
Ah, ham roast. The very words conjure up images of golden-brown, succulent meat, glistening with a sweet, sticky glaze. It's the kind of dish that makes everyone feel special, the kind that’s perfect for a holiday gathering, a family Sunday dinner, or even just a cozy night in. And while it might seem intimidating at first, I'm here to tell you: making a perfect ham roast at home is surprisingly easy.
I've been cooking for years, and let me tell you, the confidence boost you get from nailing a ham roast is incredible. It's a dish that always impresses, and the satisfaction of creating something so delicious is truly rewarding.
Today, I’m going to walk you through the entire process, from choosing the right ham to carving it up and serving it with pride. I’ll share my own tips and tricks, as well as some of the common pitfalls to avoid. You’ll be a ham roast pro in no time!
Part 1: Choosing the Right Ham

The first step is choosing the right ham. It's like picking the right canvas for a painting - if you start with a great piece of ham, you’re already halfway there. Let’s break it down:
Choosing the Type of Ham
There are two main types of ham: bone-in and boneless. bone-in hams tend to be more flavorful because the bone helps to keep the meat moist during cooking, and it adds a nice depth of flavour. However, boneless hams are easier to carve and slice, which is a big advantage for a busy cook or for a large crowd.
Ultimately, it comes down to personal preference and what you’re looking for in your ham roast. If you’re going for a classic, old-school flavour, I’d recommend a bone-in ham. But if you’re looking for convenience and ease, boneless is the way to go.
Picking the Right Size
Next up: size matters! A good rule of thumb is about 1 pound of ham per person. So, a 4-6 pound ham will feed 4-6 people, an 8-10 pound ham will feed 8-10 people, and so on. But don’t be afraid to go a bit bigger if you want leftovers. Ham is fantastic for sandwiches, salads, and even breakfast hash!
Checking the Quality
Finally, make sure you’re choosing a high-quality ham. The packaging should be intact, with no signs of damage or discolouration. Look for a ham that’s fresh, with a good colour and a pleasant aroma. The label should indicate the country of origin, the type of cure, and the weight. Always check the "use-by" date too.
A Word on Cures
You’ll usually find hams labeled as “city ham”, “country ham”, or “spiral sliced”. “City ham” is typically cured with a brine, which gives it a milder flavour. “Country ham” is cured with salt, giving it a more intense, salty taste that some people prefer. spiral-sliced ham is already pre-sliced, making it convenient for carving and serving.
The choice of cure really depends on your personal taste. If you like a milder ham, go for "city ham". If you prefer a more robust flavour, “country ham” is your best bet. And if you’re looking for a quick and easy option, spiral-sliced ham is a good choice.
Part 2: Preparing the Ham

Right, you’ve got your beautiful ham. Now it’s time to get it ready to roast. Let’s get those hands dirty!
Getting Ready to Roast
Remove the ham from its packaging and give it a good rinse under cold water. Rinse it in the sink, not the countertop, to avoid any messy spills. Pat the ham dry with paper towels.
Scoring the Ham
Here’s a little tip I learned from my grandma: score the ham. This doesn't mean you have to go all "Lord of the Flies" on it, but make some shallow cuts about an inch apart across the fat of the ham. These cuts allow the glaze to penetrate deeper and create a beautiful, caramelized crust. Plus, it helps to keep the ham from drying out.
Adding Flavor
Now comes the fun part: adding flavor! You can simply rub a mixture of salt, pepper, and brown sugar into the ham, or you can create a custom glaze. This is where you can really get creative with your flavors.
Personally, I like to use a simple glaze with honey, Dijon mustard, and a bit of brown sugar. It’s sweet, tangy, and just the right amount of salty. You can also experiment with other spices like garlic powder, onion powder, paprika, and even ginger.
For a more sophisticated glaze, try adding orange zest or cloves for a festive touch. Or, if you’re feeling adventurous, add a bit of chili powder or chipotle powder for a spicy kick.
Whatever you choose, remember to taste as you go! Adjust the seasonings to your liking.
Part 3: Cooking the Ham

You've got your ham, you've scored it, and you've seasoned it. Now, let's get it in the oven!
Choosing the Right Cooking Method
You have a few options for cooking your ham, but the most common method is roasting in the oven. It's the easiest way to achieve a perfectly cooked ham with a crispy crust. If you want to go the extra mile, you can also smoke the ham, which gives it a smoky flavour that’s truly irresistible.
For roasting, you'll need a large roasting pan, ideally one with a rack to elevate the ham and allow air to circulate around it. The roasting pan will also help to catch any drippings, which you can use later to make a delicious gravy.
Setting the Oven Temperature
Preheat your oven to 325°F (160°C). This is a good starting point, but you might need to adjust the temperature depending on the size of the ham and the desired level of doneness.
For example, if you have a large ham, you might want to cook it at a slightly lower temperature for a longer time to ensure even cooking.
Roasting the Ham
Place the ham in the roasting pan, ensuring it’s sitting securely on the rack. If you’re using a glaze, now is the time to brush it all over the ham. Roast for about 15-20 minutes per pound, or until the internal temperature reaches 140°F (60°C).
Keep an eye on your ham as it roasts, and don’t be afraid to adjust the cooking time if necessary. You want the ham to be cooked through, but you don’t want it to dry out.
Basting the Ham
As the ham roasts, you'll need to baste it regularly to keep it moist and help develop a beautiful, caramelized crust. Use the drippings from the roasting pan to baste the ham, or you can use a mixture of water and your favorite glaze. Baste every 30-45 minutes, rotating the ham so all sides get a good coating.
Using a meat thermometer
Here’s a little tip I learned the hard way: always use a meat thermometer to ensure the ham is cooked through. It’s the only way to guarantee that the ham is safe to eat.
Insert the thermometer into the thickest part of the ham, making sure it doesn’t touch any bone. The ham is done when the internal temperature reaches 140°F (60°C).
Part 4: Glazing the Ham
Glazing is the finishing touch that transforms a good ham roast into a masterpiece. It creates a glossy, caramelized crust that's irresistible to both the eyes and the palate.
The Art of Glazing
About 30 minutes before the ham is done, remove it from the oven and brush it generously with your chosen glaze. Return the ham to the oven and continue cooking until the glaze is bubbly and caramelized.
For an extra-thick crust, you can even brush on another layer of glaze during the final 15 minutes of cooking.
Choosing the Right Glaze
As I mentioned before, you can find a variety of pre-made glazes in the supermarket, but I prefer to make my own. It allows me to customize the sweetness and flavour to my liking.
My go-to glaze is a simple combination of honey, Dijon mustard, and brown sugar. It’s sweet, tangy, and just the right amount of salty. You can also add other spices to the glaze, such as cinnamon, cloves, or ginger.
For a more sophisticated glaze, try adding a touch of orange zest or a splash of brandy or bourbon. The possibilities are endless!
Applying the Glaze
When applying the glaze, be sure to coat the entire ham evenly. Use a basting brush to ensure every nook and cranny is covered. Don’t forget to rotate the ham so that all sides are glazed.
Part 5: Resting the Ham
Once the ham is cooked, it’s important to let it rest for at least 15-20 minutes before carving. This allows the juices to redistribute throughout the meat, resulting in a more tender and juicy ham.
Cover the ham loosely with foil and let it rest on a cutting board. While the ham is resting, you can start preparing your sides or make a gravy with the drippings from the roasting pan.
Part 6: Carving the Ham
This is the moment you've been waiting for: carving the ham! Take a deep breath and enjoy the anticipation. Carving the ham is easier than it looks, so don't worry if you're a bit nervous.
Getting Ready to Carve
Make sure you have a sharp carving knife and a cutting board. It’s also a good idea to have a serving platter or a large plate ready to hold the carved ham.
Carving the Ham
For a bone-in ham, start by cutting off the shank. Then, slice the ham into thin, even slices, working your way around the bone. Carve along the grain of the meat to prevent it from tearing.
For a boneless ham, you can simply slice it into thin, even slices, working your way from one end to the other.
If you’re struggling to get a clean cut, use a fork to hold the ham in place while you carve.
Part 7: Serving the Ham
You’ve done all the hard work, so now it’s time to present your beautiful ham roast to your guests. It’s time to shine!
Presenting the Ham
Arrange the carved ham on a serving platter or large plate. You can use a decorative carving board for an elegant touch. Garnish the platter with fresh herbs, fruit slices, or a sprig of rosemary for a beautiful presentation.
Serving Ideas
A ham roast is a versatile dish that can be served in a variety of ways. It’s delicious served hot, with a side of mashed potatoes, gravy, and roasted vegetables. You can also serve it cold, with mustard, pickles, and bread. It’s also great for sandwiches and salads.
If you’re feeling really adventurous, try serving your ham with a fruity chutney or a spicy mango salsa. It’s a delicious way to add a bit of zing to your meal.
Part 8: Leftovers
Don’t worry if you have leftover ham. It’s actually even better the next day!
Storage
Simply refrigerate the leftover ham in an airtight container. It will keep for up to 4 days.
Leftover Ideas
Here are a few ideas for using up leftover ham:
- ham and cheese sandwiches: A classic for a reason!
- Ham Salad: Combine diced ham with mayonnaise, celery, and onion. Serve on bread or crackers.
- Ham and potato soup: A hearty and comforting soup perfect for a cold day.
- ham and bean casserole: A great way to use up leftover beans and ham.
- Ham and Pea Risotto: A flavorful and elegant dish perfect for a special occasion.
- Ham fried rice: A delicious and easy way to use up leftover rice and ham.
- Ham Quiche: A classic brunch or lunch option that’s always a crowd-pleaser.
FAQs
Q: What if my ham is too salty?
A: If your ham is too salty, you can try soaking it in cold water for a few hours before cooking. This will help to draw out some of the salt. You can also try adding more sugar to the glaze to balance out the saltiness. You could also try serving it with a side dish that has a bit of acidity, like a tangy fruit salad or a vinaigrette-based salad.
Q: Can I cook a ham roast in a slow cooker?
A: Yes, you can cook a ham roast in a slow cooker, but it's best to choose a boneless ham that's already pre-sliced. Set the slow cooker to low and cook for 6-8 hours, or until the ham is tender.
Q: How can I tell if my ham is done?
A: The best way to tell if your ham is done is to use a meat thermometer. Insert the thermometer into the thickest part of the ham, making sure it doesn’t touch any bone. The ham is done when the internal temperature reaches 140°F (60°C). You can also check for doneness by pressing on the ham. It should be firm to the touch, and the juices should run clear when pierced with a fork.
Q: What should I serve with ham roast?
A: Ham roast is a versatile dish that can be served with a variety of sides. Some popular choices include mashed potatoes, gravy, roasted vegetables, green beans, asparagus, corn, and macaroni and cheese.
For a more elegant touch, consider serving the ham with a side of roasted root vegetables, like carrots, parsnips, and potatoes. Or, if you’re looking for something lighter, serve the ham with a salad of fresh greens and seasonal vegetables.
Q: How do I store leftover ham?
A: Leftover ham should be stored in an airtight container in the refrigerator. It will keep for up to 4 days. You can also freeze leftover ham for up to 3 months.
So there you have it - a complete guide to making a delicious ham roast! Remember, the key to success is choosing the right ham, preparing it properly, and then letting the oven do its magic. Don’t be afraid to experiment with different glazes and flavours. And most importantly, have fun!
I know you’ll be delighted with the results. Now, if you’ll excuse me, I think I’m going to go make myself a ham and cheese sandwich. It’s just too tempting to resist!
Everyone is watching

Corn on the Cob: The Ultimate Guide to Perfectly Cooked Ears
Healthy MealsAh, corn on the cob. Just the name evokes images of sunny days, barbecues, and that sweet, juicy flavour that ...

Perfect Pork Roast Oven Cooking Time: A Guide to Delicious Results
Healthy MealsThere's something truly satisfying about a perfectly roasted pork. The aroma alone is enough to make your mout...

Ham Cooking Time: How Long to Bake, Smoke, or Boil a Delicious Ham
Healthy MealsAh, ham. It's a classic, isn't it? A real crowd-pleaser, especially around holidays. And when done right, it'...

Scallops: The Ultimate Guide to Perfect Cooking
Healthy MealsAh, scallops. Those delicate, sweet, and utterly delicious morsels of the sea. They hold a special place in my...

Spaghetti Squash: The Ultimate Guide to Cooking and Serving
Healthy MealsRemember that time you saw spaghetti squash at the supermarket, looking all bumpy and strange, and thought, "W...
