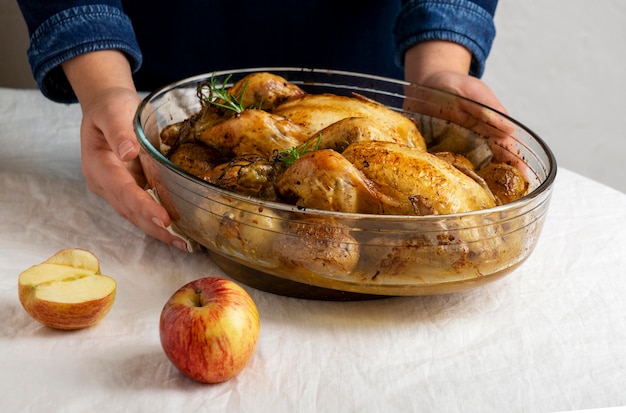
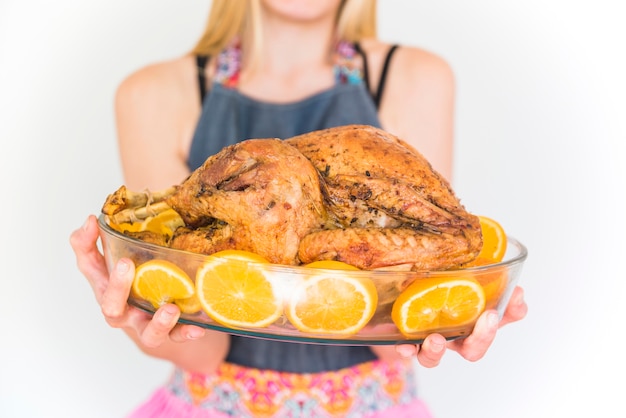
The glorious, golden-hued turkey. A majestic bird that, when roasted to perfection, can truly be the heart of any Christmas dinner or festive feast. But let's be honest, folks, roasting a stuffed turkey can feel a bit like navigating a culinary minefield. It's a delicate dance between getting the bird cooked through, the stuffing golden and fluffy, and the skin gloriously crispy. I've had my share of turkey mishaps, from pale, undercooked breasts to dry, overcooked thighs – trust me, it's not a pretty sight.
But fear not, dear reader! Over the years, I've learned the art of roasting a perfect turkey, and I’m here to share my secrets, gleaned from countless kitchen trials and, yes, a few burnt stuffing incidents. This isn't just a recipe; it's a journey, a guide that'll help you conquer the turkey and become a true culinary hero. So, grab your apron, get your oven warmed up, and let's embark on this delicious adventure together.
(Part 1) The Turkey: Choosing Your Bird
It all starts with the turkey itself. Choosing the right bird is like picking the perfect wine for your dinner – you want something top-notch to create a truly memorable meal. But with so many options, it can be a bit overwhelming. Let’s break it down, shall we?
Fresh or Frozen?
Personally, I'm a firm believer in fresh turkeys. They just have a more vibrant flavour, in my opinion. And they often seem to be a bit juicier. If you can snag a fresh turkey from your local butcher or market, I highly recommend it. But if you're working with a frozen one, no worries! Just make sure you defrost it properly. Give it plenty of time to thaw completely before you start cooking. A good rule of thumb is to defrost a frozen turkey in your refrigerator for about 24 hours for every 5 pounds of bird. So, if you’ve got a 12-pound turkey, it’ll need around 48 hours in the fridge to defrost.
Size Matters: Finding the Right Fit
The size of your turkey will depend on how many people you’re feeding. A good rule of thumb is about 1 pound of turkey per person, so a 10-pound turkey would be perfect for a dinner party of 10. Of course, you can always adjust this a bit based on your guests’ appetites. But you don’t want to end up with a bird that’s too small (leaving you scrambling for more food) or too big (leading to a mountain of leftovers). No one wants a fridge full of turkey for a week!
Organic or Conventional? The Health and Flavor Debate
This is a personal choice, but I usually opt for organic turkeys whenever possible. They’re raised without antibiotics and hormones, and I feel good knowing I'm serving up a healthier option for my family. Plus, they often have a richer flavour. But, if you’re on a budget, a conventional turkey will still be delicious! Just make sure it's been properly inspected and meets your standards of quality.
(Part 2) Stuffing: The Heart of the Turkey
Now, let's talk stuffing, the delicious side dish that gets to spend a cozy evening nestled inside the turkey. There are endless ways to make stuffing, but my personal favorite is a classic bread-based stuffing with a mix of herbs, vegetables, and savory sausage. It's a real crowd-pleaser!
The Secrets to Perfect Stuffing: A Symphony of Texture and Flavor
The key to great stuffing is finding that sweet spot where it's cooked through but not dry. It should be fluffy, moist, and bursting with flavour. It's a delicate balance, but totally achievable. Over the years, I've learned a few tricks that have made all the difference for me:
- Use a Mixture of Bread Types: I love to combine white bread with sourdough or rye bread. This adds a nice depth of flavour and texture to the stuffing. You can even try adding some stale bread for a little extra crunch.
- Don't Overstuff the Bird: Stuffing should be loosely packed into the turkey, not crammed in there like sardines. This ensures that the stuffing cooks evenly and doesn't get soggy. Think of it as a cozy, comfortable space for the stuffing, not a prison.
- Cook the Stuffing Separately for Safety: This is the most important tip! Cooking the stuffing separately ensures it’s properly cooked through and safe to eat. You can use a baking dish or even a dutch oven for this. And trust me, you’ll be much happier with the results!
- Add Moisture with Broth or Stock: Bread is the base of most stuffings, but you need to add moisture to keep it from drying out. Use a flavorful broth or stock, like chicken or turkey, to add both flavour and moisture.
- Get Creative with Flavor: Don't be afraid to add some extra flavour to your stuffing. Experiment with different herbs and spices, chopped vegetables, or even a handful of dried fruit for a touch of sweetness.
(Part 3) Preparing the Turkey: A Step-by-Step Guide
So, you've got your beautiful turkey, your delicious stuffing is ready to go, and now it's time to get ready for the grand roast. Don't rush this part, folks. The preparation is crucial to ensuring a truly impressive turkey feast.
1. Brining: The Magic Ingredient for a Juicy Bird
Brining is a game-changer for turkey roasting. It involves soaking the turkey in a saltwater solution, which helps the meat retain moisture during cooking, resulting in a juicy, flavorful bird. You can create your own brine, or find pre-made brine mixes at most grocery stores. I strongly recommend brining your turkey – it truly makes a difference in the final result! You can choose to dry brine (rubbing the salt mixture on the turkey) or wet brine (submerging the turkey in a brine solution). Both methods work well, so choose whichever you prefer.
2. Patting Dry: The Secret to crispy skin
Once your turkey is brined (or not), it’s time to pat it dry. This step is crucial for achieving that gorgeous, crispy skin. Use paper towels to remove any excess moisture. The more thoroughly you pat it dry, the crispier your skin will be.
3. Seasoning: Adding Flavor to Every Bite
Now for the fun part – seasoning your turkey! I love to rub my turkey with a mix of herbs and spices. You can use fresh or dried herbs, whatever you prefer. A classic blend of rosemary, thyme, and sage is always a winner. Don't forget a touch of salt and pepper – they're essential for bringing out the turkey's natural flavor.
4. Stuffing the Bird: With Care and Precision
If you’re opting for a stuffed turkey, now's the time to gently nestle your pre-cooked stuffing inside the cavity. Don't pack it too tightly, as this can prevent the stuffing from cooking evenly. Make sure to distribute the stuffing evenly throughout the cavity. If you're not stuffing the bird, you can add chopped vegetables, herbs, or a few lemons inside the cavity for extra flavor.
5. Trussing: Keeping It All Together
Trussing involves tying the legs and wings together to prevent the turkey from becoming misshapen during cooking. This helps to ensure that the turkey cooks evenly. There are different ways to truss a turkey, but I prefer to use kitchen twine. There are some excellent YouTube tutorials out there if you're not sure how to do it. You can also skip trussing altogether, but it does help to keep the bird looking nice and neat.
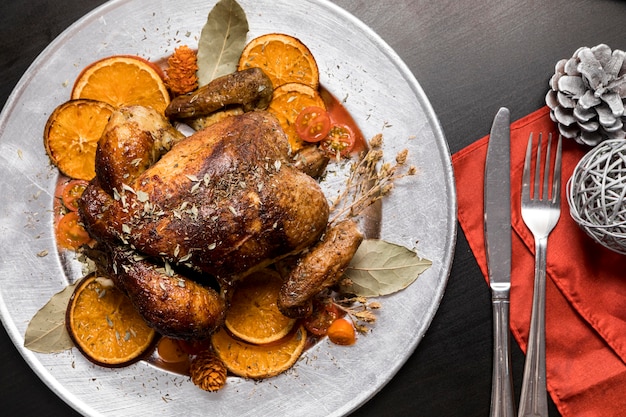
(Part 4) Roasting the Turkey: The Grand Finale
It's finally time for the grand finale: roasting your turkey! Get ready for an aromatic journey filled with anticipation and the promise of a delicious feast.
1. Preheating the Oven: It's a Must
First things first: preheat your oven to 325 degrees Fahrenheit (160 degrees Celsius). This is the ideal temperature for roasting a turkey, allowing it to cook through evenly without drying out.
2. roasting time: The Key to Perfection
The roasting time will vary depending on the size of your turkey. Here's a general guideline:
| turkey weight (lbs) | Roasting Time (hrs) |
|---|---|
| 10-12 lbs | 3-4 hours |
| 12-14 lbs | 4-5 hours |
| 14-16 lbs | 5-6 hours |
But remember, these are just estimates. You'll need to check the internal temperature of the turkey to ensure it's cooked through.
3. Basting: Achieving that Golden Glaze
Basting is a crucial step in roasting a turkey, and it's what helps you achieve that beautiful golden-brown skin. Basting involves spooning pan juices over the turkey during the roasting process. You can use a turkey baster or a spoon. I like to baste my turkey every 30-45 minutes. This keeps the turkey moist and helps the skin to crisp up nicely. Don't forget to save those pan juices – you'll use them to make a delicious gravy later on!
4. Checking for Doneness: Using a meat thermometer
Doneness is key! The most accurate way to determine if your turkey is cooked through is to use a meat thermometer. Insert the thermometer into the thickest part of the thigh (avoiding bone), and the temperature should reach 165 degrees Fahrenheit (74 degrees Celsius). The turkey is done when the juices run clear, not pink.
5. Resting: Letting It Settle
Once the turkey is cooked, you need to let it rest before carving. This allows the juices to redistribute throughout the meat, resulting in a much juicier and more flavorful turkey. Allow the turkey to rest for at least 30 minutes before carving, covered with foil.
(Part 5) Carving the Turkey: A Gentle Touch
The turkey is cooked, rested, and it's time to reveal the masterpiece! But before you dive in, you need to carve the bird properly. This requires a steady hand and a sharp knife.
1. Remove the Legs and Thighs: A Starting Point
Start by separating the legs and thighs from the breast. Use your carving knife to cut through the joint between the thigh and the breast.
2. Carving the Breast: Thin Slices for Maximum Enjoyment
Once the legs and thighs are removed, it's time to carve the breast. Use your carving knife to cut thin slices across the breast, working your way from one end to the other.
3. Carving the Wings: A Delectable Side Dish
The wings can be carved off at the joint and served as a side dish or used for a delicious turkey soup later on.
(Part 6) Leftovers: The Joy of Second Helpings
Ah, the joy of leftovers! Let's be honest, turkey is even more delicious the next day, and it's a great opportunity to get creative in the kitchen.
1. turkey sandwiches: A Classic
Nothing beats a classic turkey sandwich on toasted bread with a bit of cranberry sauce. You can also add some lettuce, tomato, and a slice of cheese for a more filling meal.
2. turkey soup: A Comforting Treat
turkey leftovers are perfect for a delicious and comforting soup. You can add vegetables like carrots, celery, and potatoes, and use the turkey broth to make a flavorful base.
3. turkey salad: A Light and Refreshing Choice
Turkey salad is a light and refreshing way to use leftover turkey. You can mix it with mayonnaise, celery, and onion, or add some cranberries for a festive touch.
4. Turkey Shepherd's Pie: A Hearty and Savory Option
For a more substantial meal, try making a delicious turkey shepherd's pie. Layer leftover turkey with mashed potatoes and your favorite gravy for a comforting and satisfying dish.
5. Turkey Pizza: A Fun and Festive Twist
Turn your leftover turkey into a delicious pizza topping. Spread a thin layer of pizza sauce on your favorite crust, add a generous amount of sliced turkey, and top it with your favorite cheeses and vegetables.
(Part 7) Gravy: The Perfect Companion
No turkey feast is complete without a generous serving of gravy! This rich and savory sauce adds a delightful touch to every bite.
1. The Pan Juices: The Foundation of Flavor
The pan juices left over from roasting the turkey are the foundation of a truly delicious gravy. Don't throw them away! You can use them to make a gravy that is full of flavour.
2. Thicken It Up: Using Flour or Cornstarch
To thicken the gravy, you can use flour or cornstarch. I prefer to use flour, as it gives a richer flavour. Simply whisk some flour into a small amount of cold water to create a slurry, then whisk it into the pan juices.
3. Simmer and Strain: Achieving a Smooth Texture
Bring the gravy to a simmer and stir constantly until it thickens to your desired consistency. Strain the gravy through a fine-mesh sieve to remove any lumps or bits of debris.
4. Flavor Boost: A Touch of Wine or Herbs
To add another layer of flavor to your gravy, you can stir in a splash of red wine or a tablespoon of your favorite herbs, such as rosemary or thyme.
(Part 8) side dishes: A Symphony of Flavors
Turkey might be the star of the show, but it needs a supporting cast of delicious side dishes to create a truly unforgettable feast.
1. Stuffing: A Classic Companion
We've already talked about stuffing, but it deserves a special mention as a classic side dish. It's a perfect complement to the turkey, and it's always a crowd-pleaser.
2. Potatoes: A Versatile Staple
Potatoes are a versatile and beloved side dish, and they come in countless forms. You can roast them, mash them, or make them into gratin. I always love to serve mashed potatoes with a generous amount of butter and cream.
3. Vegetables: A Burst of Color and Flavor
Vegetables add a burst of color and flavor to your turkey feast. You can choose from a wide variety of options, depending on your preferences. green beans, broccoli, carrots, and asparagus are always popular choices.
4. Cranberry Sauce: A Festive Touch
No turkey dinner is complete without a dollop of cranberry sauce. It's a festive and tangy addition that cuts through the richness of the turkey. You can purchase pre-made cranberry sauce, or make your own.
5. Brussels Sprouts: A Roasted Delight
roasted brussels sprouts have become a holiday favorite! They offer a sweet and nutty flavor when roasted, and pair perfectly with the savory turkey.
6. sweet potatoes: A Festive Side
sweet potatoes are a delicious and festive side dish, often served with a touch of brown sugar and butter. They offer a sweet and savory flavor that complements the turkey beautifully.
FAQs
Here are some frequently asked questions about roasting a stuffed turkey:
1. Can I Stuff the Turkey the Day Before?
It's not recommended to stuff the turkey the day before, as it can lead to bacterial growth. It's best to stuff the turkey right before roasting.
2. How Long Can I Keep Leftover Turkey in the Fridge?
Leftover turkey can be stored in the refrigerator for 3-4 days. Be sure to store it in an airtight container.
3. Can I Freeze Leftover Turkey?
Yes, you can freeze leftover turkey for up to 2 months. Be sure to wrap it tightly in freezer paper or aluminum foil before freezing.
4. Can I Cook a Turkey in a slow cooker?
Yes, you can cook a turkey in a slow cooker. However, it's not recommended to stuff the turkey when cooking it in a slow cooker.
5. Can I Cook a Turkey in a pressure cooker?
Yes, you can cook a turkey in a pressure cooker. This method can be faster than traditional roasting, but it's important to follow the manufacturer's instructions carefully.
I hope this comprehensive guide has given you all the tools you need to roast a perfect stuffed turkey. Remember, the key is to be patient, follow the instructions carefully, and don't be afraid to experiment with your own flavors and techniques. Happy roasting!
Everyone is watching

Corn on the Cob: The Ultimate Guide to Perfectly Cooked Ears
Healthy MealsAh, corn on the cob. Just the name evokes images of sunny days, barbecues, and that sweet, juicy flavour that ...

Perfect Pork Roast Oven Cooking Time: A Guide to Delicious Results
Healthy MealsThere's something truly satisfying about a perfectly roasted pork. The aroma alone is enough to make your mout...

Ham Cooking Time: How Long to Bake, Smoke, or Boil a Delicious Ham
Healthy MealsAh, ham. It's a classic, isn't it? A real crowd-pleaser, especially around holidays. And when done right, it'...

Scallops: The Ultimate Guide to Perfect Cooking
Healthy MealsAh, scallops. Those delicate, sweet, and utterly delicious morsels of the sea. They hold a special place in my...

Spaghetti Squash: The Ultimate Guide to Cooking and Serving
Healthy MealsRemember that time you saw spaghetti squash at the supermarket, looking all bumpy and strange, and thought, "W...