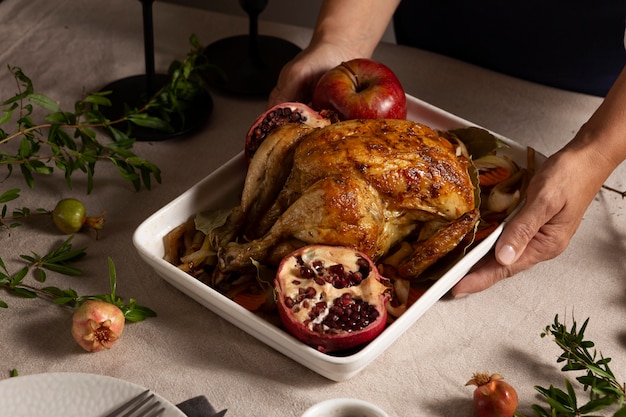
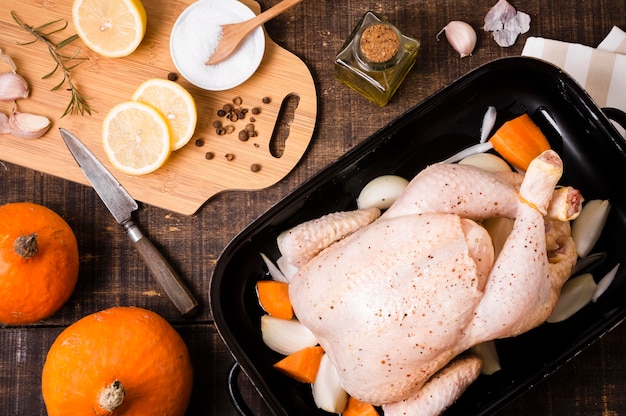
Let’s talk chicken thighs. I know some people think they're the "second-rate" cut compared to breasts, but honestly, they're the unsung heroes of the chicken world. They're bursting with flavor and stay wonderfully juicy, even if you're a bit of a klutz in the kitchen like me.
This article is all about achieving pan-fried chicken thighs that are perfectly cooked. We'll cover everything from choosing the right thighs to mastering the perfect pan-frying technique. I'll share my own tips and tricks, the good, the bad, and the downright hilarious kitchen mishaps I've experienced along the way. So, grab a notepad, maybe a glass of wine (or a cup of tea if you prefer), and let's get cooking!
(Part 1) Choosing the Right Thighs: The Foundation of Flavor

Bone-In or Boneless? A Matter of Preference
First things first, bone-in or boneless? I'm a firm believer in the bone-in chicken thigh - it's the classic, the original. The bone helps keep the meat moist and tender, and it adds a delightful depth of flavor. But, if you're short on time or just prefer boneless, that's totally fine! Just make sure they're not too thin, or they'll dry out quickly.
Skin On or Skin Off? A Question of Flavor and Fat
The next big decision: skin on or skin off? I'm a skin-on kind of person. The skin renders down in the pan, creating a gloriously crispy layer of fat that adds amazing flavor to the chicken. It's a natural basting system! Plus, it helps keep the meat incredibly juicy. However, if you're watching your fat intake, skinless thighs are a perfectly valid choice. Just make sure to give them a good sear to create that crispy texture we all love.
Size Matters: A Guide to cooking times
The size of your thighs matters when it comes to cooking time. Bigger thighs need more time to cook through, while smaller ones will cook faster. Ideally, aim for thighs that are roughly the same size. If you have a mix, no worries! Just adjust your cooking times accordingly.
(Part 2) The Perfect Pan-Frying Setup: Tools for Success

The Right Pan: A Foundation for Crispy Goodness
You'll need a good pan to create those perfectly pan-fried chicken thighs. I've tried countless pans, and a cast iron skillet is my absolute go-to. It heats up evenly and retains heat incredibly well, giving you that gorgeous crispy crust. If you don't have a cast iron pan, a heavy-bottomed stainless steel pan will work well. Just avoid non-stick pans. They won't give you the same browning and caramelization.
The Oil: Fueling the Sizzle
Now, let's talk about oil. I prefer high-heat oils like grapeseed or avocado oil. They have a high smoke point, so they won't burn easily at the high temperatures needed for pan-frying. Olive oil is another great option, but use it sparingly, as it has a lower smoke point and can burn quickly.
The Heat: Finding the Sweet Spot
You'll need medium-high heat to sear the chicken thighs and create that beautiful golden brown crust. This is where experience comes into play. You need to find the perfect temperature for your pan. Too hot, and the chicken will burn before it cooks through. Too low, and you'll end up with mushy chicken.
(Part 3) The Pan-Frying Process: A Step-by-Step Guide to Perfection

1. Prep the Chicken: Laying the Foundation
Pat those chicken thighs dry with paper towels. This is super important. It helps them crisp up nicely and prevents steam from forming, which can make them soggy.
2. Seasoning Time: Unleashing Flavor
Now, it's time for seasoning! I like to keep it simple with salt and pepper, but you can get creative and add any seasonings you like. Paprika, garlic powder, or even a dash of cayenne pepper are always great additions. Just make sure to season generously!
3. Sear It Up: Creating Crispy Perfection
Heat the oil in your pan over medium-high heat. Carefully place the chicken thighs in the pan, making sure not to overcrowd it. We want to give each thigh plenty of space to brown beautifully. You'll hear a lovely sizzling sound as the chicken releases its juices. That's the magic happening!
4. The Flip: Achieving Even Cooking
Once the chicken thighs are nicely browned on one side, use tongs to carefully flip them over. Continue cooking for a few more minutes on the other side until they're cooked through.
5. Checking for Doneness: Ensuring Safety and Flavor
You can check for doneness using a meat thermometer. It should reach an internal temperature of 165°F (74°C). If you don't have a thermometer, check by cutting into the thickest part of the thigh. The juices should run clear, and the meat should be no longer pink.
6. Resting Time: A Final Touch
After cooking, remove the chicken thighs from the pan and let them rest for a few minutes before serving. This allows the juices to redistribute, making the chicken even more tender and juicy.
(Part 4) Cooking Times and Temperatures: A Guide for Success
General Guidelines: A Starting Point
Bone-in, Skin-on: 8-10 minutes per side.
Bone-in, Skinless: 7-9 minutes per side.
Boneless, Skin-on: 6-8 minutes per side.
Boneless, Skinless: 5-7 minutes per side.
Adjustments: The Art of the Kitchen
These are just general guidelines. You may need to adjust the cooking time based on the thickness of your chicken thighs and the heat of your pan. Keep a close eye on them and don't be afraid to adjust the cooking time as needed.
(Part 5) Temperature Chart: A Visual Guide
Here’s a handy table that shows the recommended cooking times for different thicknesses of chicken thighs:
| Thickness | Bone-In | Boneless |
|---|---|---|
| 1/2 inch | 8-10 minutes | 6-8 minutes |
| 3/4 inch | 10-12 minutes | 8-10 minutes |
| 1 inch | 12-14 minutes | 10-12 minutes |
(Part 6) Don't Be Afraid to Experiment: Unlocking Endless Possibilities
Flavor Variations: A World of Taste
Pan-frying is a versatile technique, and you can experiment with different flavors and seasonings to create unique dishes. Here are a few ideas to get you started:
Citrusy: Add lemon or orange zest to your seasoning for a fresh and bright flavor.
Mediterranean: Use a mix of oregano, thyme, and garlic for a delicious Mediterranean twist.
Spicy: Add a pinch of cayenne pepper or chili flakes for a little heat.
Sauce Ideas: Adding a Finishing Touch
Once your chicken thighs are cooked, you can add a simple sauce for extra flavor. Here are a few ideas to inspire your creativity:
Lemon-Herb: Combine melted butter, lemon juice, and chopped herbs like parsley and thyme for a classic combination.
Creamy Garlic: Mix heavy cream, garlic, and Parmesan cheese for a rich and savory sauce.
Honey Mustard: Whisk together honey, mustard, and a little bit of lemon juice for a sweet and tangy sauce.
(Part 7) FAQs: Answers to Your Burning Questions
1. Can I pan-fry frozen chicken thighs?
I wouldn't recommend it. Frozen chicken thighs take longer to cook and are more likely to become dry and tough. It's best to thaw them in the refrigerator overnight before pan-frying.
2. What if my chicken thighs are sticking to the pan?
If the chicken thighs are sticking, it's usually because the pan isn't hot enough or the chicken is overcrowded. Let the pan heat up for a few minutes before adding the chicken, and make sure there's enough space between the thighs. If the chicken is still sticking, add a little more oil to the pan.
3. How do I know when my chicken thighs are cooked through?
The best way to tell if the chicken thighs are cooked through is to use a meat thermometer. It should reach an internal temperature of 165°F (74°C). You can also check by cutting into the thickest part of the thigh. The juices should run clear, and the meat should be no longer pink.
4. What if my chicken thighs are dry?
If your chicken thighs are dry, it's likely because they were overcooked. Try cooking them over a lower heat or for a shorter time. You can also add a little bit of moisture, like broth or wine, to the pan while they're cooking.
5. What can I do with leftover chicken thighs?
Leftover chicken thighs are amazing! They make great salads, sandwiches, or pasta dishes. You can also shred them and use them in tacos, burritos, or quesadillas.
(Part 8) Conclusion: Embracing the Joy of Pan-Fried Chicken Thighs
pan-frying chicken thighs is a quick, easy, and incredibly satisfying way to create a delicious meal. It's versatile, allowing you to experiment with different flavors and seasonings. With a little practice, you'll be able to pan-fry chicken thighs to perfection every time.
Remember, cooking is an adventure! Don't be afraid to experiment and have fun. And if your chicken thighs don't turn out exactly as you hoped, that's okay! We all have those days. Just try again next time, you might even surprise yourself. Now, go forth and conquer those chicken thighs!
Everyone is watching

Corn on the Cob: The Ultimate Guide to Perfectly Cooked Ears
Healthy MealsAh, corn on the cob. Just the name evokes images of sunny days, barbecues, and that sweet, juicy flavour that ...

Scallops: The Ultimate Guide to Perfect Cooking
Healthy MealsAh, scallops. Those delicate, sweet, and utterly delicious morsels of the sea. They hold a special place in my...

Spaghetti Squash: The Ultimate Guide to Cooking and Serving
Healthy MealsRemember that time you saw spaghetti squash at the supermarket, looking all bumpy and strange, and thought, "W...

Salmon Cooking Times: Perfect Guide for Every Recipe
Healthy MealsLet me tell you, cooking salmon is an art form. It's all about getting that perfect balance: juicy and tender,...

Ham Cooking Time: How Long to Bake, Smoke, or Boil a Delicious Ham
Healthy MealsAh, ham. It's a classic, isn't it? A real crowd-pleaser, especially around holidays. And when done right, it'...
