Right, so you’ve got yourself some lovely chicken legs and you're thinking of giving them the BBQ treatment. Brilliant choice! BBQ chicken legs are a classic for a reason - they’re juicy, flavourful, and perfect for a summer feast. But, like anything involving fire and poultry, there’s an art to getting them just right. No one wants dry, overcooked chicken, am I right? And that’s where I come in. I’ve spent years perfecting my BBQ chicken leg game, trying out different methods, sauces, and of course, cook times. So, grab a cold drink, get comfortable, and let me share my secrets for achieving BBQ chicken leg nirvana.
(Part 1) The Big Picture
Before we delve into the nitty-gritty, let’s get the basics out of the way. I’m assuming you’re using a charcoal or gas BBQ, because that’s what I’m most familiar with. If you’re using an oven, you’ll need to adjust the cooking times accordingly. Also, remember that every grill is different, so you might need to tweak the times slightly depending on your setup. Don't be afraid to experiment and find what works best for you and your equipment.
Preparation is Key
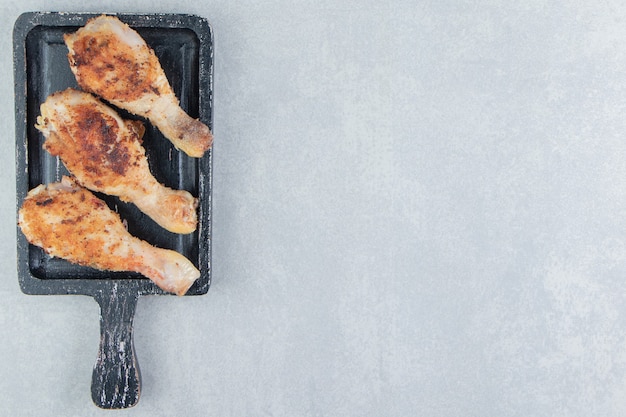
Alright, let’s get those chicken legs ready for their star turn. First things first, pat them dry with some kitchen paper. This helps prevent them from steaming, which can make the skin soggy. We want a nice crispy skin, right? Now, for the flavour. I like to give my chicken legs a good rub with a mix of paprika, garlic powder, onion powder, salt, and black pepper. This creates a base flavour that complements the bbq sauce. However, feel free to experiment with your favourite spice blend. Remember, the best part about BBQ is that you can get creative with the flavours. I've even tried adding a pinch of cayenne pepper for a bit of a kick.
What's the Deal with Skin-on or Skin-off?
Okay, now this is a question I get asked a lot. Do you leave the skin on or take it off? Well, I’m a big fan of keeping the skin on. Why? Because it helps the chicken retain moisture and adds that lovely crispy texture when it’s cooked. Plus, it acts as a barrier for the sauce, keeping the chicken juicy and flavorful. I've found that skin-on chicken legs cook more evenly and stay moist, but if you prefer skinless, that’s totally fine. Just be sure to keep an eye on the chicken to make sure it doesn’t dry out. Maybe try basting it more frequently if you're using skinless legs.
(Part 2) Grilling Time!
Alright, the chicken is prepped, the grill is hot, and you’re ready to get cooking. This is where things get exciting.
Medium-High Heat is Your Friend
I find that medium-high heat is perfect for grilling chicken legs. Aim for around 350-400 degrees Fahrenheit (175-200 degrees Celsius) on your grill. If you’re using a gas grill, you’ll want to preheat it for about 15 minutes. For charcoal, get those coals nice and white-hot. This ensures a good sear and even cooking.
Grilling Time
Now, this is where it gets a bit tricky, because cooking times can vary depending on the size of your chicken legs. For a good guideline, here’s a rough estimate:
| Size of Chicken Legs | Approximate Cooking Time |
|---|---|
| Small chicken legs (under 1 pound) | 20-25 minutes |
| Medium chicken legs (1-1.5 pounds) | 25-30 minutes |
| Large chicken legs (over 1.5 pounds) | 30-35 minutes |
Remember, these are just estimates. The best way to check if your chicken is cooked is to use a meat thermometer. Make sure the internal temperature reaches 165 degrees Fahrenheit (74 degrees Celsius) for safe and delicious chicken. If you don't have a meat thermometer, you can check by pressing on the chicken. It should feel firm and springy, and the juices should run clear. Avoid cutting into the chicken, as this can allow moisture to escape.
The Two-Step Method
Here’s a little trick I’ve learned over the years. To ensure even cooking and juicy results, I recommend a two-step method. Start by grilling the chicken legs over direct heat for about 10-15 minutes, flipping them every few minutes to get those beautiful grill marks. Then, move them to the indirect heat zone of your grill for the rest of the cooking time. This allows the chicken to cook through without drying out. For gas grills, this often involves turning off the burner directly under the chicken. For charcoal grills, you might want to move the chicken to an area with fewer hot coals.
(Part 3) The Sauce is the Boss

Now, we’re getting to the fun part – the sauce! This is where you can truly unleash your inner BBQ maestro.
Choosing the Right Sauce
The world of BBQ sauces is vast and delicious. You’ve got sweet, smoky, tangy, spicy, and everything in between. I personally love a good smoky BBQ sauce with a touch of sweetness, but choose whatever tickles your fancy. For a sweet and smoky sauce, I love a traditional Kansas City style sauce. If you prefer a tangy sauce, a Carolina style sauce is a great option. And for a spicy kick, try a Memphis style sauce with a dash of chili pepper.
When to Apply the Sauce
This is another question I get a lot. Should you apply the sauce at the beginning, the end, or both? Personally, I recommend applying the sauce towards the end of the cooking time, during the last 10-15 minutes. This helps to prevent the sauce from burning and keeps the chicken moist. If you apply the sauce too early, it can burn and create a bitter taste. I've learned this the hard way, trust me!
Don’t Forget to Baste!
To give your chicken that extra layer of flavor and prevent dryness, be sure to baste it with the sauce every few minutes during the last stage of grilling. This helps the sauce caramelize and create that beautiful glossy finish. It also ensures that the chicken is evenly coated in sauce. If you're using a thick sauce, you might want to thin it out a bit with some water or vinegar before basting. This will help it to spread more evenly.
(Part 4) Rest is Key
I know, I know, you’re probably starving by this point, but trust me, letting your chicken rest for 5-10 minutes before carving is essential. This allows the juices to redistribute throughout the meat, resulting in tender and succulent chicken. Imagine the juices running throughout the chicken when you cut into it, it's a beautiful thing!
(Part 5) Serving Up the Goodness
Alright, your chicken legs are perfectly cooked, rested, and ready to be devoured. But how do you serve them up in style?
The Classic side dish Combo
Let’s be honest, BBQ chicken legs are best enjoyed with a classic combo of side dishes. Think creamy coleslaw, tangy potato salad, and juicy corn on the cob. For extra indulgence, throw in some BBQ baked beans or a fresh green salad. This combination of flavors and textures is truly a match made in BBQ heaven.
Get Creative with Your Sides
Don’t be afraid to get creative with your sides! Try pairing your chicken legs with some grilled vegetables like peppers, onions, and zucchini. Or, go for a lighter option like a quinoa salad or a fruit salsa. You can even try a grilled pineapple or a mango salsa for a sweet and tangy twist. Remember, the possibilities are endless!
(Part 6) Leftover Love
Let’s face it, sometimes you end up with leftover BBQ chicken. And good news, it’s even more delicious the next day!
Leftover Solutions
There are so many ways to repurpose your leftover chicken. You can add it to salads, sandwiches, wraps, or even use it as a topping for nachos or tacos. Get creative and experiment with different flavour combinations. I love to use leftover BBQ chicken in a chicken salad sandwich, or even shred it and add it to a pasta dish with a creamy sauce. Don't let those delicious leftovers go to waste!
(Part 7) Troubleshooting Your BBQ Chicken Legs
Alright, let’s get real. Sometimes things don’t go quite as planned. So, what do you do if your chicken legs are looking a bit dry, or if the skin isn’t as crispy as you hoped? Fear not, I’ve got some tips for you.
Dealing with Dry Chicken
If your chicken legs are looking a bit dry, try basting them with a little more sauce and grilling them for a few more minutes. The sauce will help to rehydrate the meat. You can also try wrapping the chicken in foil for the last few minutes of cooking, which helps to retain moisture. If you notice the chicken is getting dry too quickly, consider moving it to the indirect heat zone of your grill earlier in the cooking process. Another good tip is to use a meat thermometer to check the temperature. If the temperature is rising too quickly, it's a sign that the chicken is drying out.
Getting that Crispy Skin
If you’re struggling to get that crispy skin, make sure you pat your chicken legs dry before grilling. Also, try grilling them over direct heat for a few minutes to get a good sear. This creates a nice crispy barrier that helps to keep the chicken moist. If the skin is still not crispy enough, you can try finishing them off under the broiler for a few minutes. Just be careful not to burn them! Always keep an eye on your chicken while it's in the broiler. It can go from crispy to burnt in a flash.
(Part 8) Beyond the Basics
Now, let’s dive into some more advanced techniques and tips for elevating your BBQ chicken leg game.
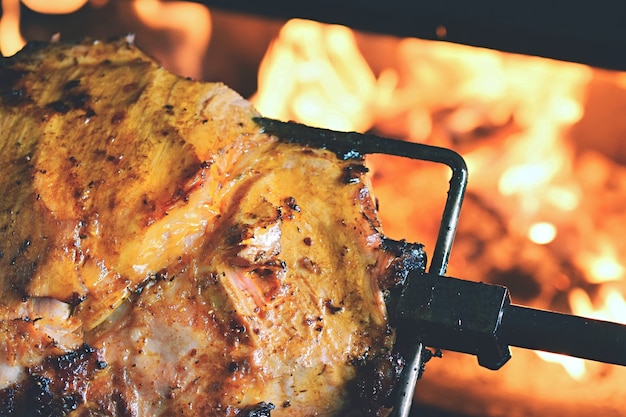
smoked chicken Legs
If you have a smoker, you can take your chicken legs to another level. Smoking infuses the meat with a rich, smoky flavour that’s simply unbeatable. You can use wood chips like hickory, mesquite, or apple wood to create different flavor profiles. Hickory wood chips provide a strong, smoky flavor, while mesquite adds a more robust, almost earthy taste. Applewood chips give a milder, sweeter flavour. Try experimenting with different wood chips to find your favourite.
Spatchcock Chicken
Spatchcocking your chicken is a great way to speed up cooking time and ensure even cooking. Basically, you flatten the chicken by removing the backbone and then grilling it skin-side down. This allows the heat to penetrate the meat more quickly and results in a juicier, more flavorful chicken. To spatchcock your chicken, you can use a pair of kitchen shears or a sharp knife to remove the backbone. Then, flatten the chicken by pressing on the breastbone. You can find tutorials online that will guide you through the process.
grilled chicken Leg Skewers
If you’re looking for a fun and easy way to serve your chicken legs, try grilling them on skewers. You can add other vegetables like peppers, onions, or zucchini to the skewers for a delicious and colorful dish. For best results, use metal skewers. They're more durable and won't burn as easily. Be sure to soak wooden skewers in water for at least 30 minutes before using them, as this prevents them from burning.
(Part 9) My Personal Favourite BBQ Chicken Leg Recipe
Alright, I’ve shared my tips and tricks, but now I’m going to let you in on my personal favourite BBQ chicken leg recipe. It’s simple, flavourful, and always a crowd-pleaser.
Ingredients
- 4 chicken legs
- 2 tablespoons paprika
- 1 tablespoon garlic powder
- 1 tablespoon onion powder
- 1 teaspoon salt
- 1 teaspoon black pepper
- 1 cup BBQ sauce (your favourite)
Instructions
- Pat the chicken legs dry and rub them with the paprika, garlic powder, onion powder, salt, and pepper. This will create a flavorful crust that will enhance the taste of the chicken.
- Preheat your grill to medium-high heat (350-400 degrees Fahrenheit). Make sure the grill is nice and hot for a good sear.
- Grill the chicken legs over direct heat for 10-15 minutes, flipping them every few minutes to get grill marks. This will create those beautiful char marks that everyone loves.
- Move the chicken legs to the indirect heat zone of your grill and continue cooking for another 15-20 minutes, basting with the BBQ sauce every few minutes. This will ensure that the chicken cooks evenly and gets that delicious BBQ glaze.
- Check the internal temperature of the chicken with a meat thermometer. It should reach 165 degrees Fahrenheit. This is the safe internal temperature for poultry.
- Let the chicken legs rest for 5-10 minutes before carving and serving. This allows the juices to redistribute, resulting in incredibly juicy chicken.
Serving Suggestions
Serve your BBQ chicken legs with your favourite side dishes. I recommend creamy coleslaw, tangy potato salad, and corn on the cob. For a complete BBQ feast, try adding some BBQ baked beans, mac and cheese, or potato chips. And don't forget a cold drink!
(Part 10) FAQs
I’ve tried to cover everything, but you might still have some burning questions. Here are some frequently asked questions about BBQ chicken legs:
1. Can I use frozen chicken legs?
Yes, you can use frozen chicken legs. Just be sure to thaw them completely before grilling. You can thaw them in the refrigerator overnight or by using the defrost setting on your microwave. Avoid thawing chicken legs at room temperature, as this can encourage bacteria growth.
2. What kind of BBQ sauce is best for chicken?
It really depends on your personal preference. If you like a sweet sauce, try a honey BBQ or a maple BBQ sauce. If you prefer a smoky sauce, go for a hickory BBQ or a mesquite BBQ sauce. For a tangy sauce, try a vinegar-based BBQ sauce. Experiment with different sauces and see what you like best. Don't be afraid to try something new!
3. How do I know if my chicken legs are cooked through?
The best way to check if your chicken legs are cooked through is to use a meat thermometer. The internal temperature should reach 165 degrees Fahrenheit (74 degrees Celsius). You can also check the chicken by pressing on it with your finger. If the chicken feels firm and springy, it’s cooked through. Another way to check is to cut into the thickest part of the chicken. The juices should run clear, not pink.
4. What happens if I overcook my chicken legs?
If you overcook your chicken legs, they’ll become dry and tough. To prevent overcooking, be sure to check the internal temperature with a meat thermometer. You can also try wrapping the chicken in foil for the last few minutes of cooking, which helps to retain moisture. If you're worried about overcooking, it's always better to err on the side of caution. It's easier to cook chicken a little longer if needed, than to try to salvage dry, overcooked chicken.
5. Can I reheat leftover BBQ chicken legs?
Yes, you can reheat leftover BBQ chicken legs. The best way to reheat them is to bake them in the oven at 350 degrees fahrenheit (175 degrees Celsius) for about 15-20 minutes, or until they are heated through. You can also reheat them in the microwave, but they may not be as juicy. If you're reheating chicken in the microwave, be sure to cover it with a damp paper towel to prevent it from drying out.
Conclusion
And that’s it! You’re now armed with the knowledge and confidence to grill up some seriously delicious BBQ chicken legs. Remember, practice makes perfect, and don’t be afraid to experiment with different techniques and flavours. So, fire up the grill, grab your favourite sauce, and enjoy the fruits of your BBQ labour! And don't forget to share your creations with friends and family. They'll be sure to appreciate your newfound BBQ skills.
Everyone is watching

Corn on the Cob: The Ultimate Guide to Perfectly Cooked Ears
Healthy MealsAh, corn on the cob. Just the name evokes images of sunny days, barbecues, and that sweet, juicy flavour that ...

Scallops: The Ultimate Guide to Perfect Cooking
Healthy MealsAh, scallops. Those delicate, sweet, and utterly delicious morsels of the sea. They hold a special place in my...

Spaghetti Squash: The Ultimate Guide to Cooking and Serving
Healthy MealsRemember that time you saw spaghetti squash at the supermarket, looking all bumpy and strange, and thought, "W...

Salmon Cooking Times: Perfect Guide for Every Recipe
Healthy MealsLet me tell you, cooking salmon is an art form. It's all about getting that perfect balance: juicy and tender,...

Ham Cooking Time: How Long to Bake, Smoke, or Boil a Delicious Ham
Healthy MealsAh, ham. It's a classic, isn't it? A real crowd-pleaser, especially around holidays. And when done right, it'...