Ah, chicken strips! Those bite-sized pieces of golden-brown deliciousness are perfect for a quick weeknight dinner, a casual gathering with friends, or even just a satisfying snack. But, like anything in the kitchen, getting them right can be a bit of a balancing act. You want them cooked through, but not dry, with a crispy exterior that's just begging to be dipped in your favourite sauce. And let's be honest, nobody wants to spend hours in the kitchen, staring intently at a skillet.
So, consider this your comprehensive guide to nailing stovetop chicken strips. I'll share my hard-earned tips and tricks, gleaned from countless kitchen experiments (and a few minor mishaps, let's be real!). We'll cover everything from choosing the right chicken to mastering the art of flipping, and I'll even throw in some insider secrets to help you create truly unforgettable chicken strips. Buckle up, it's about to get crispy!
Part 1: The Foundations of Flawless Chicken Strips
Remember, a good foundation is key to any successful dish. It's not just about throwing some chicken in a pan and hoping for the best. Here's where we lay the groundwork for those perfect chicken strips.
1. The Chicken Choice: Breasts Are Best
First things first, the chicken. You want to use chicken breasts, and for ease of use, I'm a big fan of boneless, skinless chicken breasts. They're lean and cook relatively quickly, making them a good choice for a busy weeknight. If you prefer bone-in breasts, go for it! Just be sure to adjust your cooking times accordingly. And when it comes to quality, don't settle for anything less than fresh, good-quality chicken. It makes a difference in the flavour and texture.
2. The Art of Slicing and Dicing
Now, it's time to slice those breasts into strips. Aim for strips that are about 1-inch wide and 2-3 inches long. This size is ideal for even cooking and a good bite-size for dipping. Too thick, and they'll take forever to cook through, leaving you with dry chicken. Too thin, and they might overcook before they get that crispy exterior. It's all about that delicate balance, my friend.
3. The Coating: A Crispy Canvas for Flavour
Now comes the fun part: the coating. This is where you can really unleash your inner chef and experiment. You can go for a classic breadcrumb coating, the tried-and-true favourite. But don't be afraid to venture beyond the basics. panko breadcrumbs add a lovely, airy crunch. Cornmeal offers a rustic charm and a slightly nutty flavour. And if you're feeling really adventurous, try crushed crackers or even crushed tortilla chips for a unique twist.
Whatever you choose, make sure you coat the chicken strips evenly, getting a nice, even layer of coating all over. I like to use a shallow dish for this. Just toss the chicken strips in the coating, making sure each piece is well-coated. You want that coating to stick firmly, without any bits falling off, so you can avoid the frustration of cleaning up stray breadcrumbs from your stovetop. Trust me, you'll thank me later for this little tip.
Part 2: The Stovetop Showdown: Where Chicken Strips Come Alive
Alright, the prep is done. Now, it's time to get those chicken strips sizzling on the stovetop. It's the moment of truth, and with the right techniques, you'll be rewarded with a symphony of delicious, crispy sounds.
1. The Oil Game: Choose Your Weapon Wisely
First things first, the oil. You want to use a neutral oil with a high smoke point, meaning it can withstand high temperatures without burning or smoking. vegetable oil, canola oil, and grapeseed oil are all good choices. Olive oil is lovely for flavour, but its lower smoke point makes it less ideal for frying. You want to be able to heat the oil to a good, even temperature without it starting to smoke or turn bitter.
A good quality thermometer is your best friend here. Don't rely on just looking at the oil to gauge its temperature. A thermometer gives you accurate readings, ensuring the oil is hot enough to cook the chicken strips evenly but not so hot that they burn. You want that beautiful golden brown colour, not a charred mess.
2. The Sizzling Heat: Get the Oil Ready to Rumble
Heat your oil in a large skillet over medium-high heat. You want the oil to be hot enough to sizzle when you add the chicken strips, but not so hot that they're immediately engulfed in flames. That delightful sizzling sound is your cue that the oil is ready. Think of it as the soundtrack to your culinary masterpiece!
3. Batch by Batch: Give Your Chicken Strips Space
Once your oil is hot, carefully add the chicken strips to the skillet, making sure not to overcrowd it. If you try to cook too many strips at once, they'll steam instead of fry, and you'll miss out on that coveted crispy coating. Think of it like a party – everyone needs their own space to breathe! So, work in batches, adding more strips once the first batch has cooked through and is safely resting on a paper towel-lined plate to soak up any excess oil.
4. Flipping and Frying: The Crucial Dance
Here comes the fun part – flipping! Cook the chicken strips for about 3-4 minutes on each side, or until they're golden brown and cooked through. Don't be afraid to give them a peek and a flip. You want those strips to be a lovely, even golden brown colour, with no hint of pink. You can use a meat thermometer to double-check for doneness, aiming for an internal temperature of 165 degrees Fahrenheit. This is crucial to ensure your chicken is safe to eat.
Part 3: The Finishing Touches: Elevating Your Chicken Strips
You've got those chicken strips cooked to perfection. Now, it's time to add those finishing touches that turn them into something truly special.
1. The Sauce: A Dip-Worthy Symphony
Chicken strips just beg for a good dipping sauce. Here's where your creativity can really shine. Classic honey mustard? Always a crowd-pleaser. Tangy bbq sauce? A timeless favourite. Want to add a kick? A fiery sriracha mayo will do the trick. Or maybe you're feeling adventurous with a sweet and spicy mango chutney or a creamy, garlicky ranch dressing. The possibilities are endless, so explore and find your perfect dipping duo.
2. The Garnish: Adding a Touch of Elegance
Finally, if you're feeling fancy, you can adorn your chicken strips with a few simple garnishes. A sprinkle of freshly chopped parsley or chives adds a burst of freshness. A squeeze of lemon juice offers a bright, tangy touch. Or, if you're a cheese lover, a sprinkle of grated Parmesan or cheddar can add a savory note. But hey, even a simple sprinkle of salt and pepper works wonders. It's all about adding a personal touch and expressing your own culinary style.
Part 4: Tips and Tricks from the Kitchen Trenches
Now that we've covered the basics, let's delve into some insider tips and tricks that will elevate your chicken strip game to new heights.
1. The Brine: A Secret Weapon for juicy chicken
One of my favourite tricks for juicy chicken is to brine the strips before cooking. Brining involves soaking the chicken in a saltwater solution, which helps to retain moisture and prevent dryness. It's a simple step, but it makes a big difference in the overall texture of your chicken strips. Simply mix a cup of water with a tablespoon of salt and soak the chicken strips in this solution for 30 minutes to an hour before coating and cooking. You'll be amazed by the difference it makes!
2. Don't Overcrowd the Skillet: Give Them Room to Breathe
We've already touched on this, but it's worth repeating: don't overcrowd the skillet. If you try to cook too many chicken strips at once, they'll steam instead of fry, resulting in a soggy mess. Give them the space they need to crisp up beautifully. It's all about creating an even cooking environment where each strip gets its own little heat bath.
3. Rest Up: A Little Patience for Perfect Results
Once your chicken strips are cooked through, let them rest for a few minutes on a wire rack before serving. This allows the juices to redistribute, resulting in even more tender and juicy chicken strips. It's a little bit of waiting, but well worth it for those ultimate flavour and texture results.
4. Keep a Watchful Eye: Avoid Burnt Chicken Blues
Pay close attention to your chicken strips while they're cooking! They can go from perfectly golden to burnt in a flash. Keep a watchful eye, flipping them when they're nicely browned on one side. And remember, your trusted meat thermometer is your best friend when it comes to checking for doneness. No one wants to take a bite of a burnt, dry chicken strip. It's all about that delicate dance between crispy and cooked through.
5. Embrace Experimentation: Your Culinary Playground
Don't be afraid to experiment with different coatings and dipping sauces! The world of flavour is your oyster. Think of it as your personal culinary playground. Try different herbs and spices, explore unique flavour combinations, and discover your new favourite way to cook chicken strips. It's all about finding what you enjoy the most. Who knows, you might even create a signature chicken strip recipe that everyone raves about!
Part 5: Timing Is Everything: Decoding the Cooking Times
Alright, let's talk about those crucial cooking times. The exact time it takes to cook chicken strips on the stovetop will depend on a few key factors, including the thickness of the strips, the temperature of your stovetop, and the type of oil you're using. But, as a general rule, you can expect to cook them for about 3-4 minutes per side.
1. The Thickness Factor: Adjusting to the Size
If you're using thicker chicken strips, you'll need to cook them for a little longer to ensure they're cooked through. Thinner strips will cook faster, so keep a close eye on them to avoid overcooking. Think of it like a puzzle – the pieces need to be cooked evenly, regardless of their size. It's all about making those adjustments based on the chicken's thickness.
2. The Heat Equation: Finding the Right Temperature
The temperature of your stovetop will also play a role. If your stovetop is set to a higher heat, those chicken strips will cook faster. If it's set to a lower heat, it'll take a bit longer. Pay attention to the cooking process, and if needed, adjust the heat to avoid burning or undercooking. It's all about finding that sweet spot where the heat is high enough to crisp up the coating but not too intense that it scorches the chicken.
3. Oil Temperature Matters: The Sizzling Indicator
The type of oil you're using can also affect the cooking time. Oils with a higher smoke point, like vegetable oil or canola oil, allow you to cook at a higher temperature, which will reduce the overall cooking time. If you're using an oil with a lower smoke point, like olive oil, you'll need to cook at a lower temperature, which will take a bit longer. It's about understanding the characteristics of your oil and adjusting your cooking accordingly. Remember, the oil should be hot enough to sizzle when you add the chicken, but not so hot that it starts smoking.
Part 6: Troubleshooting: When Things Go Wrong
Let's face it, sometimes things don't go perfectly in the kitchen. Even the most seasoned chefs have their fair share of kitchen mishaps. Your chicken strips might not be as crispy as you'd like, or they might be a little dry. Don't fret, it happens to the best of us. I'm here to help you troubleshoot any problems you might encounter.
1. The Dry Chicken Dilemma: Reversing the Overcooked Chicken
If your chicken strips are dry, it's likely that they were overcooked. This can happen if you cook them for too long at too high a temperature. To prevent this, cook the chicken strips over medium-high heat and check for doneness frequently. Remember, the internal temperature should reach 165 degrees Fahrenheit. Also, consider brining the chicken before cooking to help retain moisture. A little bit of planning can go a long way in avoiding dry chicken.
2. The Soggy Situation: Reviving Those Damp Chicken Strips
If your chicken strips are soggy, it's likely that they were cooked in too much oil, or the oil was not hot enough. Make sure the oil is hot enough to sizzle when you add the chicken strips, and don't overcrowd the skillet. Give them space to cook evenly and achieve that crispy exterior. Remember, that sizzling sound is your friend! It's a sign that the oil is at the right temperature.
3. The Burnt Chicken Blues: Avoiding That Charred Mess
If your chicken strips are burnt, it's likely that the oil was too hot, or they were left in the skillet for too long. Cook them over medium-high heat, and check for doneness frequently. You can also try reducing the heat if the oil seems to be getting too hot. A little vigilance goes a long way in preventing burnt chicken. It's all about that delicate balance between heat and time.
4. The Coating Calamity: Making the Coating Stick
If your coating is falling off the chicken strips, it's likely that it wasn't properly adhered to the chicken. Ensure that the chicken is completely dry before coating. To help the coating stick, you can lightly dredge the chicken strips in flour before coating them with breadcrumbs or cornmeal. Allow the coated chicken to rest for a few minutes before cooking, giving the coating time to set. It's a small step that can make a big difference.
Part 7: Serving Up Success: Endless Chicken Strip Possibilities
You've got those perfectly cooked chicken strips. Now it's time to serve them up and let the culinary celebration begin. Here are a few ideas for serving your chicken strips, and don't forget to unleash your creativity with dipping sauces.
1. Classic Chicken Strips: A Timeless Delight
Serve your chicken strips with a side of your favourite dipping sauce. Honey mustard, BBQ sauce, sriracha mayo – the choice is yours. And don't forget the sides! Fries, onion rings, coleslaw, or a fresh salad are all great companions for this classic dish. It's a simple and satisfying meal that always pleases.
2. Chicken Strip Salad: A Light and Fresh Option
Add some sliced chicken strips to a salad for a quick and easy meal. Choose your favourite greens, toppings, and dressings. A colourful mix of greens, crunchy vegetables, a creamy dressing, and a sprinkle of cheese can transform your chicken strips into a light and satisfying salad.
3. Chicken Strip Wrap: A Portable and Flavorful Treat
Wrap your chicken strips in a tortilla with some shredded lettuce, tomato, and cheese. Add some salsa or guacamole for extra flavour. It's a delicious and convenient way to enjoy chicken strips on the go.
4. Chicken Strip Sandwich: A Classic with a Twist
Turn your chicken strips into a delicious sandwich. Serve them on a toasted bun with your favourite toppings, such as lettuce, tomato, onion, and pickles. You can even add some cheese for a melty, cheesy goodness.
Part 8: FAQs: Answering Your Burning Questions
Alright, let's tackle some frequently asked questions about cooking chicken strips on the stovetop. Because let's be honest, we've all got those nagging questions, especially when we're venturing into the kitchen.
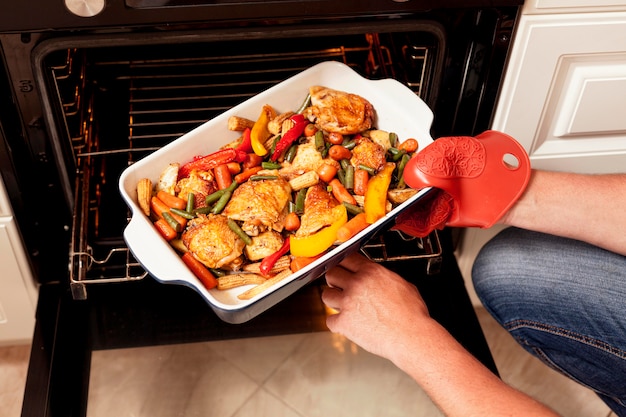
1. Can I Cook Chicken Strips in the Oven?
Yes, you can definitely cook chicken strips in the oven. Preheat your oven to 400 degrees Fahrenheit and bake the chicken strips for 15-20 minutes, or until they're cooked through. Be sure to flip them halfway through the cooking time to ensure they cook evenly. The oven method is a good option if you're looking for a more hands-off approach to cooking your chicken strips.
2. What's the Best Way to Reheat Chicken Strips?
You can reheat chicken strips in the oven, in the microwave, or in a skillet on the stovetop. If you're reheating them in the oven, preheat your oven to 350 degrees fahrenheit and bake the chicken strips for 10-15 minutes. If you're reheating them in the microwave, heat them on high for 30 seconds to 1 minute, or until they're heated through. If you're reheating them in a skillet on the stovetop, heat a little oil in the skillet over medium heat and cook the chicken strips for 2-3 minutes per side, or until they're heated through.
3. How Long Can I Store Cooked Chicken Strips in the Fridge?
You can store cooked chicken strips in the refrigerator for up to 3-4 days. Be sure to store them in an airtight container or wrap them tightly in plastic wrap. You can reheat them according to the instructions above. This way, you can enjoy your delicious chicken strips for a few days without worrying about them going bad.
4. Can I Freeze Cooked Chicken Strips?
Yes, you can freeze cooked chicken strips. Be sure to store them in an airtight container or wrap them tightly in plastic wrap. You can freeze them for up to 2-3 months. To thaw frozen chicken strips, transfer them to the refrigerator overnight. You can also thaw them in the microwave, but be careful not to overcook them. Freezing your chicken strips is a great way to save time and have a quick and easy meal ready whenever you need it.
5. What Are Some Other Ways to Cook Chicken Strips?
You can also cook chicken strips in an air fryer, on a grill, or in a pressure cooker. The air fryer will give you crispy chicken strips in a matter of minutes. The grill will give you a smoky flavour. And the pressure cooker will cook them quickly and evenly. Experiment with different methods and discover your favourite way to cook these versatile strips.
Part 9: The Final Word: Embrace the Crispy, Delicious Journey
There you have it, folks. My complete guide to cooking the perfect chicken strips on the stovetop. With a little bit of practice, you'll be able to whip up these delicious and versatile snacks in no time. So, grab your ingredients, get your skillet sizzling, and enjoy!
And hey, if you're feeling extra adventurous, try making some homemade chicken strips. It's actually easier than you might think. Just search for a recipe online and you'll be making your own chicken strips in no time. You might be surprised at how good they turn out. Just remember, don't be afraid to experiment. That's what cooking is all about!
Everyone is watching

Corn on the Cob: The Ultimate Guide to Perfectly Cooked Ears
Healthy MealsAh, corn on the cob. Just the name evokes images of sunny days, barbecues, and that sweet, juicy flavour that ...

Perfect Pork Roast Oven Cooking Time: A Guide to Delicious Results
Healthy MealsThere's something truly satisfying about a perfectly roasted pork. The aroma alone is enough to make your mout...

Scallops: The Ultimate Guide to Perfect Cooking
Healthy MealsAh, scallops. Those delicate, sweet, and utterly delicious morsels of the sea. They hold a special place in my...

Ham Cooking Time: How Long to Bake, Smoke, or Boil a Delicious Ham
Healthy MealsAh, ham. It's a classic, isn't it? A real crowd-pleaser, especially around holidays. And when done right, it'...

Spaghetti Squash: The Ultimate Guide to Cooking and Serving
Healthy MealsRemember that time you saw spaghetti squash at the supermarket, looking all bumpy and strange, and thought, "W...