Chicken fingers - those little bundles of joy! Whether they're gracing a casual weeknight dinner, a kid-friendly feast, or a cheeky pub snack, they always hit the spot. But we've all been there, haven't we? The dreaded limp, soggy, overcooked, or undercooked chicken finger. It's a culinary tragedy!
Getting that perfect crispy exterior and juicy, tender interior is the holy grail of chicken finger cooking. It's a game-changer, a culinary triumph! Let's dive into the world of chicken fingers together, armed with tips and tricks to ensure crispy, flavourful perfection every single time.
(Part 1) The perfect chicken Finger - A culinary journey
For me, a perfect chicken finger has to be a symphony of textures and flavours. That glorious, golden-brown, crispy exterior giving way to a tender, succulent, juicy chicken interior. It's a sensory experience that makes you want to lick your fingers.
The Art of Breading - A Textured Symphony
Before we even get to the cooking part, let's talk about the breading. It's the foundation of a truly spectacular chicken finger. It's the breading that creates that irresistible crispy texture, holding it all together. Over the years, I've experimented with countless breading techniques, and I've finally cracked the code to a truly exceptional coating.
The secret lies in a three-step process:
- Dusting with Flour: A light coating of flour helps the egg wash adhere to the chicken and provides a base for the breadcrumb mixture.
- A Dip in Egg Wash: The egg wash acts as a binder, helping the breadcrumbs stick to the chicken. It also adds a touch of moisture that contributes to a tender interior.
- The Crunchy Breadcrumb Finale: A final coat of seasoned breadcrumbs creates that beautifully textured, crispy crust. The key is to use breadcrumbs that are fine and dry, ensuring a light and airy coating that crisps up beautifully.
Now, here's the fun part - you can customize your breading mix to suit your tastes. Want a bit of heat? Add some paprika, cayenne, or chili powder. Craving a cheesy kick? Mix in some grated parmesan cheese. A hint of garlic powder or onion powder adds an extra layer of savoury depth. The possibilities are endless.
The Chicken - The Heart of the Matter
When it comes to the chicken itself, I'm a firm believer in boneless, skinless chicken breasts. They're readily available, easy to work with, and cook up quickly. But, if you're feeling adventurous, you can use chicken tenders, or even cut chicken breasts into long strips. The important thing is to use chicken that's been cut into evenly sized pieces, so they cook evenly and are ready at the same time.
Speaking of size, the thickness of your chicken fingers plays a crucial role in the cooking time. Thicker chicken fingers will require a little more time to cook through, so keep that in mind.
(Part 2) Getting That Perfect Crunch - cooking techniques
Now that our chicken fingers are prepped and ready to go, let's talk cooking techniques. Each method brings its own unique charm and results.
The Classic oven method - Reliable and Consistent
The oven method is a classic for a reason: it's reliable, straightforward, and produces wonderfully crispy results. It's also a great option for batch cooking. You can easily cook a large batch of chicken fingers in the oven, perfect for parties or family gatherings.
To achieve that perfect crispy texture, avoid overcrowding the baking sheet. Make sure to leave enough space between the chicken fingers so that they have room to breathe and crisp up beautifully.
The Air Fryer Revelation - Speed and Convenience
The air fryer has become my go-to for crispy chicken fingers. It produces deliciously crispy results in a fraction of the time. Plus, it's a much healthier option compared to deep frying. The air fryer uses a combination of hot air and convection to cook the chicken fingers evenly and quickly, resulting in a beautifully golden-brown and crispy exterior.
Minimal clean-up is another reason the air fryer has become a kitchen hero.
The Deep-Frying Dilemma - Indulgence and Flavor
Let's be honest, deep-fried chicken fingers have a reputation for being indulgent. But sometimes, you just need that deep-fried goodness. That crispy, golden crust and the sheer satisfaction of a perfectly executed deep-fried treat!
The key to getting the perfect deep-fried chicken finger is to ensure your oil is at the right temperature. If the oil isn't hot enough, the chicken fingers will end up greasy and soggy. And if it's too hot, they'll burn before they cook through. A good thermometer is your best friend when deep-frying.
(Part 3) Chicken Finger Cooking Time – The Real Deal
We've arrived at the crux of the matter - the cooking time. It's all about ensuring your chicken fingers are cooked to the right temperature, ensuring they're safe to eat and absolutely delicious.
Remember, these are just guidelines, and cooking time may vary slightly depending on your oven, air fryer, or the thickness of your chicken fingers.
Oven: The Patience Game - Timing is Key
For oven-baked chicken fingers, preheat your oven to 400°F (200°C). Arrange the breaded chicken fingers on a baking sheet lined with parchment paper or a silicone baking mat. Bake for 15-20 minutes, flipping them halfway through cooking to ensure even browning.
Keep a close eye on them - you know, just to make sure they're golden brown and cooked through.
Air Fryer: The Fast Track - Speed Meets Flavor
The air fryer is all about speed and efficiency. Pre-heat your air fryer to 400°F (200°C). Then, place your breaded chicken fingers in the air fryer basket, making sure they're not crowded. Cook for about 10-12 minutes, shaking the basket halfway through to ensure they cook evenly and get that beautiful crispness on all sides.
deep fryer: Hot and Ready - Finessing the Technique
Deep-frying takes a bit more finesse. Heat your oil to 350°F (175°C). Carefully add the breaded chicken fingers to the hot oil in batches, being careful not to overcrowd the pan. Cook for about 3-4 minutes, or until they're golden brown and cooked through. Remove the chicken fingers from the oil and drain them on paper towels.
Be mindful of the oil temperature throughout the cooking process. If it drops too much, the chicken fingers won't crisp up properly.
(Part 4) Don't Forget The Sauce! - Elevating the Experience
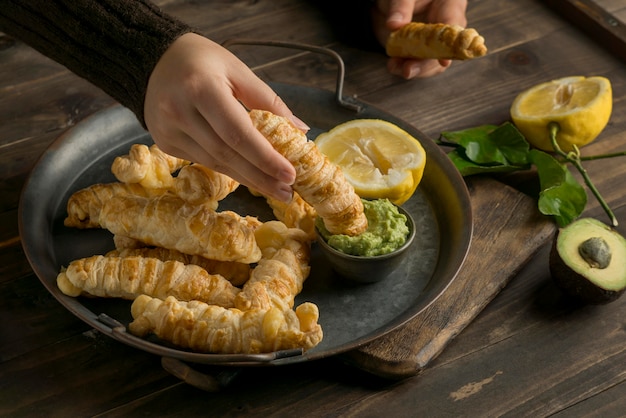
Let's face it, no chicken finger experience is complete without a delicious dipping sauce. It's the perfect accompaniment, elevating the flavour and creating a real taste sensation. From classic honey mustard to zesty sriracha mayo, the sauce options are endless.
A Dip For Every Finger - Culinary Combinations
Here are a few of my favourite sauce combinations:
- Classic Honey Mustard: Sweet, tangy, and a classic for a reason. Simply mix honey and Dijon mustard to create the perfect balance. You can also add a pinch of ground ginger or a dash of paprika for an extra layer of flavour.
- Zesty Sriracha Mayo: A spicy and creamy delight. Mix mayonnaise with a dash of sriracha, and a squeeze of lime juice for a kick. Add a pinch of finely chopped cilantro or a sprinkle of sesame seeds for a touch of freshness.
- Tangy bbq sauce: A sweet and smoky BBQ sauce will never let you down. There are countless BBQ sauce options available, so find your favourite! You can also experiment with different types of BBQ sauces, like a Carolina-style vinegar-based sauce or a smoky Kansas City sauce.
- Blue Cheese Dressing: A bold and flavourful choice that's perfect for those who love a bit of tang. Try adding a dollop of blue cheese dressing to your chicken fingers for a decadent and delicious experience.
- Ranch Dressing: A classic for a reason, ranch dressing pairs perfectly with chicken fingers, providing a creamy and tangy contrast to the crispy exterior.
(Part 5) Chicken Finger Hacks – The Secrets To Success
We all want to make those perfect chicken fingers that everyone raves about. Here are some little tips and tricks that can help make your chicken finger journey even more delicious and satisfying.
The Cold-Start Trick - Setting the Stage for Crispy Perfection
To achieve the crispiest chicken fingers, try chilling them in the fridge for 30 minutes before cooking. This helps the breading set firm, resulting in a super-crispy exterior that holds up even better during cooking.
The Panko Power - Light and Airy
For an extra crispy crust, try using panko breadcrumbs. They have a larger, flake-like structure that creates a light and airy breading that crisps up beautifully.
The Salt and Pepper Shake - Enhancing Flavor
Don't forget to season your chicken fingers! A generous sprinkle of salt and pepper before breading will bring out the flavour of the chicken. You can also get creative with other seasonings like garlic powder, onion powder, or smoked paprika.
The Oven Rack Placement - Even Distribution of Heat
For even cooking in the oven, place your baking sheet on the middle rack. This ensures that the heat is distributed evenly around the chicken fingers.
The Don't Overcrowd Rule - Breathing Room
Whether you're using the oven or the air fryer, make sure to leave enough space between the chicken fingers. This will ensure they cook evenly and don't steam each other, resulting in a soggy mess.
(Part 6) Chicken Finger Variations – Think Outside The Box
Now, let's explore some exciting ways to put a twist on the classic chicken finger. These variations are sure to impress and delight.
The Spicy Buffalo Chicken Finger - A Flavor Explosion
A flavour explosion that combines the tangy, spicy kick of Buffalo sauce with the juicy tenderness of chicken fingers. To make your own Buffalo sauce, simply whisk together melted butter, hot sauce, and vinegar. Add a touch of honey for a touch of sweetness.
The Parmesan-Crusted Chicken Finger - Cheesy and Savory
Elevate your chicken fingers with a cheesy, parmesan-crusted breading that's both savoury and satisfying. Simply add grated parmesan cheese to your breadcrumb mixture. You can also add a pinch of garlic powder or onion powder for an extra layer of flavour.
The Honey Garlic Chicken Finger - Sweet and Savory Harmony
A delightful blend of sweet and savoury, honey garlic chicken fingers are perfect for those who love a touch of sweetness. Add a tablespoon of honey and a teaspoon of garlic powder to your breadcrumb mixture for a flavorful twist.
The Coconut-Crusted Chicken Finger - A Tropical Twist
A tropical twist on the classic chicken finger, with a crispy coconut breading that adds a hint of sweetness and texture. Simply replace the breadcrumbs with shredded coconut for a unique and delicious flavour.
The Lemon Herb Chicken Finger - Bright and Refreshing
A bright and refreshing chicken finger with a zesty lemon herb breading. Perfect for a light and summery meal. Add a tablespoon of lemon zest and a teaspoon of dried herbs like thyme, rosemary, or oregano to your breadcrumb mixture.
(Part 7) The Chicken Finger Feast – Beyond The Snack
Chicken fingers are more than just a casual snack. They can be a star in a delicious, satisfying meal. Here are a few ideas to inspire your culinary creativity.
The Chicken Finger Sandwich - A Classic Revisited
A classic for a reason, the chicken finger sandwich is a simple yet satisfying meal. Serve them on a soft brioche bun with your favourite sauces, lettuce, and tomato. For an extra flavour boost, try adding a slice of bacon or a dollop of avocado.
The Chicken Finger Salad - A Light and Refreshing Option
For a lighter option, create a fresh and flavorful chicken finger salad. Toss your cooked chicken fingers with mixed greens, cherry tomatoes, red onion, and a tangy dressing. Try a vinaigrette dressing with a hint of lemon or a creamy Dijon dressing.
The Chicken Finger Pasta - Elevating pasta dishes
Elevate your pasta dishes by adding crispy chicken fingers. Toss cooked pasta with your favourite sauce and top with chicken fingers. A real crowd-pleaser! Try adding a sprinkle of parmesan cheese or a drizzle of pesto for extra flavour.
The Chicken Finger Quesadillas - Creative and Delicious
Get creative with quesadillas by adding chicken fingers, cheese, and your favourite toppings. Fold and grill until golden brown and cheesy. Try adding salsa, sour cream, guacamole, or jalapenos for a flavour explosion.
(Part 8) Chicken Finger FAQs – Let's Clear Things Up
Let's address those burning questions you might have about chicken fingers.
1. Can I freeze chicken fingers?
Yes, you can absolutely freeze cooked or uncooked chicken fingers! To freeze cooked chicken fingers, cool them completely and then store them in an airtight container or freezer bag. They'll stay good for up to 3 months. For uncooked chicken fingers, make sure they're properly prepped and breaded. Store them in an airtight container or freezer bag and they'll stay good for up to 2-3 months.
When you're ready to use them, thaw them overnight in the refrigerator or reheat them from frozen in the oven or air fryer.
2. How do I reheat chicken fingers?
There are a few ways to reheat your chicken fingers. You can bake them in the oven at 350°F (175°C) for about 10-15 minutes. Or, you can reheat them in the air fryer at 375°F (190°C) for about 5-7 minutes. Just remember to make sure they're heated through and crispy again.
3. What if my chicken fingers are soggy?
It happens, we all have those moments in the kitchen! If your chicken fingers end up soggy, don't despair! You can try re-crisping them in the oven or air fryer. Just heat them until they're crispy again, but make sure to watch them closely so they don't burn.
To prevent sogginess, make sure your chicken fingers are completely dry before breading them and avoid overcrowding the pan or baking sheet.
4. What happens if I overcook my chicken fingers?
Overcooked chicken fingers will be dry and tough. They won't be as enjoyable to eat. Keep an eye on your chicken fingers during cooking to make sure they're cooked through but not overdone.
Use a meat thermometer to check the internal temperature of your chicken fingers. They should reach an internal temperature of 165°F (74°C).
5. Can I make chicken fingers ahead of time?
Absolutely! You can prep your chicken fingers ahead of time by breading them and storing them in the fridge until you're ready to cook. This will save you time and ensure that you have delicious, crispy chicken fingers whenever you're craving them.
(Part 9) The Chicken Finger Legacy – A Culinary Love Affair
So there you have it, my chicken finger journey! It's been a love affair filled with crispy textures, delicious flavours, and countless culinary adventures. Whether you're a seasoned pro or a kitchen novice, mastering the art of the chicken finger is a rewarding experience. It's all about finding those little nuances, those secret tips, and those moments of culinary magic. So, go forth, experiment, and create your own perfect chicken finger masterpiece. Happy cooking, everyone!
I hope you've enjoyed this journey through the world of chicken fingers. I've shared my own experiences, tips, and tricks, but remember, the most important thing is to have fun in the kitchen.
Everyone is watching

Corn on the Cob: The Ultimate Guide to Perfectly Cooked Ears
Healthy MealsAh, corn on the cob. Just the name evokes images of sunny days, barbecues, and that sweet, juicy flavour that ...

Perfect Pork Roast Oven Cooking Time: A Guide to Delicious Results
Healthy MealsThere's something truly satisfying about a perfectly roasted pork. The aroma alone is enough to make your mout...

Scallops: The Ultimate Guide to Perfect Cooking
Healthy MealsAh, scallops. Those delicate, sweet, and utterly delicious morsels of the sea. They hold a special place in my...

Ham Cooking Time: How Long to Bake, Smoke, or Boil a Delicious Ham
Healthy MealsAh, ham. It's a classic, isn't it? A real crowd-pleaser, especially around holidays. And when done right, it'...

Spaghetti Squash: The Ultimate Guide to Cooking and Serving
Healthy MealsRemember that time you saw spaghetti squash at the supermarket, looking all bumpy and strange, and thought, "W...