Okay, let’s be honest, who doesn’t adore a good piece of crispy bacon? It’s the ultimate breakfast hero, a sandwich superstar, and frankly, a delicious addition to just about anything. But sometimes, you just crave that perfect, gloriously crunchy bacon, and frying it in a pan doesn't always hit the spot. That's where oven-baked bacon comes in, my friends.
This guide is your bible, your go-to resource for everything crispy oven-baked bacon. From the perfect type of bacon to the best baking techniques, I'm going to share all my secrets. So, grab your apron, put on your favorite playlist, and let’s get started!
(Part 1) The Bacon Basics: choosing the right cut
The Bacon Battlefield: Choosing Your Weapon
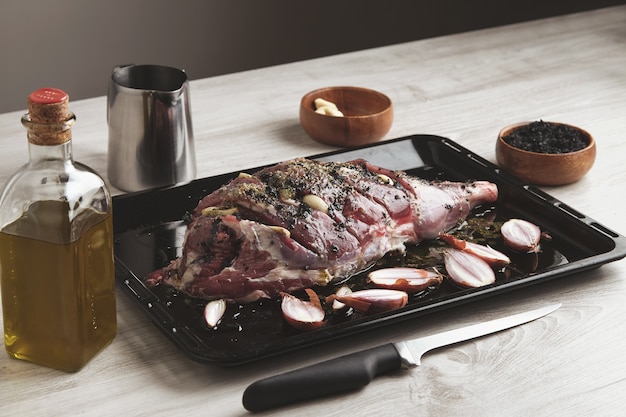
Okay, let’s talk about the star of the show – the bacon itself. There’s a whole world of bacon out there, and it can be a bit overwhelming. You've got thick-cut, thin-cut, smoked, unsmoked, and even flavored bacon. It's a bacon bonanza!
But here's the thing: for crispy oven-baked bacon, you want to choose thick-cut bacon. It's the best for achieving that perfect crunch. Thin-cut bacon tends to dry out and shrivel up in the oven, leaving you with more of a jerky-like texture, and that's definitely not what we're going for.
The Fat Factor: Why Fat is Your Friend
Now, let’s talk about fat content. You might be thinking, "More fat, more greasy bacon, right?". Well, not quite! A higher fat content actually leads to crispier bacon. It’s all about the rendering process. As the fat melts during baking, it creates a crispy shell around the bacon.
So, when choosing your bacon, look for one with a higher fat content. You can often find this information on the packaging. But here’s a little secret: thicker-cut bacon generally has a higher fat content, so you’re already on the right track!
(Part 2) Setting the Stage: Prepping Your Bacon
The Oven’s Role: Preheating for Perfect Results
Alright, your bacon is chosen, so let's get your oven ready. Remember, preheating is key to achieving that perfect crispy texture. It's like warming up your culinary stage for a delicious performance.
Preheat your oven to 375 degrees Fahrenheit (190 degrees Celsius). This temperature ensures even cooking and maximizes crispiness.
The Baking Sheet: Choosing the Right Tool
You're going to need a baking sheet. It might seem simple, but there's a little trick here. For the best results, use a rimless baking sheet. It allows for better airflow and heat circulation, which leads to that beautifully even browning.
If you only have a rimmed baking sheet, that's fine, just make sure you position the bacon so it's not touching the rim. You want those edges to get nice and crispy too!
(Part 3) Mastering the Art: The Baking Process
The Bacon Layout: Arranging for Success
It’s time for the moment of truth – laying out your bacon. This is where a little strategy comes in handy.
For the most even cooking, you want to place the bacon strips in a single layer on your baking sheet. No overcrowding, folks! It might seem tempting to cram as much bacon on there as possible, but trust me, it's just going to lead to soggy bacon and a messy situation.
If you're dealing with a lot of bacon, just use a second baking sheet. It's all about getting that crispy goodness!
Setting the Timer: Baking Time for Different Thicknesses
Here's where things get interesting. Baking time depends on the thickness of your bacon. Thicker bacon will take longer to cook through. So, you need to be a bit of a detective here.
Here's a general guide:
Thick-Cut Bacon: 18-20 minutes
Thin-Cut Bacon: 12-15 minutes
But remember, this is just a starting point. The best way to check if your bacon is done is by using your eyes and your ears.
The Tell-Tale Signs of perfect bacon
Here are the signs you’re looking for to know your bacon is ready:
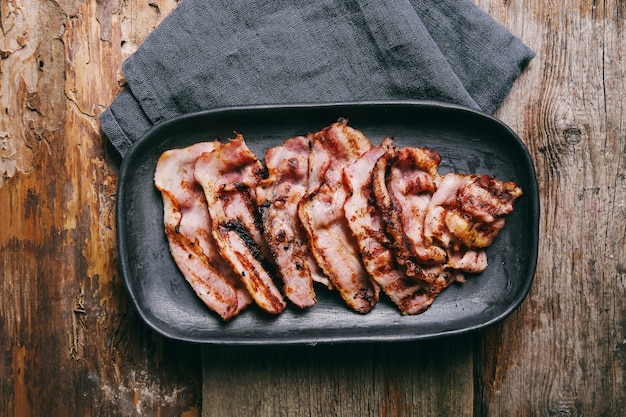
Color: The bacon should be a deep golden brown, almost a bit caramelized. You don't want it to be black or burnt, but a nice golden brown is the sign of perfection.
Texture: The bacon should be firm to the touch and have that signature crispy snap. If it's still floppy, it needs a little more time in the oven.
Sound: You should hear a gentle crackle from the bacon as it cooks. This is the sound of deliciousness, and it means the fat is rendering out beautifully.
(Part 4) The Finishing Touches: Elevating Your Bacon
The Flip: Turning for Even Crispness
Here's a little trick I learned the hard way: flipping your bacon mid-way through cooking. Now, I know what you're thinking, "But why?". It's all about ensuring even crispiness, my friend.
By flipping your bacon after about half the baking time, you'll get those gorgeous, crispy edges and a more even cook overall. Think of it as a little extra TLC for your bacon.
The Glaze Factor: Adding Sweet and Savory Flavors
Now, if you're feeling adventurous, you can add a little glaze to your bacon. This is a great way to kick things up a notch and add a touch of sweetness or smoky flavour.
Here are a few of my favourite glaze combinations:
Maple Syrup and Soy Sauce: For a sweet and salty flavour, drizzle a mixture of maple syrup and soy sauce over your bacon about halfway through baking.
Brown Sugar and Chili Powder: For a little kick, mix together brown sugar and chili powder and brush it onto your bacon during the last few minutes of cooking.
The Honeycomb Effect: Achieving Maximum Crisp with a Baking Rack
Now, this is a little trick for the bacon purists out there: using a baking rack. It might seem like an extra step, but trust me, it's worth it.
Placing your bacon on a baking rack instead of directly on the baking sheet allows for even heat circulation and helps to drain off excess fat. The result? That ultimate, crispy bacon that snaps with every bite.
(Part 5) The After-Bake: Serving Your Crispy Masterpiece
The Cooling Down Period: Patience is a Virtue
Once your bacon is out of the oven, it's going to be tempting to dive right in, I know. But hold your horses! Letting your bacon cool down for a few minutes will allow the fat to solidify, resulting in that perfect, crispy texture.
The Paper Towel Trick: Absorbing the Excess Fat
Speaking of fat, let's talk about the excess. Now, you might be thinking, "More fat, more flavour, right?". Well, while that might be true, a little excess fat can make your bacon a bit soggy.
So, after your bacon has cooled down, place it on a paper towel-lined plate or sheet of parchment paper. This will help to absorb any excess fat and keep your bacon nice and crisp.
Serving Suggestions: Bacon Beyond the Breakfast Plate
Now that your crispy bacon is ready, the possibilities are endless! Here are a few ideas to get your creative juices flowing:
Breakfast Classic: Serve it up with eggs, toast, and a side of your favorite fruit.
Sandwich Superstar: Layer it on top of your favorite sandwich, whether it's a BLT or a grilled cheese.
Salad Hero: Add a few slices to your next salad for a protein boost and a delightful crunch.
Snack Perfection: Enjoy it on its own, with a side of your favorite dipping sauce.
(Part 6) Beyond the Basics: Exploring Variations
The Sweet Tooth: Bacon with a Twist
Now, let's take things up a notch. If you're looking for something a bit more unique, you can try adding a little sweetness to your bacon.
Here are a few ideas:
Maple Bacon: Brush your bacon with maple syrup before baking for a sweet and smoky flavour.
Brown Sugar Bacon: Sprinkle brown sugar over your bacon before baking for a caramelized crust.
Honey Bacon: Drizzle honey over your bacon during the last few minutes of baking for a sticky, sweet treat.
The Savory Side: Adding More Flavor
But if sweet isn't your thing, don't worry, there are plenty of savory options too.
Garlic Bacon: Mix garlic powder with olive oil and brush it onto your bacon before baking.
Chili Bacon: Sprinkle chili powder over your bacon before baking for a spicy kick.
Smoked Paprika Bacon: Rub your bacon with smoked paprika before baking for a smoky, flavorful twist.
(Part 7) The Storage Solution: Keeping Your Bacon Crispy
The Refrigerator Rule: Storing Leftover Bacon
Alright, so you've made a glorious batch of crispy bacon, but you have some leftover. Don't worry, it's not going to go to waste.
To store your leftover bacon, let it cool completely, then place it in an airtight container in the refrigerator. You can also wrap it tightly in plastic wrap or parchment paper to prevent it from drying out.
The Freezing Option: Saving Bacon for Later
If you're planning on storing your bacon for a longer period, freezing is the way to go.
Freeze your bacon in a single layer on a baking sheet, to prevent it from sticking together.
Once the bacon is frozen solid, transfer it to a freezer bag and store it in the freezer for up to three months.
(Part 8) The Great Bacon Debate: To Cook or Not to Cook
The Cooked Bacon Dilemma: Buying vs. Making
Now, let's address the elephant in the room: buying pre-cooked bacon vs. cooking your own.
Here's the thing, both options have their pros and cons.
Buying pre-cooked bacon is convenient and saves you time, but it often lacks that crispy, satisfying texture you get from baking it yourself. Cooking your own bacon gives you complete control over the process and allows you to customize your bacon to your liking.
The Bacon Battle: Convenience vs. Crisp
So, which is the right choice for you? Ultimately, it comes down to your personal preferences.
If you're short on time and looking for a quick and easy option, buying pre-cooked bacon is a good choice. However, if you're looking for that ultimate crispy bacon experience, cooking it yourself is the way to go.
(Part 9) FAQs: Bacon Knowledge at Your Fingertips
1. Can I bake bacon in a toaster oven?
Yes, you can definitely bake bacon in a toaster oven. The only thing to keep in mind is that you'll need to adjust the baking time and temperature based on your toaster oven's power and size. Start with a lower temperature and check the bacon frequently.
2. What if my bacon is too thick?
If you're working with really thick bacon, you may need to adjust the baking time. Start with 20-25 minutes and check it frequently. You can always add a few more minutes if needed.
3. Can I use parchment paper instead of a baking sheet?
While parchment paper is great for lining baking sheets, it's not ideal for baking bacon directly on. The bacon will likely stick to the parchment paper, making it difficult to remove. Use a baking rack on top of a baking sheet or a rimmed baking sheet directly.
4. Can I bake bacon with other ingredients?
Yes, absolutely! You can bake bacon alongside other ingredients, such as potatoes, onions, or peppers. Just make sure to arrange the ingredients in a single layer on your baking sheet so that they cook evenly.
5. Can I freeze cooked bacon?
Yes, you can freeze cooked bacon. Just make sure to let it cool completely and place it in an airtight container or freezer bag before storing it in the freezer. frozen bacon can last for up to 3 months.
(Part 10) Final Thoughts: Embrace the Crispy Bacon Life
So there you have it, folks, the ultimate guide to crispy oven-baked bacon! Now, go forth and conquer the world of bacon. Experiment with different types of bacon, glazes, and flavors. And most importantly, have fun! Because let's face it, life's too short for soggy bacon. Embrace the crispy side, and you'll never look back.
Everyone is watching

Corn on the Cob: The Ultimate Guide to Perfectly Cooked Ears
Healthy MealsAh, corn on the cob. Just the name evokes images of sunny days, barbecues, and that sweet, juicy flavour that ...

Perfect Pork Roast Oven Cooking Time: A Guide to Delicious Results
Healthy MealsThere's something truly satisfying about a perfectly roasted pork. The aroma alone is enough to make your mout...

Ham Cooking Time: How Long to Bake, Smoke, or Boil a Delicious Ham
Healthy MealsAh, ham. It's a classic, isn't it? A real crowd-pleaser, especially around holidays. And when done right, it'...

Scallops: The Ultimate Guide to Perfect Cooking
Healthy MealsAh, scallops. Those delicate, sweet, and utterly delicious morsels of the sea. They hold a special place in my...

Spaghetti Squash: The Ultimate Guide to Cooking and Serving
Healthy MealsRemember that time you saw spaghetti squash at the supermarket, looking all bumpy and strange, and thought, "W...