Part 1: The Quest for the Perfect Ear
The journey to delicious corn on the cob begins with finding the right ingredients – and for this dish, that means choosing the freshest, most flavourful corn you can find.The fresh corn Advantage
I'm a firm believer in fresh, seasonal produce. There's just nothing like the taste of corn picked straight from the field, bursting with sweetness and vibrant flavour. But, if you don't have a backyard garden overflowing with corn, head to your local farmer's market or a reputable greengrocer. These are the places where you'll find the real deal – corn at its peak of freshness and flavour.
How to Spot a Fresh Ear of Corn:
- Green Husks: The husks should be bright green, a sign of freshness, and slightly damp to the touch. Avoid any that are brown, dry, or have holes.
- Tightly Wrapped Husks: The husks should be tightly wrapped around the cob, protecting the kernels inside.
- Fresh Silk: The silk, those strands sticking out of the top, should be fresh and not too dry, indicating the corn hasn't been sitting around for too long.
- Firm Cob: When you gently squeeze the cob, it should feel firm and not mushy. This indicates the kernels are plump and juicy.
- Listen for the "Pop": If you gently press the ear near the tip, you should hear a slight "pop" as the kernels release their moisture. It's like a little test of the corn's hydration.
Storing Fresh Corn:
If you can't cook the corn right away, store it in the fridge, wrapped in a damp paper towel or plastic bag. This helps maintain moisture and prevents the corn from drying out. Aim to cook it within a day or two for the best flavour.
frozen corn: A Worthy Backup
Don't worry, even if fresh corn is out of season, you can still enjoy a delicious corn on the cob. Frozen corn, when done right, can be a real lifesaver. Look for frozen corn that's been blanched and frozen immediately after harvesting – this preserves the flavour and texture as much as possible. It might not have the same fresh, bursting-with-sweetness flavour as the real deal, but it's a great alternative when fresh corn isn't available.
Tips for Using Frozen Corn:
- Thaw it first: Before cooking, thaw the corn by placing it in the refrigerator for a few hours. This helps prevent the corn from becoming overly soggy when cooked.
- Don't overcook it: Frozen corn cooks much faster than fresh corn. You'll need to adjust your cooking time accordingly, so be sure to check it frequently to prevent overcooking.
Part 2: Getting Ready for the Grill, Pan, or Pot
So, you've got your perfect corn, whether it's fresh or frozen. Now, it's time to prep it for cooking. This part is relatively simple, but there are a few things to keep in mind to ensure a smooth and tasty process.The Art of Shucking

First things first, you need to shuck the corn, peeling away the outer husks and silk. It's a classic kitchen skill, but here's a simple method that'll have you shucking like a pro:
- Remove the husks: Grab the bottom of the corn cob and gently pull the husks downwards. You can do this by holding the corn cob with one hand and pulling the husks downwards with the other. The husks should come off easily.
- Remove the silk: Once the husks are off, you'll see the silk attached to the cob. You can easily remove it by pulling it off with your fingers. Don't worry, it's easier than it looks, and there are no fancy tools needed.
- Wash the cob: Wash the corn cob under cold running water to remove any remaining silk or debris. This ensures a clean and crisp flavour.
A Little Trick for Moisture:
Here’s a little trick I’ve learned over the years, especially useful for grilling corn. If you're grilling, leave a few layers of the husk at the bottom of the cob. This acts as a natural steamer, helping to keep the corn moist and juicy while it cooks. It's like a little secret ingredient for perfect grilled corn.
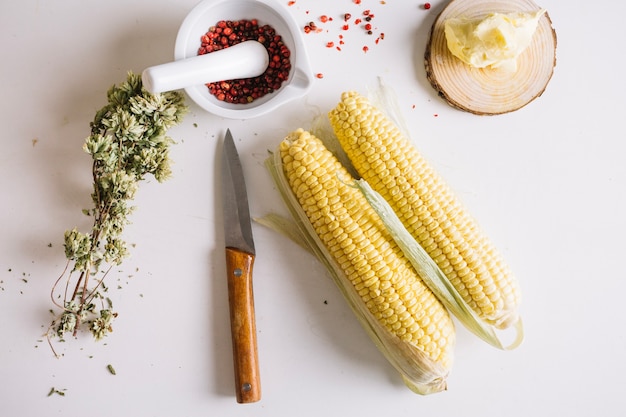
Cutting for culinary adventures
If you plan on enjoying the corn on the cob, you can skip this step. But if you're using the corn in other dishes, you'll need to cut the kernels off the cob. It's a simple process, but here's how to do it like a pro:
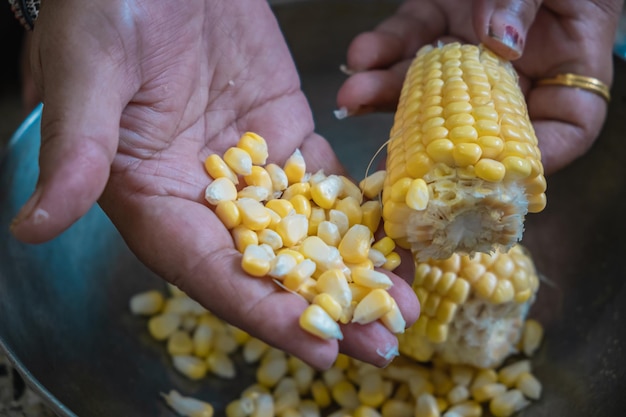
The Kernel Cutting Technique:
- Stand the cob upright: Hold the corn cob firmly in one hand, standing it upright on a cutting board. This provides a stable base for cutting.
- Use a sharp knife: Use a sharp knife to slice down the sides of the cob, removing the kernels. Work your way around the cob, making sure to get every kernel.
- Scrape the cob: Once you've removed all the kernels, use the back of your knife to scrape the cob to get any remaining kernels. This makes sure you get the most out of each ear of corn.
Part 3: The Art of Cooking: From Boiling to Grilling
Now, the moment you've been waiting for: cooking the corn. There are a few different ways to cook corn on the cob, and each method brings its own unique flavour and texture.The Classic Boil: Simple and Reliable
Boiling is the simplest and most classic method for cooking corn. It's a great way to cook a large batch of corn quickly and evenly, and it's a reliable method for getting that tender, juicy corn you crave.
How to Boil Corn to Perfection:
- Fill a large pot with water: Fill a large pot with enough water to cover the corn cobs. Add a pinch of salt to the water, which helps to season the corn and draw out its natural sweetness.
- Bring the water to a boil: Bring the water to a rolling boil over high heat. You want the water bubbling vigorously to ensure the corn cooks evenly.
- Add the corn: Carefully add the corn cobs to the boiling water. Make sure they're submerged in the water.
- Cook for 3-5 minutes: Cook the corn for 3-5 minutes, or until the kernels are tender. You can test the doneness by piercing a kernel with a fork. It should give slightly but not be overly soft.
- Drain the corn: Once the corn is cooked, drain it in a colander. You can serve it immediately or chill it for later.
Grilling: The Smoky Corn Experience
grilling corn on the cob is a summer tradition for a reason. The smoky flavour it takes on is simply irresistible. It's the perfect way to cook corn outdoors, enjoying the warmth of the grill and the aroma of summer.
The Grilled Corn Masterclass:
- Preheat the grill: Preheat your grill to medium heat. You want the grill hot enough to cook the corn evenly but not so hot that it burns.
- Wrap the corn: Wrap each cob in foil or leave a few layers of the husk on. This helps to keep the corn moist and prevent it from drying out. The husk also adds a touch of smokiness to the flavour.
- Grill the corn: Place the corn cobs on the grill and cook for 10-15 minutes, turning occasionally, until the kernels are tender and slightly charred. The char adds a delicious smoky flavour and adds a bit of visual appeal to the corn.
- Serve: Remove the corn from the grill and let it cool slightly before serving. This allows the corn to rest and the flavours to meld.
Microwave: Quick and Easy Corn
Microwaving is a quick and easy way to cook corn on the cob, especially if you're short on time. It's not the most sophisticated method, but it gets the job done in a pinch, and you can still achieve tender and flavourful corn.
microwave corn Made Simple:
- Wrap the corn: Wrap each cob in a damp paper towel. This helps to steam the corn and prevent it from drying out. You can also wrap it in a few layers of plastic wrap, creating a mini steamer.
- Microwave the corn: Place the wrapped corn in the microwave and cook on high for 3-4 minutes, or until the kernels are tender. The cooking time might vary depending on the power of your microwave, so keep an eye on it.
- Let the corn cool: Remove the corn from the microwave and let it cool slightly before serving. This allows the corn to rest and the flavours to develop.
Part 4: The Flavor Revolution: Seasoning Your Corn
You've cooked your corn, and it's looking fantastic. Now, it's time to take the flavour to the next level with a selection of seasonings that will make your taste buds sing.The Classic Duo: Butter and Salt
Let's start with the classics. Nothing beats a simple butter and salt combination. It's the perfect way to enhance the natural sweetness of the corn, bringing out its best qualities. Just melt some butter and drizzle it over the corn, then season with salt to taste. It's a simple, timeless combination that always works.
Herbs and Spices: A Burst of Flavor
Want to add a little more depth of flavour? Try some fresh herbs like chives, parsley, or basil. They add a touch of freshness and brighten up the corn's flavour. You can also use a blend of dried herbs, such as oregano, thyme, or rosemary, which provide a more intense flavour. For a touch of heat, add a pinch of cayenne pepper or chili powder, which gives the corn a subtle kick.
Cheese: A Cheesy Delight
Who doesn't love a bit of cheesy goodness? Sprinkle some grated Parmesan cheese, cheddar cheese, or crumbled feta cheese over your corn for a flavour explosion. Parmesan adds a sharp, salty note, cheddar provides a creamy, tangy flavour, and feta brings a briny, salty flavour that complements the sweetness of the corn.
Spicy Sauces: For Those Who Like It Hot
For those who like it hot, try adding some sriracha sauce, hot sauce, or jalape??o peppers. Sriracha adds a spicy, tangy flavour, while hot sauce offers a fiery kick, and jalape??o peppers provide a slightly sweet heat that complements the corn's flavour.
Part 5: Serving Corn on the Cob: A Culinary Showcase
Now that your corn is cooked and seasoned, it's time to present it in a way that does justice to its flavour and beauty.Serving Styles: Simple to Spectacular
You can serve corn on the cob straight from the pot, grill, or microwave. But, if you want to be a bit more fancy, you can serve it on a platter with a side of melted butter and your favourite seasonings. You can even create a beautiful presentation by arranging the corn on a bed of fresh herbs, adding a touch of elegance.
Serving Tips: Making it Easy and Enjoyable
- Use a corn holder: If you're serving corn on the cob, use a corn holder to make it easier to eat. This keeps your fingers clean and prevents the corn from slipping around.
- Cut the corn: If you're serving the corn in a salad or other dish, cut the kernels off the cob. This allows for easier mixing and eating.
- Serve immediately: Corn is best served hot and fresh. The flavour and texture are at their best when the corn is freshly cooked.
Part 6: Beyond the Cob: corn on the cob recipes
Now, let's explore some creative ways to use corn on the cob beyond just enjoying it on its own. It's a versatile ingredient, adding its sweetness and texture to a variety of dishes.corn salad: A summertime classic
This is a refreshing and flavourful summer salad that showcases the versatility of corn. You can use fresh or frozen corn for this recipe. It's a simple yet delicious way to enjoy the sweetness of corn.
Ingredients:
- 2 ears of corn, cooked and kernels removed
- 1/2 cup chopped red onion
- 1/2 cup chopped bell pepper (any colour)
- 1/4 cup chopped fresh cilantro
- 1/4 cup lime juice
- 2 tablespoons olive oil
- Salt and pepper to taste
Instructions:
- In a large bowl, combine the corn kernels, red onion, bell pepper, and cilantro. This creates a vibrant and colourful base for the salad.
- In a small bowl, whisk together the lime juice and olive oil. This creates a tangy and flavourful dressing.
- Pour the dressing over the salad and toss to coat. Ensure that all the ingredients are coated evenly with the dressing.
- Season with salt and pepper to taste. Adjust the seasonings to your preference.
- Serve immediately or refrigerate for later. This salad is best enjoyed fresh but can be stored in the refrigerator for a few days.
Corn Fritters: Crispy and Delicious
These are a classic comfort food, perfect for a light lunch or a side dish. You can use fresh or frozen corn for this recipe, and they're surprisingly easy to make.
Ingredients:
- 1 cup corn kernels
- 1/2 cup all-purpose flour
- 1/4 cup grated Parmesan cheese
- 1 egg, beaten
- 1/4 cup milk
- 1/2 teaspoon baking powder
- 1/4 teaspoon salt
- Oil for frying (vegetable or canola oil works well)
Instructions:
- In a large bowl, combine the corn kernels, flour, Parmesan cheese, egg, milk, baking powder, and salt. Mix well to combine all the ingredients.
- Heat the oil in a large skillet over medium heat. Make sure the oil is hot enough before adding the fritters, as this will help them to cook evenly.
- Drop the batter by tablespoons into the hot oil. Don't overcrowd the skillet, as this will lower the temperature of the oil and prevent the fritters from cooking properly.
- Cook for 2-3 minutes per side, or until golden brown. The fritters should be cooked through and have a crispy exterior.
- Remove the fritters from the pan and drain on paper towels. This absorbs excess oil, resulting in less greasy fritters.
- Serve immediately. Corn fritters are best enjoyed hot and fresh.
Corn Chowder: A Hearty and Comforting Soup
This is a classic soup, perfect for a cold evening or a comforting lunch. You can use fresh or frozen corn for this recipe. It's a hearty and flavourful soup that will warm you from the inside out.
Ingredients:
- 2 tablespoons butter
- 1 onion, chopped
- 2 celery stalks, chopped
- 2 carrots, chopped
- 4 cups chicken broth
- 1 cup corn kernels
- 1 cup milk
- 1/2 teaspoon salt
- 1/4 teaspoon black pepper
Instructions:
- In a large pot or dutch oven, melt the butter over medium heat. The butter will add a richness to the soup.
- Add the onion, celery, and carrots and cook until softened, about 5 minutes. This develops the flavour of the vegetables.
- Pour in the chicken broth and bring to a boil. The broth forms the base of the soup.
- Reduce heat to low and simmer for 10 minutes. This allows the flavours to meld and the vegetables to soften further.
- Add the corn kernels and cook for 5 minutes. The corn adds sweetness and a bit of texture to the soup.
- Stir in the milk, salt, and pepper. The milk adds creaminess and rounds out the flavour of the soup.
- Simmer for 5 minutes, or until the chowder has thickened. This creates a smoother and more cohesive soup.
- Serve hot. Enjoy this comforting soup on a chilly day.
Part 7: corn on the cob faqs
Now, you're probably wondering about a few things. Let's address some common questions about corn on the cob.FAQs
How long does corn on the cob last?
fresh corn on the cob is best eaten within a day or two of being picked. If you can't cook it right away, store it in the refrigerator, wrapped in a damp paper towel or plastic bag. It will last for up to 3 days in the refrigerator. However, the flavour and sweetness will diminish over time, so it's best to cook it as soon as possible.
What happens if you overcook corn on the cob?
Overcooked corn on the cob will be mushy and lose its flavour. The kernels will become soft and lose their sweetness. It's important to cook the corn for the right amount of time, and be sure to check it frequently to prevent overcooking.
Can you freeze corn on the cob?
You can freeze corn on the cob, but it's best to freeze the kernels instead. Freezing whole corn cobs can affect the texture, making them mushy when thawed. To freeze corn on the cob, blanch it in boiling water for 2-3 minutes, then plunge it into ice water to stop the cooking process. Once the corn has cooled, remove the husks and silk. Wrap the cobs in plastic wrap and freeze in a freezer-safe bag. For freezing the kernels, follow the same blanching method and remove the kernels from the cob. Place them in a freezer-safe bag and freeze for up to 12 months.
Is corn on the cob good for you?
Yes, corn on the cob is a good source of fiber, vitamin C, and potassium. It's also a good source of antioxidants. Corn is a whole grain, and it's a relatively low-calorie food. It's a nutritious and delicious addition to a healthy diet.
What are some other ways to eat corn?
Besides corn on the cob, you can also enjoy corn in a variety of other ways. It's delicious in salads, soups, stews, and fritters. You can also use it to make cornbread, corn muffins, and corn tortillas. Corn is a versatile ingredient that can be enjoyed in many different ways.
Part 8: Final Thoughts
There you have it, a comprehensive guide to perfectly cooked corn on the cob. It's all about choosing the right corn, preparing it properly, and cooking it just right. And don't forget the seasonings! There are so many ways to enjoy corn on the cob, whether it's a simple summer barbecue side or a more elaborate culinary creation. So go ahead, get creative, and have fun! It's a summer classic for a reason.Everyone is watching
Corn on the Cob: The Ultimate Guide to Perfectly Cooked Ears
Healthy MealsAh, corn on the cob. Just the name evokes images of sunny days, barbecues, and that sweet, juicy flavour that ...

Perfect Pork Roast Oven Cooking Time: A Guide to Delicious Results
Healthy MealsThere's something truly satisfying about a perfectly roasted pork. The aroma alone is enough to make your mout...

Ham Cooking Time: How Long to Bake, Smoke, or Boil a Delicious Ham
Healthy MealsAh, ham. It's a classic, isn't it? A real crowd-pleaser, especially around holidays. And when done right, it'...

Scallops: The Ultimate Guide to Perfect Cooking
Healthy MealsAh, scallops. Those delicate, sweet, and utterly delicious morsels of the sea. They hold a special place in my...

Spaghetti Squash: The Ultimate Guide to Cooking and Serving
Healthy MealsRemember that time you saw spaghetti squash at the supermarket, looking all bumpy and strange, and thought, "W...