Right, let's talk turkey, shall we? The festive season is upon us, and that means one thing: the big bird! Now, I'm no stranger to a roast turkey. In fact, I've been tackling this culinary behemoth for years, and I've learned a thing or two along the way. So, I thought I'd share my hard-earned wisdom and give you a proper rundown on how to cook a turkey that's not only delicious but will also leave your guests saying, "That's the best turkey I've ever had!"
Part 1: The Turkey Tango: Choosing the Right Bird

First things first, you need the star of the show: the turkey. Don't just grab the first one you see – you want to choose wisely. I'm talking about a bird that's plump, juicy, and ready to be transformed into a culinary masterpiece.
1.1. Fresh vs. Frozen: The Great Debate
The eternal question: fresh or frozen? Honestly, it’s a matter of preference. Fresh turkeys are fantastic because they’re already defrosted, and you can get straight to the good stuff. They often have a slightly better flavour because they haven't been frozen. However, frozen turkeys are often more affordable and are available for longer. You can find them in a wider variety of sizes too. If you’re going with frozen, make sure to give it ample time to defrost in the fridge before you start cooking. It takes about 24 hours for every 5 pounds of turkey. Make sure you defrost it properly in the fridge, never on the counter, to prevent bacteria growth.
1.2. Size Matters: Picking the Right Weight
Now, let’s talk size. I usually aim for a turkey that’s about 12-14 pounds, perfect for a crowd of 6-8 people. But if you're having a smaller gathering, go for a smaller turkey. Just remember, a general rule of thumb is to plan for about 1 pound of turkey per person, although you might find you need a little extra for hungry guests! And don't forget to consider the side dishes you'll be serving. If you're planning on a big spread, you might want to go for a slightly larger bird.
1.3. Checking for Quality: The Turkey Inspection
Before you even think about bringing your turkey home, give it a good look over. Here’s what to check:
- Look for a plump, firm breast. A good turkey will have a nicely rounded breast, free from any blemishes.
- Make sure the skin is smooth and intact. No tears or punctures, thank you very much!
- Check the packaging. It should be clean and free of any tears.
- Read the date label. Make sure the turkey is fresh and within its sell-by date.
If something doesn’t look quite right, don’t be afraid to put it back and grab another one. It's better to be safe than sorry.
Part 2: The Art of Brining: Unleashing the Juiciest Turkey Ever

Now, this is where the magic really happens. Brining is a process where you soak the turkey in a saltwater solution, which helps to infuse it with flavour and moisture. Trust me, a brined turkey is a revelation – it’s seriously juicy and tender, the kind of turkey that makes your guests go "wow!"
2.1. The Brining Benefits: Why It’s Worth the Effort
Brining is not just a fancy culinary trick – it’s a game-changer. Here’s why:
- Locks in moisture: The salt draws out moisture from the turkey, and then the water in the brine re-hydrates the bird, creating a juicy and tender final product.
- Enhances flavour: The salt in the brine penetrates the turkey meat, adding a depth of flavour that you wouldn't get otherwise.
- Even cooking: Brining helps the turkey cook more evenly, ensuring a juicy breast and tender legs.
I've been a believer in brining for years, and I can tell you, it’s worth every minute of your time. You might be thinking, "Do I really need to do this?" And to that, I say, absolutely! It's the key to a truly moist and delicious turkey. Don't be intimidated by the process, it's actually quite simple. You can even prepare the brine in advance and just add the turkey to it when you're ready.
2.2. Brining Techniques: Choose Your Weapon
There are two main ways to brine: dry and wet.
- Dry Brining: This is a simple technique where you rub a salt-based mixture all over the turkey, and leave it uncovered in the fridge for a few days. It's a great option if you have limited fridge space, but it doesn't work as well for locking in moisture as wet brining.
- Wet Brining: This involves immersing the whole turkey in a saltwater solution for several hours. This is my personal favourite because it ensures the turkey is thoroughly seasoned and stays juicy. You can use a large stockpot, a cooler, or even a brining bag. Just make sure the turkey is completely submerged in the brine.
2.3. Brine Recipes: The Secrets to a Spectacular Turkey
Here's a simple wet brine recipe that I use and swear by:
Wet Brine Recipe
Ingredients:
- 1 gallon (4 liters) of cold water
- 1 cup (230g) kosher salt
- 1/2 cup (115g) sugar
- 1/4 cup (60ml) lemon juice
- 1 tablespoon (15ml) dried thyme
- 1 tablespoon (15ml) dried rosemary
- 1 bay leaf
Instructions:
- Combine all ingredients in a large pot or container. Stir until the salt and sugar are dissolved. You can use a whisk or a wooden spoon to dissolve the salt and sugar.
- Add the turkey to the brine, ensuring it's fully submerged. Make sure the turkey is completely covered by the brine. If it's not, you may need to use a larger container.
- Cover and refrigerate for 12-24 hours. It's best to brine the turkey for at least 12 hours, but you can brine it for up to 24 hours if you have the time. If you're brining for longer, make sure to check the brine to ensure it's still covering the turkey.
- Remove the turkey from the brine and pat it dry. Once you've removed the turkey from the brine, give it a good pat down with paper towels to remove any excess moisture.
- Discard the brine. Don't use the brine again, as it will be too salty.
You can experiment with different herbs and spices to create your own signature brine. I like to add some black peppercorns or garlic for a bit of extra flavour. You can also use fresh herbs if you prefer. Just make sure to chop them finely so they're well distributed in the brine.
Part 3: Preparing the Turkey: A Culinary Choreography

Alright, so your turkey has had its luxurious bath, and now it’s time to get ready for the big roast. It’s not all about simply popping it in the oven – there are a few things you need to do to ensure it’s ready for its moment of glory.
3.1. Patting Dry: The Importance of a Dry Surface
Once you’ve removed the turkey from the brine, give it a good pat down with paper towels. You want to make sure the skin is nice and dry. This helps the skin crisp up nicely in the oven, which is key for a delicious, golden-brown exterior. If the skin is wet, it will steam instead of crisp up, and you won't get that lovely golden-brown colour.
3.2. The Stuffing Debate: To Stuff or Not to Stuff?
Ah, stuffing, the ultimate Thanksgiving dilemma. I used to stuff my turkeys, but these days, I prefer to cook my stuffing separately. Why? Well, it’s all about safety. When you stuff a turkey, it can take longer for the stuffing to cook through, which can lead to food poisoning. It’s best to err on the side of caution and bake your stuffing separately. Plus, you'll get a crispier stuffing if you cook it in a separate dish. You can also prepare the stuffing in advance and just pop it in the oven while the turkey is roasting.
If you do decide to stuff your turkey, make sure you cook it to an internal temperature of 165 degrees Fahrenheit. I use a meat thermometer to check the temperature. And for extra safety, I’ll often stuff the turkey with a stuffing made with sausage, which helps to prevent the stuffing from being undercooked. Remember, stuffing should be cooked to an internal temperature of 165 degrees Fahrenheit as well.
3.3. Trussing the Turkey: Creating a Culinary Masterpiece
Now, let’s talk about trussing. This is a technique that involves tying the turkey legs together with kitchen twine. It helps to keep the bird together, ensures even cooking, and gives it a more aesthetically pleasing shape. You’ll find loads of videos online explaining how to truss a turkey, but honestly, it’s pretty straightforward. Just make sure to tie the twine tightly, but not too tight, or you’ll risk cutting into the meat. If you're not comfortable trussing, you can skip this step. It's not essential for a delicious turkey, but it does help to ensure even cooking.
3.4. Seasoning: The Finishing Touches
Before you pop the turkey into the oven, don't forget to season it generously with salt, pepper, and any other herbs and spices that you fancy. I often use a simple mix of salt, pepper, garlic powder, and onion powder. Don’t be shy with the seasoning – remember, the more flavour, the better!
You can also rub the turkey with a mixture of butter and herbs for extra flavour. Just make sure to spread it evenly over the turkey, especially under the skin, to help it cook evenly. You can use a spoon or your fingers to spread the butter and herb mixture.
Part 4: Roasting the Turkey: The Grand Finale
Now, you've done all the prep work, and it's time for the grand finale – roasting! I like to use a large roasting pan, and I always place the turkey on a rack so that air can circulate around it, ensuring it cooks evenly. If you don't have a roasting rack, you can place the turkey on a bed of chopped vegetables, such as onions, carrots, and celery, for added flavour and moisture.
4.1. Oven Temperature: Finding the Sweet Spot
I usually cook my turkey at 325 degrees Fahrenheit. It's a good temperature for achieving a crispy skin and juicy meat. But if you’re feeling adventurous, try roasting at a higher temperature (like 400 degrees) for the first 30 minutes to get the skin extra crispy. Then, reduce the temperature to 325 degrees for the rest of the roasting time. This is a good technique if you want to ensure a crispy skin. Just make sure you watch the turkey closely to ensure it doesn't burn.
4.2. cooking time: The Art of Timing
The roasting time for your turkey will depend on its weight. Here's a handy table to help you out:
| turkey weight (pounds) | Roasting Time (hours) |
|---|---|
| 8-12 | 2-3 |
| 12-16 | 3-4 |
| 16-20 | 4-5 |
Remember, these are just guidelines. You'll want to check the internal temperature of your turkey to ensure it's cooked through. And don't be afraid to adjust the roasting time as needed. You can always add a few minutes if the turkey isn't quite cooked through.
4.3. Temperature Check: Making Sure It’s Done
You’ve got to make sure that your turkey is cooked to a safe internal temperature of 165 degrees Fahrenheit. Use a meat thermometer inserted into the thickest part of the thigh, without touching the bone. If the temperature isn't high enough, keep roasting for another 15 minutes and check again. Don't rely on the turkey juices running clear, as this is not a reliable indicator of doneness. Always use a meat thermometer to ensure the turkey is cooked through.
4.4. Resting: The Importance of Patience
Once the turkey is cooked, don’t be tempted to carve it right away. You need to let it rest for at least 30 minutes. This allows the juices to redistribute throughout the meat, resulting in a much more succulent and flavorful turkey. Use a carving board or large platter to let it rest. You can cover it loosely with foil to keep it warm while it's resting.
Part 5: Carving the Turkey: A Skillful Dance
So, your turkey has had its well-deserved rest, and now it's time to carve it. You might be thinking, "This is going to be messy!" I get it, carving a turkey can seem daunting, but with a little practice, you'll become a carving pro. Here’s how to do it like a pro:
5.1. Carving Tools: The Essential Arsenal
You'll need a few tools to make carving easier. These are my go-to carving tools:
- Carving Knife: It's sharp, curved blade makes it easy to slice through the turkey without tearing the meat. Make sure your carving knife is sharp, as this will make carving much easier. If your knife isn't sharp, you can sharpen it yourself or take it to a professional.
- Carving Fork: This is used to hold the turkey in place while you carve. This will help you to keep the turkey from moving around as you carve it. It will also help to keep your fingers out of the way of the sharp carving knife.
- Cutting Board: This provides a stable surface for carving. Make sure your cutting board is large enough to hold the turkey. You can also use a carving board with a well to catch any juices that drip from the turkey.
5.2. Carving Techniques: A Step-by-Step Guide
Here's how to carve your turkey like a boss:
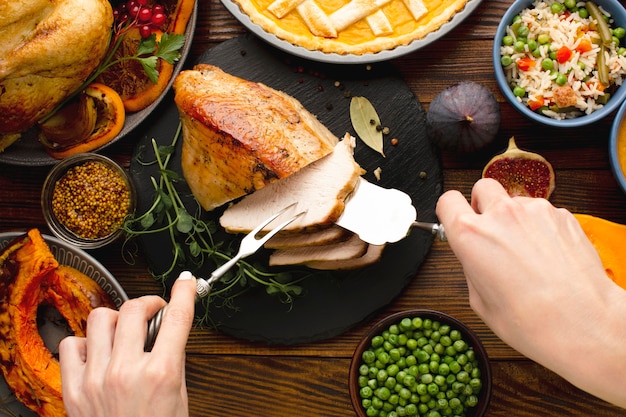
- Remove the legs and thighs: Starting with the turkey facing you, use your carving fork to hold the bird in place. Then, use the carving knife to cut along the inside of the leg and thigh, separating them from the body. You'll need to cut through the joint where the leg connects to the body.
- Cut the legs in half: Use the carving knife to cut each leg in half, along the bone. This will make it easier to serve the legs. You can also remove the skin from the legs at this point if you prefer.
- Remove the breasts: Carefully use the carving knife to cut along the breastbone, separating the breasts from the body. You can use the carving fork to help you to hold the turkey in place as you cut.
- Slice the breasts: Once the breasts are removed, use the carving knife to slice them into thin, even pieces. You can slice the breasts across the grain for a more tender texture.
- Cut the wings: Cut the wings from the turkey body by using the carving knife to cut along the joint where the wing attaches to the breast. You can also remove the wing tips at this point, as they are often quite bony.
5.3. Serving the Turkey: Presenting the Feast
Now that you've carved your turkey, it's time to present it on a beautiful platter. I like to arrange the carved turkey pieces artfully on the platter, with the breasts in the centre and the legs and thighs surrounding them. And don’t forget the gravy! You can use a gravy boat or a pitcher to serve the gravy.
Part 6: The Sideshow: Making the Most of Your Side Dishes
Now, you’ve got the turkey sorted, but what about the sides? The perfect turkey dinner needs a stellar supporting cast of side dishes to truly shine. These are some of my go-to side dishes that always go down a treat:
6.1. Classic Sides: The Turkey’s Faithful Companions
- mashed potatoes: Classic and comforting, mashed potatoes are a must-have. I like to use a potato ricer to create a smooth, silky texture. You can add a touch of butter, cream, or milk to your mashed potatoes for added richness. You can also add some herbs and spices, such as garlic, chives, or parsley, for extra flavour.
- Stuffing: As I mentioned earlier, I prefer to cook stuffing separately. It can be made with bread, vegetables, herbs, and even sausage. You can use a variety of different breads for your stuffing, such as sourdough, rye, or even cornbread. Just make sure you cube the bread into bite-sized pieces.
- Cranberry Sauce: A tangy and sweet counterpoint to the savoury turkey, cranberry sauce is essential for any festive meal. You can make your own cranberry sauce or use a store-bought version. If you're making your own, you can add a touch of orange zest or some chopped walnuts for extra flavour.
- green bean casserole: A creamy and cheesy dish that’s always a crowd-pleaser. There are countless recipes, but I like mine with crispy fried onions on top. You can use fresh green beans or frozen green beans for this dish. Just make sure you drain the green beans well before adding them to the casserole.
- Gravy: A rich and flavorful gravy is the perfect accompaniment to the turkey. I make my gravy from the turkey drippings for an extra burst of flavour. You can add a tablespoon of butter and a tablespoon of flour to the turkey drippings to thicken the gravy. You can also add a splash of wine or broth for extra flavour.
6.2. Beyond the Basics: Exploring New Side Dish Horizons
If you're feeling adventurous, try some of these side dishes for a twist on tradition:
- roasted sweet potatoes: These are a delicious and healthy alternative to mashed potatoes. Toss them with olive oil, salt, pepper, and a touch of cinnamon before roasting. You can also add a touch of maple syrup or honey for extra sweetness.
- Brussels Sprouts with Bacon: These are a surprisingly tasty and satisfying side dish. I like to roast them with bacon, olive oil, and balsamic vinegar. You can also add some chopped garlic or onion to the Brussels sprouts for extra flavour.
- roasted asparagus: This is a light and fresh side dish that complements the turkey perfectly. Roast it with olive oil, salt, pepper, and lemon juice. You can also add a few sprigs of thyme or rosemary to the asparagus for extra flavour.
Part 7: Leftover Love: Reimagining the Turkey
Now, we all know that a turkey dinner often results in leftovers. But don’t think of them as just leftovers – think of them as opportunities for culinary creativity! There are so many delicious ways to use up your leftover turkey.
7.1. turkey sandwiches: A Classic Comfort
Who doesn't love a good turkey sandwich? I like to use leftover turkey in a classic turkey sandwich with mayonnaise, lettuce, tomato, and a slice of cheese. It’s a simple but satisfying meal. You can also add some cranberry sauce or a little bit of stuffing to your turkey sandwich for extra flavour.
7.2. turkey soup: Warming Up the Soul
Transform your leftover turkey into a hearty and comforting soup. You can add vegetables, noodles, or rice, and season it with your favourite herbs and spices. Some popular vegetables to add to turkey soup include carrots, celery, onions, potatoes, and green beans. You can also add some herbs and spices, such as thyme, rosemary, and bay leaves, for extra flavour.
7.3. turkey pot pie: A Flavorful Feast
For a more substantial leftover turkey meal, try a turkey pot pie. It's a great way to use up both leftover turkey and vegetables. You can make a turkey pot pie with a flaky crust or a puff pastry crust. Just make sure you cook the filling until it's bubbly and the crust is golden brown.
7.4. turkey salad: A Light and Refreshing Option
For a light and refreshing meal, try a turkey salad. You can mix the turkey with mayonnaise, celery, onion, and cranberries. You can also add some chopped walnuts or pecans for extra crunch. You can serve the turkey salad on bread, crackers, or lettuce leaves.
Part 8: FAQs: Answering Your Turkey-Related Questions
You’ve got questions, I’ve got answers! Here are some frequently asked questions about turkey cooking:
8.1. Q: What if my turkey is overcooked?
A: If your turkey is overcooked, it will be dry and tough. Unfortunately, there's not much you can do to fix this. However, try to slice the turkey thinly and serve it with a sauce or gravy to add some moisture. Next time, be sure to check the internal temperature of the turkey more frequently. And remember, it's always better to err on the side of undercooked than overcooked.
8.2. Q: Can I freeze leftover turkey?
A: Yes, you can freeze leftover turkey. Just make sure it's properly wrapped in plastic wrap and then placed in a freezer bag. Frozen turkey can be stored for up to 3 months. When you're ready to use it, thaw it in the refrigerator overnight. Don't thaw turkey at room temperature, as this can lead to bacteria growth.
8.3. Q: How do I know if my turkey is done?
A: The best way to know if your turkey is done is to use a meat thermometer. Insert the thermometer into the thickest part of the thigh, without touching the bone. The turkey is cooked when the internal temperature reaches 165 degrees Fahrenheit.
8.4. Q: What if I don’t have a meat thermometer?
A: If you don’t have a meat thermometer, you can check the turkey by pressing on the breast. If the breast feels firm and the juices run clear, it’s likely cooked. But remember, this is just a general guideline, and it’s always best to use a meat thermometer to ensure your turkey is cooked to a safe internal temperature. Don't rely on the turkey juices running clear as this is not a reliable indicator of doneness.
8.5. Q: What’s the best way to reheat leftover turkey?
A: The best way to reheat leftover turkey is to do it slowly in the oven at a low temperature. Place the turkey on a baking sheet and bake in a 300-degree oven for about 30 minutes, or until heated through. You can also reheat turkey in a microwave or on the stovetop. Just make sure to heat it through thoroughly to ensure it's safe to eat.
Now, you're all set to cook a truly amazing turkey. So, go forth and conquer that bird! You’ve got this! And remember, a little bit of patience and a whole lot of love will go a long way. Happy cooking!
Everyone is watching

Perfect Rice Every Time: The Ultimate Guide to Cooking Rice
Cooking TipsAs a self-proclaimed foodie, I've always been a bit obsessed with rice. It's the foundation of countless cuisi...

Ultimate Guide to Cooking the Perfect Thanksgiving Turkey
Cooking TipsThanksgiving. Just the word conjures up images of overflowing tables laden with delicious food, the scent of r...

The Ultimate Guide to Cooking Asparagus: Tips, Techniques, and Recipes
Cooking TipsAsparagus. The mere mention of this spring delicacy conjures up images of vibrant green spears, crisp and burs...

Can You Cook Spaghetti with Gasoline? (The Shocking Truth)
Cooking TipsWe've all seen those crazy internet trends. You know, the ones that make you wonder, "Did someone actually try...

Chorizo and Eggs Recipe: The Ultimate Guide
Cooking TipsRight, let’s talk about chorizo and eggs. You know, that classic Spanish dish that's always a winner. It's th...
