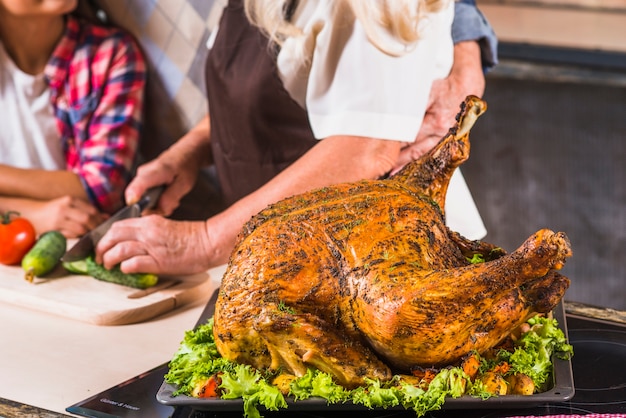
Thanksgiving. It’s the big one, isn’t it? The one that makes or breaks your reputation as a host. Everyone’s eyes are on you, waiting to see if you’ve pulled off the ultimate turkey masterpiece. And let's be honest, the pressure can be real.
But don’t panic, my friends! This is where I come in, your trusty turkey whisperer, ready to share the secrets that’ll turn you from a turkey-frying novice into a seasoned pro.
We're going to dive deep into the whole shebang, from the moment you get that bird home to the glorious moment it hits the table, glistening and golden. We'll tackle those big questions like brining vs. dry-brining, the best way to roast, and how to achieve that perfect crispy skin. We'll even cover some handy tips and tricks to make sure you’re not left scrambling in the kitchen while everyone's waiting for their dinner.
So, grab a cuppa, get comfy, and let's get this thanksgiving turkey party started.
(Part 1) Turkey Talk: Choosing Your Bird

Let's start with the basics. You need to pick your perfect turkey, and there’s more to it than just grabbing the biggest bird on the shelf. We're aiming for flavour here, folks, not just bulk.
Fresh or Frozen? The Age-Old Debate
First up, the big debate: fresh or frozen? I'm a big fan of fresh turkeys. They tend to have a more intense flavour, and the skin usually crisps up beautifully. But if you're short on time, frozen is perfectly fine. Just make sure you give it plenty of time to defrost properly.
Size Matters: Feeding a Crowd, Not Just a Family
Now, when it comes to size, consider the number of guests you’re having. A good rule of thumb is to aim for around 1 pound of turkey per person. But remember, you're not just feeding hungry bellies; you’re feeding a holiday tradition, and a bit of leftover turkey is never a bad thing.
The Big Reveal: Unveiling Your Turkey
Right, you’ve got your turkey home. What next? Time to give it a good look over. Check for any signs of bruising, discolouration, or odd smells. If you spot anything fishy, don’t hesitate to swap it for another bird.
(Part 2) Preparation Time: Brining, Dry-Brining, and Beyond

Okay, your turkey is prepped and ready. Now, it’s time to decide if you want to take it to the next level with a good brining or dry-brining session.
Brining: A Plunge into Flavour
Brining is essentially soaking your turkey in a salty water solution. This helps to infuse it with moisture and flavour. It’s a bit like giving your turkey a spa treatment, and the results are definitely worth the effort.
What’s in a Brine?
There's a million different brine recipes out there, but the basic ingredients include:
- Salt: The key player, responsible for the moisture and tenderness.
- Water: The base of the solution, which helps the salt penetrate the turkey.
- Sugar: Adds a bit of sweetness and balances out the saltiness.
- Herbs and Spices: Give your turkey a flavour boost and add some personality.
Brining Basics: The Do’s and Don’ts
You can brine your turkey in a large stock pot, a cooler, or even a bathtub if you’re feeling adventurous. Just make sure the turkey is fully submerged in the brine. For a standard turkey, you'll want to brine it for 12-24 hours, but always check the recipe for specific instructions.
Dry-Brining: The Salt-Rub Approach
Dry-brining is a simpler method that involves rubbing the turkey with a generous amount of salt and leaving it uncovered in the fridge for 1-2 days. The salt draws out moisture, which then re-absorbs back into the meat, making it incredibly juicy and flavorful.
The Great Brine Debate: Choosing the Right Method
So, which one should you choose? That’s really down to personal preference. I find that both methods yield delicious results, so it’s just a matter of picking the one that best suits your schedule and taste.
(Part 3) Roasting the Turkey: Setting the Stage for a Spectacular Feast

Now we're getting into the heart of the matter – the actual roasting. This is where the real magic happens.
The Oven's Your Canvas: Preheating for Perfection
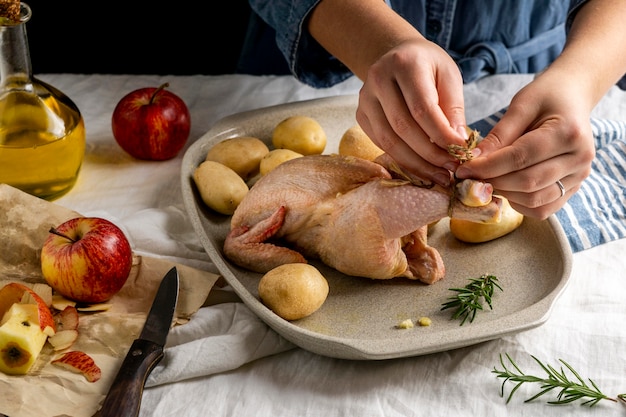
Firstly, preheat your oven to 325°F (160°C). Make sure your turkey is patted dry, and rub it with olive oil, salt, pepper, and any other seasonings you fancy.
Stuffing the Cavity: A Feast for the Senses
Whether you’re going for traditional stuffing or a modern twist, stuffing the cavity of your turkey can add a whole new dimension of flavour. Just make sure your stuffing is cooked to a safe internal temperature (165°F/74°C) before serving.
Creating a Roast-Worthy Environment: Racking Up the Flavor
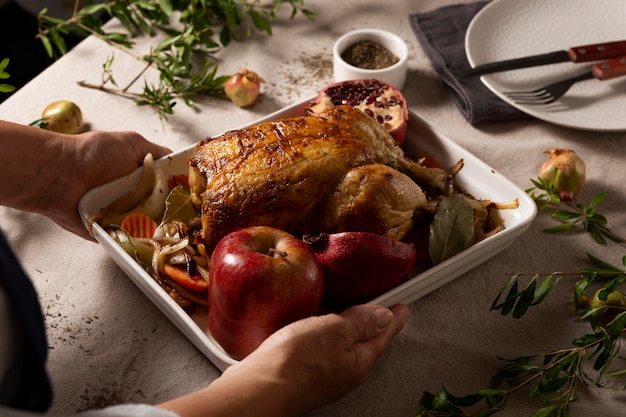
You’ll want to position your turkey in a roasting pan, and I always recommend using a roasting rack to ensure even cooking and crispy skin. If you’re worried about your turkey getting dry, you can place a roasting pan filled with water underneath the rack, creating a little steam bath for your bird.
Timing is Everything: The Art of Roast Mastery
The roasting time will vary depending on the size of your turkey. A good rule of thumb is to allow 15 minutes per pound for an unstuffed turkey and 20 minutes per pound for a stuffed turkey. Always check the turkey’s internal temperature with a meat thermometer. It’s cooked when the internal temperature reaches 165°F (74°C) in the thickest part of the thigh.
Rest is Essential: Let the Turkey Settle
Once your turkey is cooked, it’s crucial to let it rest for at least 30 minutes before carving. This allows the juices to redistribute throughout the meat, resulting in a much juicier, more flavorful bird.
(Part 4) Mastering the Crispy Skin: The Secret to a Triumphant Turkey
We’ve all seen those perfectly roasted turkeys with golden, crispy skin that just screams “Thanksgiving perfection”. Well, I’m here to tell you, it’s not as difficult as it seems.
The High-Heat Trick: Achieving Crispy Perfection
Start by increasing the oven temperature to 400°F (200°C) for the last 30 minutes of cooking. This will help to crisp up the skin beautifully.
The Basting Ballet: Keeping the Skin Moist and Flavorful
You can also give your turkey a little boost by basting it with pan drippings throughout the cooking process. This helps to keep the skin moist and prevents it from drying out.
The Skin-Saving Secret: Avoiding Soggy Skin
To keep your skin from getting soggy, don’t cover the turkey with foil during the roasting process. You want that skin exposed to the heat so it can achieve that glorious crispiness.
(Part 5) Beyond the Bird: side dish Symphony
Okay, so you’ve got your turkey sorted, but what about the side dishes that make Thanksgiving a real feast?
Side Dish Staples: Thanksgiving Classics
No Thanksgiving table is complete without a selection of classic sides:
mashed potatoes: Creamy, dreamy, and oh-so comforting.
Stuffing: A flavourful blend of bread, vegetables, and herbs, perfectly seasoned and baked to golden perfection.
Gravy: A rich and savory sauce, made from pan drippings and thickened with flour or cornstarch.
Cranberry Sauce: A tart and tangy condiment, a classic Thanksgiving counterpoint to the richness of the turkey and sides.
Creative Side Dish Inspiration: Adding a Personal Touch
But don’t be afraid to get creative with your side dishes. Try adding some seasonal vegetables like Brussels sprouts roasted with bacon, or a refreshing salad with pomegranates and citrus fruits.
The Art of Balance: Creating a Harmonious Feast
When choosing your side dishes, think about the overall balance of flavours and textures. You want a mix of creamy, crunchy, sweet, and savory to create a truly satisfying thanksgiving feast.
(Part 6) Carving the Turkey: A Moment of Truth
The turkey is cooked, it’s rested, and now it’s time to unveil your masterpiece. Carving the turkey is a moment of truth, but don’t worry, it’s easier than you think.
Essential Tools: The Right Equipment for the Job
You’ll need a sharp carving knife and a carving fork. If you’re feeling fancy, you can use a carving board, but a large cutting board will do the job just fine.
The Carving Technique: Slicing to Perfection
Start by removing the legs and thighs by cutting along the joint where the leg meets the body.
Then, carve the breasts by slicing them into thin pieces.
Once the breasts are carved, you can remove the wings and carve them separately.
Finally, carve the dark meat from the legs and thighs.
Don't Forget the Drippings: Flavorful Gold
Don’t throw away those pan drippings! They’re full of flavour and can be used to make delicious gravy or sauce.
(Part 7) Leftovers: A Thanksgiving Treasure
Let’s face it, Thanksgiving is all about the leftovers. turkey sandwiches, turkey pot pie, turkey soup - the possibilities are endless!
Storage Tips: Keeping Leftovers Safe and Delicious
Store leftover turkey in the refrigerator for up to 4 days or freeze it for up to 2 months.
Recipe Inspiration: Transforming Leftovers into New Delights
Here are a few ideas for leftover turkey magic:
turkey salad Sandwiches: Combine leftover turkey with mayonnaise, celery, onion, and your favorite seasonings.
Turkey Pot Pie: Make a hearty and comforting pie with leftover turkey, vegetables, and a creamy sauce.
Turkey Soup: Warm up with a flavorful soup made with leftover turkey, broth, vegetables, and noodles.
(Part 8) The Final Touch: A Thanksgiving Table Setting
The food is ready, the turkey is carved, and now it’s time to set the table and enjoy the fruits of your labour.
A Festive Table Setting: Creating a Warm and Welcoming Ambiance
Tablecloth and Placemats: Choose a festive tablecloth and placemats that complement the Thanksgiving theme.
Dinnerware: Opt for elegant dinnerware in a classic colour scheme like white or cream.
Table Decor: Add some seasonal touches like pumpkins, gourds, or fall foliage.
Candles: Set the mood with flickering candles for a warm and inviting ambiance.
A Toast to Thanksgiving: Celebrating Togetherness
And finally, don’t forget to raise a glass to the spirit of Thanksgiving, to family, friends, and the delicious feast you’ve created.
(Part 9) FAQs: Turkey Talk Demystified
Here are some commonly asked questions about Thanksgiving turkeys:
1. How do I tell if my turkey is fully cooked?
The best way to determine if your turkey is cooked is to use a meat thermometer. Insert it into the thickest part of the thigh, not touching the bone. The turkey is fully cooked when the internal temperature reaches 165°F (74°C).
2. What’s the best way to keep my turkey moist?
Brining or dry-brining helps to keep the turkey moist. Also, using a roasting rack and placing a pan of water in the bottom of the oven can help to create steam and prevent the turkey from drying out.
3. Can I stuff my turkey the night before?
It’s not recommended to stuff your turkey the night before because it can increase the risk of foodborne illness. Stuffing should be cooked to an internal temperature of 165°F (74°C), and it's best to stuff the turkey just before roasting.
4. What should I do if my turkey skin is getting too dark?
If the turkey skin starts to get too dark, you can cover it loosely with foil. However, this may make the skin less crispy. You can also reduce the oven temperature slightly.
5. How do I reheat leftover turkey?
You can reheat leftover turkey in the oven, microwave, or on the stovetop. If you're reheating it in the oven, place it in a baking dish and cover it with foil. Reheat it at 325°F (160°C) until heated through, which will take about 20-30 minutes.
(Part 10) Happy Thanksgiving!
There you have it, folks – the ultimate guide to conquering your Thanksgiving turkey. Remember, it’s not just about the bird, it’s about creating memories and sharing a special meal with loved ones. So relax, have fun, and enjoy the magic of Thanksgiving!
(Part 11) The Importance of Timing: A Thanksgiving Schedule
Timing is crucial for a stress-free Thanksgiving. Here’s a suggested schedule to help you stay on track:
| Time | Task |
|---|---|
| 3-4 days before Thanksgiving | Defrost your turkey if using frozen. Begin brining or dry-brining if desired. |
| 2-3 days before Thanksgiving | Prepare your stuffing and any other side dishes that can be made ahead of time. |
| 1 day before Thanksgiving | Make your gravy and cranberry sauce. Shop for any remaining ingredients. Set your table and prepare any necessary decorations. |
| Thanksgiving Day | Roast your turkey. Prepare the remaining side dishes. Let the turkey rest. Carve the turkey and serve your delicious meal! |
(Part 12) Troubleshooting Tips: Solving Turkey Troubles
Every chef has a few kitchen mishaps. Here are some common Thanksgiving turkey problems and their solutions:
1. The Turkey is Dry:
Prevention: Use a roasting rack and place a pan of water in the bottom of the oven.
Fix: If the turkey is dry, you can try adding some moisture back in by basting it with broth or pan drippings.
2. The Turkey Skin is Soggy:
Prevention: Don't cover the turkey with foil during roasting.
Fix: You can try crisping up the skin by placing the turkey under a broiler for a few minutes, but be careful not to burn it.
3. The Stuffing Isn't Cooked Through:
Prevention: Cook the stuffing separately, either in a baking dish or in the turkey cavity for the last 30 minutes of cooking.
Fix: If the stuffing is undercooked, you can reheat it in the oven until it reaches an internal temperature of 165°F (74°C).
4. The Gravy is Too Thin:
Prevention: Use a cornstarch slurry (mix cornstarch with cold water) to thicken the gravy.
Fix: Add a cornstarch slurry to the gravy and whisk it constantly until it thickens to your desired consistency.
5. The Cranberry Sauce is Too Tart:
Prevention: Add some sugar or orange zest to the cranberry sauce.
Fix: You can add a little bit of sugar or orange zest to the cranberry sauce to balance out the tartness.
Everyone is watching

Prime Rib Roast Cooking Time Chart: Per Pound Guide
Cooking TipsPrime rib roast. Just the name conjures images of lavish dinners, crackling fires, and hearty laughter. It’s ...

How Long to Bake Potatoes in the Oven (Perfect Every Time)
Cooking TipsBaked potatoes are a staple in my kitchen. They're incredibly versatile, delicious, and surprisingly easy to m...

Perfect Rice Every Time: The Ultimate Guide to Cooking Rice
Cooking TipsAs a self-proclaimed foodie, I've always been a bit obsessed with rice. It's the foundation of countless cuisi...

The Ultimate Guide to Cooking Asparagus: Tips, Techniques, and Recipes
Cooking TipsAsparagus. The mere mention of this spring delicacy conjures up images of vibrant green spears, crisp and burs...

Ultimate Guide to Cooking the Perfect Thanksgiving Turkey
Cooking TipsThanksgiving. Just the word conjures up images of overflowing tables laden with delicious food, the scent of r...
