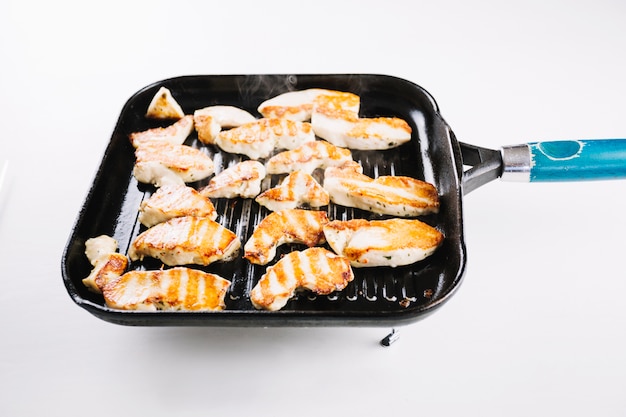
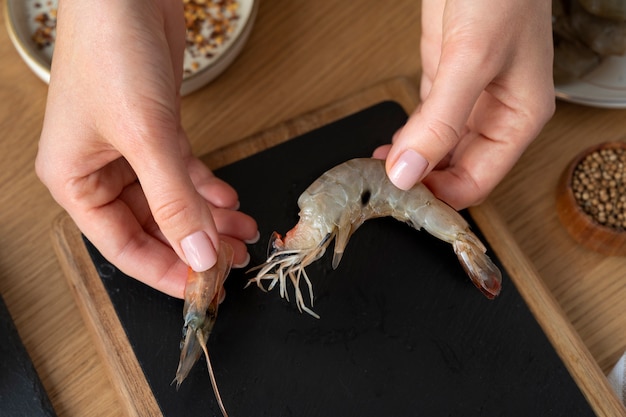
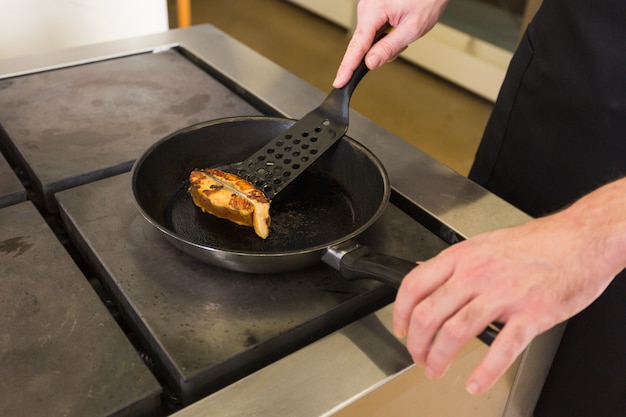
Let's face it, there's nothing quite like a plate of perfectly pan-seared shrimp. That juicy, succulent shrimp, kissed with a golden-brown crust and bursting with flavour, is pure culinary heaven. But, we’ve all been there. You throw a bunch of shrimp into the pan, full of hope and culinary ambition, only to end up with a plate of tough, rubbery little fellas. It’s a tragedy, I tell you! But fear not, my friend, because I’m about to share my secrets to pan-searing shrimp that are juicy, flavorful, and so easy, even a culinary novice can master it.
(Part 1) The Shrimp: It All Starts Here

Imagine a perfectly cooked shrimp: tender, slightly bouncy, and bursting with that sweet, briny flavour. To achieve this culinary nirvana, you've got to start with the right shrimp. Now, I'm not saying you need to go on a fancy seafood expedition to find the elusive "perfect shrimp", but choosing wisely is crucial. Here’s how to navigate the world of shrimp and select the perfect candidates for your pan-searing masterpiece.
Choosing Your Shrimp: Fresh or Frozen?
Okay, let's talk about the big debate: fresh versus frozen. Both have their merits, and it really depends on your priorities and what’s available in your neck of the woods.
- fresh shrimp: There’s something undeniably magical about fresh shrimp. The flavour is just so vibrant. It’s like a little taste of the ocean. Look for shrimp that are firm to the touch and have a slightly sweet scent. If you’re near the coast, fresh shrimp is a no-brainer.
- frozen shrimp: Don’t be afraid to embrace frozen shrimp. It’s a total lifesaver when you’re short on time or can’t find fresh shrimp. Just make sure you choose shrimp that are individually frozen, not stuck together in a giant block. And remember, it's essential to defrost them properly before cooking. No one wants soggy shrimp.
Honestly, when it comes to pan-searing, frozen shrimp can work just as well as fresh shrimp, especially if you're a pro at defrosting. The key is to choose good quality shrimp that are not overly processed, and don’t forget to pat them dry before cooking.
types of shrimp: A Quick Rundown
Now that you've got your shrimp situation sorted, let’s talk about varieties. Each type has its own unique flavour and texture, so choosing the right one can make a real difference.
- Whiteleg Shrimp: This is the most common type you'll find in supermarkets. They’re relatively mild in flavour and have a good, firm texture. They’re a great all-around shrimp for pan-searing.
- Pink Shrimp: These beauties are known for their sweet, delicate flavour and firm texture. They’re perfect for those who prefer a more subtle flavour.
- Tiger Shrimp: Want a bit more oomph? Tiger shrimp is the way to go. These guys have a slightly stronger flavour and a more robust texture. They’re great for adding a touch of boldness to your dish.
Don’t be afraid to experiment with different types of shrimp. You might discover a new favourite!
Size Matters: Understanding shrimp sizes
You might be thinking, "shrimp is shrimp, right?" Wrong! Shrimp sizes are actually a thing, and they matter for pan-searing. The size of the shrimp affects how quickly they cook and how much flavour they absorb. Here's the lowdown on shrimp sizing, measured in "counts per pound":
| Count | Description |
|---|---|
| 16/20 | Small shrimp, ideal for snacking or as part of a larger dish. |
| 21/25 | Medium shrimp, a good all-around size for pan-searing. They cook quickly and evenly. |
| 26/30 | Large shrimp, perfect for showcasing in a main course. These guys are delicious but take a bit longer to cook. |
| 31/40 | Extra large shrimp, ideal for grilling or skewering. They’re a bit too big for the delicate process of pan-searing. |
For pan-searing, I usually go for a medium or large size (21/25 or 26/30). They cook quickly and evenly, and the size is perfect for a satisfying bite. But ultimately, the choice is yours. It’s your culinary adventure, after all!
(Part 2) Getting Ready: Prepping Your Shrimp

Alright, you’ve got your shrimp, now it's time to give them a little love and attention. Prepping your shrimp properly is crucial for achieving that perfect sear and juicy texture. Here's a step-by-step guide to getting those little guys ready for the pan.
1. Pat Them Dry: The Importance of Moisture
Think of shrimp like little sponges. They absorb moisture easily, and too much moisture can make them steam instead of sear. That’s not what we want, right? We want crispy, golden-brown shrimp. So, pat those shrimp dry with paper towels, making sure to remove any excess water.
2. Seasoning Strategies: Getting That Flavor Boost
Now for the fun part: seasoning! This is where you get to inject your personality into your dish. You can go simple with salt and pepper, or get creative with herbs and spices. Remember, a little goes a long way, especially with delicate shrimp. Here are a few ideas to get your culinary juices flowing:
- Classic: Salt, pepper, garlic powder, and a pinch of cayenne pepper for a little kick. This is a timeless combination that’s always a crowd-pleaser.
- Herby: Fresh thyme, rosemary, and lemon zest – a Mediterranean twist. This combination is fresh and bright, with a touch of citrusy zest.
- Spicy: Paprika, chili flakes, and cumin for a fiery flavour. If you like your food with a bit of heat, this is the way to go.
Remember, don’t be afraid to experiment with different seasonings. There's a whole world of flavour waiting to be discovered.
3. The Shell Dilemma: To Peel or Not to Peel?
This is a question that has divided shrimp lovers for centuries: to peel or not to peel? It’s a matter of personal preference and the overall vision for your dish.
- Peel Before Cooking: This is ideal if you want a clean, no-fuss presentation. Plus, peeling before cooking allows the shrimp to cook more evenly.
- Peel After Cooking: This is great if you want a slightly more intense flavour, as the shells add a bit of richness. Just be careful not to burn them!
Personally, I prefer peeling after cooking. It’s quicker, and I like the subtle flavour that the shells add. But hey, it’s all about personal preference. You can’t go wrong either way!
(Part 3) The Pan-Searing: Mastering the Art of Heat

Here’s where the real magic happens. Pan-searing is a beautiful dance of heat and timing. We want to create that delicious golden-brown crust while keeping the shrimp juicy and tender. Let’s break it down.
1. Choose Your Weapon: The Perfect Pan
You need a pan that can handle the heat and distribute it evenly. Think of it as your culinary weapon of choice. Here are my top picks:
- Cast-Iron Pan: The classic choice for pan-searing. Cast iron heats up quickly and retains heat beautifully, creating that perfect sear. Plus, it’s super durable and will last for years.
- Heavy-Bottomed stainless steel pan: A great alternative to cast iron, providing even heat distribution and durability.
- Avoid: Thin-Bottomed Pans: These won’t give you the desired sear. They’ll heat up unevenly and could make your shrimp stick to the pan.
Remember, the right pan is crucial. It’s the foundation for your culinary masterpiece.
2. High Heat is Your Friend: Don’t Be Shy
When pan-searing shrimp, high heat is your friend. It’s all about getting that pan scorching hot before adding your shrimp. You want to hear a gentle sizzle, not a roaring inferno. The goal is to create a sear that locks in the shrimp’s natural juices, resulting in a tender, flavorful morsel.
3. No Crowding: Shrimp Need Space
Just like humans, shrimp don’t like to be crowded. Don't overcrowd the pan, as this will lower the temperature and result in steamed shrimp, which isn't what we're going for. If you've got a lot of shrimp, work in batches to ensure even cooking.
4. The Flip: A Quick Glance and a Gentle Touch
Shrimp cook quickly, so don't overthink the flip. Once you see the shrimp start to turn pink and a little crispy on the bottom (usually 1-2 minutes), it’s time to flip them. Use a thin spatula and flip them gently. We want to keep those beautiful golden-brown sear marks intact.
5. Don’t Overcook It: A Little Pink is Your Friend
Overcooked shrimp are a culinary tragedy. They become tough, rubbery, and lose all their juicy goodness. Shrimp are done when they’re pink and opaque throughout, usually another 1-2 minutes after flipping. Remember, a little pink is your friend.
(Part 4) The Finishing Touches: Taking Your Shrimp to the Next Level
You’ve got perfectly seared shrimp, but let’s not stop there. We're going to add a few final touches that will take your dish from good to amazing.
1. A Splash of Wine: Deglazing for Extra Depth
After you’ve removed the shrimp from the pan, add a splash of white wine or dry sherry to deglaze the pan. Scrape up all those delicious bits stuck to the bottom, creating a rich and flavorful sauce. This is where the magic happens, folks. It’s all about adding that extra layer of depth and complexity.
2. Lemon Juice: A Bright and Tangy Finish
A squeeze of lemon juice adds a burst of freshness and acidity that balances the richness of the shrimp. Just a few drops is all you need to brighten up the dish.
3. Herbs: A Touch of Aromatic Delight
Fresh herbs like parsley, chives, or basil add a lovely aroma and flavour. Add them at the end for a vibrant finish. Let the aroma fill the air, and let your taste buds sing.
(Part 5) Serving Your Shrimp: The Best Sidekicks
Pan-seared shrimp is incredibly versatile. It pairs beautifully with a variety of sides, from classic to creative. Here are some ideas to get you started:
- Classic: Garlic bread, rice, pasta, or a simple salad. These are tried-and-true combinations that never fail.
- Creative: Polenta, couscous, or roasted vegetables. These sides add a touch of elegance and sophistication.
- Spiced: Spicy chorizo, mango salsa, or a spicy dipping sauce. For those who love a little heat, these sides are perfect.
Don’t be afraid to experiment and find your own perfect combinations. The possibilities are endless!
(Part 6) Beyond the Basics: Taking Your Shrimp to New Heights
Now that you’ve mastered the art of pan-searing, let’s explore a few creative ways to take your shrimp to the next level.
1. shrimp scampi: A Classic Italian Delight
Shrimp scampi is a classic Italian dish that features shrimp sautéed with garlic, white wine, and butter, creating a rich and flavorful sauce. Serve it over pasta for a satisfying meal that’s sure to impress.
2. shrimp tacos: A Taste of Mexico
Tacos are a great way to enjoy pan-seared shrimp. Grill some tortillas, top with your cooked shrimp, and add your favourite toppings, like salsa, guacamole, and sour cream. It’s a delicious and easy way to bring a taste of Mexico to your table.
3. Shrimp Skewers: A Perfect summer treat
Thread your shrimp onto skewers with colourful vegetables like bell peppers, onions, and zucchini. Grill or pan-sear them for a healthy and delicious summer meal. It’s a beautiful and flavourful way to enjoy shrimp, especially during the warmer months.
(Part 7) Troubleshooting: Fixing Common Shrimp Mistakes
Let’s face it, we all make mistakes in the kitchen. But don’t worry, I’m here to help you fix those common shrimp blunders.
1. Overcooked Shrimp: Too Rubbery?
If your shrimp are a bit rubbery, don’t despair! They’re probably overcooked. Unfortunately, there’s not much you can do to fix it, but try adding a splash of lemon juice to brighten the flavour. Sometimes a little citrusy touch can help mask the rubbery texture.
2. Undercooked Shrimp: Still Translucent?
It’s better to err on the side of undercooking than overcooking. If your shrimp are still translucent, just pop them back in the pan for a minute or two to finish cooking. Remember, you can always cook them a little longer, but you can’t undo overcooking.
3. Shrimp Stuck to the Pan: Not Sticking?
Shrimp can be tricky to flip. If they’re sticking to the pan, use a thin spatula and loosen them gently. You may need to add a little more oil to the pan. Sometimes the pan is just a bit too dry.
(Part 8) FAQs: Answering Your Burning Shrimp Questions
Here are some of the most common questions I get about pan-searing shrimp:
1. How Long Do I Cook Shrimp for?
cooking time will vary depending on the size of the shrimp and your pan’s temperature. As a general rule, medium-sized shrimp should cook for 1-2 minutes per side. Always check for doneness by making sure the shrimp are pink and opaque throughout. You can also gently press a shrimp to check for firmness.
2. What Happens if I Overcook Shrimp?
Overcooked shrimp will be tough and rubbery. They’ll also lose their flavour and moisture. It’s always best to err on the side of undercooking. You can always pop them back in the pan for a few more seconds if needed.
3. Can I Freeze Pan-Seared Shrimp?
Yes, you can! Allow the shrimp to cool completely, then store them in an airtight container in the freezer. They’ll last for up to 3 months. To reheat, simply thaw them in the refrigerator overnight and then reheat them in a pan over medium heat.
4. What's the Best Way to Defrost Shrimp?
The best way to defrost shrimp is in the refrigerator. This will take about 12-24 hours, depending on the size of the shrimp. You can also defrost shrimp in a bowl of cold water, but don’t defrost them in the microwave as this can result in uneven cooking.
5. Can I Marinate Shrimp Before Pan-Searing?
Absolutely! Marinating shrimp before cooking adds extra flavour and moisture. Use your favourite marinade, but make sure it doesn’t contain any acidic ingredients, as this can make the shrimp tough. Marinate for at least 30 minutes, but no longer than 2 hours.
There you have it, my friend! My ultimate guide to pan-searing shrimp, a delicious and easy dish that’s sure to impress. So, go forth, unleash your inner culinary genius, and create a shrimp dish that will have everyone begging for more.
Everyone is watching

Prime Rib Roast Cooking Time Chart: Per Pound Guide
Cooking TipsPrime rib roast. Just the name conjures images of lavish dinners, crackling fires, and hearty laughter. It’s ...

How Long to Bake Potatoes in the Oven (Perfect Every Time)
Cooking TipsBaked potatoes are a staple in my kitchen. They're incredibly versatile, delicious, and surprisingly easy to m...

Perfect Rice Every Time: The Ultimate Guide to Cooking Rice
Cooking TipsAs a self-proclaimed foodie, I've always been a bit obsessed with rice. It's the foundation of countless cuisi...

The Ultimate Guide to Cooking Asparagus: Tips, Techniques, and Recipes
Cooking TipsAsparagus. The mere mention of this spring delicacy conjures up images of vibrant green spears, crisp and burs...

Ultimate Guide to Cooking the Perfect Thanksgiving Turkey
Cooking TipsThanksgiving. Just the word conjures up images of overflowing tables laden with delicious food, the scent of r...
