You know that feeling, right? The craving for a simple, classic vanilla cake, the kind that makes you feel all warm and fuzzy inside. The problem is, finding a recipe that consistently delivers that perfect, fluffy texture and irresistible vanilla flavour can be a real challenge. But trust me, you've stumbled upon the right place! This isn't just any old vanilla cake recipe, it's the one I've perfected over years of baking, tweaking, and tasting. It's the recipe that's become my go-to for birthdays, celebrations, and just because. It's the one that always gets rave reviews, even from the pickiest of eaters.
So, are you ready to join me on a baking adventure? We'll start with the basics, a simple and reliable recipe that's guaranteed to work. Then, we'll dive into a few secrets of the trade, my personal tips and tricks for getting that perfect rise and incredible flavour. We'll even explore decorating ideas, because let's be honest, the fun doesn't stop at the oven! This isn't just about baking a cake; it's about creating something special, something that makes you feel good, something to share with those you love.
(Part 1) The Foundation: A Simple and Reliable Recipe
Before we get started, let's gather our ingredients. This recipe is a dream for any baker, no matter your experience level. You'll likely have most of what you need in your pantry already:
Ingredients:
- 225g (8oz) unsalted butter, softened - This is the key to a light and airy cake. We'll talk more about softening butter in a bit.
- 225g (8oz) caster sugar - This is what gives the cake its sweetness and helps create that lovely crumb.
- 4 large eggs - Eggs add richness and structure to the cake, and they help bind everything together.
- 1 tsp vanilla extract - This is the star of the show! Vanilla extract adds that iconic vanilla flavour we all love. Use pure vanilla extract for the best results.
- 225g (8oz) self-raising flour - Self-raising flour already contains baking powder, which makes the cake rise beautifully. If you only have plain flour, just add 1 tsp of baking powder.
- 1 tsp baking powder - This helps the cake rise and create that lovely light texture. If you're using self-raising flour, you don't need to add any extra baking powder.
- 100ml (3.5 fl oz) milk - Milk helps to make the batter more moist and adds a touch of richness.
Instructions:
- Preheat your oven to 180°C (350°F) and grease and flour a 20cm (8 inch) round cake tin. I always line the base with a circle of baking parchment too. It helps prevent the cake from sticking, making it easier to remove from the tin later.
- In a large bowl, cream together the softened butter and sugar until light and fluffy. This is where your elbow grease (or the power of your mixer) comes in! The more you cream the butter and sugar, the lighter and airier your cake will be. It's a bit of a workout, but totally worth it.
- Add the eggs one at a time, beating well after each addition. You might find the mixture separates slightly at this point, but don't fret! It'll all come back together nicely in the next step. If you're using a hand mixer, remember to scrape down the sides of the bowl to ensure everything is well combined.
- Add the vanilla extract. A little bit goes a long way, but don't be shy to add that full teaspoon! It's what brings the magic to the vanilla flavour.
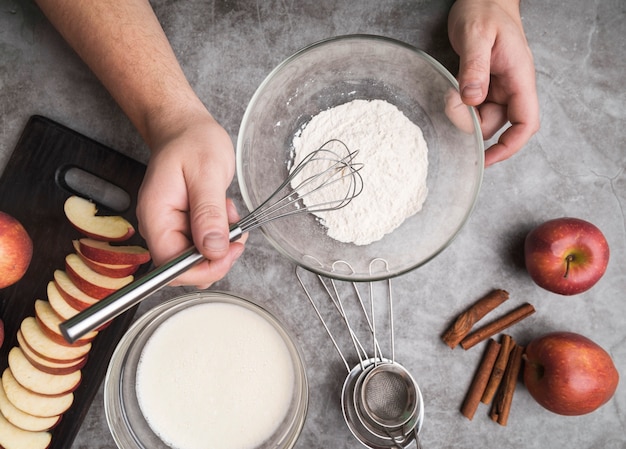
- In a separate bowl, whisk together the flour and baking powder. This is a crucial step! It helps ensure the baking powder is evenly distributed and prevents lumps in your cake. We all know those lump nightmares, right? This simple step is a total game-changer.
- Gradually add the dry ingredients to the wet ingredients, alternating with the milk. Start and finish with the flour mixture. Mix gently until just combined. Don't overmix! Overmixing can make the cake tough and dense, so we want to keep things light and airy.
- Pour the batter into the prepared cake tin and bake for 30-35 minutes, or until a skewer inserted into the centre comes out clean. I always give it a little wiggle too - if the top bounces back, it's ready!
- Leave the cake to cool in the tin for 10 minutes before turning it out onto a wire rack to cool completely. Resist the urge to rush this step! Patience is key here. Let it cool properly, and you'll be rewarded with a cake that's perfectly firm and ready for decorating.
(Part 2) The Art of the Perfect Vanilla Cake: Secrets from the Kitchen
Now, let's talk about those little tricks and tweaks that make all the difference. These are the secrets I've learned over years of baking, the things that elevate a good vanilla cake to something truly special.
1. The Butter: Softening Matters
First things first, let's talk about butter. It's a crucial ingredient, and it's all about that perfect softness. Use unsalted butter, and let it sit out at room temperature until it's pliable. You don't want it melted, just soft enough to cream smoothly with the sugar. You should be able to easily press it between your fingers. Don't skip this step! It creates that light and airy texture that makes a vanilla cake truly irresistible.
2. The Temperature is Key
Here's another tip: bring your eggs to room temperature too. Cold eggs can make the batter curdle and result in a dense cake. Just leave them on the counter for a bit before you get started.
3. Don't Overmix
We talked about this briefly, but it's worth repeating. Overmixing is the enemy of a fluffy vanilla cake. Once you've combined the wet and dry ingredients, mix only until everything is just combined. That's it! Stop there.
4. The Importance of Cooling
I can't stress this enough: let the cake cool completely before you ice it or decorate it. A warm cake will make the frosting melt and slide off, and that's a disaster waiting to happen. Be patient, let it cool properly, and you'll have a perfectly firm cake, ready for your decorating dreams.
(Part 3) Beyond Vanilla: Adding Flavour and Fun

Vanilla is a classic, but sometimes you want to spice things up a bit. Here are a few ideas to add a little something extra to your vanilla cake, to make it your own.
1. A Hint of Citrus: Lemon or Orange
For a light and refreshing twist, add the zest of a lemon or orange to the batter. The zest adds a beautiful aroma and a subtle tang. I love to add a tablespoon of lemon zest to my vanilla cake, it's a classic combination! You can also use orange zest if you prefer, it's a wonderful choice too.
2. A Warm Embrace: Cinnamon or Nutmeg
For something a bit more warming, add a teaspoon of cinnamon or nutmeg to the batter. It's perfect for those autumnal baking days, and it pairs beautifully with a cream cheese frosting. I love the way a little cinnamon adds a warm and comforting flavour to the cake. It's perfect for those cozy evenings when you just want something special. You can also use nutmeg, which has a slightly more subtle and earthy flavour. It's a great choice for a more sophisticated cake.
3. The Chocolate Touch: A Classic Combination
You can never go wrong with chocolate! Add a tablespoon of cocoa powder to the batter for a rich and decadent chocolate-vanilla cake. It's a foolproof way to elevate your cake to a new level of deliciousness. It's also a great way to satisfy those chocolate cravings without being too overwhelming.
(Part 4) Decorating Dreams: Taking Your Cake to the Next Level
Now, let's talk about the fun part! Decorating a vanilla cake is a real joy. There are endless possibilities, and it's a great way to get creative and express yourself. Here are a few of my favourite ways to decorate a vanilla cake:
1. The Classic: buttercream frosting
You can't go wrong with a good old-fashioned buttercream frosting. It's easy to make, incredibly versatile, and always tastes delicious. You can find countless recipes online, but my favourite is a simple vanilla buttercream. Just whisk together softened butter, powdered sugar, and a bit of vanilla extract. You can add a touch of colour with food colouring, or keep it classic and white. It's perfect for piping, spreading, or even just dolloping on top of the cake.
2. A Smooth Finish: Ganache Glaze
For a luxurious and smooth finish, try a ganache glaze. It's made by melting chocolate with cream, and it creates a beautiful, glossy coating for your cake. You can even add a little bit of vanilla extract or a splash of coffee for extra flavour. I love the way ganache gives the cake a sophisticated and elegant look. It's also incredibly easy to make, which is always a bonus.
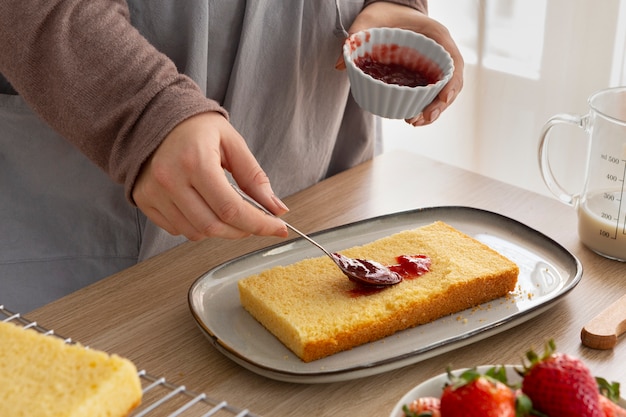
3. Fruity Delights: Fresh Berries and Fruit
For a touch of freshness and sweetness, decorate your cake with fresh berries or sliced fruit. Strawberries, blueberries, raspberries, and blackberries are all great options. You can arrange them on top of the cake in a beautiful pattern or simply scatter them randomly. It's a simple way to add a pop of colour and flavour to your dessert.
4. Sprinkles, Nuts, and More: Embracing Texture
Don't forget about the toppings! You can add texture and colour to your cake with sprinkles, chopped nuts, chocolate shavings, or even edible flowers. There's no limit to what you can use, so get creative and have fun!
(Part 5) cake decorating 101: A Beginner's Guide
Don't be intimidated if you're new to cake decorating! It's easier than you think. Here are a few basic tips to help you get started:
1. The Right Tools
Invest in some basic cake decorating tools. You'll need a piping bag, a few different piping tips, an offset spatula, and a turntable. These tools will make it much easier to create beautiful decorations.
2. Practice Makes Perfect
Before you attempt to decorate your actual cake, practice your piping skills on a piece of parchment paper. It's a good way to get used to the different piping tips and techniques.
3. Take it Slow
Don't rush the process. Take your time, and remember that it's okay if your first attempts aren't perfect. The more you practice, the better you'll get.
(Part 6) Cake Storage: Keeping It Fresh and Delicious
You've made your beautiful cake, now how do you keep it fresh and delicious? Here are a few tips for storing your vanilla cake:
1. Room Temperature for a Few Days
Store your cake at room temperature for up to 3 days. It's the best way to preserve the texture and flavour of the cake. Just make sure it's covered with a cake dome or a piece of plastic wrap to prevent it from drying out.
2. The Freezer for Longer Storage
For longer storage, you can freeze your cake for up to 3 months. Wrap it tightly in plastic wrap and then aluminum foil. Thaw it in the refrigerator overnight before serving. It's a great way to have a delicious cake on hand for a last-minute gathering.
(Part 7) Beyond the Basics: Exploring Variations and Ideas
This vanilla cake recipe is a fantastic starting point, but the possibilities are truly endless. Here are a few ideas to get your creative juices flowing:
1. Layered Delights: Adding Filling and Fun
Take your cake to the next level by adding a delicious filling between the layers. You could try a simple jam layer, a whipped cream filling, or a decadent chocolate ganache. It's a great way to add another dimension of flavour and texture to your cake.
2. A Twist of Flavour: Infused Syrups and Glaze
Elevate the flavour of your cake by making an infused syrup. Simply simmer sugar, water, and a flavouring of your choice, like lemon zest, orange zest, vanilla beans, or spices, until the sugar dissolves. Then, brush the cake with the syrup while it's still warm. It's a simple but effective way to add a burst of flavour to your cake.
3. Theme It Up: Birthday, Holidays, and Beyond
Decorate your cake according to the occasion. For a birthday cake, you could add candles, sprinkles, and a birthday message. For a holiday cake, decorate it with festive colours and themes.
(Part 8) FAQs: Your Vanilla Cake Questions Answered
I know you might have some questions about making and decorating a vanilla cake. Here are some of the most common ones I get, and my answers!
1. Can I use a different type of flour?
It's best to use self-raising flour for this recipe, as it already contains baking powder. If you only have plain flour, you'll need to add 1 tsp of baking powder to the flour mixture.
2. What if I don't have a stand mixer?
No problem! You can use a hand mixer to cream the butter and sugar. Just make sure you get it nice and light and fluffy.
3. Can I use vegan butter?
Yes, you can use vegan butter in this recipe. Just make sure it's softened to room temperature, and it should work just fine.
4. Can I make this cake gluten-free?
Yes, you can make this cake gluten-free by using a gluten-free flour blend. Just follow the instructions on the flour package.
5. How long will the cake last in the fridge?
Once you've iced your cake, it will last for up to 5 days in the refrigerator. Just make sure it's well-wrapped in plastic wrap or stored in an airtight container.
(Part 9) A Final Word: Sharing the Joy of Vanilla Cake
I hope you find this recipe as helpful and rewarding as I do. It's a simple, timeless classic, and it's always a guaranteed hit. Making a cake is a wonderful way to share your love with those around you, and a perfect vanilla cake can really brighten up any occasion.
So, go on! Give it a try and see what happens. I'm sure you'll love it as much as I do.
Happy baking!
Everyone is watching

Perfect Rice Every Time: The Ultimate Guide to Cooking Rice
Cooking TipsAs a self-proclaimed foodie, I've always been a bit obsessed with rice. It's the foundation of countless cuisi...

The Ultimate Guide to Cooking Asparagus: Tips, Techniques, and Recipes
Cooking TipsAsparagus. The mere mention of this spring delicacy conjures up images of vibrant green spears, crisp and burs...

Ultimate Guide to Cooking the Perfect Thanksgiving Turkey
Cooking TipsThanksgiving. Just the word conjures up images of overflowing tables laden with delicious food, the scent of r...

Prime Rib Roast Cooking Time Chart: Per Pound Guide
Cooking TipsPrime rib roast. Just the name conjures images of lavish dinners, crackling fires, and hearty laughter. It’s ...

Can You Cook Spaghetti with Gasoline? (The Shocking Truth)
Cooking TipsWe've all seen those crazy internet trends. You know, the ones that make you wonder, "Did someone actually try...