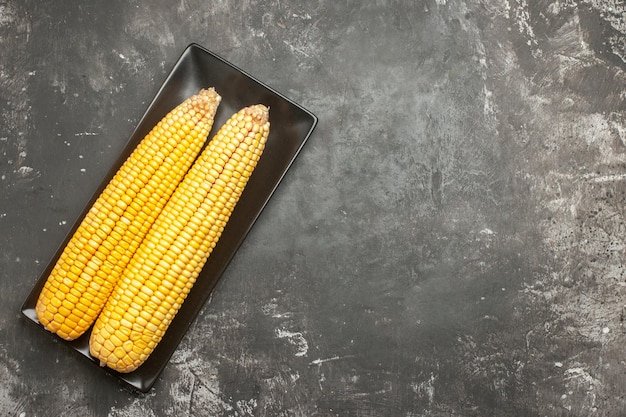
(Part 1) The Corn: Choosing Your Weapon

1. Look for Freshness
The husk is your first clue. It should be vibrant green, almost shimmering, and slightly damp. If it's dry and brown, that corn has been hanging around a bit too long and the kernels won't be as plump and juicy. Don't be afraid to give the husk a little sniff – it should have a fresh, sweet scent, like summer itself.
2. Check the Kernels
Gently peel back a small section of the husk. You want to see kernels that are plump and tightly packed, without any gaps or holes. If the kernels are soft or wrinkled, it's a sign that the corn isn't as fresh as it could be.
3. Don't Be Afraid to Ask
If you're buying from a market or farm stand, ask the vendor about the corn's origin and harvest date. Knowing where it comes from and how long ago it was picked gives you a better idea of its freshness.
(Part 2) Getting Ready to Roast

1. Husk and Silk Removal
First, gently pull back the husks, but don't remove them completely. They'll act like a little jacket, keeping the moisture in during the roasting process. Then, using your fingers, a damp paper towel, or a small knife, gently remove the silks. Those pesky things can be a real buzzkill, and we want nothing but sweet, juicy corn.
2. A Little TLC: Flavouring Your Corn
This is where the creativity kicks in! Before we roast, we're going to infuse our corn with flavour. Here's where the magic happens.
a. Butter Up
A classic for a reason! A simple pat of butter, melted and permeating those kernels, creates a rich, buttery flavour that's hard to resist. You can elevate this simple delight by adding a touch of garlic, herbs, or a sprinkle of chilli flakes for a hint of heat.
b. Herb Infused
If you prefer a more delicate touch, fresh herbs are your best friends. Rosemary, thyme, oregano, and basil all work beautifully, adding a subtle aroma and flavour to your corn. The scent alone is enough to make your mouth water!
c. Sweet and Spicy
For those who like a little bit of sweet and spicy magic, try a sprinkle of brown sugar or maple syrup mixed with a pinch of cayenne pepper. This combination will create a sweet, smoky flavour that's both comforting and exciting.
3. Wrap It Up
Once you've got your flavour combination sorted, wrap the husk back around the corn and secure it with kitchen twine. This keeps everything tidy and prevents the corn from drying out during the roasting process.
(Part 3) oven roasting: The Big Event

1. Preheating is Key
Preheat your oven to 200 degrees Celsius (400 degrees Fahrenheit). This crucial step ensures that the corn cooks evenly and quickly.
2. Direct Heat for Char
Place the corn directly on the oven rack, no need for a baking sheet here. This allows the corn to get that beautiful char on the husks, adding a smoky depth of flavour. Make sure the corn isn't touching the bottom of the oven, or it might burn.
3. cooking time
The cooking time will vary depending on the size of the corn. On average, it'll take about 20-30 minutes for the corn to be fully cooked. You'll know it's ready when the husks are slightly browned and crispy. If you want to check, carefully pull back a small bit of the husk and look at the kernels. They should be plump and slightly translucent.
4. Rest Time
Once the corn is cooked, let it rest for about 10 minutes before serving. This allows the corn to cool down slightly and makes it easier to handle.
(Part 4) Taking it to the Next Level: Variations and Add-ons
Now that you've mastered the basics, it's time to unleash your inner culinary adventurer! There are countless ways to take your roasted corn on the cob from simple to sensational. Here are a few ideas to get your taste buds tingling:1. Spice it Up
If you're a fan of fiery flavours, add a sprinkle of chili powder, chipotle powder, or even some crushed red pepper flakes before wrapping the corn. You can also get adventurous with different spice blends like Mexican seasoning or jerk seasoning. Just remember, a little goes a long way! You want to enhance the sweetness of the corn, not overpower it.
2. A Touch of Sweetness
For those who love a hint of sweetness, try drizzling a little bit of honey or maple syrup over the corn before wrapping it. You can also add some cinnamon, nutmeg, or allspice for a warming touch. This combination creates a sweet and comforting flavour profile that's perfect for fall evenings.
3. Get Cheesy
For a truly indulgent treat, consider adding some cheese. Shredded cheddar, Parmesan, or even crumbled feta will create a deliciously cheesy flavour. You can add the cheese before wrapping the corn, or you can sprinkle it on top after it's cooked. It's your call, my friend! Just imagine that gooey, melted cheese mingling with the sweet corn – pure heaven!
(Part 5) Serving it Up: Time to Enjoy!
You've done it! You've roasted the perfect corn on the cob. Now, it's time to enjoy the fruits of your labour. Here's how to make the most of this culinary triumph:1. Presentation Matters
While the taste is the star of the show, presentation still matters! Take those husks off and reveal your beautifully roasted corn. For an extra touch, place each cob on a nice cutting board or a platter. This creates a moment of anticipation before the first bite, letting your guests admire the beautiful char and the intoxicating aroma.
2. Embrace the Mess
Don't be afraid to get your hands dirty! There's something truly satisfying about biting into a fresh, juicy ear of corn. You can also use a butter knife to help you remove the kernels from the cob. But honestly, nothing beats the experience of biting into a whole cob. Just grab a napkin and enjoy!
3. Accompanying Delights
Now, what to serve with your masterpiece? The possibilities are endless! I'm a big fan of grilled meats and fish, a simple green salad, or a refreshing summer fruit salad. You can also serve it with a side of beans, rice, or potatoes. It's all about creating a balanced and delicious meal that celebrates the season.
(Part 6) Beyond the Basics: Tips and Tricks
We've covered the essentials, but there are always those little tips and tricks that can take your roasted corn to the next level. Here's what I've learned along the way.1. Don't Overcrowd the Oven
Give your corn some space to breathe! If you overcrowd the oven, the corn won't cook evenly and might end up steamed rather than roasted. It's better to roast in batches to ensure each cob gets the perfect char and cooks thoroughly.
2. Watch for Browning
Keep a close eye on your corn. The husks should be starting to brown and crisp up, but don't let them burn. If the husks are getting too dark, reduce the oven temperature slightly. You want that beautiful char, not a burnt mess!
3. The Importance of Leftovers
Sometimes, you end up with more roasted corn than you can eat in one sitting. Don't worry, it's a good problem to have! You can easily store leftover roasted corn in the refrigerator for up to 3 days. Just let it cool completely, then wrap it in plastic wrap or foil. To reheat, simply microwave it for a few minutes until it's warmed through.
4. Freezing for Later
Want to enjoy your corn on the cob later? No problem! You can freeze it for up to 3 months. Let the corn cool completely, then wrap each cob in plastic wrap and then in aluminum foil. Store it in a freezer-safe bag. To reheat frozen corn, simply place it in a steamer basket and steam it for about 10 minutes until warmed through. You can also add the frozen corn directly to soups, stews, or casseroles.
(Part 7) Beyond the Oven: Alternative Roasting Methods
While the oven is the classic method, you're not limited to just one way to roast corn. Let's explore some alternative techniques that will bring a whole new dimension of flavour to your corn on the cob.1. Grilling
grilling corn adds a smoky flavour that can't be beat. Simply preheat your grill to medium heat. Place the corn directly on the grill rack and close the lid. Cook for about 15-20 minutes, turning the corn every 5 minutes, until the husks are slightly charred and the kernels are tender. Be careful not to overcook the corn, or it will become dry. Pro tip: soak the corn in cold water for about 30 minutes before grilling. This helps to keep the kernels moist.
2. Smoker
If you're a smoker enthusiast, this is a game-changer. The smoke adds a depth of flavour that's simply unbeatable. Follow the same instructions as grilling, but instead of a grill, use your smoker. Choose your favourite wood chips for a personal touch. Just make sure the smoker is preheated to the desired temperature before adding the corn.
(Part 8) FAQs: Your Corn-Roasting Questions Answered
Let's clear up any lingering questions you might have about this delicious culinary adventure.1. Can I roast corn on the cob without the husks?
Yes, you can roast corn on the cob without the husks. Simply remove the husks and silks, then brush the corn with oil and season it with your favourite spices. Place the corn on a baking sheet and roast for about 15-20 minutes, turning it halfway through, until the kernels are tender. This method gives you a bit more control over the browning process and allows you to get a crispier texture. However, it's important to note that roasting corn without the husks can make it a bit drier. So, if you prefer a more moist and flavorful corn, roasting it in the husks is still the way to go.
2. What if my corn is too long to fit in the oven?
No worries, just use the "split-and-fold" method. Cut the corn in half lengthwise. Then, fold each half in on itself, wrap it in foil, and roast as usual. The foil helps to keep the moisture in and prevents the corn from drying out.
3. Can I freeze roasted corn on the cob?
Yes, you can freeze roasted corn on the cob, but it's best to freeze it before roasting. This helps to prevent the corn from becoming mushy. Simply blanch the corn for a few minutes, then cool it completely and wrap it in plastic wrap and foil. Place it in a freezer-safe bag and freeze for up to 3 months.
4. What's the best way to eat roasted corn on the cob?
There's no right or wrong answer here. Some people prefer to eat it directly from the cob, while others prefer to remove the kernels using a butter knife. Ultimately, it's up to personal preference. But if you're going for a truly immersive experience, I highly recommend biting into a whole cob. Just make sure you've got a napkin handy!
5. Can I roast corn on the cob with the husk still on?
It's possible, but not recommended. The husks will burn and release smoke, potentially setting off your smoke alarm. It's best to remove the husks, leaving them just to act as a wrap during cooking. This will ensure even cooking and prevent any unwanted smoke alarms. Besides, it's much easier to remove the husks after the corn is cooked.
(Part 9) A Final Bite: The Joy of Roasted Corn
There's something about the scent of roasted corn on the cob that fills the kitchen with a warm, nostalgic aroma. It's a reminder of summer days spent by the grill or the fireplace, surrounded by loved ones. And that's what I love most about roasted corn - it's not just about the taste, it's about the memories and the joy that it brings.
So next time you're craving a little bit of summer magic, grab some fresh corn, fire up your oven, and let's get roasting! Trust me, you won't regret it.
Everyone is watching

Prime Rib Roast Cooking Time Chart: Per Pound Guide
Cooking TipsPrime rib roast. Just the name conjures images of lavish dinners, crackling fires, and hearty laughter. It’s ...

How Long to Bake Potatoes in the Oven (Perfect Every Time)
Cooking TipsBaked potatoes are a staple in my kitchen. They're incredibly versatile, delicious, and surprisingly easy to m...

Perfect Rice Every Time: The Ultimate Guide to Cooking Rice
Cooking TipsAs a self-proclaimed foodie, I've always been a bit obsessed with rice. It's the foundation of countless cuisi...

The Ultimate Guide to Cooking Asparagus: Tips, Techniques, and Recipes
Cooking TipsAsparagus. The mere mention of this spring delicacy conjures up images of vibrant green spears, crisp and burs...

Ultimate Guide to Cooking the Perfect Thanksgiving Turkey
Cooking TipsThanksgiving. Just the word conjures up images of overflowing tables laden with delicious food, the scent of r...
