Ah, the humble steak. A culinary icon, a symbol of indulgence, and a dish that can be either incredibly satisfying or utterly disappointing depending on how it's cooked. But fear not, my fellow food enthusiasts! I'm here to guide you through the process of achieving steak perfection in the oven, a technique that, once mastered, will elevate your dinner game and earn you envious nods from your guests.
This guide isn't just about throwing a steak in the oven and hoping for the best. We're going to dive into the details, from picking the perfect cut to understanding the science behind the sear and the importance of resting. Get ready to impress yourself and everyone at your table with the ultimate oven-cooked steak.
(Part 1) choosing the right cut

As any seasoned cook knows, the journey to a delicious steak begins with selecting the right cut. It’s not about being fancy; it's about finding a piece of meat that will cook evenly and retain its natural flavour and tenderness.
The Cut Matters
I’m a big fan of ribeye for its marbling, which makes it incredibly juicy and flavorful. But don’t limit yourself! There's a whole world of steak cuts out there, each with its own unique characteristics. A juicy sirloin, a hearty new york strip, a leaner filet mignon – each offers a different flavor profile and cooking experience. It’s all about personal preference!
Look for Marbling and Thickness
No matter your choice, there are a few key things to look for when selecting your steak. First, marbling. This refers to the streaks of fat running through the meat, and it’s a crucial indicator of flavour and tenderness. You want to see a good distribution of marbling, not just a few isolated streaks. Second, thickness. Aim for a steak that's at least 1-inch thick. This ensures even cooking and gives you more leeway for achieving your desired level of doneness.
(Part 2) Prepping for Perfection

You’ve got your steak. Now, it’s time to prep it for its starring role in your culinary masterpiece. It’s all about creating the ideal canvas for the flavors to shine.
Pat it Dry, Pat it Dry
Before you start seasoning, it’s essential to pat the steak dry with paper towels. This simple step removes excess moisture, allowing for a beautiful, even sear and preventing steam from forming during cooking, which can make the steak soggy.
Seasoning - The Art of Simplicity
When it comes to seasoning, I believe in keeping things simple. A good quality sea salt and freshly ground black pepper are all you need to enhance the steak's natural flavour. However, if you’re feeling adventurous, you can experiment with other spices, like garlic powder, onion powder, paprika, or a touch of chili powder. Remember, less is more. Let the steak’s flavor be the star, and use seasoning to enhance it, not overpower it.
The Importance of Resting
After seasoning, give your steak some time to come to room temperature. Let it rest for about 30 minutes before cooking. This allows the steak to warm up evenly, preventing cold shock when it hits the hot pan, which can lead to uneven cooking.
(Part 3) The Art of the Sear

Now, we get to the fun part – the sear. This is what gives your steak that captivating crust, adding a layer of depth and complexity to its flavour. It’s a critical step that separates a good steak from a truly great one.
Heat is Your Friend
You’ll need a cast-iron skillet or a heavy-bottomed pan for this crucial step. Preheat it over medium-high heat for about 5 minutes, getting the pan nice and hot. This heat is essential for creating the desired crust.
The Oil Factor
Once your pan is sizzling, add a generous amount of oil – enough to coat the bottom of the pan. I prefer using grapeseed oil or avocado oil because of their high smoke point, meaning they won't burn easily even at high temperatures.
The Sizzle of Success
When the oil is shimmering, carefully place the steak in the pan. You’ll hear a satisfying sizzle as it makes contact with the hot surface. Let it cook undisturbed for 2-3 minutes per side, or until you see a dark brown, crispy crust forming. Don’t be tempted to flip it too soon; let it develop that beautiful color.
(Part 4) Oven-Cooking to Perfection
The sear gives you a great start, but to achieve perfect doneness, it’s time to move your steak to the oven. This allows for even cooking and helps to lock in the juices.
Preheat for Evenness
Preheat your oven to 350°F (175°C). This consistent temperature ensures that your steak cooks evenly from edge to center, preventing overcooking in the middle while the edges remain well done.
Transfer and Bake
Carefully transfer your seared steak to a baking sheet. You can use the same pan you used for searing, just make sure to wipe off any excess oil to avoid excessive smoke. Place the baking sheet in the preheated oven and allow the steak to cook until it reaches your desired doneness.
cooking time - A Balancing Act
The cooking time depends on the thickness of your steak and how well-done you prefer it. As a general guide, a 1-inch thick steak will take about 8-10 minutes for medium-rare. However, every steak is different, and it’s essential to keep an eye on the process and adjust cooking time as needed.
(Part 5) Mastering Doneness - The Art of the Test
You’ve reached the most crucial part – determining if your steak is cooked to your liking. Doneness is a personal preference, and there are several methods to help you get it right.
The Finger Test - A Helpful Guide
The finger test is a simple way to estimate doneness. Touch your index finger and thumb together, feeling the firmness of the muscle. That's what a rare steak should feel like. For medium-rare, touch your thumb and middle finger together. Medium, thumb and ring finger. Medium-well, thumb and pinky.
The meat thermometer - Precision for Perfection
If you want precision, invest in a meat thermometer. This handy tool will give you an accurate internal temperature reading, ensuring you achieve your desired level of doneness every time.
Doneness Chart - A Visual Guide
Here's a handy chart to guide you:
| Doneness | Internal Temperature (°F) | Internal Temperature (°C) |
|---|---|---|
| Rare | 125-130 | 52-54 |
| Medium-rare | 130-135 | 54-57 |
| Medium | 140-145 | 60-63 |
| Medium-well | 150-155 | 65-68 |
| Well-done | 160 | 71 |
(Part 6) The Rest is Golden
You’ve cooked your steak to perfection, but the journey isn’t over yet. The final step is crucial for achieving optimal tenderness and flavour: resting.
Why Resting is Key
It might be tempting to slice into your steak immediately, but resist the urge! Allowing it to rest for 10 minutes before slicing is essential. During cooking, the steak’s juices are pushed to the surface. Resting allows those juices to redistribute throughout the meat, ensuring a succulent, tender, and evenly flavorful steak.
The Resting Ritual
Cover the steak loosely with foil to keep it warm while it rests. This creates a humid environment that helps retain the moisture and allows the juices to redistribute evenly.
(Part 7) Serving the Star of the Show
The moment you’ve been waiting for has arrived! Your perfectly cooked steak is ready to be enjoyed.
The Art of Slicing
Before serving, slice the steak against the grain. This means cutting across the muscle fibers, making the steak more tender and easier to chew.
The Perfect Accompaniment
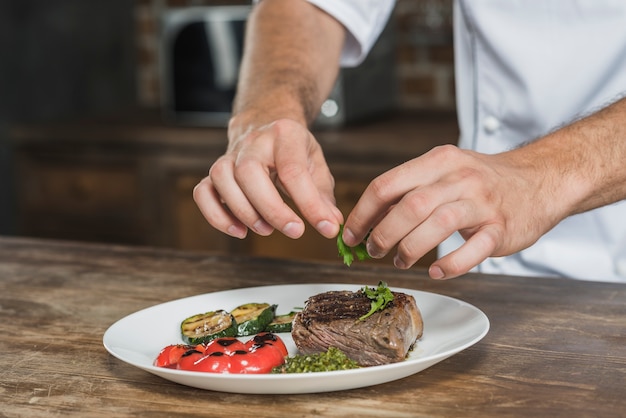
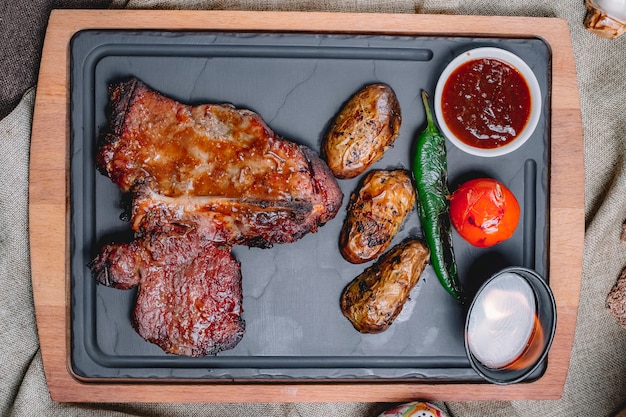
A perfectly cooked steak deserves equally delicious accompaniments. From roasted vegetables and creamy mashed potatoes to a refreshing salad, the possibilities are endless. Choose your favorites, or get creative and try something new!
(Part 8) Troubleshooting and Tips
Even the most experienced cooks can face a few challenges in the kitchen. Here are some common issues and tips to help you avoid them.
Overcooked Steak - A Fixable Situation
If you’ve overcooked your steak, don’t despair. It's still salvageable! Wrap it in foil and let it rest for a few minutes to help rehydrate and regain some of its tenderness.
Tough Steak - Addressing the Issue
A tough steak might be a result of uneven cooking or insufficient resting time. Ensure that you cook your steak evenly, and remember to let it rest for at least 10 minutes before slicing.
Patience is a Virtue
The key to achieving a perfect steak is patience. Don't rush the process. Allow your steak to cook slowly and evenly, and let it rest properly before slicing. It will be worth the wait!
FAQs
Q1: What kind of oven should I use?
You can use a conventional oven or a convection oven. If you're using a convection oven, you'll need to reduce the cooking temperature by 25 degrees Fahrenheit.
Q2: How do I know if my steak is done?
The best way to check the doneness is with a meat thermometer. If you don't have one, the finger test can provide a rough estimate.
Q3: Can I cook more than one steak at a time?
Yes, you can cook multiple steaks at the same time. Just make sure to give them enough space on the baking sheet so they can cook evenly.
Q4: What happens if I overcook my steak?
If you overcook your steak, it will be tough and dry. Try wrapping it in foil and letting it rest for a few minutes to help it rehydrate.
Q5: How do I store leftover steak?
Leftover steak can be stored in the refrigerator for up to 3 days. Make sure to wrap it tightly in plastic wrap or aluminum foil. You can reheat it in the oven or microwave.
Everyone is watching

Prime Rib Roast Cooking Time Chart: Per Pound Guide
Cooking TipsPrime rib roast. Just the name conjures images of lavish dinners, crackling fires, and hearty laughter. It’s ...

How Long to Bake Potatoes in the Oven (Perfect Every Time)
Cooking TipsBaked potatoes are a staple in my kitchen. They're incredibly versatile, delicious, and surprisingly easy to m...

Perfect Rice Every Time: The Ultimate Guide to Cooking Rice
Cooking TipsAs a self-proclaimed foodie, I've always been a bit obsessed with rice. It's the foundation of countless cuisi...

The Ultimate Guide to Cooking Asparagus: Tips, Techniques, and Recipes
Cooking TipsAsparagus. The mere mention of this spring delicacy conjures up images of vibrant green spears, crisp and burs...

Ultimate Guide to Cooking the Perfect Thanksgiving Turkey
Cooking TipsThanksgiving. Just the word conjures up images of overflowing tables laden with delicious food, the scent of r...
