There’s a certain magic to a perfectly hard-boiled egg, isn’t there? That vibrant yolk, the smooth, firm white, the satisfying crack of the shell - it’s a simple pleasure that never fails to bring a smile to my face. But let’s be honest, mastering the art of hard-boiling can feel like a bit of a culinary gamble. Sometimes you get a beautiful, easily-peeled egg, and other times you end up with a rubbery, green-ringed monstrosity.
Fear not, my friends! This guide is more than just a recipe; it’s a deep dive into the science and the art of hard-boiling, a quest for the ultimate egg experience. We’ll explore the secrets to achieving that flawless, vibrant yolk, the tricks for preventing that dreaded green ring, and even unearth some clever hacks to make the whole process a breeze. So, grab your trusty pot, your favourite egg-cellent tools (pun intended!), and let's embark on this egg-cellent journey together!
(Part 1) The Tools of the Trade
Before we dive into the boiling itself, let’s talk about the essential equipment. You don't need a fancy kitchen to whip up a batch of hard-boiled eggs, but having the right tools can make all the difference.
The Pot: Your Boiling Companion
First, the pot! You’ll want a pot that’s spacious enough to comfortably hold your eggs with at least an inch of water above them. I typically use a medium-sized saucepan; anything too large might lead to over-boiling and wasted water.
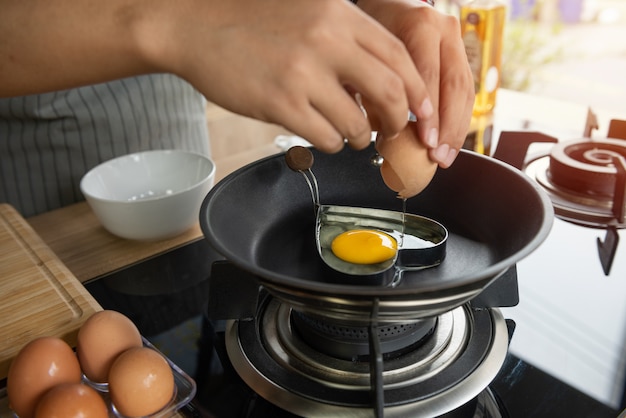
The Eggs: The Stars of the Show
Now, the stars of the show - the eggs! You have your choice of brown or white, but it ultimately comes down to personal preference. While I have a soft spot for brown eggs, they taste exactly the same! For the best results, opt for fresh eggs. Older eggs have a larger air pocket, which can make them more prone to cracking during boiling.
The ice bath: A Cooling Savior
Here's where things get interesting. An ice bath is a game-changer for hard-boiled eggs. It abruptly stops the cooking process, ensuring a smooth, firm white and preventing the dreaded green ring. Simply grab a large bowl, fill it with ice and cold water, and get ready to cool those hot eggs!
The Peeling Aid: Taming the Shell
Ah, the peeling - a potential nightmare for many. I've tried everything from gently tapping the egg on the counter to using a spoon, and even heard about the baking soda trick! But my personal favourite peeling aid is a good old-fashioned egg spoon. It's a small, slotted spoon that allows you to carefully pry open the shell without damaging the delicate egg white.
(Part 2) The Science Behind the Perfect Hard-Boiled Egg
Now that you’ve got your tools, let’s talk about the actual process. Hard-boiling eggs may seem simple, but there’s definitely some fascinating science at play.
Understanding the Egg White
The egg white is primarily composed of protein. When heat is applied, these protein molecules unravel and bond together, forming the solid texture we know and love. The longer you cook the egg, the more tightly these proteins bond, resulting in a firmer, even rubbery white.
The Delicate Yolk
The yolk, on the other hand, is mostly fat and water. As it heats up, the fat starts to solidify, creating that lovely, creamy texture. However, the yolk is quite sensitive to overcooking. Cook it for too long, and the yolk will harden and dry out, becoming a rubbery ball.
The Mystery of the Green Ring
Now, let’s address the infamous green ring. It’s not just an unsightly blemish; it’s a sign that your egg has been overcooked. This green ring forms when the iron in the yolk reacts with the sulfur in the white, creating iron sulfide. While it's perfectly safe to eat, it doesn’t exactly scream "delicious"!
(Part 3) The Different Methods of Hard-Boiling
There are a few different methods for cooking hard-boiled eggs, each with its own advantages and disadvantages. Let’s explore some of the most popular methods.
The Stovetop Method: Classic and Reliable
This is the tried-and-true method most people are familiar with. It’s simple, straightforward, and doesn’t require any fancy equipment.
- Place your eggs in a saucepan and cover them with cold water, ensuring the water is at least an inch above the eggs.
- Bring the water to a rolling boil over high heat.
- Once the water boils, turn off the heat and cover the pot with a lid. Let the eggs sit in the hot water for the desired amount of time, depending on the level of doneness you’re aiming for.
- After the designated time, drain the hot water and immediately plunge the eggs into an ice bath to stop the cooking process.
The instant pot Method: Fast and Convenient
If you’re a fan of your Instant Pot, you’ll be pleased to know it can also be used for hard-boiling eggs. This method is quick and convenient, but it does involve a few extra steps.
- Place the eggs in the Instant Pot and cover them with cold water, ensuring the water level is at least an inch above the eggs.
- Close the Instant Pot lid and seal the vent.
- Cook the eggs on high pressure for 4 minutes for soft-boiled eggs or 6 minutes for hard-boiled eggs.
- Allow the pressure to release naturally for 5 minutes before manually releasing the remaining pressure.
- Immediately transfer the eggs to an ice bath to stop the cooking process.
The pressure cooker Method: Slightly Faster, Requires Attention
Similar to the Instant Pot, a pressure cooker can be used to hard-boil eggs. This method is slightly faster than the stovetop method, but it requires more attention to ensure the eggs don’t overcook.
- Place the eggs in the pressure cooker and cover them with cold water, ensuring the water level is at least an inch above the eggs.
- Close the pressure cooker lid and bring the pressure to high heat.
- Once the pressure reaches high, reduce the heat to low and cook the eggs for 3 minutes for soft-boiled eggs or 5 minutes for hard-boiled eggs.
- Turn off the heat and allow the pressure to release naturally for 5 minutes before manually releasing the remaining pressure.
- Immediately transfer the eggs to an ice bath to stop the cooking process.
(Part 4) Timing is Everything: Perfecting the Doneness
Now, let’s talk about timing. The amount of time you cook your eggs determines how hard-boiled they’ll be.
Soft-Boiled: runny yolk, Tender White
For a soft-boiled egg, you want a runny yolk with a tender white. Aim for 3-4 minutes of cooking time for a perfectly soft-boiled egg.
Medium-Boiled: The Sweet Spot
This is my personal favourite – the yolk is still soft and creamy, but the white is firm. This typically takes 6-7 minutes.
Hard-Boiled: Solid Yolk and White
For a hard-boiled egg, you want a completely solid yolk and white. Aim for 8-10 minutes of cooking time.
Overcooked: The Rubbery Disaster
If you cook your eggs for too long, the yolk will become hard and rubbery, and the white may start to turn grey. This is what we want to avoid at all costs!
(Part 5) The Art of Peeling: Unleashing the Smooth Egg
Now that your eggs are perfectly cooked, it’s time for the peeling. Here’s where some of my hard-earned wisdom comes into play.
The Secret to Easy Peeling: Creating an Air Pocket
The trick to effortless peeling is all about creating a small air pocket between the shell and the egg white. This allows the shell to easily peel away without sticking to the white.
The Tap Technique: A Gentle Approach
One common technique is to gently tap the egg on a hard surface, like the counter, to create a small crack. This method works well for most eggs, but it can sometimes be a bit messy.
The Egg Spoon Technique: A Controlled Approach
This is my go-to method. Gently insert the egg spoon between the shell and the white, and slowly pry open the shell. This technique is less likely to damage the egg and makes for a cleaner peeling experience.
The Rolling Technique: A Fun Twist
Here’s a fun one! Gently roll the egg on a hard surface, such as a counter or cutting board, applying a bit of pressure. This helps to loosen the shell from the egg white.
(Part 6) Preventing the Green Ring: Ensuring a Beautiful Egg
Remember that green ring we talked about earlier? There are a few things you can do to prevent it.
Older Eggs: A Natural Advantage
Older eggs have a larger air pocket, which allows the yolk to rise during cooking, reducing the risk of the yolk reacting with the white.
Adding Vinegar: A Helpful Trick
Vinegar helps to break down the proteins in the egg white, making it easier for the shell to peel away and potentially reducing the formation of the green ring.
Quick Chilling: Stopping the Reaction
This helps to stop the cooking process quickly, preventing the yolk from overcooking and reacting with the white.
Keeping It Simple: Time and Temperature
Sometimes, the best approach is the simplest. Simply avoid overcooking the eggs. If you follow the recommended cooking times, you’re less likely to encounter the green ring.
(Part 7) Storing Your Hard-Boiled Eggs: Keeping Them Fresh
Once you’ve got those perfect hard-boiled eggs, you’ll want to store them properly to ensure they stay fresh and delicious.
Refrigerator Storage: The Best Option
Store your hard-boiled eggs in a sealed container in the refrigerator for up to a week. This will help to keep them fresh and prevent them from drying out.
Washing Before Storing: A Big No-No
The outer shell of the egg has a natural protective coating that helps to keep the egg fresh. Washing it before storing can remove this coating and shorten the shelf life of your eggs.
Separate the Whites and Yolks: For Versatile Use
If you want to use the egg whites and yolks separately, you can store them in airtight containers in the refrigerator for up to 3 days.
Freezing Hard-Boiled Eggs: Not Recommended
Freezing hard-boiled eggs is not recommended, as it can affect the texture and flavour. However, you can freeze the separated egg whites and yolks for later use.
(Part 8) Delicious Ways to Enjoy Hard-Boiled Eggs: A Culinary Delight
Now, for the fun part – all the delicious ways to enjoy those hard-boiled eggs!
classic deviled eggs: A Timeless Treat
A timeless favourite, deviled eggs are a staple at any potluck or picnic. Simply mash the yolk with mayonnaise, mustard, and seasonings, and pipe it back into the egg white.
egg salad Sandwiches: Quick and Easy
Another classic, egg salad sandwiches are quick and easy to make. Simply chop the hard-boiled eggs and combine them with mayonnaise, mustard, celery, and onion.
Eggy Breakfast Bowls: A Healthy Start
Top a bowl of salad greens with hard-boiled eggs, avocado, tomatoes, and a sprinkle of feta cheese for a healthy and satisfying breakfast.
Egg-cellent Snacks: On-the-Go Goodness
Hard-boiled eggs are a perfect on-the-go snack. They’re packed with protein and nutrients, making them a great choice for a healthy and filling bite.
Egg Salad Wraps: A Portable Delight
For a more portable snack, wrap your favourite egg salad in a tortilla with your favourite toppings, like lettuce, tomatoes, and cheese.
(Part 9) FAQs: Answering Your Egg-cellent Questions
I know, you’re probably full of questions by now. So, let’s tackle a few of the most common ones.
1. How do I know if my eggs are fresh?
A fresh egg will sink to the bottom of a bowl of water and lay flat. An older egg will float because of the air pocket that develops over time.
2. Why are my eggs cracking in the water?
This can happen if the eggs are too old or if the water is too cold when you add the eggs. Try using fresh eggs and adding them to the water when it is already hot, but not boiling.
3. Can I cook my eggs in the shell?
Yes, you can! However, it’s a bit more difficult to control the cooking time. If you’re looking for a perfectly cooked egg, I recommend using the stovetop or Instant Pot methods.
4. Can I use other liquids instead of water?
You can! Some people use broth or even coffee to add flavour to their hard-boiled eggs. However, the flavour might not be as pronounced.
5. How long can I keep hard-boiled eggs in the refrigerator?
You can keep hard-boiled eggs in the refrigerator for up to a week. However, they will start to lose their freshness after a few days.
There you have it, my friends! The ultimate guide to perfectly hard-boiled eggs, brimming with tips, tricks, and delicious ideas. Now go forth and conquer those eggs, and enjoy the beautiful, simple pleasure of a perfectly cooked egg. Happy boiling!
Everyone is watching

Prime Rib Roast Cooking Time Chart: Per Pound Guide
Cooking TipsPrime rib roast. Just the name conjures images of lavish dinners, crackling fires, and hearty laughter. It’s ...

How Long to Bake Potatoes in the Oven (Perfect Every Time)
Cooking TipsBaked potatoes are a staple in my kitchen. They're incredibly versatile, delicious, and surprisingly easy to m...

Perfect Rice Every Time: The Ultimate Guide to Cooking Rice
Cooking TipsAs a self-proclaimed foodie, I've always been a bit obsessed with rice. It's the foundation of countless cuisi...

The Ultimate Guide to Cooking Asparagus: Tips, Techniques, and Recipes
Cooking TipsAsparagus. The mere mention of this spring delicacy conjures up images of vibrant green spears, crisp and burs...

Ultimate Guide to Cooking the Perfect Thanksgiving Turkey
Cooking TipsThanksgiving. Just the word conjures up images of overflowing tables laden with delicious food, the scent of r...