Let's be honest, there's something truly satisfying about a perfectly cooked steak. That beautiful crust, the juicy center, the symphony of flavors... it's a culinary experience that deserves all the praise. But let's face it, mastering the art of steak can feel daunting, especially when you're venturing beyond the trusty frying pan. Fear not, fellow food enthusiasts, because I'm about to unveil my secrets to achieving oven-cooked steak perfection, turning even the most novice cook into a confident steak aficionado.
My journey to steak mastery has been filled with both triumphs and, shall we say, "learning experiences" (read: a few dry, chewy disasters). But through trial and error (and maybe a few online recipe consultations), I've cracked the code. And trust me, once you've mastered these techniques, you'll never look back.
(Part 1) The steak selection: Choosing Your Culinary Canvas

You can't create a masterpiece without the right canvas, and in the culinary world, that canvas is your steak. Now, I'm a staunch ribeye enthusiast. Its marbling, juiciness, and inherent flavour just win me over every time. But don't feel restricted! The world of steak is vast, and there are countless delicious cuts waiting to be explored. Sirloin, new york strip, even a classic rump – experiment, have fun, and discover your personal favourite.
Just remember, thicker cuts are your oven-cooking allies. They retain moisture better, ensuring even cooking and a luscious, tender result. Think of it as a thicker steak, a more even cooking journey, and a more satisfying reward.
choosing the right cut: Navigating the Butcher Counter
Don't be intimidated by the butcher counter! Just ask for a cut that's at least 1.5 inches thick. You want that good, solid foundation for your culinary masterpiece. And never be afraid to tap into the butcher's expertise! They're the masters of the trade and will be more than happy to guide you.
Of course, you can always grab a steak from the supermarket. But take a moment to choose wisely. Look for a steak that boasts good marbling, that beautiful swirled network of fat that translates to juicy, flavorful results. And avoid any cuts labelled "lean" – they're more likely to end up dry and tough, a culinary tragedy waiting to happen.
The Importance of Quality: A Commitment to Flavor
Here's where I get a bit of a purist, and I'm happy to admit it. I'm a firm believer in good-quality meat. Whenever possible, I seek out local butchers or farmers markets, where you can often find incredible cuts. There's a distinct difference in flavour that's worth the extra effort. But don't worry if you're on a budget! You can still get a decent cut from the supermarket. Just make sure it's properly aged, a process that enhances tenderness and flavour. And always steer clear of anything that looks discolored or smells off. You want a steak that's ready to sing, not a culinary disappointment waiting to happen.
(Part 2) Getting Ready to Cook: Setting the Stage
Okay, you've got your chosen steak, now it's time to get your kitchen in order. We're about to embark on a culinary adventure, and it's essential to have everything prepped and ready to go.
Preparing the Steak: A Symphony of Seasoning
Once you've got your gorgeous cut of steak, it's time to give it a little love. I like to season generously with salt and pepper – it's a classic pairing for a reason. A good seasoning is like the foundation of a great painting, setting the stage for a symphony of flavours. Feel free to experiment with other herbs and spices, but I prefer to keep it simple, allowing the steak's natural flavour to shine.
And don't forget to pat the steak dry with paper towels. This simple step helps to create a beautifully crispy crust, adding another layer of texture to your culinary creation.
Heating Up the Oven: The Heart of the Operation
Now, let's get that oven fired up. Preheat it to a high temperature, around 400°F (200°C). This intense heat creates that perfect balance – a juicy, tender interior and a gloriously crisp exterior. And while you're at it, grab your oven rack and place it in the middle position. This ensures the steak cooks evenly on all sides, preventing any hot spots or uneven cooking disasters.
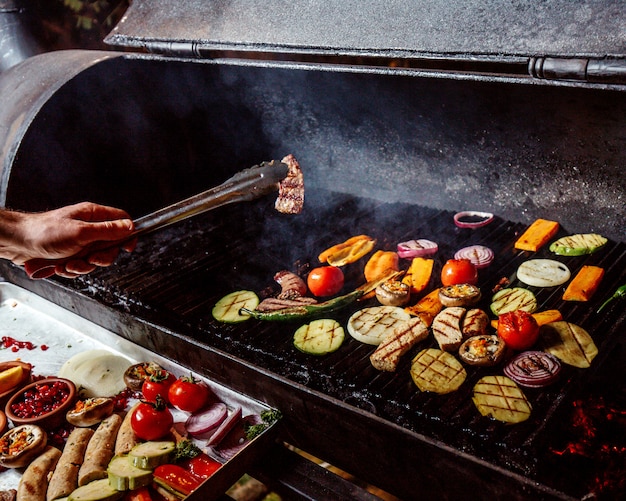
(Part 3) The Crucial First Step: The Sear – A Culinary Kiss of Fire
This is where the magic truly begins. The sear is the key to unlocking the steak's full potential, creating that mouthwatering, crispy crust and locking in all those precious juices. It's the initial dance between the steak and heat, a pivotal moment in your culinary journey.
Searing in a cast iron pan: A Classic Choice
My go-to method for searing is a trusty cast iron pan. Its exceptional heat distribution and ability to retain heat create the perfect environment for achieving that gorgeous browning. Heat the pan over medium-high heat until it's smoking hot – that's when you know you're ready to sear. Add a little bit of oil, just enough to coat the bottom of the pan. Carefully place the steak in the pan and resist the urge to move it for about 3-4 minutes. Let it form that beautiful crust, the first sign of your culinary masterpiece taking shape. When you can easily lift the steak, it's time to flip. Flip it over and sear the other side for another 3-4 minutes, allowing that same gorgeous browning to develop.
Searing in a Different Pan: Adapting Your Technique
Don't have a cast iron pan? No worries! You can use any heavy-bottomed pan, like a good old-fashioned stainless steel or a trusty non-stick option. The key is to ensure it's properly heated and that the oil is hot enough to sizzle when you add the steak. That's your signal that you're ready to embark on the searing process.
Searing Tips: Mastering the Art of the Sear
Here are a few tips to ensure your sear is as perfect as your steak:
- Don't overcrowd the pan. Give your steak plenty of space to breathe and cook evenly. Overcrowding can lead to uneven cooking and a less than ideal sear.
- Resist the urge to touch the steak while it's searing. Let it be! It will release itself when it's ready to flip, showcasing its perfect golden-brown crust. Patience is key in this stage of the culinary journey.
- Avoid using a fork to flip the steak. It will pierce the meat and release those precious juices, compromising the tenderness and flavour of your steak. Instead, use tongs or a spatula, tools that gently guide the steak, ensuring it retains its juiciness.
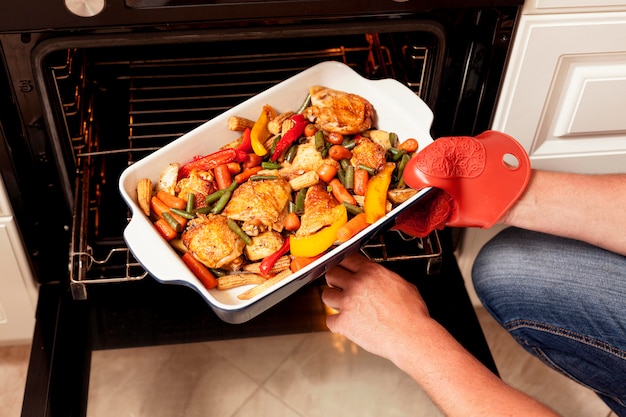
(Part 4) Finishing the Steak in the Oven: A Symphony of Heat
The initial sear has created the foundation. Now it's time to move our steak to the oven for the final, transformative step.
Transferring to the Oven: The Final Stage
Carefully transfer the seared steak to a baking sheet. Remember, your oven should already be preheated to 400°F (200°C), the perfect temperature to finish cooking the steak to your desired level of doneness.
Doneness Guide: Unlocking the Flavors
There's a whole world of doneness possibilities, each offering a distinct flavor profile. Here's a handy guide to help you navigate the different levels:
| Doneness | internal temperature (°F) | Description |
|---|---|---|
| Rare | 125-130 | Center is red and cool, showcasing a bold, raw flavor |
| Medium-Rare | 130-135 | Center is pink and slightly warm, offering a balance of tenderness and flavor |
| Medium | 135-140 | Center is slightly pink and warm, a well-rounded option for those seeking a touch of pink |
| Medium-Well | 140-145 | Center is very slightly pink, a good choice for those who prefer a more cooked steak |
| Well-Done | 145+ | Center is brown and hot, a fully cooked option, though less tender and juicy than other doneness levels |
Time is of the Essence: Understanding cooking time
Remember, cooking time depends on the thickness of your steak. A thicker steak will naturally need a bit more time to reach your desired level of doneness. But as a general guide, here's a breakdown of approximate cooking times:
- 1 inch thick: 5-7 minutes per side
- 1.5 inches thick: 7-10 minutes per side
- 2 inches thick: 10-12 minutes per side
(Part 5) Resting the Steak: The Art of Patience
You've done the hard work, and now it's time for a little patience. Resting the steak is crucial – it allows the juices to redistribute throughout the meat, leading to a more tender and juicy result. Think of it as a well-deserved break for your steak, a time for the flavors to deepen and meld together.
Time for a Break: A Culinary Timeout
Once the steak is cooked to your liking, take it out of the oven and let it rest for at least 5-10 minutes before slicing. Place it on a cutting board, cover it loosely with foil, and let it rest. This allows the juices to redistribute evenly, ensuring a more tender and flavorful steak.
Why Resting is Crucial: A Scientific Explanation
Think of it this way: when you cook a steak, the juices naturally move toward the center of the meat. By resting it, you give those juices a chance to escape the center and distribute evenly throughout the steak. This prevents them from spilling out when you slice it, ensuring a more tender and flavorful outcome. It's a simple yet crucial step in the journey to steak perfection.
(Part 6) Slicing and Serving: The Grand Finale
The moment you've been waiting for: time to enjoy that delicious steak! But before you dive in, there's one more crucial step.
Slicing Technique: A Matter of Precision
Use a sharp knife to slice the steak against the grain. This means slicing perpendicular to the muscle fibers, resulting in a more tender bite. Think of it as cutting through the muscle, allowing for a softer, more enjoyable texture. Slice it into even pieces, about half an inch thick. This ensures each bite is a perfect balance of flavour and texture.
Serving Suggestions: Showcasing Your Culinary Creation
Now, it's all about presentation – turning your culinary masterpiece into a feast for the eyes as well as the palate.
- Serve your steak on a warm plate, a simple yet effective way to keep it at the perfect temperature.
- Add a dollop of butter to the top of your steak. It will melt beautifully, adding a rich, buttery flavour that elevates your steak to new heights.
- Drizzle some pan sauce over your steak. If you've seared the steak in a pan, you'll have delicious juices and browned bits left behind – a culinary treasure trove waiting to be transformed into a delectable sauce. Deglaze the pan with a bit of wine or broth, scraping those browned bits off the bottom, and you'll have a sauce that complements your steak perfectly.
- Don't forget the sides! mashed potatoes, roasted vegetables, or a simple salad all go wonderfully with steak, offering a delightful symphony of textures and flavours.
(Part 7) Don't Fear the Thermometer: A Guide to Accuracy
You've heard it before, and I'm saying it again: use a meat thermometer! It's the most reliable way to ensure your steak is cooked to your liking, eliminating any guesswork and ensuring your steak is perfect every time. It's the secret weapon that takes your steak game from good to great.
Why it's Essential: The Key to Consistency
Don't rely on your eyes or intuition. A meat thermometer provides an accurate reading of the internal temperature, giving you the confidence to cook your steak to your desired doneness level. It's like having a personal steak guide in your kitchen, eliminating any uncertainty and ensuring consistently delicious results.
How to Use a Meat Thermometer: Mastering the Technique
Insert the thermometer into the thickest part of the steak, making sure it doesn't touch any bone. This ensures an accurate reading, preventing any skewing of results. Leave the thermometer in the steak for about 15-20 seconds to allow it to settle and give you a precise reading. And don't forget to refer to the doneness chart provided earlier – it's your guide to unlocking the perfect level of doneness for your steak.
(Part 8) FAQs: Common Questions About Oven-Cooked Steak
Q: Can I cook steak in a slow cooker?
A: While you can technically cook steak in a slow cooker, it's not ideal. Slow cookers are designed for tougher cuts of meat that need to be broken down during a long cooking process. Steak, on the other hand, is a delicate cut of meat that can become tough and dry if cooked for too long. Stick to searing and oven cooking for the best results.
Q: Can I cook steak in the microwave?
A: Absolutely not! microwave cooking is a culinary no-no when it comes to steak. It will result in a dry, tough steak, far from the juicy, flavorful experience you're aiming for. Stick to the oven or stovetop – those are the keys to unlocking steak perfection.
Q: How can I prevent my steak from being overcooked?
A: Keep a close eye on the steak as it cooks, and use that trusty meat thermometer to ensure it reaches your desired level of doneness. You can also take the steak out of the oven a few minutes before it reaches your target temperature, allowing it to finish cooking while resting. This gentle approach prevents overcooking and ensures a perfectly cooked steak.
Q: Can I cook steak in advance and reheat it later?
A: While it's possible, it's not ideal. The best way to enjoy steak is fresh off the grill or out of the oven. That's when the flavors are at their peak, and the texture is at its most tender. If you must reheat it, do so in a preheated oven or on the stovetop. Avoid the microwave, as it can further dry out the steak.
Q: What are some good sauces to serve with steak?
A: The world of steak sauces is vast and exciting! Here are a few of my personal favorites:
- Béarnaise Sauce: A classic French sauce made with egg yolks, butter, and herbs. Its creamy, tangy, and slightly herby flavor pairs perfectly with a variety of steak cuts.
- Mushroom Sauce: A rich and savory sauce made with mushrooms, wine, and broth, offering a deep, earthy flavor that complements the steak beautifully.
- Red Wine Sauce: A classic steak sauce made with red wine, shallots, and herbs. It's a simple yet elegant sauce that adds a touch of sophistication to your steak.
- Peppercorn Sauce: A spicy and flavorful sauce made with peppercorns, butter, and herbs, offering a delightful balance of heat and flavor.
- Horseradish Cream Sauce: A creamy and tangy sauce made with horseradish, sour cream, and herbs. It's a refreshing addition to steak, offering a contrasting flavor that elevates the overall experience.
So there you have it, my friends. A complete guide to achieving the perfect oven-cooked steak, even if you're a complete beginner. With a little practice and the right techniques, you'll be serving up restaurant-quality steak at home in no time. Happy cooking!
Everyone is watching

Prime Rib Roast Cooking Time Chart: Per Pound Guide
Cooking TipsPrime rib roast. Just the name conjures images of lavish dinners, crackling fires, and hearty laughter. It’s ...

How Long to Bake Potatoes in the Oven (Perfect Every Time)
Cooking TipsBaked potatoes are a staple in my kitchen. They're incredibly versatile, delicious, and surprisingly easy to m...

Perfect Rice Every Time: The Ultimate Guide to Cooking Rice
Cooking TipsAs a self-proclaimed foodie, I've always been a bit obsessed with rice. It's the foundation of countless cuisi...

The Ultimate Guide to Cooking Asparagus: Tips, Techniques, and Recipes
Cooking TipsAsparagus. The mere mention of this spring delicacy conjures up images of vibrant green spears, crisp and burs...

Ultimate Guide to Cooking the Perfect Thanksgiving Turkey
Cooking TipsThanksgiving. Just the word conjures up images of overflowing tables laden with delicious food, the scent of r...