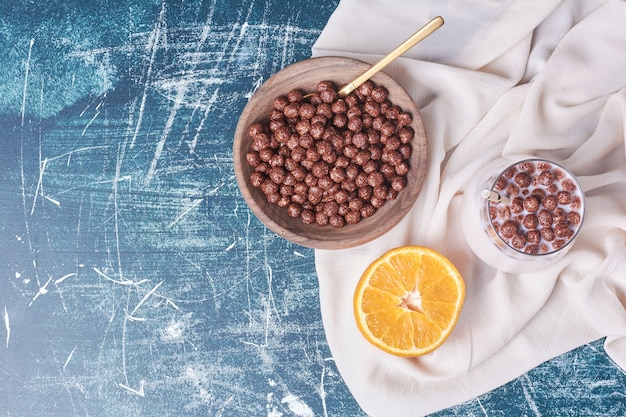
black beans are a staple in my kitchen, a versatile ingredient that’s as much a comfort food as it is a culinary chameleon. I’ve been cooking with black beans for years, experimenting with different methods and recipes. From hearty stews to vibrant salads, there’s always a place for them on my table. But let’s face it, sometimes even the simplest things can seem a bit daunting. Cooking perfect black beans can feel like a bit of a culinary mystery, especially when you’re starting out. Fear not, my fellow bean enthusiasts, because today I’m sharing everything I’ve learned about cooking the perfect black beans. We’re going to embark on a journey together, covering everything from choosing the right beans to mastering the art of seasoning. So grab a cuppa, settle in, and let’s get cooking!
Part 1: Picking the Perfect Beans
Understanding Black Beans
First things first, let's talk about black beans themselves. These little guys come in a variety of shapes and sizes, each with its own unique texture and flavour. You’ll often find them labelled as “black turtle beans” or “black beans” – they’re essentially the same, just different names. Now, when it comes to choosing the right beans, there are a couple of things to keep in mind.
Choosing the Right Beans
Personally, I prefer dried black beans because they tend to have a richer flavour than canned ones. They might require a little extra effort, but the results are worth it. When choosing dried beans, check them for any signs of damage or discolouration. Look for beans that are plump and uniform in size. Avoid any that look shriveled or have a dusty appearance.
If you're looking for the best flavour, opt for organic black beans. These beans are grown without the use of pesticides and herbicides, resulting in a purer, more natural flavour. You'll also find that organic black beans are often sourced from smaller, more sustainable farms, supporting responsible farming practices.
If you’re in a rush, canned black beans are a great alternative. Just make sure to rinse them thoroughly to remove any excess sodium and to soften their flavour. Many brands now offer low-sodium options or even no-salt-added canned beans, which are a great choice for those watching their sodium intake.
Part 2: Prepping for Success

The Magic of Soaking
Now, before you start cooking, we’re going to give those dried beans a little pampering. Soaking is a crucial step in the process, helping to soften the beans and reduce cooking time. It also makes them easier to digest. I find that a good 8-12 hours of soaking does the trick. Simply place the beans in a large bowl, cover them with plenty of fresh water, and let them soak overnight.
While soaking, the beans absorb water, which helps to break down their tough outer layer. This softens the beans, making them more tender and easier to digest. Soaking also helps to remove any impurities or dust that may be clinging to the beans.
Draining and Rinsing
Once the beans have soaked, it’s time to drain them. Give them a good rinse under cold water, removing any debris or floating beans. This step is essential to remove any excess starch and to prevent the beans from getting mushy during cooking.
The starch that is released during soaking can make the beans sticky and cloudy. Rinsing the beans thoroughly before cooking ensures that they cook evenly and maintain a smooth texture. It also helps to prevent the beans from becoming overly thick or gloppy during the cooking process.
Part 3: The Art of Cooking
The Stovetop Method
Here’s where the magic really happens. For my stovetop method, I use a large pot with a tight-fitting lid. I add the rinsed beans to the pot, along with plenty of fresh water. The general rule of thumb is to use about 3 cups of water for every 1 cup of beans. Bring the mixture to a boil, then reduce heat to a low simmer. Cover the pot and let the beans simmer gently for 1-2 hours, or until they are tender but not mushy. Remember, the cooking time can vary depending on the age and variety of beans.
For an extra flavour boost, consider adding a bay leaf to the pot while the beans are simmering. The bay leaf will infuse the beans with a subtle, earthy aroma. Remove the bay leaf before serving.
The pressure cooker Method
If you’re looking for a faster approach, a pressure cooker is your new best friend. Simply add the beans and water to the pressure cooker, following the manufacturer’s instructions. The pressure cooker will drastically reduce the cooking time, often getting the job done in 30-45 minutes. Just remember to release the pressure carefully to avoid any steam burns.
Pressure cookers use steam to cook food more quickly and efficiently. The increased pressure creates a higher temperature within the cooker, which speeds up the cooking process. While pressure cookers are a great option for busy cooks, be sure to use them with caution and follow the manufacturer's guidelines.
Part 4: Mastering the Seasoning Game
The Basics of Flavour
Now, it’s time to unleash your inner culinary artist. Black beans are a blank canvas for flavour, so don’t be afraid to experiment. Start with the basics: salt, pepper, and a bay leaf. These ingredients will create a wonderful depth of flavour. I also like to add a pinch of cumin for a touch of warmth and a hint of earthiness.
Salt is crucial for enhancing the natural flavour of the beans. It helps to balance the sweetness and create a more well-rounded taste. Pepper adds a touch of spice and complexity, while cumin brings a warm, earthy aroma that complements the bean's flavour profile.
Adding Complexity
Once you’ve got the basics down, you can start adding your own personal touches. Here are a few of my favourite additions:
- Garlic and Onion: These aromatic ingredients add a lovely depth of flavour, especially when sautéed before adding to the beans. You can simply mince the garlic and onion and add them directly to the pot, or you can sauté them in a little olive oil until softened and fragrant. This creates a more robust base flavour for your beans.
- Smoked Paprika: A pinch of smoked paprika adds a smoky, almost bacon-like flavour, which pairs perfectly with black beans. It adds a depth of flavour and a hint of smokiness that complements the hearty texture of the beans.
- Chipotle Peppers: For a kick of heat and smoky flavour, add a few chipotle peppers in adobo sauce. The chipotle peppers, with their smoky heat and subtle sweetness, can take your black beans to another level. Just be sure to start with a small amount and adjust the spice level to your liking.
- Lime Juice: A squeeze of fresh lime juice adds a bright acidity that balances out the richness of the beans. The citrusy flavour cuts through the richness of the beans and creates a refreshing contrast, making the dish more lively and exciting.
- Fresh Herbs: A sprinkle of fresh cilantro, parsley, or oregano adds a burst of freshness and brightness to your black beans. The herbs add a fragrant aroma and a hint of greenness, elevating the flavour profile of the beans.
Part 5: The Art of Texture
Finding the Perfect Consistency
As your beans simmer away, keep an eye on their texture. You want them to be tender but still hold their shape. If they’re starting to get mushy, you might need to adjust the cooking time. Remember, you can always add a little more liquid to the pot if needed. If you prefer a smoother texture, you can mash a portion of the beans with a potato masher or a fork.
The perfect texture for black beans is a balance between tenderness and firmness. They should be soft enough to easily chew, but still hold their shape. If they become too mushy, it can affect their texture in recipes where they are used as a base or filling.
Experimenting with Textures
Black beans can be used in a variety of ways, from chunky dips to silky smooth soups. For chunky dishes, like salads or salsas, you’ll want to keep the beans whole. For smoother dishes, like soups or stews, you might want to mash some of the beans to create a richer texture. You can even achieve a creamy consistency by blending a portion of the cooked beans into a smooth purée and adding it back to the main dish.
Part 6: Bringing Out the Best in Black Beans
From Humble Beans to Culinary Stars
Now that your black beans are cooked to perfection, it’s time to let them shine. There are countless ways to use them in your cooking. From traditional Mexican dishes like black bean salsa and refried beans to modern culinary creations, the possibilities are endless.
Black beans are a versatile ingredient that can be used in both sweet and savoury dishes. They can be incorporated into hearty stews, vibrant salads, flavourful dips, and even desserts. Their rich, earthy flavour and hearty texture make them a wonderful addition to a wide range of cuisines.
Exploring Culinary Delights
Here are just a few ideas to get your creative juices flowing:
- black bean burgers: Create delicious and healthy veggie burgers by combining black beans with breadcrumbs, spices, and your favourite vegetables. You can add chopped onions, bell peppers, carrots, or even corn to the mixture for added texture and flavour. Serve the burgers on whole-wheat buns with your favourite toppings, such as lettuce, tomato, and avocado.
- black bean soup: This classic comfort food is both hearty and satisfying. You can add your own unique twist by incorporating different vegetables, spices, and toppings. For a smoky flavour, add a few chipotle peppers in adobo sauce to the soup. For a lighter option, try a vegetable broth base and add fresh herbs like cilantro and lime juice for a vibrant finish.
- black bean salads: Add a protein punch to your salads by using black beans as a base. Combine them with fresh vegetables, herbs, and a tangy dressing. Try a black bean salad with corn, bell peppers, red onion, and a lime-cilantro vinaigrette. Or, for a more earthy salad, combine black beans with roasted sweet potatoes, spinach, and a balsamic vinaigrette.
- Black Bean Salsa: A vibrant and refreshing dip or topping, perfect for chips, tacos, or salads. Combine cooked black beans with diced tomatoes, onions, cilantro, jalapenos, and a squeeze of lime juice for a classic salsa. For a more complex salsa, try adding roasted corn, mango, or avocado for a unique flavour profile.
- Black Bean Enchiladas: These Mexican-inspired dishes are both satisfying and delicious. Fill corn tortillas with a mixture of black beans, cheese, and your favourite vegetables. Top with a red or green enchilada sauce and bake until golden brown.
- black bean chili: A hearty and flavorful dish perfect for a cold winter night. Combine black beans with ground beef or turkey, diced tomatoes, onions, chili powder, and cumin. Top with your favorite toppings, such as shredded cheese, sour cream, and chopped cilantro.
Part 7: Storage and Longevity
Keeping Your Beans Fresh
Once your beans are cooked, you can store them in the refrigerator for up to 5 days. They can also be frozen for up to 3 months, making them a convenient and healthy meal prep option. Just remember to label and date the container before freezing.
Proper storage is crucial to maintaining the quality and freshness of your cooked black beans. Refrigerating them in an airtight container helps to prevent them from drying out and absorbing other flavours from the fridge. Freezing is a great option for extending the shelf life of the beans and making them available for quick and easy meals.
Maximizing the Lifespan
To ensure your beans stay fresh for as long as possible, store them in an airtight container in the refrigerator. This will help to prevent them from absorbing other flavours in the fridge and maintain their texture. When freezing, make sure to pack them in a freezer-safe container or bag to prevent freezer burn.
Freezer burn occurs when moisture is lost from frozen food, resulting in a dry, discolored, and unpleasant texture. Using airtight containers or bags with a freezer-safe seal helps to minimize air exposure and prevent freezer burn, ensuring that your black beans stay fresh and flavorful.
Part 8: FAQs: Your Black Bean Questions Answered
I know you might have some questions about cooking with black beans, so I've put together a list of frequently asked questions and answers to help you out.
FAQs
| Question | Answer |
|---|---|
| Can I use canned black beans instead of dried ones? | Absolutely! Canned black beans are a great shortcut if you're short on time. Just be sure to rinse them thoroughly to remove excess sodium. For a richer flavour, you can combine canned black beans with a small amount of dried beans to add complexity to the dish. |
| Why do my black beans sometimes taste metallic? | This is often a sign that the beans have been exposed to metal. To avoid this, use a non-reactive pot like stainless steel or enamelware. You can also try adding a pinch of citric acid or lemon juice to the cooking water to help neutralize any metallic taste. |
| How can I prevent my black beans from getting mushy? | Don't overcook them! Once they are tender, remove them from the heat. You can also add a little bit of lemon juice or vinegar to help firm up the beans. The acidity of the lemon juice or vinegar helps to preserve the beans' texture and prevent them from becoming overly soft. |
| What are some creative ways to use black beans in my cooking? | Black beans are incredibly versatile! You can use them in dips, salads, soups, stews, and even desserts! Try making a black bean hummus, a black bean brownie, or a black bean salsa. The possibilities are endless! |
| Can I freeze cooked black beans? | Yes! Cooked black beans freeze beautifully. Simply pack them in an airtight container or freezer-safe bag and label them with the date. When ready to use, defrost the frozen beans in the refrigerator overnight or in a microwave on a low setting. |
Part 9: The Final Word
So there you have it, my ultimate guide to cooking perfect black beans. Remember, cooking is a journey, not a destination. Don’t be afraid to experiment with different flavours and textures. Get creative in the kitchen and have fun! And most importantly, enjoy the delicious results of your culinary adventure.
Everyone is watching

Prime Rib Roast Cooking Time Chart: Per Pound Guide
Cooking TipsPrime rib roast. Just the name conjures images of lavish dinners, crackling fires, and hearty laughter. It’s ...

How Long to Bake Potatoes in the Oven (Perfect Every Time)
Cooking TipsBaked potatoes are a staple in my kitchen. They're incredibly versatile, delicious, and surprisingly easy to m...

Perfect Rice Every Time: The Ultimate Guide to Cooking Rice
Cooking TipsAs a self-proclaimed foodie, I've always been a bit obsessed with rice. It's the foundation of countless cuisi...

The Ultimate Guide to Cooking Asparagus: Tips, Techniques, and Recipes
Cooking TipsAsparagus. The mere mention of this spring delicacy conjures up images of vibrant green spears, crisp and burs...

Ultimate Guide to Cooking the Perfect Thanksgiving Turkey
Cooking TipsThanksgiving. Just the word conjures up images of overflowing tables laden with delicious food, the scent of r...