Choosing Your Brisket

What is a Brisket?
A brisket is a large cut of meat that comes from the breast of a steer or cow. It's a tough cut of meat, but it's also bursting with flavor. When cooked properly, it melts in your mouth, delivering a truly satisfying experience. A brisket is actually made up of two distinct muscles: the flat and the point.
Choosing Your Cut
Now, for the key decision: Which cut do you want? This is like choosing your favourite flavour of ice cream. It's a personal preference, but there are some key differences to consider.
- The Flat: This is the leaner part of the brisket. It's a bit more challenging to cook, requiring a bit more attention to detail. However, when done right, it's a delicious, flavourful experience. You'll get a lean, meaty slice with a more pronounced flavour.
- The Point: The point has more fat, which makes it more tender and forgiving to cook. It's ideal for those who prefer a rich, succulent bite. You'll get a more marbled and flavorful piece of meat, perfect for those who love a melt-in-your-mouth experience.
- The Packer Brisket: This is a combination of the flat and the point, often found in supermarkets. It offers the best of both worlds, with a good mix of lean and fatty meat. This is a great option for beginners, as it's more forgiving and offers a balance of flavours.
Ultimately, the choice is yours, but I find the packer brisket is the most user-friendly option for a beginner. You're getting a good mix of lean and fatty, which makes for a more balanced flavour and a more forgiving cooking experience. There's something for everyone, so choose what speaks to your taste buds!
Size Matters
Don't get carried away by size. A bigger brisket doesn't necessarily mean a better brisket. A brisket that weighs between 10-12 pounds is a great starting point, especially for a home cook. You can always adjust your cooking time based on the size of your brisket. If you're looking for a smaller cut, there's nothing wrong with going for a 6-8 pound brisket. It will just take a little less time to cook.
What to Look For
When you're selecting your brisket, you're looking for a piece of meat that's well marbled with fat, especially along the edges and throughout the point. This fat is going to be what renders down and baste your brisket, giving it that melt-in-your-mouth texture and incredible flavour. You'll see it as little white streaks running through the meat. The more marbling, the better! Also, feel the brisket. If it feels firm and springy, then you've got a good one.
(Part 2)Trimming Your Brisket

Why Trim?
Trimming your brisket is essential for a few reasons. First, it helps remove excess fat, which can cause uneven cooking and a less tender outcome. Second, trimming allows for a more even cook, ensuring that every part of your brisket reaches the right temperature. Finally, trimming helps you control the flavour and tenderness of your brisket. You want to create a balance between fat and lean meat, so you can achieve that perfect tenderness and juicy flavour.
How to Trim
Start by finding the thickest part of the brisket (usually near the point). I like to trim this area down to about ?? inch. You're not aiming for a super thin piece of meat; you're just looking for an even surface to help it cook evenly. Be sure to remove any loose or excess fat and trim the sides of the brisket to create a more rectangular shape. This will help the brisket cook more evenly, and ensure all parts are exposed to the smoke.
Don’t Throw Away That Fat!
That trimmed fat isn’t going to waste! It’s going to be used as a delicious flavour bomb later on. Save it in a freezer-safe bag and you’ll see exactly what I mean. It will add an incredible depth of flavour to your brisket.
(Part 3)Seasoning Your Brisket

The Rub Down
This is the foundation of your brisket’s flavour profile. Start with a good quality brisket rub. You can find plenty of pre-made rubs at your local grocery store, but I encourage you to get adventurous and create your own. Here’s a simple, but delicious recipe:
| Ingredients | Amount |
|---|---|
| Coarse Salt | 2 tablespoons |
| Black Pepper | 1 tablespoon |
| Paprika | 1 tablespoon |
| Garlic Powder | 1 tablespoon |
| Onion Powder | 1 tablespoon |
| Brown Sugar | 1 tablespoon |
Mix all the ingredients together and generously rub it onto the brisket. You want to cover the entire surface of the brisket, but be careful not to overdo it. Too much rub can lead to a salty or over-seasoned brisket. Remember, a good rub should enhance the natural flavours of the brisket, not overpower them.
Injection
Injecting your brisket with a marinade or brine is another great way to boost its flavour. It’s not strictly necessary, but it can definitely elevate the taste. You can find tons of injection recipes online, but a simple one that I like to use is a mixture of apple cider vinegar, Worcestershire sauce, and beef broth. The vinegar helps to tenderize the meat, while the Worcestershire sauce and beef broth add a depth of savoury flavour. You can use a meat syringe or a blunt-tipped needle to inject the liquid evenly throughout the brisket. Remember to inject it into the thickest parts of the brisket, to ensure the flavour reaches every corner.
(Part 4)Setting Up Your Grill
You’ve got your brisket ready, now it’s time to turn your grill into a flavour factory.The Right Grill
For the best brisket results, you’re going to want to use a charcoal smoker. Charcoal smokers provide a consistent, low and slow heat that’s essential for creating a tender and flavourful brisket. The wood chips used in the smoker will infuse the brisket with a smoky aroma and flavour that simply can’t be replicated with a gas grill.
Fire Up the Smoker
The magic starts with a bed of charcoal. If you’re using a water smoker, fill it up about halfway with water. This creates a moist environment that helps to keep your brisket juicy and prevent it from drying out. Water smokers are great because they help to maintain a steady, even temperature throughout the cook.
Managing the Heat
The key to grilling a perfect brisket is to maintain a steady temperature between 225°F to 250°F. Use the vents on your smoker to control the heat. You want a steady, slow cook. Patience is your friend here. It's all about low and slow, giving the brisket time to break down the tough fibers and render the fat.
(Part 5)Placing the Brisket
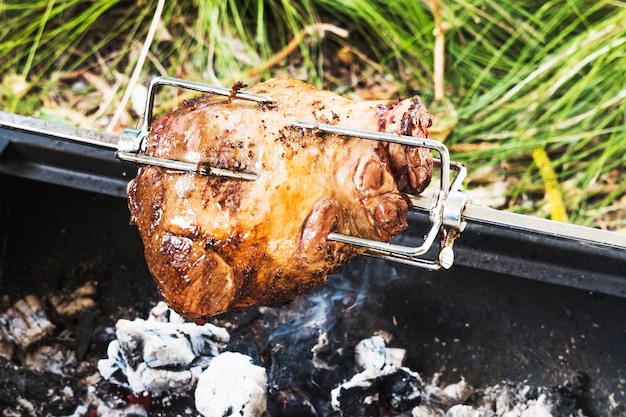
Before you put your brisket on the grill, remember the fat. The trimmed fat we set aside earlier? Time to put it to work. Place a few chunks of the fat directly on the hot coals in the smoker. This helps create a delicious smoke ring and adds a depth of flavour to your brisket. The fat will render down, creating a rich, smoky aroma and flavour that will infuse the brisket.
Now, it’s time to carefully place the brisket on the smoker grate. Make sure it’s far enough away from the direct heat. You want to achieve that indirect heat, so the brisket slowly cooks without scorching. This means placing the brisket over a section of the smoker that doesn't have direct heat from the coals. This will help to ensure the brisket cooks evenly and doesn't burn.
(Part 6)The Long and Slow Cook
You’ve reached the heart of the brisket journey. This is where time becomes your ally. It’s going to be a long and slow cook, but it’s essential for breaking down those tough muscle fibres and creating that melt-in-your-mouth texture.The Stall
You’ll notice a stall will occur somewhere between 150°F and 170°F. This is a natural part of the brisket cooking process, and it’s nothing to worry about. It’s where the brisket’s internal temperature seems to plateau. This is due to the moisture in the brisket turning into steam, which slows down the cooking process. Just keep the smoker temperature steady, and eventually, it will start to rise again.
Patience is Key
You’ll know your brisket is done when it reaches an internal temperature of 203°F to 205°F. A brisket will typically take 8 to 12 hours to reach this temperature, but it can vary depending on the size and thickness of your cut. Trust me, it’s worth the wait. It's all about the slow and steady approach, allowing the meat to break down and develop that incredible tenderness.
(Part 7)The Wrap
Once your brisket reaches an internal temperature of about 160°F, you can wrap it in butcher paper. This helps to trap in the moisture and accelerate the cooking process. It’s like giving your brisket a warm, fuzzy hug. The steam trapped inside the paper helps to further break down the meat and tenderize it, creating that melt-in-your-mouth texture.
The butcher paper will also help to soften the brisket, making it even more tender. When you wrap your brisket, make sure it’s completely sealed, like a little meat burrito. This ensures that the steam stays trapped inside, creating a moist environment for the brisket to cook in.
(Part 8)Resting
The brisket has endured hours of heat, and now it needs to rest. This is a crucial step that you don’t want to skip. Let the brisket rest for at least two hours in a cooler or a warm area (around 165°F to 175°F) before carving. This allows the juices to redistribute, resulting in a more tender and flavorful brisket. The resting period allows the muscle fibers to relax and the juices to reabsorb throughout the meat, resulting in a much more tender and flavorful final product.
(Part 9)Carving and Serving
Time to enjoy the fruits of your labor! You've created a masterpiece of smoky deliciousness. It's time to share your culinary triumph with the world, or at least your friends and family.
Carving
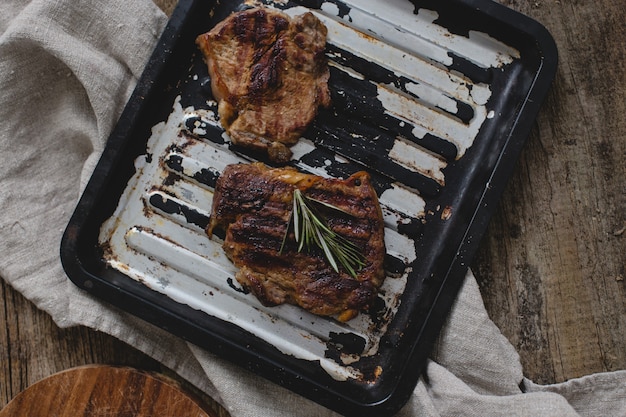
Start by slicing the brisket against the grain. This means cutting across the direction of the muscle fibres, which makes the brisket easier to chew. Use a sharp knife, and you’ll be able to slice through the brisket with ease. I like to carve it into thin slices, about ?? inch thick. This will ensure each slice is tender and flavorful.
Serving
Now for the grand finale: serving your brisket. There are endless possibilities here. The classic pairing is with some simple sides like coleslaw, baked beans, potato salad, and cornbread. These sides provide a perfect balance of flavors and textures, complementing the rich, smoky flavor of the brisket.
You can also get creative with your serving ideas. Try topping your brisket with a tangy barbecue sauce, a dollop of horseradish cream, or even a sprinkle of fresh herbs. The options are endless! A little creativity can really take your brisket to the next level, adding a burst of flavour and a touch of personal flair.
FAQs
Here are a few commonly asked questions about grilling a brisket:
- What if my brisket is too dry? If your brisket is too dry, it may have been cooked at too high a temperature or not wrapped properly. It's important to ensure the smoker temperature remains consistent throughout the cook, and to wrap the brisket tightly in butcher paper during the last stage of cooking.
- Can I use a gas grill? You can, but a charcoal smoker will give you the best results. The wood chips and charcoal create a unique smoky flavour that you won't get with a gas grill.
- Can I cook brisket in the oven? Yes, but the flavour will be different. A slow cooker is also a good option. While you can cook a brisket in the oven or a slow cooker, the flavour and texture won't be quite the same as a smoked brisket. The slow, low heat of a smoker creates a unique smoky flavour that can't be replicated with these methods.
- What should I do with leftover brisket? Leftover brisket is fantastic! It can be used in sandwiches, tacos, salads, or even as a topping for a baked potato. You can also make a delicious brisket hash with leftover brisket, potatoes, and onions.
- How long will my brisket last in the refrigerator? A cooked brisket will last for about 3 to 4 days in the refrigerator. Make sure to store it properly in an airtight container to prevent it from drying out.
Everyone is watching

Perfect Rice Every Time: The Ultimate Guide to Cooking Rice
Cooking TipsAs a self-proclaimed foodie, I've always been a bit obsessed with rice. It's the foundation of countless cuisi...

Ultimate Guide to Cooking the Perfect Thanksgiving Turkey
Cooking TipsThanksgiving. Just the word conjures up images of overflowing tables laden with delicious food, the scent of r...

The Ultimate Guide to Cooking Asparagus: Tips, Techniques, and Recipes
Cooking TipsAsparagus. The mere mention of this spring delicacy conjures up images of vibrant green spears, crisp and burs...

Can You Cook Spaghetti with Gasoline? (The Shocking Truth)
Cooking TipsWe've all seen those crazy internet trends. You know, the ones that make you wonder, "Did someone actually try...

Asparagus Pan-Frying: The Ultimate Guide to Crispy, Flavorful Asparagus
Cooking TipsAh, asparagus. It's a harbinger of spring, a symbol of fresh starts, and a delicious addition to any meal. Bu...
