Let's be honest, there's something special about a perfectly cooked beef tenderloin. It's the star of the show, the centerpiece of a celebratory meal, the kind of dish that makes you feel like you've just stepped into a fancy restaurant. But achieving that perfect level of tenderness, juiciness, and that gorgeous rosy pink center? That's where the real challenge lies. I've been a food enthusiast for years, and let me tell you, I've had my fair share of triumphs and, well, let's just say, "learning experiences" when it comes to roasting beef tenderloin. But with time and a good dose of trial and error, I've finally cracked the code. So, gather 'round, because this is your ultimate guide to creating a beef tenderloin roast that'll have your guests begging for more.
(Part 1) Choosing Your Beef

Alright, first things first, you need the right starting point. And when it comes to a beef tenderloin, we're talking about a piece of prime real estate. It should be a thick, gorgeous cut, ideally around 2.5 kg or more. Anything smaller and you're risking a dry, overcooked result. Don't worry, finding this beauty isn't a chore. Head to your local butcher, a real champion of meat, and ask for a tenderloin. They'll know exactly what you're looking for and will happily guide you towards the best option.
The Art of Selecting a Prime Cut
Now, let's get into the nitty-gritty of selecting the perfect tenderloin. You want to see a good, even marbling of fat. Think of it like the hidden treasure of a good beef tenderloin - it's what keeps the meat moist and tender, creating that melt-in-your-mouth experience. The color should be a vibrant, healthy red, and you'll notice a beautiful network of white fat streaks running through it. Don't hesitate to ask the butcher for their expert opinion. They're like culinary detectives, able to spot the telltale signs of a top-notch cut. Make sure the surface is smooth and free from any discoloration or blemishes. That's your cue that it might not be as fresh as you'd like.
(Part 2) Preparing Your Tenderloin

You've got your beautiful piece of beef, ready to be transformed into a culinary masterpiece. Let's start by patting it dry with some kitchen paper. We want a dry surface for the seasoning to adhere properly. Now, for the seasoning, don't be shy. Salt and pepper are the foundation of a perfect roast, so give it a generous sprinkle. Don't be afraid to add a bit of flair, either. A whisper of garlic powder, a hint of paprika, or a pinch of dried herbs can really elevate the flavors. Just remember, you're enhancing the natural flavors of the beef, not trying to drown them out.
Tying the Beef for Even Cooking
Here's a little secret that makes a big difference: tie your beef tenderloin before roasting. It helps keep the shape uniform and prevents it from getting too thin in certain areas. Grab some kitchen twine, the trusty rope of the kitchen, and wrap it tightly around the tenderloin at even intervals. It's a bit of a dance with the twine, but believe me, the result is worth it.
(Part 3) Cooking Your Tenderloin

Now, the moment of truth! The magic of roasting is all about getting the perfect balance of heat and time, ensuring that delicious tenderness and juiciness. We're going to focus on oven roasting, a method that gives you the most control over the process and yields those consistently fantastic results.
The oven method: A Symphony of Heat
First, preheat your oven to 200°C. Then, grab your trusty roasting pan, the stage for this culinary performance. I like to add a drizzle of oil to the bottom of the pan. It helps the tenderloin brown beautifully, creating a delightful crust. Gently place your tied-up tenderloin in the pan, making sure there's some space between the beef and the sides of the pan. We want that hot air to circulate freely, creating an even cooking environment.
roasting times depend on the size of your tenderloin and how you like your beef cooked. Here's a general guideline, but remember, every oven is a little different.
| Doneness | internal temperature (°C) | Roasting Time (approx.) |
|---|---|---|
| Rare | 49-52 | 15-20 minutes per 500g |
| Medium Rare | 55-57 | 18-25 minutes per 500g |
| Medium | 60-63 | 20-30 minutes per 500g |
| Medium Well | 65-68 | 25-35 minutes per 500g |
| Well Done | 71 | 30-40 minutes per 500g |
I always recommend using a meat thermometer, your culinary compass. It's the most accurate way to ensure your beef is cooked to perfection. Just insert it into the thickest part of the tenderloin to get a true reading.
Resting: Letting the Juices Redistribute
Once your tenderloin reaches the desired temperature, take it out of the oven. It's time for a little rest, a well-deserved pause for the juices to redistribute throughout the meat. Let it rest for 15-20 minutes, tucked away in a warm spot. While it rests, you can whip up your sides. A crisp roast potato, tender green beans, and a rich, flavorful gravy are always a winning combination.
(Part 4) Slicing and Serving
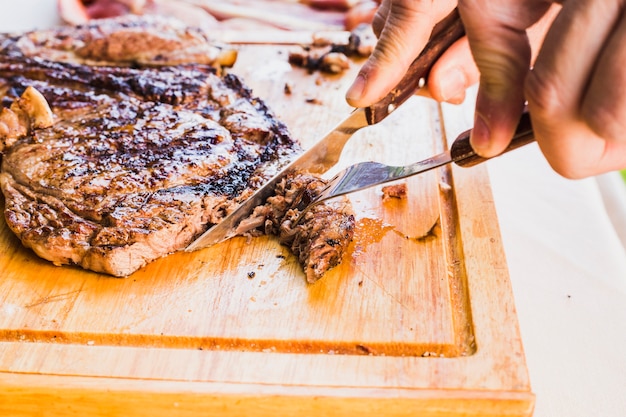
The moment of truth has arrived! After your tenderloin has rested, it's time for the grand finale - slicing. Grab a sharp knife, the sharpest tool in your kitchen arsenal. Slice the tenderloin against the grain. This ensures that the slices are tender and easy to chew.
Presenting Your Culinary Masterpiece
Now, it's time to present your masterpiece. Arrange the sliced tenderloin beautifully on a platter, a canvas for culinary art. Add your sides, a symphony of flavors and textures. Get ready for the compliments, the smiles, the satisfied sighs. You've created a culinary masterpiece.
(Part 5) Tips for Success
Here are a few extra tips to ensure a flawless roast:
- Patience is key. Don't overcook your tenderloin. It's a delicate dance, and overcooking can lead to dryness.
- Trust your culinary compass. Use a meat thermometer for the most accurate reading. It's like having a chef whisper the perfect temperature in your ear.
- Let it rest. That resting time is crucial, allowing the juices to settle back into the meat, creating that melt-in-your-mouth texture.
- Experiment! Don't be afraid to play around with different seasonings and herbs. It's your culinary adventure, so have fun with it!
- Relax and enjoy the process. Cooking should be a source of joy, so let loose, have fun, and relish the experience.
(Part 6) Flavour Boosters
Want to take your roast tenderloin to the next level? Try adding a few flavour boosters to elevate the experience:
- A drizzle of olive oil before roasting. A gentle kiss of olive oil, adding richness and a touch of aroma.
- A pat of butter on top before resting. A final touch of creamy richness, melting into the surface.
- A sprinkle of fresh herbs like rosemary or thyme. The aroma of fresh herbs, filling the air with the scent of a culinary masterpiece.
- A few cloves of garlic, rubbed on the tenderloin before cooking. A hint of garlic, adding a subtle depth of flavor.
- A touch of honey or maple syrup for a hint of sweetness. A sweet and savory dance, adding a touch of complexity.
(Part 7) Leftover Love
Let's face it, leftover roast beef is a gift from the culinary gods. It's like a delicious blank canvas for culinary creativity. Don't let it go to waste! It's the perfect ingredient for sandwiches, salads, or even a hearty beef stew. The possibilities are endless!
(Part 8) FAQs
Here are a few questions I often get about roasting beef tenderloin:
Can I use a cheaper cut of beef?
Absolutely! You can use a cheaper cut of beef, like a sirloin or ribeye. However, it might not be as tender as a tenderloin. You might need to cook it for a longer time to achieve the desired tenderness.
What if my tenderloin is too small?
If you're dealing with a smaller tenderloin, consider cooking it in a skillet or on the grill. This helps ensure even cooking and prevents dryness.
What's the best way to store leftover roast beef?
Store your leftover roast beef in the refrigerator for up to 3-4 days. Wrap it tightly in plastic wrap or foil. You can also freeze it for up to 3 months.
Can I cook my tenderloin on a grill?
Absolutely! You can cook your tenderloin on a gas or charcoal grill. Pre-heat the grill to medium-high heat, then place the tenderloin on the grill and cook for about 10-15 minutes per side, or until it reaches your desired internal temperature.
What are some good side dishes to serve with roast beef?
The world of side dishes is your oyster! Some of my personal favorites include roasted potatoes, green beans, asparagus, mashed potatoes, and a rich gravy.
(Part 9) Final Thoughts
Roasting a beef tenderloin might seem daunting, but it's actually a relatively simple process. Just follow these tips and you'll be rewarded with a delicious, impressive meal that will have everyone singing your praises. Remember, have fun with it! Enjoy the journey, experiment with flavors, and create a culinary masterpiece that you'll be proud to share.
Everyone is watching

Perfect Rice Every Time: The Ultimate Guide to Cooking Rice
Cooking TipsAs a self-proclaimed foodie, I've always been a bit obsessed with rice. It's the foundation of countless cuisi...

Prime Rib Roast Cooking Time Chart: Per Pound Guide
Cooking TipsPrime rib roast. Just the name conjures images of lavish dinners, crackling fires, and hearty laughter. It’s ...

The Ultimate Guide to Cooking Asparagus: Tips, Techniques, and Recipes
Cooking TipsAsparagus. The mere mention of this spring delicacy conjures up images of vibrant green spears, crisp and burs...

Ultimate Guide to Cooking the Perfect Thanksgiving Turkey
Cooking TipsThanksgiving. Just the word conjures up images of overflowing tables laden with delicious food, the scent of r...

How Long to Bake Potatoes in the Oven (Perfect Every Time)
Cooking TipsBaked potatoes are a staple in my kitchen. They're incredibly versatile, delicious, and surprisingly easy to m...
