Let's talk ribs, folks! There's nothing quite like the smoky, tender, fall-off-the-bone goodness of perfectly grilled ribs. It's a dish that screams summer, backyard barbecues, and good times with friends and family. But let's be honest, getting those ribs just right can be a bit of a challenge. You've got to nail the prep, the cook, and the sauce to make sure they're truly mouthwatering.
I've been grilling for years, and I've learned a thing or two about getting those ribs absolutely perfect. It's not just about following a recipe; it's about understanding the process and having a bit of patience. So, grab a beer, settle in, and let's dive into the ultimate guide to grilling tender, juicy ribs.
Part 1: The Meat of the Matter
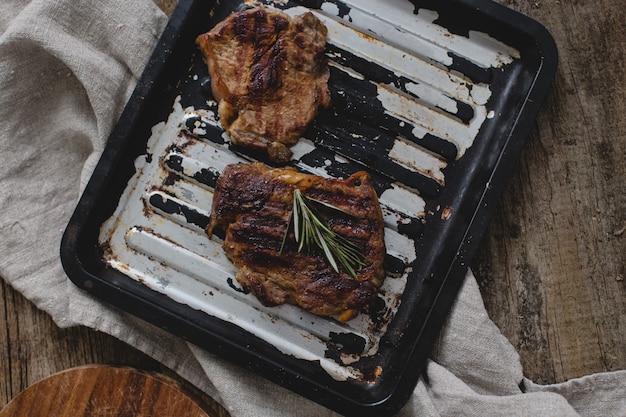
Firstly, let's talk about the star of the show - the ribs. There are a few different types you can choose from, but I personally find baby back ribs and spare ribs to be the best for grilling. Baby backs are generally a bit smaller and meatier, offering a more concentrated flavour. They're also known for their beautiful marbling, which contributes to their tenderness and juiciness. Spare ribs, on the other hand, are longer and have more cartilage, making them a bit tougher but with a unique, robust flavour. They also boast a larger surface area, which means more room for delicious barbecue sauce!
Choosing the Right Ribs: A Butcher's Tale
Now, here's a little tip I learned the hard way. Always go for ribs that have a good amount of marbling. You want that nice fat throughout the meat – it's what gives you that incredible tenderness and flavour. Think of it like the "secret ingredient" to perfect ribs. A good butcher can help you pick the right ones, so don't be afraid to ask for advice. They're the experts, and they can guide you towards the best cuts for your needs.
I remember the first time I went to a butcher shop. I was intimidated, thinking they'd judge my amateur grilling skills. But the butcher was incredibly helpful. He showed me the different cuts of ribs, explained the difference between baby backs and spares, and even recommended a great dry rub recipe. It was an invaluable experience that taught me more than any cookbook ever could.
Preparing Your Ribs: The First Steps to Success
Once you've got your ribs, it's time to get them ready for grilling. This is a crucial step, so pay attention! You'll need to:
- Remove the Membrane: That thin, white membrane on the back of the ribs can be tough and chewy, so we want to get rid of it. It's like a little protective layer that keeps the meat juicy, but it can get in the way of our goal: perfectly tender ribs. You can use a paper towel or a butter knife to gently peel it off. Start at one end and work your way down, slowly lifting the membrane with your fingers. It takes a bit of patience, but it's totally worth it. Trust me, it makes a huge difference!
- Seasoning Time: This is where you get to have some fun. You can use a simple salt and pepper rub, or get creative with a dry rub that includes paprika, garlic powder, onion powder, and other spices. I like to experiment with different rubs to find my favourites. For a classic smoky flavour, try a blend of paprika, brown sugar, garlic powder, onion powder, black pepper, and cayenne pepper. But feel free to add your own twist! Maybe a dash of chili powder for a bit of heat, or some dried thyme for a touch of herbal aroma. The possibilities are endless!
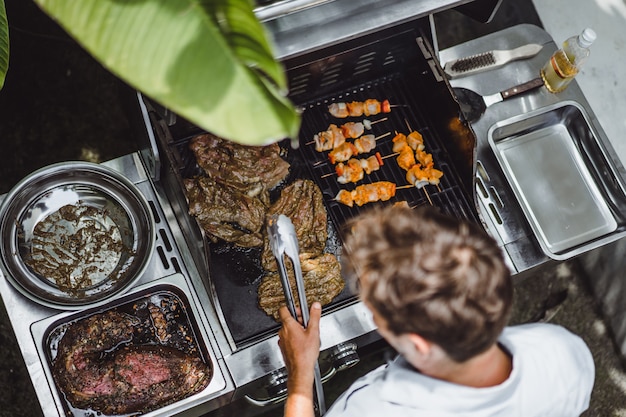
- Don't Forget the Smoke: If you're a purist like me, you'll want to use a smoker for that deep, smoky flavour. It's the quintessential touch that elevates ribs from good to incredible. But if you're short on time or space, a grill with a smoker box is a great alternative. I use hickory wood for a classic smoky flavour, but you can experiment with other woods like applewood or pecan. Each wood brings its own unique flavour profile. Applewood gives you a sweet and mild smoke, while pecan offers a nutty and slightly buttery flavour. It's a whole world of smoky flavour waiting to be explored!
Part 2: Mastering the Grill: Low and Slow vs. Hot and Fast
Alright, now that your ribs are prepped and ready to go, let's talk about the grilling process. There are two main methods for grilling ribs: low and slow or hot and fast.
Low and Slow: The Classic Approach to Tenderness
The low and slow method is my go-to for ribs. It involves cooking the ribs at a low temperature for a longer period, which helps break down the connective tissue and makes them incredibly tender. Think of it like a slow-cooked symphony of flavour. The low heat allows the meat to gently cook, melting the fat and creating a juicy, succulent experience. It's a bit of a commitment, but the results are worth it. You'll be rewarded with ribs that literally fall off the bone.
- Set the Temperature: Your grill should be set to around 225-250 degrees Fahrenheit. I use a digital thermometer to make sure the temperature is consistent. This is crucial for a slow and even cook. You don't want to be constantly adjusting the heat, which can make the ribs dry and unevenly cooked.
- Smoke 'em if You Got 'em: If you're using a smoker, add your wood chips to the smoker box and let them smoke for about 2-3 hours. This is where the magic happens! The smoke infuses the ribs with that distinctive smoky flavour that we all crave. You can add more wood chips as needed, but keep an eye on the temperature to make sure it doesn't get too high.
- Patience is Key: Let those ribs cook for 3-4 hours, or until they're tender. You'll want to check them periodically and make sure they're not drying out. Use a meat thermometer to check the internal temperature. It should be around 190-200 degrees Fahrenheit when they're done. Don't be afraid to baste them with a bit of sauce during the cooking process. It will help them stay moist and add another layer of flavour.
- The Wrap-Up: After 3-4 hours, wrap the ribs in foil and cook them for another hour or two. This helps them retain moisture and develop that "fall-off-the-bone" texture. Think of it as a warm hug for your ribs, helping them reach their full potential. This step is essential for achieving that melt-in-your-mouth tenderness that makes ribs so irresistible.
Hot and Fast: A Quick and Delicious Option for the Impatient Grill Master
If you're looking for a faster method, the hot and fast approach is a great option. It involves cooking the ribs at a higher temperature for a shorter period, resulting in a crispy bark and juicy meat. It's perfect for those times when you need a delicious meal in a hurry.
- Heat It Up: Set your grill to medium-high heat, around 350-400 degrees Fahrenheit. The higher heat will create a crispy bark on the outside while keeping the meat juicy and tender on the inside.
- Cook 'em Quick: Grill the ribs for about 2-3 hours, flipping them every 30-45 minutes. Keep a close eye on them, as they can cook quickly at this temperature. You want to avoid burning them, so be prepared to adjust the heat if needed.
- The Glaze: About 30 minutes before the ribs are done, brush them with your favourite barbecue sauce. The heat will caramelize the sauce, creating a delicious glaze that will add another layer of flavour to your ribs.
Part 3: The Sauce: A Masterclass in Flavor
Now, no rib grilling experience is complete without a delicious barbecue sauce. You can buy store-bought sauce, but honestly, making your own is super easy and adds a personal touch. You can really make it your own by adjusting the ingredients to your liking, adding more sugar for sweetness or more spice for heat. And if you want to get fancy, you can experiment with different types of vinegar, like balsamic vinegar or white wine vinegar.
My Homemade barbecue sauce recipe: A Taste of Home
Here's my go-to recipe, which I've perfected over years of grilling:
Ingredients:
- 1 cup ketchup: The base of our sauce, providing a rich and tangy foundation.
- 1/2 cup apple cider vinegar: Adds a bright, tart flavour that balances the sweetness of the sauce.
- 1/4 cup brown sugar: Sweetens the sauce and creates a rich, caramel-like flavour.
- 2 tablespoons Worcestershire sauce: Adds a complex, umami flavour that elevates the sauce.
- 1 tablespoon Dijon mustard: Adds a tangy, slightly spicy flavour that complements the sweetness of the sauce.
- 1 teaspoon garlic powder: A touch of garlic adds a savoury aroma and depth of flavour.
- 1 teaspoon onion powder: Adds a subtle onion flavour that complements the other ingredients.
- 1/2 teaspoon black pepper: A touch of black pepper adds a bit of heat and depth of flavour.
- 1/4 teaspoon cayenne pepper (optional): Adds a kick of heat for those who enjoy a bit of spice.
Instructions:
- Combine all ingredients in a saucepan over medium heat.
- Bring the sauce to a simmer, stirring occasionally. This allows the flavours to meld and the sauce to thicken slightly.
- Reduce the heat to low and simmer for 15-20 minutes, or until the sauce has thickened. The simmering process helps the sauce develop its rich, complex flavour.
- Remove from the heat and let cool slightly. This allows the sauce to cool down and thicken further.
You can adjust the ingredients to your liking, adding more sugar for sweetness or more spice for heat. Experiment with different types of vinegar, like balsamic vinegar or white wine vinegar. You can even try adding a splash of bourbon or whiskey for a smoky, complex flavour.
Part 4: Ribs and Sides: A Culinary Symphony of Flavours
Of course, no barbecue is complete without some delicious sides to go with those ribs. I love to pair my ribs with classic barbecue staples, like:
- potato salad: Creamy, tangy, and perfect for soaking up all those delicious barbecue juices. I love the classic potato salad, with its creamy dressing and tangy dill. But feel free to get creative and try different variations. Maybe a mustard-based potato salad with crispy bacon, or a potato salad with a smoky chipotle dressing.
- Coleslaw: A refreshing and crunchy side that cuts through the richness of the ribs. I prefer a classic coleslaw with a tangy vinegar dressing. But you can also try a creamy coleslaw with a mayonnaise-based dressing, or a slaw with a sweet and spicy dressing.
- Baked Beans: Sweet, smoky, and always a crowd-pleaser. I love baked beans with a touch of molasses for sweetness and a bit of brown sugar for a caramelized flavour. But feel free to experiment with different seasonings, like chili powder, cumin, or paprika.
- Cornbread: A classic Southern side that's perfect for dipping into barbecue sauce. I love a cornbread with a touch of honey for sweetness and a bit of buttermilk for tang. But you can also try a cornbread with a jalape??o kick or a cornbread made with sweet corn kernels.
- Macaroni and Cheese: A decadent and comforting side that's sure to impress. I love a classic macaroni and cheese with a creamy cheddar sauce. But you can also try a macaroni and cheese with a spicy cheese sauce, or a macaroni and cheese with a cheesy breadcrumb topping.
But don't be afraid to get creative with your sides! You can try grilled vegetables, salads, or even fruit salad for a lighter and more refreshing option.
Part 5: Ribs and Drinks: The Perfect Pairing
You've got your ribs, your sides, and now it's time to think about the perfect drink pairing. I always enjoy a cold beer with my ribs, but there are many other options that complement the smoky flavours.
- Beer: A classic choice, and there are many styles that work well with ribs. I recommend a lighter beer like a lager or pale ale, or a darker beer like a stout or porter. A crisp lager can cut through the richness of the ribs, while a stout or porter will complement the smoky flavour.
- Wine: If you're looking for something a bit more sophisticated, try a red wine like Cabernet Sauvignon or Merlot. These wines have the boldness to stand up to the richness of the ribs. You can also try a Zinfandel, which has a fruity flavour that complements the sweetness of the barbecue sauce.
- Whiskey: A good bourbon or rye whiskey can complement the smoky flavours of the ribs. The oaky notes of the whiskey will enhance the smoky flavour of the ribs, creating a harmonious pairing.
- Lemonade: For a refreshing and tangy drink, try a glass of lemonade. It's a perfect balance to the richness of the ribs. The acidity of the lemonade will help cut through the fat and sweetness of the ribs.
Of course, the best drink pairing is the one you enjoy the most! So don't be afraid to experiment and find your perfect match.
Part 6: Ribs and Tips: Making Your Grill Masterpiece
Now that you have all the essential ingredients and tips, let's wrap up with some bonus tips to ensure your ribs are truly amazing!
- Don't Overcook Them: Overcooked ribs are dry and tough, so make sure you check them regularly and use a meat thermometer to ensure they're cooked through but not overdone. A good rule of thumb is that ribs should be cooked to an internal temperature of 190-200 degrees Fahrenheit. The meat should be tender enough to pull away from the bone easily.
- Use a Meat Thermometer: A meat thermometer is essential for getting the ribs cooked to perfection. It's the only way to know for sure that they're cooked through without overcooking them. Invest in a good quality meat thermometer that gives you accurate readings.
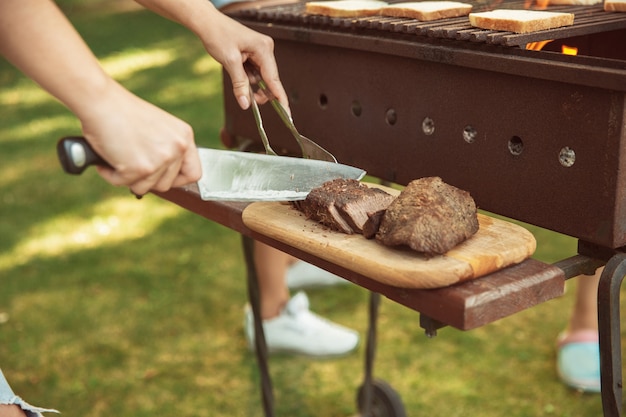
- Rest Them: Once the ribs are cooked, let them rest for about 15 minutes before slicing them. This allows the juices to redistribute and makes them even more tender. Think of it like giving your ribs a little "timeout" to relax and rehydrate.
- Keep It Clean: Make sure your grill is clean before you start cooking. This will help prevent your ribs from sticking and ensure that they cook evenly. A clean grill will prevent any unwanted flavours from being transferred to your ribs.
- Experiment with Flavours: Don't be afraid to get creative with your seasonings and sauces! Try different rubs, sauces, and woods to find your perfect combination. The possibilities are endless! You can try adding a touch of coffee grounds to your dry rub for a smoky, earthy flavour, or use a combination of different woods for a more complex smoke.
Part 7: Ribs and Mistakes: Avoiding the Common Pitfalls
As with any culinary adventure, even experienced grill masters have encountered their fair share of rib-related blunders. But fear not, my fellow grill enthusiasts, for knowledge is power! Let's shed light on common rib grilling mistakes and how to avoid them:
- Overcooked Ribs: Overcooked ribs are a common mistake, especially for those new to grilling. Always use a meat thermometer to check the internal temperature and avoid overcooking them. Overcooked ribs will be dry and tough, so make sure you cook them to the right temperature.
- Unevenly Cooked Ribs: Unevenly cooked ribs can happen if your grill isn't hot enough or if the ribs are too close together. Make sure your grill is preheated to the correct temperature and give the ribs enough space to cook evenly. If you're using a charcoal grill, make sure the coals are evenly distributed.
- Dry Ribs: Dry ribs can be caused by overcooking or not wrapping them properly during the cooking process. Use a meat thermometer to check the internal temperature and make sure you wrap the ribs in foil for at least an hour during the cooking process. The foil wrap will help to trap moisture and prevent the ribs from drying out.
- Burnt Ribs: Burnt ribs can happen if the grill is too hot or if the ribs are too close to the heat source. Make sure your grill is preheated to the correct temperature and adjust the heat as needed. If you're using a gas grill, be sure to use a diffuser to distribute the heat evenly.
By avoiding these common mistakes, you'll be on your way to grilling the best ribs of your life!
Part 8: Ribs and Inspiration: Mastering the Art of Grilling
The joy of grilling ribs lies not just in the delicious results but also in the journey itself. Each successful rib grilling adventure is a testament to patience, practice, and the willingness to experiment. Embrace this journey of flavour, and let your passion for grilling shine through.
Remember, the true magic of grilling lies in the art of improvisation and the endless possibilities. Don't be afraid to deviate from the recipe, experiment with different flavours and techniques, and find what truly delights your palate.
So go forth, my friends, and grill with confidence! May your ribs be tender, juicy, and smoky, and may your grilling adventures be filled with joy and satisfaction.
FAQs
Here are some frequently asked questions about grilling ribs:
| Question | Answer |
|---|---|
| How long does it take to grill ribs? | The grilling time for ribs depends on the method you choose. Low and slow grilling can take 4-6 hours, while hot and fast grilling can take 2-3 hours. The low and slow method allows for a more tender and juicy result, while the hot and fast method offers a crispy bark and a quicker cook time. |
| What temperature should I grill ribs at? | For low and slow grilling, aim for 225-250 degrees Fahrenheit. For hot and fast grilling, aim for 350-400 degrees Fahrenheit. Maintaining the right temperature is crucial for achieving the desired tenderness and texture. |
| What is the best wood to use for smoking ribs? | Hickory is a classic choice for smoking ribs, but you can also use other woods like applewood, pecan, or cherry. Each wood brings its own unique flavour profile. Hickory offers a strong, smoky flavour, while applewood imparts a sweet and mild smoke. Pecan offers a nutty and slightly buttery flavour, and cherry adds a subtle sweetness. |
| What is the best way to tell if ribs are done? | The best way to tell if ribs are done is to use a meat thermometer. They should reach an internal temperature of 190-200 degrees Fahrenheit. You can also check for tenderness by gently pulling on a bone. If the meat easily pulls away from the bone, it's ready. |
| What is the best way to store leftover ribs? | Store leftover ribs in an airtight container in the refrigerator for up to 3 days. You can also freeze them for up to 3 months. To reheat frozen ribs, thaw them in the refrigerator overnight and then reheat them in a low oven or on the grill. |
Everyone is watching

Prime Rib Roast Cooking Time Chart: Per Pound Guide
Cooking TipsPrime rib roast. Just the name conjures images of lavish dinners, crackling fires, and hearty laughter. It’s ...

How Long to Bake Potatoes in the Oven (Perfect Every Time)
Cooking TipsBaked potatoes are a staple in my kitchen. They're incredibly versatile, delicious, and surprisingly easy to m...

Perfect Rice Every Time: The Ultimate Guide to Cooking Rice
Cooking TipsAs a self-proclaimed foodie, I've always been a bit obsessed with rice. It's the foundation of countless cuisi...

The Ultimate Guide to Cooking Asparagus: Tips, Techniques, and Recipes
Cooking TipsAsparagus. The mere mention of this spring delicacy conjures up images of vibrant green spears, crisp and burs...

Ultimate Guide to Cooking the Perfect Thanksgiving Turkey
Cooking TipsThanksgiving. Just the word conjures up images of overflowing tables laden with delicious food, the scent of r...