Let's face it, there's nothing quite like a perfectly cooked ribeye steak. It's a culinary masterpiece that's juicy, tender, and bursting with flavor. I've been a steak enthusiast for as long as I can remember, and over the years, I've learned a thing or two about crafting the perfect bite.
This guide is more than just a recipe—it's a journey into the world of ribeye, from choosing the right cut to mastering different cooking methods and techniques. So, grab a comfy chair, get ready to dive into the details, and let's create something truly delicious together.
Part 1: Choosing the perfect ribeye
1.1. Finding the Right Cut
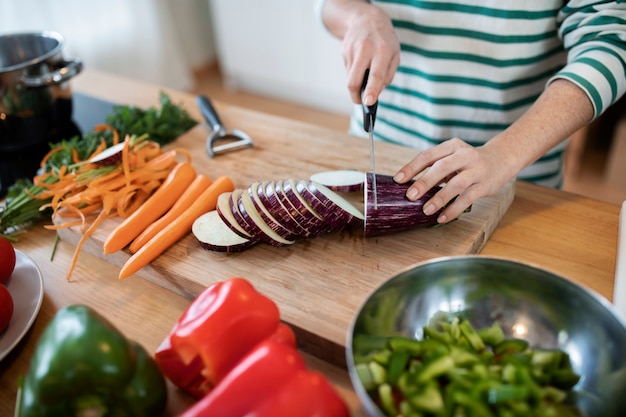
The first step to cooking an amazing ribeye is choosing the right cut. You want a piece of meat with a good amount of marbling – those streaks of fat that make the steak incredibly juicy and flavorful. Imagine the fat as the key to a symphony of flavor, a rich melody that plays on your taste buds. Think of it this way: the more marbling, the more succulent your steak will be. Aim for a piece of meat that's at least 1 inch thick, preferably closer to 1.5 inches. This ensures you'll get a beautiful crust on the outside while maintaining a tender, juicy interior.
1.2. Understanding the Grades
Once you've found a cut with good marbling, you'll want to pay attention to the quality grade. You'll see different grades like Select, Choice, and Prime. Think of these grades as a scale of quality, with Prime being the top of the line. It's like the Rolls Royce of steaks, but it comes with a hefty price tag. Choice is a great middle ground, offering a good amount of marbling and a delicious steak experience at a more reasonable price. Select, on the other hand, is the most budget-friendly option, but it tends to be leaner.
1.3. The Butcher's Expertise
Don't be afraid to lean on your local butcher for expert advice. They are the ultimate connoisseurs of meat, and they can guide you towards the perfect cut for your needs. Tell them what you're looking for, whether it's a juicy, marbled steak for a special occasion or a leaner option for a weeknight dinner. They'll not only help you choose the right cut but also offer valuable tips on seasoning and cooking techniques.
Part 2: Preparing for the Cook
2.1. Bringing the Steak to Room Temperature
Before you start cooking, let your steak come to room temperature. This might seem like a small detail, but it makes a big difference in the final result. Imagine cooking a frozen pizza – it'll be a soggy mess. The same principle applies to steak. If you put a cold steak on a hot pan, the outside will cook too quickly before the inside has a chance to warm up properly, leading to uneven cooking.
2.2. The Art of Seasoning
Now, it's time to season your steak. Think of seasoning as adding the finishing touches to a masterpiece. Salt is the foundation of any good steak seasoning – it draws out the moisture and helps develop a delicious crust. Pepper adds a touch of spice and texture. But don't be afraid to experiment with other spices. Garlic powder, onion powder, smoked paprika – the possibilities are endless. Just remember to keep the seasoning simple and let the natural flavor of the steak shine through.
2.3. Dry-Brining for Enhanced Flavor
For a truly exceptional flavor, try dry-brining your steak. It's a simple technique that involves rubbing the steak with a mixture of salt, pepper, and your favorite spices, then leaving it uncovered in the fridge for a few hours or even overnight. This allows the salt to penetrate the meat, creating a more flavorful and tender steak. It's like giving your steak a spa treatment before cooking, ensuring it's at its absolute best.
Part 3: Cooking the Steak
3.1. Choosing the Right Cooking Method
You have a few options for cooking your ribeye, each offering a unique flavor and texture. The classic cast-iron skillet is a versatile option that delivers a crispy sear and a beautiful crust. A grill is perfect for those smoky, chargrilled flavors that transport you to a backyard barbecue. For a more controlled and even cook, consider the oven. Remember, the key to any cooking method is high heat. Think of it as the secret ingredient that creates that irresistible crust.
3.2. mastering the sear
Once your chosen cooking method is ready, pat your steak dry with paper towels. This will help to create a crispy, flavorful crust. Add a touch of oil to your hot pan or grill, let it heat up for a minute or two, and then carefully place your steak in the pan. Resist the urge to move it for at least two minutes – let that beautiful crust develop.
3.3. The Flip and the Finish
After a couple of minutes, it's time to flip your steak. Use tongs, not a fork, to avoid puncturing the meat and losing precious juices. Cook for another two minutes on the second side, and then repeat for the remaining sides. Here's a little trick I've learned over the years: if you want a medium-rare finish, leave the steak on the last side for just one minute. It's all about finding that perfect balance of crispness and tenderness.
Part 4: Achieving Your Desired Doneness
4.1. Reading the Signs
How do you know when your steak is cooked to perfection? There are a few ways to tell. The trusty old meat thermometer is always a reliable option, but if you're a visual learner, you can also look for color cues. A rare steak will have a red interior with a cool touch, while a medium-rare steak will have a slight pinkness inside. A medium steak will be brown throughout, and a well-done steak will be brown and firm.
4.2. The Finger Test: A Simple Guide
Here's a handy trick that I've been using for years – the finger test. Touch your thumb to your middle finger and feel the fleshy part at the base of your thumb. That's the feel of a rare steak. Now, touch your thumb to your index finger and feel the same spot. That's the feel of a medium-rare steak. It's a simple but surprisingly accurate method.
4.3. The Importance of Resting
Before you dive into your perfectly cooked ribeye, allow it to rest for about 5 to 10 minutes. This lets the juices redistribute throughout the meat, ensuring a tender and juicy bite. Think of it as a well-deserved rest after a culinary workout.
Part 5: Serving Your Steak
5.1. Sizzle and Savour
Once your steak has rested, it's time to slice it against the grain, meaning you cut across the muscle fibers. This helps make the steak even more tender and ensures a smooth, delicious bite. Don't forget to add those finishing touches. A knob of butter, a sprinkle of fresh herbs, or a drizzle of your favorite sauce – these simple additions can elevate your steak to another level.
5.2. Perfecting the side dishes
What to serve with your perfectly cooked ribeye? The possibilities are endless! I'm a big fan of simple sides that let the steak shine, like roasted potatoes, asparagus, or a mixed green salad. But if you're feeling more adventurous, you can explore creamy mashed potatoes, sauteed mushrooms, or even a cheesy macaroni and cheese. Remember, it's your culinary masterpiece, so go wild!
Part 6: Exploring Different Cooking Methods
6.1. The Grill Master's Touch
If you're a grill enthusiast, you're in for a treat. Heat your grill to medium-high heat, around 400°F, and make sure your grill grates are clean and lightly oiled. Place your steak on the grill and cook for about 3 minutes per side. Then, rotate the steak 90 degrees and cook for another minute or two on each side. This helps create those beautiful grill marks that add a touch of artistry to your steak.
6.2. The Oven's Warm Embrace
For an even cook and a crispy crust, try the oven. Preheat your oven to 400°F. Place your steak on a baking sheet and cook for about 10 to 12 minutes for a medium-rare finish. You can use a meat thermometer to check the internal temperature. Aim for an internal temperature of 130°F for medium-rare, allowing the steak to rest for a few minutes before checking again as it will continue to cook slightly.
6.3. reverse searing: A Foolproof Method
For a more foolproof method, consider reverse searing. This involves cooking your steak in a low oven first, then searing it on the stovetop. Preheat your oven to 275°F. Place your steak on a baking sheet and cook for about 30 to 45 minutes, depending on the thickness of your steak. Once it reaches an internal temperature of about 120°F for medium-rare, remove it from the oven, let it rest for a few minutes, then sear it in a hot pan for about 30 seconds to a minute per side. This ensures an even cook throughout and a deliciously crispy crust.
Part 7: Mastering the Art of Temperature
7.1. The Meat Thermometer: Your Culinary Companion
For precision cooking, invest in a good meat thermometer. It's like having a secret weapon in your kitchen arsenal. Simply insert the thermometer into the thickest part of the steak, making sure it doesn't touch bone. For medium-rare, aim for an internal temperature of 130°F. Remember to let the steak rest for a few minutes before checking the temperature again, as it will continue to cook slightly.
7.2. A Guide to Temperature and Doneness
Here's a handy temperature guide to help you achieve your desired doneness:
| Doneness | Internal Temperature (°F) |
|---|---|
| Rare | 125-130 |
| Medium-Rare | 130-135 |
| Medium | 135-140 |
| Medium-Well | 140-145 |
| Well-Done | 145 |
Part 8: Tips and Tricks
8.1. The Great Salt and Pepper Debate
You'll often hear conflicting advice about when to season your steak. Some suggest seasoning before cooking, while others recommend seasoning after. Personally, I've found that seasoning before cooking helps develop a better crust. But if you prefer to season after, that works too. It's all about personal preference and what gives you the best results.
8.2. Resting: A Crucial Step
Remember, resting your steak is crucial. It allows the juices to redistribute, making for a more tender and juicy steak. If you skip this step, you'll end up with a dry, tough steak.
8.3. Don't Overcook: Embrace the Pink
And lastly, don't overcook your steak. A well-cooked steak should be tender and juicy, not dry and tough. If you're unsure, err on the side of undercooking rather than overcooking. You can always cook it a bit longer if it's not quite done to your liking, but you can't undo overcooking. Embrace the pink!
Part 9: FAQs
9.1. What are the best cuts of beef for steaks?
Ribeye is my personal favorite, but you can also try new york strip, tenderloin (filet mignon), or top sirloin. They all have their own unique qualities and flavor profiles, so you can experiment and find your personal favorite.
9.2. How long should I let my steak rest before cooking?
I recommend letting it sit at room temperature for about 30 minutes. This helps to ensure even cooking and a more tender steak.
9.3. What are some good sauces to serve with ribeye steak?
The classic choices are béarnaise, chimichurri, and peppercorn sauce. But you can also experiment with other sauces, like a creamy mushroom sauce or a balsamic glaze.
9.4. What are some good sides to serve with ribeye steak?
I'm a big fan of roasted potatoes, asparagus, or a mixed green salad. But you could also get creative with mashed potatoes, sauteed mushrooms, or a cheesy macaroni and cheese.
9.5. What are some tips for cooking steak on a gas grill?
Preheat your grill to medium-high heat. Make sure your grill grates are clean and lightly oiled. Cook for about 3 minutes per side, then rotate the steak 90 degrees and cook for another minute or two on each side. This helps create those delicious grill marks.
And there you have it, folks. My ultimate guide to cooking the perfect ribeye steak. Now go forth and conquer those culinary challenges. You've got this! Remember, it's all about practice, experimentation, and having fun in the kitchen. Every time you cook a ribeye, it's a new opportunity to learn, refine your skills, and create a culinary masterpiece. Enjoy the journey!
Everyone is watching

Prime Rib Roast Cooking Time Chart: Per Pound Guide
Cooking TipsPrime rib roast. Just the name conjures images of lavish dinners, crackling fires, and hearty laughter. It’s ...

How Long to Bake Potatoes in the Oven (Perfect Every Time)
Cooking TipsBaked potatoes are a staple in my kitchen. They're incredibly versatile, delicious, and surprisingly easy to m...

Perfect Rice Every Time: The Ultimate Guide to Cooking Rice
Cooking TipsAs a self-proclaimed foodie, I've always been a bit obsessed with rice. It's the foundation of countless cuisi...

The Ultimate Guide to Cooking Asparagus: Tips, Techniques, and Recipes
Cooking TipsAsparagus. The mere mention of this spring delicacy conjures up images of vibrant green spears, crisp and burs...

Ultimate Guide to Cooking the Perfect Thanksgiving Turkey
Cooking TipsThanksgiving. Just the word conjures up images of overflowing tables laden with delicious food, the scent of r...