Ah, pinto beans! These humble legumes hold a special place in my heart (and my stomach). They’re the foundation for countless delicious dishes, from hearty chili to creamy refried beans, and they’re always a welcome addition to my kitchen pantry. But let’s be honest, cooking dried beans from scratch can feel a little intimidating, especially for those who are new to the process.
Don’t worry, you don’t need a culinary degree to master the art of cooking perfect pinto beans. This guide is your one-stop shop for all things pinto bean, packed with tips, tricks, and personal anecdotes to make the process a breeze. Get ready to ditch the canned beans and embrace the incredible flavour and texture of freshly cooked pinto beans.
(Part 1) Choosing the Right Beans
The Importance of Freshness
You know how they say, “You are what you eat?” Well, when it comes to beans, it’s true! fresh beans are the key to a truly delicious and satisfying dish. That’s why I always choose beans that are bright in colour, plump and firm, with no signs of discoloration or damage. You can find them in most well-stocked grocery stores, often in the bulk aisle or the dried goods section.
The Types of Pinto Beans
Now, you might be wondering, “What kind of pinto beans should I buy?” Well, there are two main types to choose from:
- Regular pinto beans: These are the workhorses of the bean world, the most commonly found type. They have a slightly firmer texture and a mild flavour that makes them perfect for a variety of dishes. I love using them in chili and soups because they hold their shape well and add a nice, hearty texture.
- Baby pinto beans: These are smaller in size and have a slightly sweeter flavour. They cook a little faster and tend to be more tender, which makes them great for dishes where you want a smoother consistency, like refried beans.
Ultimately, the choice is yours! I personally love using both types, depending on the recipe. Experiment and see what you prefer!
Storing your Pinto Beans
Once you’ve got your beans, it’s important to store them properly to keep them fresh. Find a cool, dry place and store them in an airtight container. This will help prevent moisture from getting in and spoiling the beans, keeping them ready for your next culinary adventure.
(Part 2) Preparing Your Beans
Washing and Sorting
Before you start cooking, it’s essential to wash and sort your beans. Think of it like giving them a little spa treatment before their big debut in your kitchen! Rinse them thoroughly under cold running water, gently rubbing them with your hands to remove any dirt or debris.
As you’re rinsing, take a moment to sort through the beans. This might seem tedious, but it’s worth it! Look for any broken or discoloured beans and toss them out. You might also find a few little stones or pebbles hiding among the beans – those need to go too. This step ensures that only the best beans make it to your pot, resulting in a tastier and more enjoyable dish.
Soaking: The Key to Tenderness
Now, the moment we’ve all been waiting for: soaking! This is the secret ingredient to achieving perfectly cooked pinto beans. Soaking helps soften the beans, making them cook faster and more evenly. It also helps reduce the cooking time and prevents them from getting too mushy.
There are two ways to soak your beans: overnight or for a shorter period. I’m a big fan of overnight soaking, giving the beans about 8-12 hours to fully absorb the water and soften beautifully. This method ensures that the beans cook to perfection and have a tender, fluffy texture.
The No-Soak Method
I know what you might be thinking: “Soaking takes forever! Is there a faster way?” Well, there is a no-soak method, but it will take much longer to cook your beans. If you choose to go this route, add 1 tablespoon of baking soda to your pot of water. Baking soda helps soften the beans more quickly and prevents them from becoming mushy.
(Part 3) Cooking Your Pinto Beans
The Right Pot
First things first, choose a pot that’s large enough to accommodate your beans and plenty of water. I prefer a heavy-bottomed pot, like a dutch oven, because it distributes heat evenly and prevents scorching. You can also use a large stockpot or a stainless steel pot.
The Magic Ratio
The ideal ratio for cooking pinto beans is 2 cups of beans to 6 cups of water. This might seem like a lot of water, but trust me, the beans will absorb most of it during the cooking process.
Let's Get Cooking!
Now, it’s time to get your hands dirty! Here’s a step-by-step guide to cooking your pinto beans:
1. Bring your beans and water to a boil: Make sure the water is boiling vigorously before adding your beans. This ensures even cooking and helps prevent them from sticking to the bottom of the pot.
2. Reduce heat and simmer: Once the beans are boiling, reduce the heat to low and simmer for 1-2 hours, or until they are tender. Check on them every 30-45 minutes and add more water if needed. Remember, it’s better to add water gradually throughout the cooking process to maintain a consistent level.
3. Season: About 30 minutes before the beans are done, add your salt and other seasonings. Don’t add salt too early, as it can make the beans tough. I like to use a generous amount of salt, but feel free to adjust to your taste.
4. The final test: Once your beans are cooked, taste one to check for tenderness. They should be tender but not mushy. If they’re still a little firm, simmer for a bit longer, adding more water if needed.
Important Tip: Don't Overcook!
Overcooked beans can become mushy and lose their flavour. You want to catch them at the perfect moment, just before they become too soft. Keep an eye on them and check for tenderness regularly. Once they’re tender and slightly resistant, they’re ready to go!
(Part 4) Mastering Different Textures
Velvety Smooth Beans
For those who love a super smooth and creamy texture, you can use an immersion blender or food processor to mash some of the cooked beans. This creates a wonderfully thick and rich consistency, perfect for dips, soups, and stews. Just remember to keep some whole beans in the mix for texture and flavour.
A Little Chunkier
If you prefer a slightly chunkier texture, simply avoid blending the beans. They’ll have a good amount of texture while still being perfectly tender, making them great for salads, tacos, or any dish where you want a little more bite.
(Part 5) Using Your Cooked Pinto Beans
The Versatile Bean
Now that you’ve got perfect pinto beans, the world is your oyster! You can use them in a countless number of dishes, from classic favourites to more creative creations.
Classic Dishes
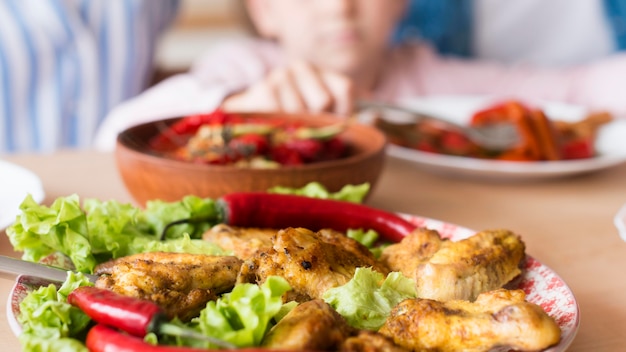
Chili: Pinto beans are the heart and soul of a good chili! Add your cooked beans to your favourite chili recipe for a hearty and satisfying meal.
Refried beans: These are a staple in Mexican cuisine, and for good reason! Simply mash your cooked beans with a little butter, salt, and pepper for a delicious and easy side dish.
bean soup: A simple and comforting soup that’s perfect for a cold day. Add your cooked beans to a base of broth, vegetables, and spices for a nourishing and satisfying meal.
More Creative Ideas
Tacos: Fill your tacos with seasoned pinto beans, your favourite toppings, and a dollop of sour cream for a delicious and easy weeknight meal.
Salads: Add cooked pinto beans to your favourite salad for extra protein and fibre. They add a hearty texture and a satisfying flavour to any salad.
Burritos: Fill your burritos with beans, rice, cheese, and your favourite fillings for a satisfying lunch or dinner.
Dips: Blend your cooked beans with avocado, lime juice, and spices for a delicious and healthy dip. Serve with tortilla chips, vegetables, or even crackers.
Freezing Your Beans
Want to save time later? Freeze your cooked beans! You can store them in airtight containers or freezer bags for up to 3 months. Simply thaw them overnight in the refrigerator before using.
(Part 6) Mastering the Art of Flavor
The Power of Spices
Pinto beans are a blank canvas, waiting for you to unleash your culinary creativity! Add your own personal touch with the right spices and seasonings. I always start with salt and pepper, but then I like to experiment with different flavour profiles.
Here are a few of my favourite combinations:
- Spicy: Add a pinch of cayenne pepper, chili powder, and cumin. This combination brings a fiery kick to your beans, perfect for those who love a little heat.
- Smoky: Try adding smoked paprika, chipotle powder, and a little bit of liquid smoke. This combo adds a deep, smoky flavour that’s both complex and satisfying.
- Savoury: Add a blend of oregano, thyme, and garlic powder for a classic flavour profile. This combination is a crowd-pleaser, adding a comforting and familiar flavour to your beans.
- Latin Inspired: A touch of cilantro, cumin, and a squeeze of lime juice will transport you to a vibrant Latin American kitchen. This combination is fresh, zesty, and full of flavour.
- Indian Flavours: Combine curry powder, turmeric, and ginger for a warm and exotic flavour. This combination will add a touch of warmth and spice to your beans, perfect for adventurous palates.
The Secret to Creamy Beans
For those incredibly creamy refried beans, you can add a little bit of butter or olive oil while mashing. It helps to bind the beans together and gives them a luxurious texture. You can also add a splash of milk or cream for extra richness.
The Importance of Acid
Adding a little bit of acid like lemon juice, lime juice, or vinegar to your beans can help to balance out the flavours and enhance their natural sweetness. It also helps to break down the beans a bit more, giving them a softer texture.
The Magic of Garlic
I love adding a few cloves of garlic to my beans. It adds a deep and complex flavour that’s truly irresistible. I usually add it towards the end of the cooking process, allowing the garlic to infuse its flavour without becoming overpowering.
(Part 7) Tips and Tricks for Perfect Beans
Keep an Eye on the Water Level
As your beans cook, they’ll absorb the water. Make sure to check the water level regularly and add more water if necessary to keep the beans submerged.
A Little Patience Goes a Long Way
Cooking pinto beans takes time. Don’t be tempted to rush the process. Let the beans simmer gently until they are tender and flavorful. Patience is key to achieving perfection!
Don’t Be Afraid to Experiment
Cooking is all about creativity! Don’t be afraid to experiment with different spices, seasonings, and techniques. You might be surprised at the delicious results.
(Part 8) FAQs
1. How long do pinto beans take to cook?
Cooking time for pinto beans can vary depending on whether you soak them or not. Unsoaked beans can take up to 2 hours, while soaked beans can cook in as little as 1 hour. Always check the beans for tenderness, and add more water if needed.
2. What if my beans are still hard after cooking?
If your beans are still hard after cooking, they may not have been soaked long enough. You can try cooking them for a little longer, but they might never achieve the desired tenderness. It might be best to start fresh with a new batch of beans.
3. Can I use canned pinto beans instead of cooking my own?
Absolutely! Canned pinto beans are a great convenience option, and they can be used in many recipes. However, they tend to be a bit saltier than homemade beans, so adjust the seasoning accordingly.
4. What should I do with leftover pinto beans?
Leftover pinto beans are a gift! You can use them in soups, stews, salads, dips, or even as a base for a quick and easy burrito bowl. They’re also great for adding to sandwiches or wraps.
5. Can I freeze cooked pinto beans?
Yes, you can freeze cooked pinto beans for up to 3 months. Simply transfer them to airtight containers or freezer bags and freeze. Thaw them overnight in the refrigerator before using.
(Part 9) Conclusion
And there you have it, my ultimate guide to cooking perfect pinto beans! It might seem like a lot of information, but I promise, it's all worth it. Once you get the hang of it, you'll be making perfectly cooked beans every time. And trust me, once you experience the magic of freshly cooked beans, you'll never go back to canned.
So, get ready to unleash your culinary creativity and enjoy the delicious and versatile world of pinto beans. Happy cooking!
Everyone is watching

Perfect Rice Every Time: The Ultimate Guide to Cooking Rice
Cooking TipsAs a self-proclaimed foodie, I've always been a bit obsessed with rice. It's the foundation of countless cuisi...

Prime Rib Roast Cooking Time Chart: Per Pound Guide
Cooking TipsPrime rib roast. Just the name conjures images of lavish dinners, crackling fires, and hearty laughter. It’s ...

The Ultimate Guide to Cooking Asparagus: Tips, Techniques, and Recipes
Cooking TipsAsparagus. The mere mention of this spring delicacy conjures up images of vibrant green spears, crisp and burs...

Ultimate Guide to Cooking the Perfect Thanksgiving Turkey
Cooking TipsThanksgiving. Just the word conjures up images of overflowing tables laden with delicious food, the scent of r...

How Long to Bake Potatoes in the Oven (Perfect Every Time)
Cooking TipsBaked potatoes are a staple in my kitchen. They're incredibly versatile, delicious, and surprisingly easy to m...