There’s something truly special about homemade jam. It’s more than just the taste, although that’s undeniably a huge part of it. It’s the entire experience, from carefully selecting the fruit (or sourcing the best quality you can find) to the satisfying gurgle of the jam simmering on the stove, and the anticipation as the jars cool on the windowsill. And nothing beats the aroma of fresh peaches bubbling with sugar, filling your kitchen with the sweet essence of summer. This year, I decided to take a plunge into the world of peach jam. It proved to be a surprisingly simple adventure, and the results were absolutely divine. So, I thought I’d share my easy recipe with you, along with a few tips and tricks I learned along the way.
(Part 1) Getting Started: The Quest for the Perfect Peach
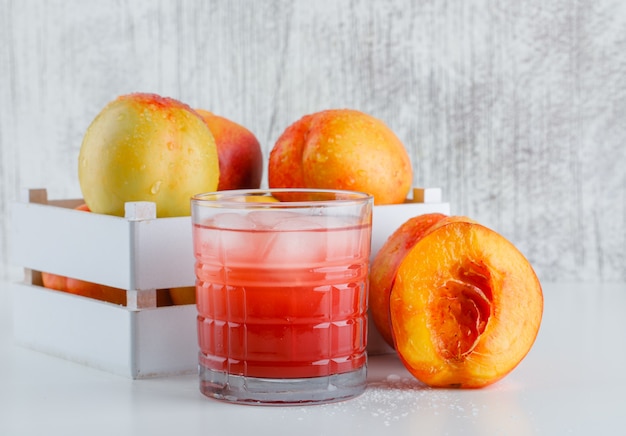
Let’s begin with the star of the show: the peaches. Now, I confess, I’m a bit of a peach purist. I adore the subtle flavour and the soft, luscious texture of white peaches, but yellow peaches work just as well. If you're lucky enough to have a peach tree in your garden, then you’ve got a head start! But for the rest of us, finding the right peaches is crucial.
Finding the Right Peach
Here’s what to look for in your perfect peaches:
- Firmness: They should feel firm to the touch, but yield slightly when you press them gently. Avoid peaches that are rock-hard or excessively squishy.
- Aroma: A ripe peach will release a sweet, fruity fragrance. If you don’t get a whiff of that peachy goodness, it might not be quite ready yet.
- Colour: A deep colour, whether yellow or white, is a good indicator of ripeness. However, don't be fooled by colour alone. Some peaches can be deceiving!
- No Bruises: Look for peaches without any bruises or soft spots. These can affect the flavour and texture of the jam.
Don't Be Afraid to Ask for Help
If you’re unsure, don’t be shy! Ask the fruit stall owner or the person at the market. They’ll be more than happy to guide you in selecting the perfect peaches for your jam. They might even have some helpful tips on how to tell if a peach is ready to eat.
(Part 2) Preparing Your Peaches: From Picking to Peeling
Okay, so you’ve got your peaches. Now what? Well, it’s time to get them ready for their transformation into jam! This is the process I use, and trust me, it’s super easy.
Washing and Peeling
Start by washing your peaches thoroughly under cold running water. You can use a vegetable brush to gently scrub away any dirt or debris. Now, for the peeling! This is where I discovered a trick that saved me countless hours and a fair bit of frustration. Instead of trying to peel them with a knife (which always seemed to leave little bits of skin behind), I simply blanched them for a few seconds.
The Magic of Blanching: A Time-Saving Tip
This is how it works:
- Fill a large pot with water and bring it to a rolling boil.
- Carefully lower the peaches into the boiling water and let them simmer for about 30 seconds.
- Immediately transfer the peaches to a bowl filled with ice water to stop the cooking process.
- After a few minutes, you’ll find the skins can be easily peeled off with your fingers. It’s a game-changer!
(Part 3) The Jam-Making Journey: From Peaches to Deliciousness
Alright, we're at the heart of the jam-making process. Our peaches are prepped and ready to be transformed into a delicious treat. Now, for the fun part!
Chopping and Measuring: The Foundation of Your Jam
First, chop your peaches into small pieces. You can use a knife or a food processor, but I prefer to chop them by hand. I find it gives me more control over the size of the pieces, and I like the rustic look it adds to the jam. Once your peaches are chopped, measure out the amount you need. For this recipe, I used approximately 4 cups of chopped peaches.
Sweetening the Deal: The Art of Sugar
Now, onto the sugar. I use a combination of white granulated sugar and a touch of brown sugar to add a hint of caramel flavour. But, feel free to adjust the sweetness to your liking. The amount of sugar you use will influence the jam's consistency and setting time. For this batch, I used 3 cups of white granulated sugar and 1/4 cup of light brown sugar.
The Jam Pot: The Key to Even Cooking
I use a large, heavy-bottomed pot for making jam. It helps to distribute the heat evenly and prevent scorching. But a regular saucepan will work just fine. Now, let’s get cooking!
(Part 4) The Simmer and Stir: A Gentle Approach to Jam-Making
We're in the final stretch now! The peaches, sugar, and all the ingredients are in the pot. Now, it's time to simmer and stir. This is where a little bit of patience comes in handy. But it's worth it, I promise!
The Cooking Process: Patience and Precision
Place the pot over medium heat and bring the mixture to a rolling boil. Then, reduce the heat to low and simmer for about 30-45 minutes, stirring occasionally. As the jam cooks, it will thicken, and the colour will deepen. It's a good idea to skim off any foam that forms on the surface. This foam is just excess moisture evaporating, and it can make the jam cloudy.
The Jellying Test: Ensuring Perfection
To make sure your jam is ready, perform the "jell test". Scoop a spoonful of jam onto a chilled plate. Let it cool for a few minutes, then tilt the plate. If the jam sets and doesn't run, it's ready! If it's still runny, continue cooking it for a few more minutes.
(Part 5) Preserving the Summer: Jarring and Storing Your Jam
We're almost there! The jam is cooked, and it's time to prepare those jars. A little bit of preparation now will ensure your jam stays delicious and safe for months to come.
Sterilizing the Jars: A Crucial Step
This is a crucial step. It ensures that the jars are clean and free from bacteria that could spoil the jam. Here's how I do it:
- Wash the jars and lids in hot, soapy water.
- Place the jars and lids in a large pot and fill it with water. Make sure the water level is high enough to cover the jars by at least an inch.
- Bring the water to a boil and simmer for 10 minutes. This will sterilize the jars.
- Carefully remove the jars and lids with tongs and place them upside down on a clean kitchen towel to dry.
Filling the Jars: The Finishing Touches
Once the jars are sterilized and dry, you can fill them with the hot jam. Leave about 1/2 inch of space at the top of each jar. It's important to wipe the rim of the jars with a clean, damp cloth to remove any drips or spills. This will help ensure a good seal.
Sealing the Jars: Locking in the Flavor
Now, place the lids on the jars and tighten them securely. The jam will create a vacuum seal as it cools. If you hear a "pop" sound as the jar cools, it means the seal is good.
(Part 6) The Sweet Smell of Success: Cooling and Enjoying Your Jam
We made it! The jam is in the jars, and it's time to let it cool. There's something incredibly satisfying about watching those hot jars slowly cool down, the steam rising from them like little puffs of magic.
The Cooling Process: Patience and Anticipation
Place the jars on a rack or a clean kitchen towel and let them cool completely. This usually takes a few hours. Once they're cool, you can check the seal by gently pressing on the lid. If it doesn't budge, the seal is good, and your jam is ready to be enjoyed!
Storing and Enjoying: The Fruits of Your Labor
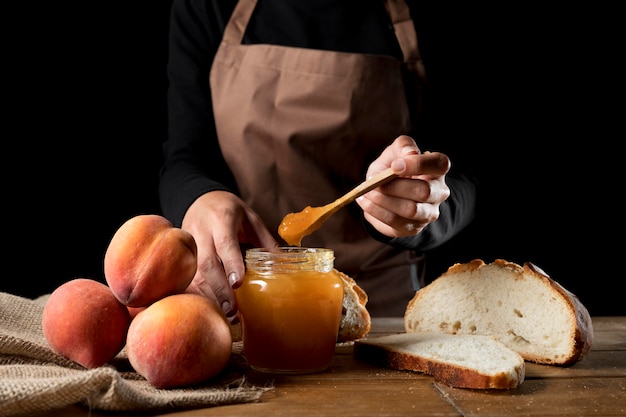
Store your homemade peach jam in a cool, dark place. It should keep for several months. Don't forget to label your jars with the date. Now, the fun part! Enjoy your homemade jam on toast, scones, biscuits, or even just by the spoonful.
(Part 7) Experimenting with Flavours: Adding a Twist to Your Jam
I'm a bit of a jam experimenter myself. I love trying out different flavours and combinations to create unique jams. So, feel free to get creative with your peach jam! Here are a few ideas that you might like to try:
Adding Extra Flavour: A World of Possibilities
Think about adding these ingredients to your jam:
- Spices: A pinch of cinnamon, nutmeg, or ginger adds a warm, comforting flavour.
- Citrus: A little bit of lemon or lime juice adds brightness and tanginess.
- Other Fruits: Add some chopped blueberries, raspberries, or blackberries for a mixed berry jam. You could even add a few slices of fresh ginger for a spicy kick.
Tips and Tricks: From a Jam-Making Pro
Here are some tips that I've learned along the way:
- Don't overcook it: Overcooking jam can make it too thick and syrupy. Keep a close eye on it and use the jelling test to make sure it's cooked just right.
- Don't worry about lumps: Some small lumps in the jam are perfectly normal. They add to the rustic charm of homemade jam.
- Get creative with colours: Try using food colouring to add a splash of colour to your jam. A touch of red food colouring will give your peach jam a deeper hue.
(Part 8) A Table of Recipes: Expanding Your Jam Horizons
Here's a table with some different peach jam recipes you might like to try:
| Recipe Name | Ingredients | Instructions |
|---|---|---|
| Classic Peach Jam |
|
|
| Spiced Peach Jam |
|
|
| Peach and Ginger Jam |
|
|
(Part 9) FAQs: Answers to Your Jam-Making Questions
Making jam might seem like a daunting task, but it’s truly a simple process. And once you’ve made your first batch, you’ll be hooked! However, I understand you might have a few questions about the process. Here are answers to some common questions:
1. What if my jam is too runny?
If your jam is too runny, it means it hasn't cooked long enough. Simply continue simmering it for a few more minutes, stirring occasionally. Check it again with the jelling test. If it's still runny, keep cooking until it reaches the desired consistency.
2. What if my jam is too thick?
If your jam is too thick, it's likely you've overcooked it. Don't worry, it's still edible. You can add a little bit of water or lemon juice to thin it out. Just simmer it gently for a few minutes until it reaches the desired consistency.
3. Can I use frozen peaches for jam?
Yes, you can use frozen peaches for jam. Just make sure to thaw them completely before chopping and using them in the recipe. You might also need to adjust the cooking time slightly, as frozen peaches may release more moisture.
4. How long does homemade jam last?
Homemade jam can last for several months if stored properly. Keep it in a cool, dark place and it should stay good for at least 6 months. Make sure to check the seal of the jars regularly.
5. What other fruits can I use to make jam?
The possibilities are endless! You can use almost any fruit to make jam. Some popular choices include strawberries, raspberries, blackberries, blueberries, and plums. You can also experiment with more unusual fruits like figs, gooseberries, or even rhubarb. Get creative and enjoy the process of making your own delicious jams!
So, there you have it! My guide to making delicious homemade peach jam. I hope it inspires you to give it a try. It's a fun and rewarding process, and the end result is a delicious and homemade treat that you'll be proud to share with family and friends. Happy jamming!
Everyone is watching

Perfect Rice Every Time: The Ultimate Guide to Cooking Rice
Cooking TipsAs a self-proclaimed foodie, I've always been a bit obsessed with rice. It's the foundation of countless cuisi...

Prime Rib Roast Cooking Time Chart: Per Pound Guide
Cooking TipsPrime rib roast. Just the name conjures images of lavish dinners, crackling fires, and hearty laughter. It’s ...

The Ultimate Guide to Cooking Asparagus: Tips, Techniques, and Recipes
Cooking TipsAsparagus. The mere mention of this spring delicacy conjures up images of vibrant green spears, crisp and burs...

Ultimate Guide to Cooking the Perfect Thanksgiving Turkey
Cooking TipsThanksgiving. Just the word conjures up images of overflowing tables laden with delicious food, the scent of r...

How Long to Bake Potatoes in the Oven (Perfect Every Time)
Cooking TipsBaked potatoes are a staple in my kitchen. They're incredibly versatile, delicious, and surprisingly easy to m...