The Ultimate Guide to Cooking Perfect Eggs: From Sunny-Side Up to Boiled to Scrambled
Eggs are a culinary chameleon, adapting to almost any dish and pleasing palates across the globe. Whether you're a breakfast enthusiast, a lunch-packing pro, or a dinner-party aficionado, knowing how to cook eggs perfectly is an essential culinary skill.
But let's face it, sometimes cooking eggs feels like a bit of a gamble. One minute you've got a gloriously runny yolk masterpiece, and the next you're staring at a rubbery, overcooked mess. Don't fret! I've been there too. I've had my fair share of egg mishaps, but I've also learned a thing or two about conquering the art of egg cookery. So grab your trusty pan, your trusty whisk, and your favourite mug of tea, and let's embark on a journey to egg-cellence!
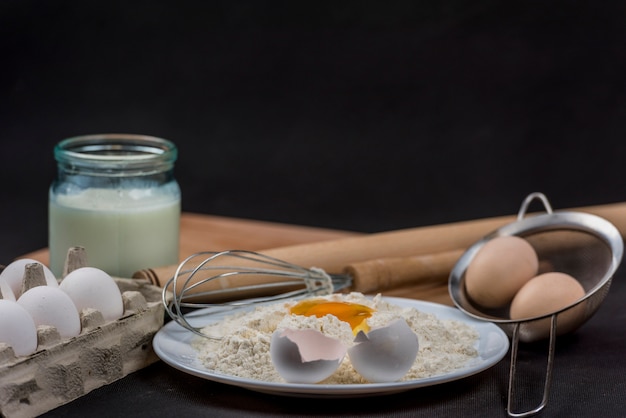
(Part 1) The Basics: Deciphering the Egg's Secret Code

Before we jump into the frying pan, let's demystify the egg itself. It's not just a simple round thing, but a culinary marvel with a distinct personality. Understanding its components and how they react to heat is crucial for mastering any egg recipe.
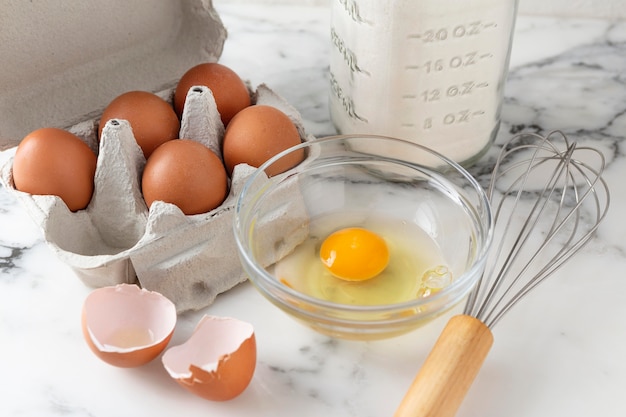
The White and the Yolk: A Tale of Two Textures
The egg white, that clear, viscous liquid, is a protein powerhouse. It's the reason your eggs solidify when you cook them. The yolk, however, is a golden treasure trove of fat and flavour. It's what gives your eggs that luscious richness.
Temperature: The Egg's Magic Number
Here's where the magic happens: the egg white sets at a lower temperature than the yolk. This explains why you get that perfectly runny yolk with a firm white in a sunny-side up egg. As you apply more heat and cook for longer, both the white and the yolk solidify.
(Part 2) Sunny-Side Up: The Classic Egg, Mastered
The sunny-side up egg – a simple yet elegant breakfast icon. It's a testament to the beauty of a perfectly cooked egg, where the yolk shimmers like a golden sun and the white embraces it in a delicate embrace. But achieving this culinary triumph requires a steady hand and a touch of know-how.
Choosing the Right Pan: The Foundation of Success
First, choose a trusty pan. I personally favour cast iron, but any non-stick pan will do as long as it's clean and well-seasoned. A thin film of butter or oil will prevent sticking and add a delightful richness to your eggs.
Low and Slow: The Gentle Art of Egg Cooking
Now, here's where patience is key. Turn the heat to medium-low. You want a gentle heat that allows the white to set slowly without scorching the delicate yolk. Don't rush this part!
The Perfect White: A Visual Cue
Crack your egg into the pan and watch it closely. As the white begins to set around the edges, leaving the centre still runny, gently nudge it with a spatula to release it from the pan. At this stage, if you're feeling adventurous, you can add a pinch of salt and pepper.
Flip It or Don't: A Matter of Preference
Now for the big question: flip it or leave it? If you're craving that perfectly runny yolk, leave it be. But if you prefer a more cooked yolk, carefully flip it for a few seconds to cook the top.
(Part 3) Frying Techniques: Expanding Your Egg Horizons
Let's move onto some variations on the frying theme. These techniques, while different, still rely on understanding the white and yolk's behaviour in response to heat.
scrambled eggs: The Everyday Champion
Scrambled eggs are the breakfast hero, perfect for a quick bite or a simple side dish. They're remarkably versatile, allowing you to add your favourite flavours and textures.
Whisking Technique: The Foundation of Smoothness
Begin by whisking your eggs in a bowl. A splash of milk or cream adds richness and helps them scramble more evenly.
Medium Heat: The Sweet Spot for Tenderness
Heat your pan over medium heat. A knob of butter or a drizzle of oil will help create a luscious base for your scrambled eggs. Remember, the aim is to cook the eggs gently, not scramble them into a rubbery mess.
Gentle Stirring: The Secret to Creaminess
Pour the whisked eggs into the hot pan and stir constantly with a spatula. Don't let them sit for too long or they'll become tough. You're aiming for a smooth, creamy texture.
Seasoning and Serving: Adding Your Personal Touch
Season with salt and pepper to taste. At this stage, you can let your creativity run wild and add ingredients like chopped herbs, crumbled cheese, or even leftover veggies.
Over-Easy: The Goldilocks of Eggs
over-easy eggs are a delightful twist on the sunny-side up, offering a slightly cooked yolk while still retaining that delectable runny texture.
Flip It Gently: The Key to a Perfectly Set Yolk
Follow the same steps as for sunny-side up, but when the white sets around the edges, gently flip the egg over. It only needs a few seconds on the other side to cook the top of the yolk slightly.
The Golden Hue: The Sign of a Perfect Over-Easy
The yolk should be a lovely golden colour, not runny or completely set. It's a delicate balance, but once you master it, you'll be an over-easy pro.
Other Frying Techniques: Expanding Your Egg Repertoire
Don't be afraid to explore other frying techniques. Here are a few to try:
Over-Medium: Similar to over-easy, but cooked a bit longer for a more set yolk.
Basted Eggs: This method involves spooning hot pan juices over the top of the egg to cook it more evenly.
Fried Eggs with Herbs: A sprinkle of fresh herbs, like parsley or chives, adds a delightful burst of flavour to your fried eggs.
(Part 4) boiled eggs: The Perfect Hard-Boiled or Soft-Boiled
Now, let's delve into the realm of the humble boiled egg. It's a simple yet satisfying way to enjoy eggs, and a versatile ingredient for salads, sandwiches, and even those iconic deviled eggs.
The Perfect Hard-Boiled Egg: Timing is Everything
Here, precision is key.
The Method: A Simple, Reliable Process
1. Gently place your eggs in a saucepan and cover them with cold water.
2. Bring the water to a boil.
3. Once it boils, reduce the heat and simmer for 8-10 minutes for perfectly hard-boiled eggs.
The Vinegar Trick: Easier Peeling, Guaranteed
Add a tablespoon of vinegar to the boiling water. This clever trick helps prevent the egg white from sticking to the shell, making peeling a breeze.
The Perfect soft-boiled egg: A Delicate Dance of Texture
For a soft-boiled egg, you'll need to shorten the cooking time.
The Method: A Quick and Easy Approach
1. Place your eggs in a saucepan and cover them with cold water.
2. Bring the water to a boil.
3. Remove the pan from the heat and let the eggs sit in the hot water for 3-5 minutes.
The Texture: A Culinary Symphony of Creamy and Soft
With a soft-boiled egg, the yolk should be gloriously runny, while the white is set but still slightly soft.
(Part 5) poached eggs: The Elegant Egg, Refined
poached eggs are all about elegance and finesse. They're a little more demanding than other methods, but the result is undeniably worth the effort.
The Right Equipment: Tools for Egg-cellence
You'll need a saucepan, a slotted spoon, and a whisk. Some swear by a poaching basket, but I find a simple slotted spoon works just fine.
Getting Ready: Setting the Stage for a Poached Perfection
Fill the saucepan with about 2 inches of water and bring it to a simmer. Add a splash of vinegar to the water, which helps the egg white coagulate and form a beautiful shape.
Poaching Time: A Gentle Dance of Heat and Water
Crack the egg into a small bowl or ramekin. Gently swirl the water in the pan to create a whirlpool. Carefully slide the egg into the centre of the whirlpool. Cook for 3-4 minutes, or until the white is set and the yolk is still runny. Use the slotted spoon to lift the egg out of the water and place it on a plate lined with paper towels to absorb any excess water.
The Finishing Touches: Adding a Touch of Luxury
Season the poached egg with salt and pepper to taste. For a touch of indulgence, add a dollop of creamy hollandaise sauce or a sprinkle of fresh herbs.
(Part 6) Baking Eggs: The Unexpected Delight
Who knew you could bake eggs? It might seem unconventional, but it's a great way to cook multiple eggs at once, offering a unique texture and allowing for creative customization.
Eggs in a Muffin Tin: Individual Egg Portions, Mastered
This is a classic way to bake eggs, perfect for individual servings. It's incredibly adaptable, allowing you to add your favourite toppings.
Getting Ready: Prepping for a Perfect Bake
Grease a muffin tin with a thin layer of butter or oil.
Crack and Bake: Simplicity at its Best
Crack an egg into each muffin cup. Add a pinch of salt and pepper, or get creative with cheese, herbs, or vegetables. Bake in a preheated oven at 350°F (175°C) for 15-20 minutes, or until the whites are set and the yolks are cooked to your liking.
Baked Eggs in a casserole dish: A Hearty Option for a Crowd
This method is perfect for baking a large batch of eggs, making it ideal for brunch or a hearty side dish.
The Method: A Simple, Multi-Egg Approach
1. Preheat your oven to 350°F (175°C).
2. Crack the eggs into a large bowl and whisk them together.
3. Add milk, cream, salt, pepper, and any other desired ingredients.
4. Pour the mixture into a greased casserole dish.
5. Bake for 20-25 minutes, or until the eggs are set.
(Part 7) Beyond the Basics: Exploring Flavour and Texture Frontiers
The beauty of eggs lies in their versatility. You can use them in countless ways, adding your own personal touch to create truly unique dishes.
The Sweet Side of Eggs: A Culinary Surprise
Don't shy away from sweet flavours! Eggs can create delightful desserts.
Eggs in Custard: A classic dessert, eggs are a key ingredient in custards, adding richness and a velvety texture.
Eggs in Bread Pudding: Eggs help bind the bread, creating a creamy, comforting dessert.
Eggs in Savoury Dishes: A Versatile Culinary Companion
Eggs can also add flavour and texture to savoury dishes.
Eggs in Quiche: A quintessential French dish, quiche is a savoury tart filled with eggs, cheese, and vegetables, creating a symphony of flavours and textures.
Eggs in Frittatas: Frittatas are a type of Italian omelette, often filled with vegetables and cheese, offering a satisfying and customizable meal.
Adding Flavour and Texture: A Culinary Playground
There are endless ways to experiment with different flavours and textures.
Herbs: Fresh herbs like parsley, chives, and dill add a burst of fresh flavour.
Cheese: A sprinkle of grated cheese adds richness and saltiness.
Vegetables: Chopped vegetables like onions, peppers, and mushrooms add flavour and texture.
Spicy Additions: A pinch of chili flakes or sriracha adds a kick, awakening the taste buds.
(Part 8) The Eggs-cellent egg storage and Safety: Keeping Eggs Fresh and Safe
Just like any other food, eggs need to be stored properly to stay fresh and safe to eat.
Refrigeration: The Key to Egg Longevity
Keep your eggs in the refrigerator, preferably in the original carton. This helps prevent them from absorbing odours from other foods.
The Shelf Life: Understanding egg freshness
Eggs can be kept in the refrigerator for up to 3 weeks after their sell-by date. To check for freshness, place an egg in a bowl of cold water. If it sinks, it's fresh. If it floats, it's old and should be discarded.
Handling with Care: food safety First
Always wash your hands thoroughly after handling eggs. It's also crucial to keep raw eggs separate from cooked foods to prevent cross-contamination.
(Part 9) Eggs-pert Tips and Tricks: Mastering the Art of Egg Cookery
Here are some of my favourite egg tips and tricks to elevate your egg game.
For Perfectly Poached Eggs: Achieving Egg-cellence
Add a tablespoon of vinegar to the poaching water. This helps to keep the egg white from spreading out too much, ensuring a beautiful, compact shape.
For fluffy scrambled eggs: The Secret to Light and Airy Scrambled Eggs
Add a tablespoon of milk or cream to the eggs before scrambling them. This helps make them lighter and fluffier, creating a cloud-like texture.
For Easy peeling hard-boiled eggs: A Foolproof Peeling Technique
Add a tablespoon of vinegar to the boiling water. This helps prevent the egg white from sticking to the shell, making peeling a breeze.
For a Richer egg yolk: Unlocking a Deeper Flavour
Use older eggs. The yolk of an older egg is more concentrated, resulting in a richer, deeper flavour.
FAQs (Frequently Asked Questions)
Q: How long should I cook a hard-boiled egg?
A: For a hard-boiled egg, cook for 8-10 minutes.
Q: How can I tell if an egg is fresh?
A: Place the egg in a bowl of cold water. If it sinks, it's fresh. If it floats, it's old and should be discarded.
Q: What is the best way to store eggs?
A: Store eggs in the refrigerator, preferably in the original carton.
Q: Can I freeze eggs?
A: You can freeze eggs, but it's best to separate the yolks and whites before freezing.
Q: What are some good ways to use leftover hard-boiled eggs?
A: Leftover hard-boiled eggs are delightful in salads, sandwiches, deviled eggs, or even chopped up and added to pasta dishes.
Final Thoughts
There you have it, your comprehensive guide to cooking perfect eggs. From sunny-side up to boiled to scrambled, we've covered a wide range of techniques. Remember, practice makes perfect, so don't be afraid to experiment and find what you like best. And most importantly, enjoy the deliciousness that is a perfectly cooked egg!
Everyone is watching

Prime Rib Roast Cooking Time Chart: Per Pound Guide
Cooking TipsPrime rib roast. Just the name conjures images of lavish dinners, crackling fires, and hearty laughter. It’s ...

How Long to Bake Potatoes in the Oven (Perfect Every Time)
Cooking TipsBaked potatoes are a staple in my kitchen. They're incredibly versatile, delicious, and surprisingly easy to m...

Perfect Rice Every Time: The Ultimate Guide to Cooking Rice
Cooking TipsAs a self-proclaimed foodie, I've always been a bit obsessed with rice. It's the foundation of countless cuisi...

The Ultimate Guide to Cooking Asparagus: Tips, Techniques, and Recipes
Cooking TipsAsparagus. The mere mention of this spring delicacy conjures up images of vibrant green spears, crisp and burs...

Ultimate Guide to Cooking the Perfect Thanksgiving Turkey
Cooking TipsThanksgiving. Just the word conjures up images of overflowing tables laden with delicious food, the scent of r...