spiral cut ham. Just the name conjures up images of a beautifully glazed ham, glistening under the oven light, ready to be carved and devoured. It’s a true crowd-pleaser, a centerpiece for holiday feasts and family gatherings, and frankly, a delicious way to celebrate just about anything. But let’s be honest, sometimes tackling a spiral cut ham can feel a bit daunting. How do you cook it? What’s the best way to get that irresistible golden glaze? And how on earth do you slice it without it crumbling into a pile of hammy chaos?
Fear not, my friends! This guide will walk you through every step, from choosing the right ham to achieving the perfect glaze, and everything in between. We’ll even touch on the art of carving and what to do with those delicious leftovers. So grab your apron, fire up your oven, and let’s get cooking!
Part 1: Choosing the perfect ham
Let’s start at the beginning, because choosing the right ham is the foundation for a truly magnificent meal. After all, you wouldn’t build a house on a shaky foundation, would you? So, what makes a winning ham?
Size Matters
First, think about the size of your gathering. You don’t want to be left with a mountain of ham that feeds an army when you only need to feed a few, or worse, run out before everyone gets their fill! A good rule of thumb is to allow about 1/2 to 3/4 pound of ham per person. It might seem like a lot, but trust me, it's better to have some leftovers for sandwiches or a delicious soup later.
Bone-in or Boneless?
Now, the great debate: bone-in or boneless? bone-in hams tend to be more flavorful, as the bone helps to keep the meat moist and adds a lovely depth to the flavor. However, they can be a bit more challenging to carve. boneless hams are, you guessed it, boneless, which makes them incredibly convenient and easy to slice. But, they can sometimes be a bit drier than their bone-in counterparts. Ultimately, it comes down to your personal preference and what you’re looking for in your ham. If you’re after maximum flavor, go for bone-in. For ease of carving and less mess, boneless is the way to go.
types of ham
Alright, let’s talk about the different types of ham. There are two main categories:
- city ham: This is the classic ham, usually cured and smoked, resulting in a deep, salty flavor. It’s perfect for a traditional roast and is the type of ham you’ll most commonly find pre-sliced and spiral-cut.
- country ham: This type of ham is cured and smoked for a longer time, which leads to a very salty and strong flavour. It’s usually served thinly sliced and is often used for specific regional dishes.
For our purposes, we’ll be focusing on the city ham, as it’s the most common type used for spiral-cut hams.
Part 2: Preparing Your Ham for Cooking
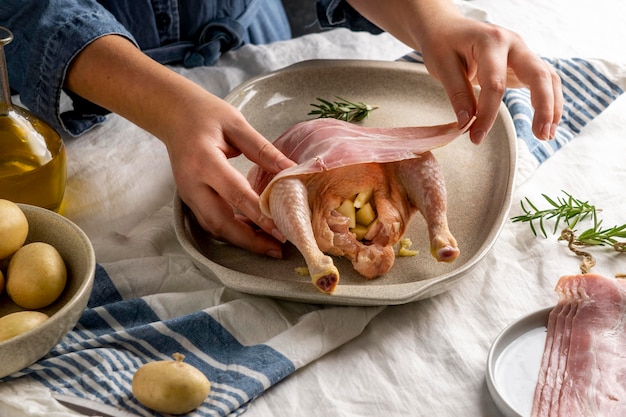
So, you’ve found the perfect ham. Now, let’s get it ready for the oven! The good news is, it’s a relatively simple process.
Removing the Packaging
First, remove the ham from its packaging. If it’s wrapped in plastic, you can just toss it. If it’s in a netting, leave it on. The netting helps to keep the ham from drying out in the oven, which is a definite plus!
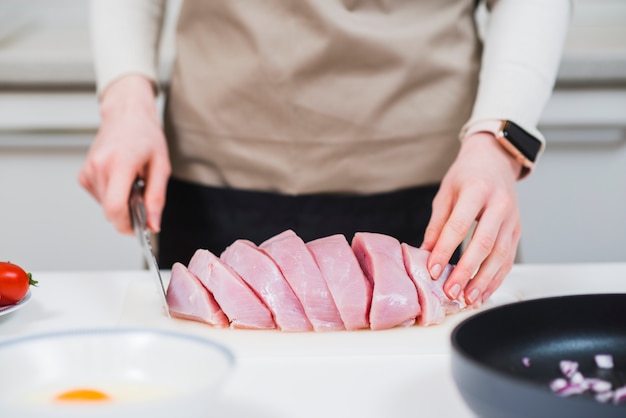
Scoring Your Ham
Now, grab a sharp knife and score the ham. This step is crucial for a few reasons. First, scoring helps the fat render, which adds richness and flavor to the ham. Second, it creates more surface area for your glaze to adhere to, which leads to a beautiful golden color and a delightful caramelized crust. To score your ham, simply make diagonal cuts about 1/4 inch deep across the top of the ham. Don’t worry, it’s easier than it sounds!
The Glaze: The Star of the Show
This is where the real fun begins. The glaze! It’s what transforms a good ham into a truly extraordinary one. You can be as creative as you want here, experimenting with different flavors and textures. We’ll dive into some delicious glaze recipes later on, but for now, just know that a good glaze is essential. It adds sweetness, flavor, and that captivating golden color we all crave.
Part 3: Cooking Your Ham to Perfection
Alright, it's time to get down to the nitty-gritty – cooking the ham. This is where patience and a good oven come into play. Remember, we want a beautifully cooked ham, tender and juicy, with a delicious golden glaze.
Oven Temperature
The general rule of thumb is to cook the ham at 325°F (165°C). But, remember, every oven is a bit different, so it’s always a good idea to keep a watchful eye. You’ll know your ham is done when the internal temperature reaches 140°F (60°C). You can check this with a meat thermometer, which is a good investment for any home cook.
cooking time
Now, how long do you cook it for? That depends on the weight of your ham. A good guide is to calculate about 15-20 minutes per pound. So, a 10-pound ham would need about 2-3 hours. However, always double-check the instructions on the ham packaging, as they may provide specific guidelines based on their particular product.
The Glaze Again
Don’t forget about the glaze! About 30 minutes before your ham is done, baste it generously with your chosen glaze. This ensures that it gets beautifully caramelized and takes on that irresistible golden hue.
Part 4: A Glaze for Every Taste
Now, let’s talk glaze! This is where the real magic happens. A good glaze can transform your ham from ordinary to extraordinary. I’ve tried countless glazes over the years and I’ve got a few tried-and-true favorites that are sure to please any crowd.
Classic Honey Glaze
This is a simple and classic glaze that never disappoints. Just mix together equal parts honey and brown sugar, a splash of orange juice, and a pinch of mustard. Spread it over the ham and let it bake until it's glistening and golden. The honey adds a delicate sweetness, the brown sugar adds a depth of flavor, the orange juice brings a touch of citrusy brightness, and the mustard adds a subtle tang. It’s a winning combination!
Tangy pineapple glaze
For a tropical twist, this glaze is perfect. Simply combine pineapple juice, brown sugar, and a little bit of Dijon mustard. The pineapple juice adds a sweet and tangy flavor, while the mustard gives it a little kick. This glaze is a perfect complement to the rich flavor of ham, creating a harmonious balance of sweet, tangy, and savory notes.
Spicy maple glaze
This glaze is perfect for those who like a little heat. Combine maple syrup, Dijon mustard, and a dash of cayenne pepper. You can adjust the amount of cayenne pepper to your desired level of heat. The maple syrup provides a rich sweetness, the Dijon mustard adds a tangy counterpoint, and the cayenne pepper adds a subtle warmth that builds with each bite. It’s a delicious glaze for those who like a little extra kick.
Glaze Tips
- Don’t be afraid to experiment with different glazes. The possibilities are endless!
- If you’re feeling adventurous, add in some chopped fruit, nuts, or spices. For instance, try adding a handful of chopped pecans or a tablespoon of chopped dried cranberries to your honey glaze. Or, experiment with the spices – a pinch of cinnamon or ginger can add a delightful dimension to any glaze.
- Make sure the glaze is nice and thick. This will help it to stick to the ham and caramelize beautifully. If your glaze is too thin, simmer it for a few minutes until it thickens.
Part 5: The Grand Finale: Serving Your Ham
The ham is cooked, the glaze is glistening, and the aroma is making your mouth water. Now, take a deep breath, because it’s time to serve your masterpiece! But before you get too excited, remember to let the ham rest for about 15 minutes before carving. This allows the juices to redistribute throughout the ham, resulting in a more tender and juicy experience. Patience is key!
Carving a Spiral Cut Ham
Carving a spiral cut ham is a bit different than carving a whole ham. The slices are already cut, so you’re just separating them. Just use a sharp knife and carefully slice between the existing cuts. If you’re using a bone-in ham, you’ll need to remove the bone before you can slice it. This is a bit more involved, but it’s definitely doable!
side dish Pairings
Now, what goes well with ham? You have to think about the sides! My go-to’s are mashed potatoes, green beans, and a nice salad. But, you can go wild with your side dish choices. sweet potato casserole, cornbread, or even a fruit salad would all be delicious. It really comes down to your personal preference and the occasion.
Part 6: Leftovers? No Problem!
Let’s face it, you’re probably going to have some leftovers. But don’t despair! There are plenty of delicious ways to use them.
Sandwiches
ham sandwiches are a classic for a reason. Just pile some ham on bread with some cheese and your favourite condiments. A little bit of mustard or mayo, maybe some sliced pickles or tomato, and you've got a perfect sandwich.
Soup
A ham and bean soup is a hearty and comforting meal. Just add the leftover ham to a pot of soup with beans, vegetables, and broth. You can use any type of beans you like, from kidney beans to black beans to white beans. Add in some chopped carrots, celery, and onions for a flavourful and satisfying soup.
Pasta
Leftover ham can also be added to pasta dishes. It works well with carbonara, pesto, or even a simple tomato sauce. Try adding some diced ham to your carbonara for a salty and savory touch. Or, toss it into a pesto pasta with cherry tomatoes and fresh basil for a bright and flavorful meal.
Part 7: Storing Your Ham
If you’re lucky enough to have some leftovers, make sure you store them properly. You want to keep them in the refrigerator for no more than 3-4 days.
Storage Tips
- Wrap the ham tightly in plastic wrap or aluminum foil. This will help to prevent it from drying out and absorbing flavors from other foods in your fridge.
- You can also freeze leftover ham for up to 2-3 months. To freeze, wrap the ham tightly in plastic wrap and then aluminum foil. This creates a double layer of protection, ensuring that your ham stays fresh in the freezer.
Part 8: FAQs
Now, let’s address some of the most common questions about spiral cut ham.
Q: Can I cook a spiral cut ham in a slow cooker?
A: Absolutely! A slow cooker is a perfect way to cook a spiral cut ham. Just place the ham in the slow cooker and cook on low for 6-8 hours. You can add a glaze to the ham during the last hour of cooking to give it a beautiful golden finish.
Q: What if my ham is too salty?
A: If your ham is too salty, you can try soaking it in cold water for a few hours before cooking. This will help to draw out some of the salt. You can also add more water to the cooking liquid to help dilute the saltiness.
Q: Can I cook a spiral cut ham without a glaze?
A: Yes, you can cook a spiral cut ham without a glaze. However, it will not have the same sweet and glossy finish. You can try brushing it with a little bit of butter or olive oil during the cooking process to add some moisture and flavour.
Q: How long does it take to reheat a ham?
A: You can reheat a ham in the oven at 325°F (165°C) for about 15-20 minutes, or until it’s heated through. You can also reheat it in the microwave on low for about 2-3 minutes. Just be sure to check the internal temperature with a meat thermometer to ensure it's fully cooked.
Q: Can I use a spiral cut ham for a cold buffet?
A: Absolutely! A spiral cut ham is perfect for a cold buffet. Just let it cool completely after cooking and then slice it thinly. You can serve it with mustard, horseradish, or other condiments.
Conclusion
Well, there you have it. Everything you need to know about cooking the perfect spiral cut ham. From choosing the right ham to creating a heavenly glaze, you’re now ready to impress your guests and make a delicious meal. So, grab your apron, fire up the oven, and get cooking!
Everyone is watching

Prime Rib Roast Cooking Time Chart: Per Pound Guide
Cooking TipsPrime rib roast. Just the name conjures images of lavish dinners, crackling fires, and hearty laughter. It’s ...

How Long to Bake Potatoes in the Oven (Perfect Every Time)
Cooking TipsBaked potatoes are a staple in my kitchen. They're incredibly versatile, delicious, and surprisingly easy to m...

Perfect Rice Every Time: The Ultimate Guide to Cooking Rice
Cooking TipsAs a self-proclaimed foodie, I've always been a bit obsessed with rice. It's the foundation of countless cuisi...

The Ultimate Guide to Cooking Asparagus: Tips, Techniques, and Recipes
Cooking TipsAsparagus. The mere mention of this spring delicacy conjures up images of vibrant green spears, crisp and burs...

Ultimate Guide to Cooking the Perfect Thanksgiving Turkey
Cooking TipsThanksgiving. Just the word conjures up images of overflowing tables laden with delicious food, the scent of r...