Let's be honest, there's something undeniably cool about cast iron cookware. It's like having a piece of history in your kitchen, a sturdy, reliable companion that's been around for generations. I've been a cast iron devotee for years, and let me tell you, the love affair just keeps getting stronger. It's not just about the vintage charm, though, it's the performance, the flavour, and the sheer joy of cooking with a pan that has a story to tell.
So, grab a cuppa and settle in. We're about to embark on a culinary journey through the world of cast iron. We'll cover everything from choosing the right pan and seasoning it to mastering the art of cooking with it, exploring some delicious recipes, and, of course, ensuring your cast iron stays in tip-top shape for years to come.
(Part 1) The Allure of Cast Iron: Why It's Still the King

You might be thinking, "Why go through the trouble with cast iron? I've got my trusty non-stick pan." But trust me, there's a reason why cast iron has been a kitchen staple for centuries. It's a kitchen workhorse with a unique set of advantages that makes it a truly special piece of cookware.
Durability: Built to Last
Let's start with the obvious: cast iron is a beast. It's built to last. I'm talking about pans that have been passed down through generations, bearing the marks of countless meals and a lifetime of love. My grandmother's cast iron skillet, with its handle that's seen more than a few scrapes and dents, is still going strong, proving that these pans are practically indestructible. They can handle the heat, the scratches, the bumps - they're built to weather the storms of your cooking adventures. Plus, you can even toss them in the oven for those times when you need a bit more room or a higher temperature.
Unbeatable Heat Distribution and Retention
Here's where cast iron truly shines. It heats up evenly and holds onto that heat like a champ. This is a game-changer for searing steaks, achieving that perfect crust, or even baking a loaf of sourdough that has a beautiful, even rise. The even heat distribution ensures consistent cooking results, no matter what you're whipping up.
A Flavor Infusion You Won't Find Anywhere Else
And now, we get to the real magic. Cast iron develops a natural patina, a layer of seasoned oil that builds up over time and infuses your food with a rich, almost nutty flavour. Imagine the aroma of a sizzling burger, those delicious, caramelized bits clinging to the pan, adding a depth of flavour that simply can't be replicated with any other type of cookware. It's the kind of flavour that brings back memories, that transports you to a simpler time, where food was cooked with heart and soul, and the pan was a cherished family heirloom.
(Part 2) Getting Started with Cast Iron: Your First Steps

So, you're convinced. You're ready to embrace the cast iron life. Don't worry, it's not as daunting as it might seem. Let's take it step by step.
Choosing Your First cast iron pan: Finding Your Perfect Match
You've got options, my friend. There's a world of cast iron out there, from vintage finds to modern masterpieces. Here's how to navigate the selection process:
- Start with a 10-inch skillet: It's the perfect size for most everyday cooking, from pan-frying chicken to making a hearty batch of pancakes.
- Look for good quality cast iron: Lodge, Griswold, and Wagner are well-respected brands, known for their durability and performance. You can usually find them at kitchen stores or online.
- Don't be afraid of pre-seasoned cast iron: It saves you a step and allows you to start cooking right away. Plus, you can always season it yourself later if you want to start from scratch.
Seasoning Your Cast Iron: Creating that Magical Non-Stick Surface
Seasoning is the key to that smooth, non-stick surface that makes cast iron a joy to cook with. It's a simple process that creates a protective layer of oil, ensuring your food won't stick and enhancing its flavour.
Instructions:
- Wash the pan with hot soapy water: Get rid of any residue or dust left from manufacturing. Make sure to dry it thoroughly.
- Thinly coat the pan with a neutral oil: I prefer flaxseed or grapeseed oil for their high smoke points and flavourlessness. A thin, even layer is all you need.
- Place the pan in a preheated oven at 350°F (175°C) for an hour: This allows the oil to polymerize, creating that hard, protective layer.
- Turn off the oven and let the pan cool completely inside the oven: This prevents any sudden temperature changes that could crack the seasoning.
- Repeat this process at least 3 times: The more you season your pan, the more durable and non-stick it will become.
And that's it! You've now got a perfectly seasoned cast iron pan ready for its culinary debut.
(Part 3) Mastering the Art of Cast Iron Cooking: Unlocking the Secrets

Okay, you've got your seasoned pan, you're ready to start cooking. But cast iron has its own set of rules, and once you understand them, you'll be a cast iron cooking pro in no time.
Cast Iron Cooking Essentials: Tips and Tricks
- Preheat the pan: Cast iron loves to be hot, so give it plenty of time to heat up before adding your food. This will ensure even cooking and prevent sticking.
- Use high heat: Cast iron can handle high heat without warping, making it ideal for searing meat, creating those beautiful caramelized crusts, or getting vegetables perfectly crisp.
- Avoid using metal utensils: They can scratch the seasoning, damaging that precious layer you worked so hard to create. Stick to wooden or silicone utensils that won't cause any harm.
- Don't let your pan dry out: Always add a little bit of oil or butter before cooking. It keeps the seasoning layer happy and prevents food from sticking.
- Use low heat for delicate foods: Cast iron retains heat so well that it's easy to overcook delicate ingredients like fish or eggs. Start with a lower heat and adjust as needed.
- Let the pan cool completely before washing: This prevents cracking or warping, and helps maintain the seasoning.
(Part 4) Cast Iron Recipes: A culinary adventure
Now, let's dive into some delicious recipes that showcase the versatility of cast iron. From hearty stews to crispy salmon and sweet cornbread, these recipes will inspire you to explore the world of cast iron cooking.
crispy skin Salmon with Roasted Vegetables: A Simple, Elegant Dish
This recipe takes advantage of cast iron's even heat distribution to achieve a perfectly crispy salmon skin and tender, roasted vegetables.
Ingredients:
- 1 pound salmon fillet
- 1 tablespoon olive oil
- 1/2 teaspoon salt
- 1/4 teaspoon black pepper
- 1 cup chopped vegetables (such as broccoli, carrots, or zucchini)
- 1/4 cup lemon juice
- 2 cloves garlic, minced
- Fresh herbs (such as dill or parsley), for garnish
Instructions:
- Preheat your cast iron skillet over medium-high heat.
- Pat the salmon dry and rub it with olive oil, salt, and pepper.
- Place the salmon skin-side down in the hot skillet and cook for 4-5 minutes, or until the skin is crispy. You'll hear a delightful crackling sound as it crisps up.
- Flip the salmon and cook for another 2-3 minutes, or until cooked through. The internal temperature should reach 145°F (63°C).
- While the salmon is cooking, toss the vegetables with olive oil, lemon juice, and garlic. A little bit of salt and pepper won't hurt either.
- Remove the salmon from the skillet and add the vegetables. Spread them out in a single layer.
- Roast the vegetables for 10-15 minutes, or until tender and slightly caramelized.
- Serve the salmon with the roasted vegetables and garnish with fresh herbs. A squeeze of lemon juice adds a bright, tangy finish.
Cast Iron Cornbread: A Classic with a Crispy Crust
This classic recipe is a perfect example of how cast iron can be used for baking. The result is a moist, delicious cornbread with a slightly caramelized bottom that's just irresistible.
Ingredients:
- 1 cup all-purpose flour
- 1 cup cornmeal
- 1/2 cup granulated sugar
- 1 teaspoon baking powder
- 1/2 teaspoon baking soda
- 1/2 teaspoon salt
- 1 cup buttermilk
- 1/4 cup melted butter
- 1 egg
Instructions:
- Preheat your cast iron skillet to 350°F (175°C).
- In a large bowl, whisk together the flour, cornmeal, sugar, baking powder, baking soda, and salt.
- In a separate bowl, whisk together the buttermilk, melted butter, and egg.
- Gradually add the wet ingredients to the dry ingredients, stirring until just combined. Don't overmix, or you'll end up with a tough cornbread.
- Pour the batter into the preheated cast iron skillet. Spread it out evenly, leaving a little bit of space around the edges.
- Bake for 25-30 minutes, or until a toothpick inserted into the center comes out clean. The top should be golden brown and spring back when touched.
- Let the cornbread cool slightly before serving. This will allow it to set and prevent it from crumbling when you cut into it.
dutch oven Beef Stew: A Hearty Winter comfort food
Cast iron Dutch ovens are absolute champions when it comes to slow cooking. They create a wonderfully cozy, even heat that transforms humble ingredients into a feast. This beef stew is the ultimate winter comfort food, perfect for those chilly evenings.
Ingredients:
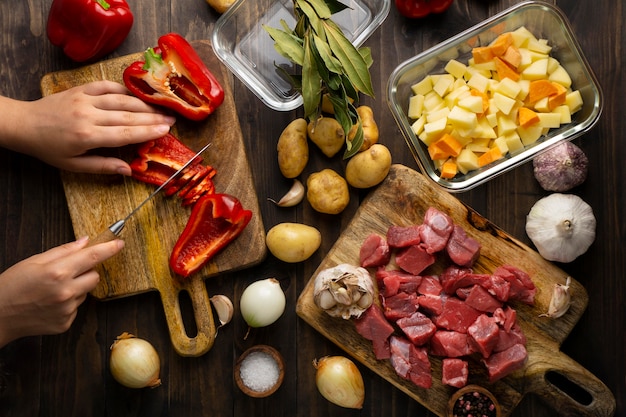
- 2 pounds beef chuck roast, cubed
- 1 tablespoon olive oil
- 1 onion, chopped
- 2 carrots, chopped
- 2 celery stalks, chopped
- 4 cloves garlic, minced
- 1 (14.5 ounce) can diced tomatoes
- 1 (10.75 ounce) can beef broth
- 1 teaspoon dried thyme
- 1 teaspoon dried rosemary
- 1/2 teaspoon salt
- 1/4 teaspoon black pepper
- 1 cup frozen peas
- 1 cup frozen pearl onions
Instructions:
- Heat the olive oil in your Dutch oven over medium-high heat. Brown the beef on all sides. This will give it a lovely crust and add depth of flavour to the stew.
- Remove the beef from the Dutch oven and set aside. You'll add it back later.
- Add the onion, carrots, and celery to the Dutch oven and cook until softened, about 5 minutes. You want them to be tender but still have a little bit of bite.
- Stir in the garlic and cook for 1 minute more. Just until fragrant.
- Return the beef to the Dutch oven. Add the diced tomatoes, beef broth, thyme, rosemary, salt, and pepper. Give it a good stir to combine everything.
- Bring the mixture to a boil, then reduce the heat to low, cover, and simmer for 2-3 hours, or until the beef is tender and falling apart. This is where the Dutch oven truly shines. The slow, even heat allows the flavours to meld and the beef to become incredibly tender.
- Stir in the peas and pearl onions and cook for an additional 15 minutes, or until the peas are heated through. This adds a burst of sweetness and colour to the stew.
- Serve the stew hot with crusty bread. It's the perfect way to soak up all that delicious, rich broth.
(Part 5) cast iron care and Maintenance: Keeping Your Pan in Top Shape
Cast iron, like any good friend, needs a little TLC to stay in top form. It's not about being overly fussy, it's about understanding its needs and showing it some love. Here's how to keep your cast iron pan happy and healthy for years to come.
Cleaning Your Cast Iron: A Gentle Approach
Forget the harsh detergents! Cast iron hates them. They strip away the seasoning, leaving your pan vulnerable to rust.
Here's the right way to clean it:
- Hot water and a scrub brush are your best friends: Use them to remove any food residue. If there are any stubborn bits stuck, use a wooden spoon or a plastic scraper. Avoid anything that could scratch the seasoning.
- Avoid soaking your cast iron pan: Soaking can cause rust and damage the seasoning. Just a quick rinse in hot water is all it needs.
- Dry your pan thoroughly: Use a clean towel or place it on the stovetop over low heat for a minute or two to ensure there's no moisture left behind.
- Re-season your pan after every few uses: This helps maintain the protective layer of oil and prevents rust. It's like giving your pan a little top-up of its protective shield.
- Use a light coat of oil for daily re-seasoning: Just a thin layer is all you need. You want to create a smooth, even coating, not a thick, greasy layer. Wipe away any excess oil.
Dealing with Rust: Bringing Your Pan Back to Life
Don't panic if you see a little bit of rust! It's a common occurrence, especially if you've let your pan sit for a while. It's not the end of the world, and your pan can be brought back to its former glory with a little elbow grease.
Here's how to remove rust:
- Use a steel wool pad or a scrub brush with soapy water: Work gently to remove the rust. If the rust is stubborn, use a baking soda paste.
- If the rust is stubborn, use a baking soda paste: Mix baking soda with water to form a paste. Apply it to the rust and let it sit for 15-20 minutes. The baking soda will help break down the rust.
- Wash and dry the pan thoroughly: Get rid of any baking soda residue and ensure the pan is completely dry.
- Re-season the pan: Give it a good coat of oil and bake it in the oven. This will restore the protective layer and prevent future rust.
(Part 6) Cast Iron Myths Debunked: Separating Fact from Fiction
There's a lot of misinformation circulating about cast iron. Let's set the record straight and clear up some common myths.
Myth: Cast Iron Is Difficult to Use
This is simply not true! Once you get the hang of it, cooking with cast iron is actually quite easy and rewarding. It's all about understanding the basics, like preheating and seasoning, and then letting the pan do its magic.
Myth: Cast Iron Can't Be Used in the Dishwasher
Absolutely not! Dishwashers are the enemy of cast iron. They strip away the seasoning, leaving your pan vulnerable to rust and making it stick. Hand washing is the only way to go.
Myth: You Need to Season Your Cast Iron After Every Use
While frequent seasoning helps maintain the pan, you don't need to do it every single time. Just do it every few uses, or when you notice the seasoning getting thin. You'll know when it needs a refresh because it will start to look dull or sticky.
Myth: Cast Iron Is Only Good for Cooking Meat
False! Cast iron is fantastic for all sorts of dishes, including vegetables, baked goods, and even breakfast. It's incredibly versatile and can handle anything you throw at it. Just remember to adjust the heat accordingly.
(Part 7) Cast Iron Beyond the Kitchen: Creative Uses
Cast iron is not just for cooking. Its durability and versatility lend themselves to all sorts of creative uses around the house. Here are a few ideas to get your wheels turning.
- Cast iron trivets: They're stylish and heat-resistant, perfect for protecting your tabletops from hot dishes. The rustic charm adds a touch of character to your table setting.
- Cast iron flower pots: They add a rustic charm to your garden, blending seamlessly with the surrounding greenery. The weight of the pot helps keep plants stable and prevents them from toppling over in the wind.
- Cast iron doorstops: They're heavy and durable, keeping your doors from slamming shut and adding a touch of industrial style to your home decor.
(Part 8) The Joy of Cast Iron
So, there you have it. A complete guide to cast iron cooking, from choosing your first pan to maintaining it for years to come. I hope this has inspired you to explore the world of cast iron. It's more than just a pan; it's a piece of history, a testament to culinary tradition, and a tool that can bring a lifetime of delicious memories to your kitchen.
Remember, don't be afraid to experiment. Have fun, get creative, and most importantly, enjoy the deliciousness that comes with cooking with cast iron.
FAQs
1. Can I use cast iron to cook acidic foods like tomatoes?
Yes, you can! While acidic foods can sometimes react with cast iron, a properly seasoned pan will hold up just fine. Just be sure to dry the pan thoroughly after cooking and re-season it if necessary. A well-seasoned cast iron pan will have a protective layer that can withstand most acidic foods.
2. Can I cook eggs in a cast iron pan?
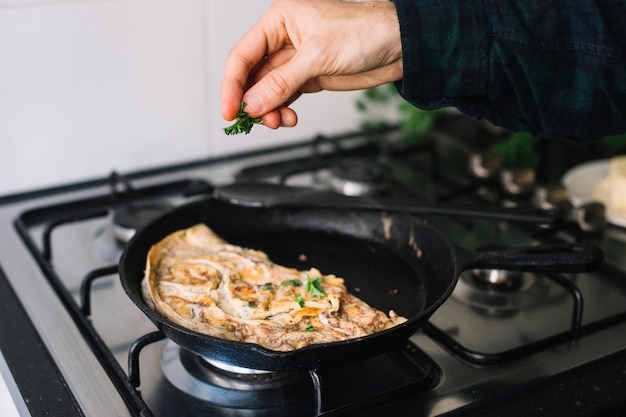
Absolutely! Cast iron is great for cooking eggs, even without added oil. The natural patina will prevent sticking, and you'll get a nice, crispy texture. You'll find that eggs slide right off the pan, making for perfect omelets, scrambled eggs, or sunny-side-up eggs with those beautiful, crispy edges.
3. What's the best way to store my cast iron pan?
The simplest way is to store it with a light coating of oil. This will help protect it from rust and keep it ready for your next culinary adventure. You can also store it in a dry place, or even wrap it in a paper towel to absorb any moisture. Avoid storing it with other metal utensils, as they can scratch the seasoning.
4. How do I know if my cast iron is properly seasoned?
A properly seasoned cast iron pan should have a smooth, dark, and non-stick surface. When you rub your finger across it, it should feel slick, not rough or gritty. If it feels rough, it might need a bit more seasoning.
5. What should I do if my cast iron pan gets chipped?
Don't worry! Minor chips can be easily fixed by re-seasoning the pan. Just scrub the chipped area thoroughly, apply a thin coat of oil, and bake it in the oven according to the seasoning instructions. For larger chips, you can use a special cast iron repair kit. These kits are readily available online or at kitchen supply stores.
Everyone is watching

Perfect Rice Every Time: The Ultimate Guide to Cooking Rice
Cooking TipsAs a self-proclaimed foodie, I've always been a bit obsessed with rice. It's the foundation of countless cuisi...

Ultimate Guide to Cooking the Perfect Thanksgiving Turkey
Cooking TipsThanksgiving. Just the word conjures up images of overflowing tables laden with delicious food, the scent of r...

The Ultimate Guide to Cooking Asparagus: Tips, Techniques, and Recipes
Cooking TipsAsparagus. The mere mention of this spring delicacy conjures up images of vibrant green spears, crisp and burs...

Can You Cook Spaghetti with Gasoline? (The Shocking Truth)
Cooking TipsWe've all seen those crazy internet trends. You know, the ones that make you wonder, "Did someone actually try...

Chorizo and Eggs Recipe: The Ultimate Guide
Cooking TipsRight, let’s talk about chorizo and eggs. You know, that classic Spanish dish that's always a winner. It's th...
