Let's be honest, nothing beats a truly fantastic pizza. You know, the kind with a crust that crackles when you bite into it, a perfect layer of molten cheese, and toppings that burst with flavor. It's the kind of pizza that makes you close your eyes and sigh with pure contentment. And the secret to achieving pizza perfection? A pizza stone, my friend, is your secret weapon.
I've been a pizza enthusiast for years, experimenting with every technique imaginable. But it wasn't until I embraced the pizza stone that my pizza game truly elevated. It's like a little bit of Italy in your own kitchen. But here's the thing: a pizza stone isn't just a fancy gadget you buy on a whim. You need to understand it, learn its quirks, and master its use. So, grab a comfy seat, pour yourself a cuppa, and let's embark on a journey to pizza stone mastery.
(Part 1) The Pizza Stone: Your New Best Friend

The Benefits of a Pizza Stone
Forget what you think you know about pizza stones. They're not just a slab of rock. They're actually the key to unlocking a whole new world of pizza possibilities. Here's why:
- Even Heat Distribution: Imagine your pizza baking evenly, no more burnt edges and raw centers. That's the power of a pizza stone. It absorbs and distributes heat like a master chef, ensuring a perfectly cooked pizza every time.
- Crispy Crust: Crave that satisfying crunch? A pizza stone's super-hot surface turns ordinary dough into a masterpiece of crispy perfection. It's the secret to a truly remarkable crust.
- Moisture Control: Say goodbye to soggy bottoms! A pizza stone draws moisture away from the dough, leaving you with a beautifully crisp crust that's both light and airy.
- Versatility: But wait, there's more! A pizza stone isn't just for pizza. Use it to bake bread, cookies, biscuits, even reheat leftovers. It's a multi-talented kitchen champion, ready for any culinary challenge.
Choosing the Right Pizza Stone
Now, you're ready to embrace the pizza stone, but with so many options, how do you choose the right one? Don't worry, I've got you covered. Here's a guide to finding your perfect match:
- Size: Think about the size of pizzas you usually make. A 12-inch stone is perfect for individual pizzas, but for larger family feasts, you'll want something bigger to accommodate those generous pies.
- Material: The most popular pizza stone materials are ceramic and cordierite. Both excel at heat retention, so choose what suits your budget and style.
- Thickness: Thicker stones hold heat for longer, ensuring a steady and consistent baking experience. But be warned, they can also be heavy, so consider your lifting capabilities.
- Shape: While most pizza stones are round, you can also find rectangular options. Choose the shape that best fits your cooking style and your oven space.
Remember, your ideal pizza stone should be big enough for your pizzas, not too thick or heavy, and made from a material that ensures even heat distribution.
(Part 2) Mastering the Pizza Stone: The Art of Preheating

You've got your pizza stone, but before you even think about tossing a pizza onto it, you need to understand the importance of preheating. Think of it like warming up your oven before baking a cake – a crucial step for delicious results.
Preheating: The Essential First Step
Preheating your pizza stone is like giving your pizza a warm welcome. It ensures the stone is scorching hot, ready to cook your pizza evenly and quickly. Here's how to do it right:
- Place your stone on the rack in the lower third of your oven. This ensures even heating from the bottom up, creating a beautiful, evenly cooked crust.
- Preheat your oven to the highest temperature it can handle. This is usually around 500°F (260°C). This high heat is what creates that satisfyingly crispy crust we all love.
- Let the stone preheat for at least 30 minutes. This gives it ample time to absorb the heat and reach its optimal baking temperature.
You'll know your stone is ready when it's radiating heat. Don't even think about touching it with bare hands – it's seriously hot!
The Importance of Oven Temperature
While it's tempting to crank up the oven to the highest setting, remember that the ideal temperature depends on the type of pizza you're making.
For a classic Neapolitan pizza, you'll want a high temperature, around 500°F (260°C). This intense heat cooks the pizza quickly, creating a thin, bubbly crust with a slight char.
But if you're making a thicker, more rustic pizza, you might need a slightly lower temperature, around 450°F (230°C). This allows the dough to cook through without burning, resulting in a thicker, more substantial crust.
Don't be afraid to experiment. Find the temperature that creates the perfect crust for your pizza style.
(Part 3) Getting Started: The First Steps to Pizza Success

The stone is preheated, the oven is ready, and your taste buds are tingling with anticipation. Let's get down to the nitty-gritty of making a pizza on your trusty pizza stone.
Preparing the Dough
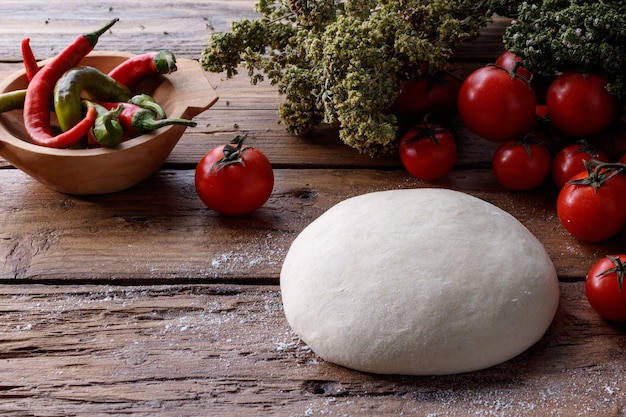
A good pizza starts with a good dough. While you can always buy pre-made dough, I highly recommend making your own. It's a simple process and lets you control the ingredients and flavors, creating a personalized pizza experience.
Here's my go-to recipe for a classic pizza dough:
Ingredients:
- 2 1/4 teaspoons active dry yeast
- 1 teaspoon sugar
- 1 1/4 cups warm water (105-115°F)
- 3 cups all-purpose flour
- 1 1/2 teaspoons salt
- 1 tablespoon olive oil
Instructions:
- Combine yeast, sugar, and warm water in a large bowl. Let it sit for 5 minutes until the yeast is foamy, indicating it's active and ready to work its magic.
- Add flour and salt to the yeast mixture and mix with a wooden spoon until a dough forms.
- Turn the dough onto a lightly floured surface and knead for 5-7 minutes until smooth and elastic.
- Place the dough in a lightly oiled bowl, cover with plastic wrap, and let rise for 1-2 hours in a warm place. This allows the yeast to do its thing, creating bubbles and making the dough light and airy.
Feel free to experiment with different types of flour. Whole wheat flour adds a nutty flavor and more fiber, while adding herbs or even a sourdough starter creates a more complex flavor profile.
Shaping the Dough
Once the dough has risen, it's time to shape it into a pizza. Shaping dough can be a bit intimidating at first, but with a little practice, it becomes a breeze.
Here's a simple method to get you started:
- Punch down the dough to release any trapped air. This ensures a more even texture and prevents air pockets from forming during baking.
- Divide the dough into portions, depending on the size of your pizzas.
- Shape the dough by gently pressing it out with your fingertips. This creates a more even distribution of the dough, ensuring a consistent crust thickness.
- Use a rolling pin to help you get an even thickness, but don't roll it out too thin. A rolling pin ensures a uniform thickness, preventing the crust from becoming too thin and fragile.
- Transfer the dough to a lightly floured surface. This prevents the dough from sticking and allows for easy manipulation.
Aim for a dough that's about 1/4-inch thick. A thinner crust will cook faster, creating a crispy, delicate texture. A thicker crust will hold more toppings, perfect for those who love a generous load.
(Part 4) Building a Delicious Pizza: The Art of Toppings
Now, let's get to the fun part: the toppings! This is where your creativity shines. From classic pepperoni to exotic combinations, the possibilities are endless.
Choosing the Right Toppings
Don't be afraid to experiment! But there are a few tips to keep in mind for building a truly delicious pizza:
- Start with a good base: A layer of sauce and cheese is essential for a well-balanced pizza.
- Consider the thickness of your toppings: If you're using thick toppings like mushrooms or peppers, don't overload the pizza. Too many toppings can weigh it down and make the crust soggy.
- Don't overcrowd: Give your toppings some breathing room. They'll cook more evenly and you'll avoid a soggy crust.
- Add toppings in the right order: Spread the sauce first, followed by cheese, then add your other toppings. This ensures the cheese melts perfectly and the toppings cook evenly.
Here are a few of my favorite topping combinations to inspire you:
Classic: Marinara sauce, mozzarella cheese, pepperoni
Vegetarian: Tomato sauce, mozzarella cheese, mushrooms, onions, bell peppers, olives
Gourmet: Pesto sauce, goat cheese, roasted vegetables, prosciutto
Spicy: Arrabbiata sauce, mozzarella cheese, pepperoni, jalape??os
Feel free to switch up the toppings and create your own signature pizzas.
The Importance of Cheese
Let's face it, cheese is a pizza's best friend. It adds flavor, richness, and creates that irresistible melty goodness.
There's a wide world of cheese to explore, but here are some classic pizza cheese choices:
- Mozzarella: The reigning champ of pizza cheese. It melts beautifully, creating that iconic stringy goodness, and has a mild, milky flavor.
- Provolone: A bit sharper than mozzarella with a slightly salty taste, adding a more complex dimension to your pizza.
- Parmesan: A hard, salty cheese that adds a rich, umami flavor to your pizza. Use it sparingly, as it can be quite strong.
- Gorgonzola: A blue cheese that adds a pungent, earthy flavor to your pizza. Perfect for those who love a bold taste.
Experiment with different cheeses and even blend them together to create unique flavor profiles.
(Part 5) Baking Your Pizza: Bringing it All Together
You've prepared the dough, piled on your favorite toppings, and now it's time for the magic to happen. The baking!
Transferring the Pizza to the Pizza Stone
This is where a little finesse comes in handy. You want to get your pizza onto the hot stone without losing any precious toppings.
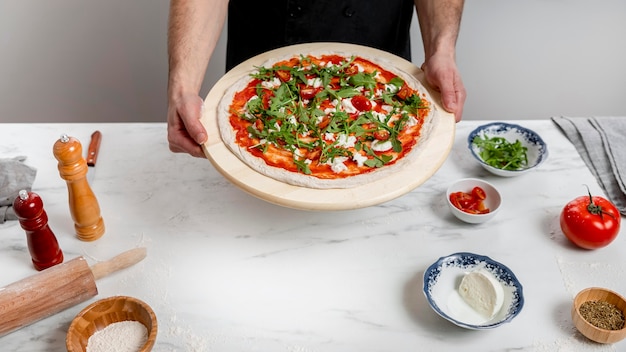
- Use a pizza peel: A pizza peel is a long, flat paddle designed to transfer pizzas to and from the oven. It's your secret weapon for smooth pizza transfers.
- Dust the peel with flour: This will help prevent the dough from sticking, ensuring a clean release onto the hot stone.
- Slide the pizza onto the stone: Gently push the pizza off the peel and onto the stone.
If you don't have a pizza peel, you can use a baking sheet, but make sure it's heat-resistant.
Baking Time
The baking time will vary depending on the type of pizza you're making, the thickness of the crust, and the temperature of your oven.
As a general rule, a pizza with a thin crust will take about 5-8 minutes to bake, while a thicker crust will take around 10-15 minutes.
Keep a watchful eye on your pizza while it's baking. You want the crust to turn golden brown and the cheese to be bubbly and slightly browned, a sign of perfect doneness.
You can use a pizza stone thermometer to check the temperature of the stone. The ideal temperature is around 500°F (260°C).
(Part 6) Finishing Touches: Taking Your Pizza to the Next Level
Your pizza is baked, it smells divine, but there's a little extra magic you can add to elevate your pizza experience.
Adding Fresh Herbs and Spices
Fresh herbs and spices add a burst of flavor to your pizza. Try basil, oregano, parsley, or a sprinkle of red pepper flakes for a touch of heat.
Sprinkle them on top of the pizza before you bake it, or add them as a finishing touch after it comes out of the oven.
Drizzling with Olive Oil
A drizzle of high-quality olive oil adds richness and depth of flavor to your pizza. Drizzle it over the pizza after it comes out of the oven, allowing the warmth to infuse the crust.
Adding a Little Heat
If you love a little kick, add a few sliced jalape??os or a sprinkle of red pepper flakes to your pizza. It's a simple way to add a punch of heat and personality to your pizza.
(Part 7) Taking Care of Your Pizza Stone: Keeping it in Top Shape
Your pizza stone is an investment, and like any good friend, it needs a little TLC. Proper cleaning and maintenance will keep your pizza stone in tip-top shape for years to come.
Cleaning Your Pizza Stone
The best way to clean your pizza stone is with a simple wipe using a damp cloth. Don't use soap or detergents, as they can damage the stone and leave behind unwanted residues.
If there are any stubborn bits of food stuck on the stone, gently scrub it with a brush or a scraper.
Never soak your pizza stone in water. This can cause it to crack and ruin its integrity.
Storing Your Pizza Stone
When you're not using your pizza stone, store it in a cool, dry place. It can be stored in the oven or on a shelf.
Don't stack anything on top of it. This can damage the stone and compromise its heat distribution capabilities.
(Part 8) FAQ: Your Pizza Stone Questions Answered
I know you're curious. Here are some common questions about pizza stones, answered for your peace of mind.
Q: Can I put a pizza stone in the dishwasher?
A: Absolutely not! Dishwashers use high temperatures and harsh detergents that can damage your pizza stone. Stick to hand washing with a damp cloth.
Q: Can I use a pizza stone on a gas stovetop?
A: It's not recommended. Pizza stones are designed for ovens and the high temperatures of stovetops can cause them to crack.
Q: What do I do if my pizza stone cracks?
A: If your pizza stone cracks, it's best to replace it. A cracked stone can be a safety hazard, as it can break into sharp pieces.
Q: Can I use a pizza stone to bake other things?
A: Absolutely! Pizza stones are versatile and can be used to bake bread, cookies, biscuits, and even reheat leftovers.
Q: How do I know when my pizza stone is preheated?
A: You'll know your pizza stone is preheated when it's scorching hot. Don't touch it with bare hands!
(Part 9) Pizza Stone Mastery: A Journey of Flavour
So there you have it. My guide to pizza stone mastery. It's not just about the stone itself, it's about the journey. The journey of creating delicious pizzas in your own kitchen, the journey of experimenting with different flavors, the journey of becoming a pizza master.
Remember, practice makes perfect. Don't be afraid to try new things, experiment with toppings, and find what works best for you. And most importantly, have fun!
Get your pizza stone out, fire up the oven, and let's make some amazing pizza together!
Everyone is watching

Perfect Rice Every Time: The Ultimate Guide to Cooking Rice
Cooking TipsAs a self-proclaimed foodie, I've always been a bit obsessed with rice. It's the foundation of countless cuisi...

Ultimate Guide to Cooking the Perfect Thanksgiving Turkey
Cooking TipsThanksgiving. Just the word conjures up images of overflowing tables laden with delicious food, the scent of r...

The Ultimate Guide to Cooking Asparagus: Tips, Techniques, and Recipes
Cooking TipsAsparagus. The mere mention of this spring delicacy conjures up images of vibrant green spears, crisp and burs...

Can You Cook Spaghetti with Gasoline? (The Shocking Truth)
Cooking TipsWe've all seen those crazy internet trends. You know, the ones that make you wonder, "Did someone actually try...

Chorizo and Eggs Recipe: The Ultimate Guide
Cooking TipsRight, let’s talk about chorizo and eggs. You know, that classic Spanish dish that's always a winner. It's th...
